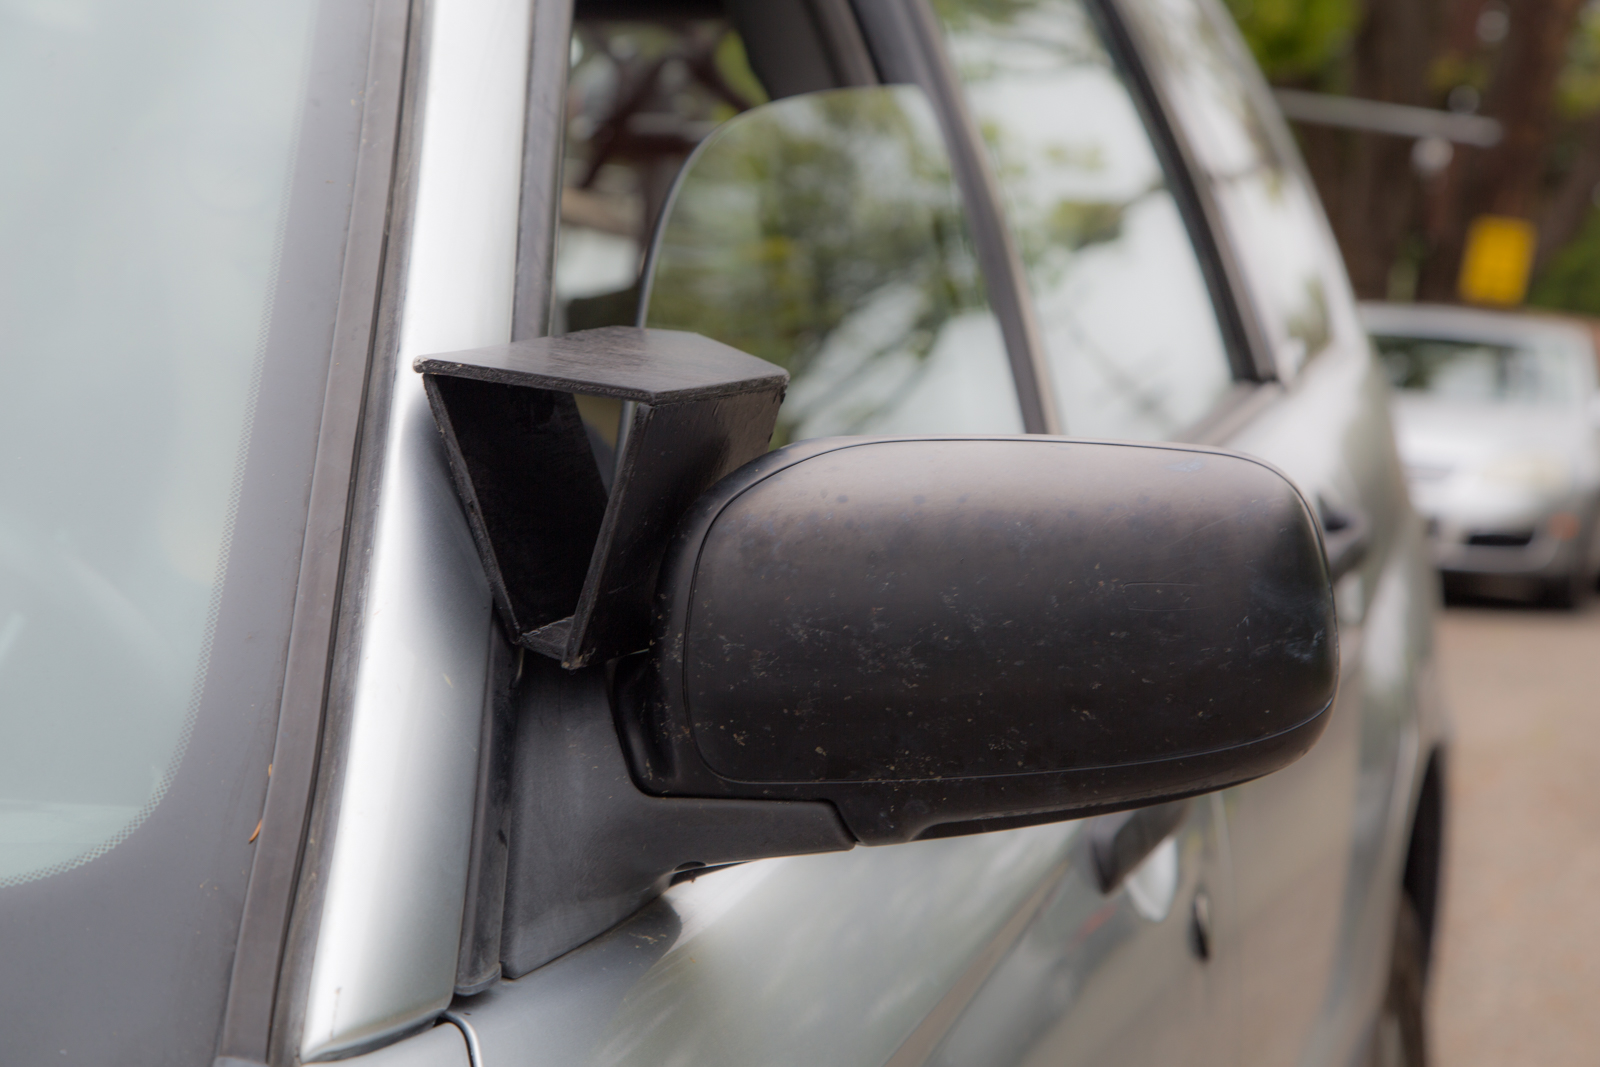
Photo by Hep Svadja

My first car had no air conditioning. In those days not many cars did. What we did have, though, were small triangular vent windows (Figure A) that pivoted outward to scoop buffeting gales of fresh air into the car, which cooled us by evaporation. It worked much better than you might think. It also allowed us to smell fresh-cut hay or yard grass, or fragrant flowers, or fall leaves, and it let us sense pleasant temperature changes while driving through shady valleys or climbing New England hills. I miss all that.

Figure A. Photo by Hep Svadja
Read articles from the magazine right here on Make:. Don’t have a subscription yet? Get one today.

Cars these days — some even equipped with ultimately pampering filtered and zoned AC — cut us off from the outside world, and opening the windows on a fine spring or autumn day or a warm summer evening doesn’t let in much air.

To experience a whiff of those bygone days, make your own air scoop. Almost every car has a convenient space between the front plastic triangle of side-window filler and the side mirror housing. It’s the perfect place to mount a scoop, but each vehicle is a little different, so you’ll need to tailor yours to fit.

What will the next generation of Make: look like? We’re inviting you to shape the future by investing in Make:. By becoming an investor, you help decide what’s next. The future of Make: is in your hands. Learn More.

Project Steps

MEASURE THE SPACE

Start by taking rough measurements — height, width, length, and any slope angle of the vehicle filler panel. (The exhaust of my scoop measures about 2″×3″.)

PROTOTYPE IN CARDBOARD

Figure B. Photo by Phil Bowie

Rough out the scoop panels in cardboard with an X-Acto knife or scissors. Use masking tape to hold the panels together for trial fitting (Figure B). You may have to recut the panels a time or two to get the mock-up scoop just right.

BUILD AND MOUNT YOUR SCOOP

Figure C. Photo by Sydney Palmer

When you’re happy with the mock-up, use the cardboard pieces as templates to cut final panels out of lightweight ¼” craft plywood from Lowe’s or elsewhere (Figure C). Glue the panels together with quick-set epoxy (Figure D).

Figure D. Photo by Phil Bowie

Fill any joint imperfections with wood filler or body putty. Sand, prime, fine-sand, and apply topcoat. I chose flat black to be inconspicuous (Figure E). Apply a generous rectangular patch of self-stick velcro to hold the scoop securely in place so it will be removable in inclement weather, or quickly mountable on a nice day. To regulate airflow, simply raise or lower the side window a bit (Figure F).

Figure E. Photo by Sydney Palmer
Figure F. Photo by Phil Bowie

Now go enjoy one of the simple pleasures motorists of the past knew well.