Written and photographed by Benjamin Cabé

It was a long weekend of May 2020. Like many of my human siblings stuck at home with time on their hands due to an ongoing pandemic, I was busy trying to perfect my bread recipe. In fact, just a few days before, I had ordered a gas sensor (Figure A below) that I thought would be ideal to help me monitor my sourdough starter and bake my bread at just the right moment. 

Figure A
This article appeared in Make: Vol. 77. Subscribe today to get more great projects delivered to your mailbox.

And then I thought about it some more. “Surely, this is the perfect excuse for me to finally start learning this machine learning thing that everyone’s talking about. But … do I really want to bake dozens of baguettes before I have a training set large enough to teach an AI the relationship between the olfactory fingerprint of the sourdough starter and the yumminess of the final loaf? Plus, flour is pretty scarce these days!” 

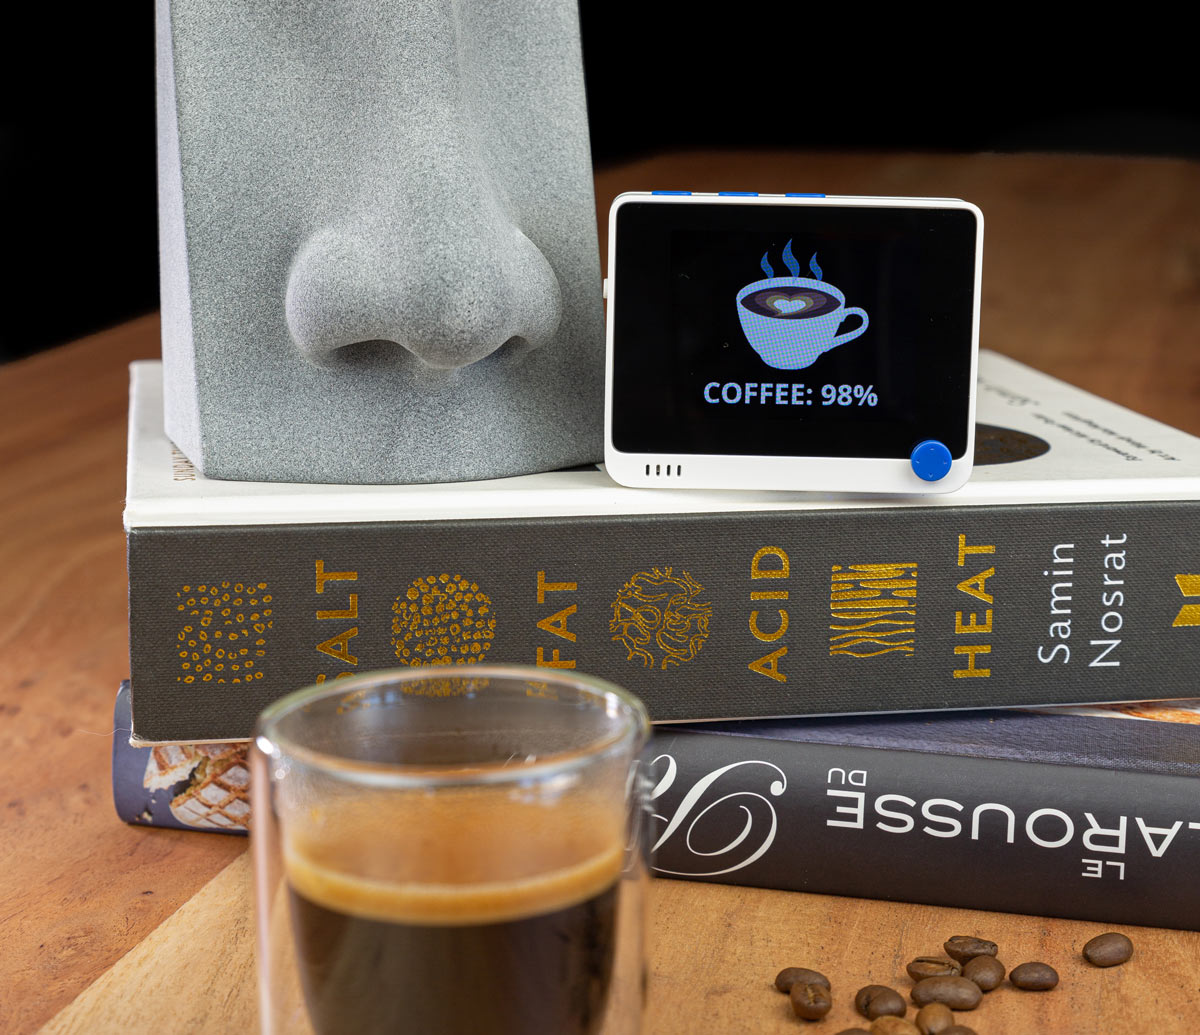
That’s how, over the course of the next few days, I ended up building a DIY, general-purpose, artificial nose — one that can smell virtually anything you teach it to recognize! The artificial nose is powered by artificial intelligence — a TinyML neural network that I trained using the free online tool Edge Impulse and then uploaded onto an Arduino-compatible microcontroller.

I learned a lot along the way, and not just about machine learning. From designing my first 3D enclosure to rudimentary fluid dynamics (the airflow within the nose is not exactly optimal), it was the first time I built my own “thing” from scratch, so I’m excited to share it with the Make: community. Here are the steps for replicating the build for yourself. 

A DIY Solution for Anosmia? 

Anosmia refers to a temporary or permanent loss of the ability to smell. Among U.S. adults over 40, some 3% suffer from total anosmia and 23% report some alteration in their ability to smell. Add Covid-19 to the mix, and you get even more people impaired in their day-to-day olfactory life.  

Since I started sharing my project, I’ve heard dozens of stories of folks being impacted by anosmia. Has that bottle of milk gone sour? Does the dog need a bath? Could I use a shower? For many, those everyday questions are just impossible to answer. And while a cheap, DIY electronic nose will likely not replace a fully functional human nose anytime soon, it could most certainly become a great companion for those suffering from anosmia.

What will the next generation of Make: look like? We’re inviting you to shape the future by investing in Make:. By becoming an investor, you help decide what’s next. The future of Make: is in your hands. Learn More.

Project Steps

1. Get Your Parts Ready

You can 3D print the nose enclosure from thingiverse.com/thing:4493907 (Figure B). Alternatively, grab your Miniaturizer 3000™, fly to Easter Island, and capture your own 1:100 copy of a moai! 

Note that you don’t need the handsome enclosure to build the artificial nose, but you certainly need all the electronic components. They’re easy to put together; there’s no soldering involved at all, just plugging in some jumper wires and connectors.

Connect the Electronics 

The brain of your nose will be a Wio Terminal, an Arduino-compatible platform on steroids that has enough processing power — and by definition, TinyML doesn’t need much anyway — to analyze scents in real-time. Since it features an LCD screen, we can have a nice-looking user interface thanks to a dedicated (and pretty complete!) library. You can learn more about it at wiki.seeedstudio.com/Wio-Terminal-LCD-Overview. 

The Wio Terminal conveniently features Seeed’s Grove-style connectors on its sides, but it makes for a more polished build to use the Raspberry Pi-compatible expansion slot on the back to connect the various sensors and actuators and hide all the wiring within the enclosure. 

The gas sensor is connected to the I²C interface, and the MOSFET (used to switch the fan on or off and make the nose “inhale”) is connected to digital output D0. Follow the wiring diagram to connect the components

Assemble the Nose

Use short M2 screws with washers and nuts to attach the Wio Terminal and the DC fan to the back of the nose enclosure.

NOTE: The fan should feature an arrow indicating the direction of rotation and/or airflow, but you may want to briefly power it with 5V to double check that it will make the nose inhale, not exhale!

Slide the multi-channel gas sensor into the dedicated slot with the actual sensors facing the nostrils. 

Flash the Brain

We’re talking about the Wio Terminal, not your actual brain! The quickest way to get an idea of what the nose is capable of is to use a basic model that I’ve already trained for simple things such as detecting the smell of coffee. 

Head over to github.com/kartben/artificial-nose/releases and download the ready-to-use firmware (firmware.uf2). Hook up the Wio Terminal to your computer using a USB cable and enter the bootloader mode by quickly toggling the Wio’s power switch twice. The device will then show up as an external drive, allowing you to copy the firmware that you’ve just downloaded onto it.

If you’d rather compile the firmware yourself or, more likely, you’d like to deploy a different AI model altogether, you will just need PlatformIO to compile and upload the updated code, after you’ve followed the instructions below to retrain a model for your scents of choice (“Teach a Faux Nose New Tricks”). 

Start Sniffing!

After a successful copy of the firmware, the Wio Terminal will automatically restart in Training mode and show you a real-time graph of the various gases being detected by your artificial nose (Figure 1 below).

Press the 5-way joystick button to enter Inference mode. The screen should now indicate what scent is being detected with the highest level of confidence. This basic model can smell coffee, tea, whiskey, and rum.

User Interface Cheatsheet

  • Joystick (5-way switch) — Press in, to alternate between Inference mode (the nose displays its current prediction) and Training mode (raw sensor data is displayed).  Push left or right to navigate the various screens of the application.
  • Upper-left button — aka Button 1 or Key A. Press to toggle the fan on and off.

How Does a Gas Sensor Work? 

There are several kinds of gas sensors out there, but the technique applied the most commonly involves using a MOS (metal oxide semiconductor) which, when heated, starts reacting with the gases contained in the air, causing its resistance to change. 

From there, chemistry is the least of your concerns as a good ol’ voltage divider is all you need to measure the resistance — hence gas concentration — in your project. The sensor used in this build even has its own microcontroller that takes care of that for you, and then exposes the readings in digital form, over I²C.

As gas sensors involve heating the metal oxide sensing layer to high temperatures, they typically require a non-negligible amount of power to work properly. For example, the 4 sensors used in this build each draw 20mA of current for their internal heating alone! Keep that in mind for battery-powered scenarios.

Furthermore, it takes a while — 24 hours, if you follow the datasheet! — for readings to be considered accurate after the gas sensor starts being warmed up, so unfortunately turning it on for only a couple seconds when you need a reading will likely give you poor results.

More Sensors, More Scents

You might find yourself limited by the capabilities and accuracy of the sensor used in this build. In my experience, it’s working fine for telling a handful of scents apart — I first used it to distinguish between a few brands of my favorite spirits. But your project might involve classifying dozens of very similar scents, or scents that don’t graph distinctively on this particular sensor. 

If that’s the case, just start browsing your favorite electronics supplier’s catalog, and consider replacing the original sensor with something more geared toward your application. Methane? Ozone? Ammonia? Smoke? Name a compound that’s characteristic of the scent you’re trying to classify, and there’s a good chance a sensor for it already exists on the market. 

I Smell Improvements Coming

There are many things I wish I’d done differently when designing the enclosure. In retrospect, using Blender instead of actual CAD software probably was a bad idea. The nose looks pretty and Blender can do stunning 3D renderings, but tweaking the model is unnecessarily complex. 

Somewhat related, the nose cavity and nostrils could probably do a better job at concentrating the airflow straight onto the gas sensors. Or maybe the fan is blowing too strongly, not leaving enough time for the gas sensor to react with the air molecules? Either way, don’t hesitate to experiment using the nose … without the nose! 

Another important next step: Use the Wio’s built-in Wi-Fi to make the nose a connected, wireless device. The nose could be very useful in remote or difficult-to-access location. For example, in the drop ceiling of an office building’s restrooms, to monitor when they need servicing. 

Therefore, by the time you’re reading this, my GitHub repo will most likely contain all the instructions to directly upload to an IoT platform, in real time, the detected scents. I also plan on making it possible to fully update the nose’s neural network remotely, without any human intervention. 

Just think of the possibilities if all of us makers start putting together an open source catalog of scents’ fingerprints that anyone can cherry-pick from for building their own smell-capable applications! 

How about you? Who nose what you’ll do to improve the build?

Teach a Faux Nose New Tricks

How to train your artificial nose with Edge Impulse

You might not find it incredibly useful to build an artificial nose that can tell coffee and tea apart, and I would agree. But what if you could teach the nose to alert you when your food is burning, or when your favorite fruit is perfectly ripe? 

In Make: Volume 75, Helen Leigh introduced TinyML as well as Edge Impulse, a great tool that tremendously simplifies the development of AI models for constrained devices like microcontrollers.

Here’s how to use Edge Impulse to train a new model for your artificial nose, so it can start classifying the things you care about.  

1. Head to studio.edgeimpulse.com/public/2389/latest and clone the base Edge Impulse project into your own account (Figure 1). This will allow you to augment the original dataset with your own classes of scents, or even replace it altogether.

1. Head to studio.edgeimpulse.com/public/2389/latest and clone the base Edge Impulse project into your own account (Figure 1). This will allow you to augment the original dataset with your own classes of scents, or even replace it altogether. 

2. Connect the artificial nose to your computer over USB, and make sure it is in Training Mode (Figure 2). 

3. Install the Edge Impulse command line tools (docs.edgeimpulse.com/docs/cli-installation) on your computer and launch the data forwarder using the command:
edge-impulse-data-forwarder --frequency 10

4. Follow the data forwarder instructions in the console to log into your Edge Impulse account. The data forwarder will remotely tether the serial output of your nose to the Edge Impulse project you cloned in the first step, and sensor data will directly appear in your project! 

5. Name the 4 sensor axes: Nitrogen dioxide, Carbon monoxide, Ethyl alcohol, and Volatile organic compounds (Figure 3).

6. Your device should now show up in the Data Acquisition section of your Edge Impulse project. Acquire and label as many samples as you need for the different things you want your artificial nose to detect. 

NOTE: Make sure to acquire at least 2–3 minutes’ worth of sensor data for each scent, and a roughly equal number of samples for each category, so that your AI model can be trained correctly. 

7. Retrain the model based on your newly collected data samples, using the conveniently named Retrain Model action. If you’re not happy with the performance of your model (Figure 4), collect some more samples. Rinse and repeat!

8. Finally, use the Deployment menu to export your project as an Arduino library. This will allow you to download a ZIP file containing the neural network you just trained. Replace the lib/ei-artificial_nose-arduino source folder of the nose’s firmware with the contents of your new ZIP file.

9. Use pio run to recompile the firmware and upload it to the Wio Terminal. Your nose is retrained.