All that is needed is some basic soldering, a little mechanical knowledge, and the ability to adapt a project to suit your needs, as a few parts were scrounged.

What will the next generation of Make: look like? We’re inviting you to shape the future by investing in Make:. By becoming an investor, you help decide what’s next. The future of Make: is in your hands. Learn More.

Project Steps

First, you will need a few things:

1. A gearmotor capable of lifting something about the weight of an AA battery to half the distance you want the blade to fall (explained in more detail later).

2. One or two wall power supplies (or the equivalent in batteries) which combined produce the maximum voltage your gearmotor can take. Using two supplies will give you a better effect but a single one will work if it produces sufficient voltage.

3. An adapter to fit your motor.

4. A small microswitch (N.O./N.C.) that will go alongside your motor. Mine had this built in.

5. A hunk of cardboard the size you want the guillotine’s blade to be.

6. Aluminum foil.

7. A dowel rod. Its length should be half the distance you want the blade to move.

8. (optional) A metal rod a little over double the length of the dowel.

9. Fishing line.

10. Various pieces of mounting hardware.

The first thing you need to do is to find something that adapts to your gearmotor. Then, you super-glue the adapter to the end of your dowel rod. Then, if you have the metal rod, glue it to the side of the dowel and adaptor; then if you want you can wind it with fishing line for aditional sturdiness.

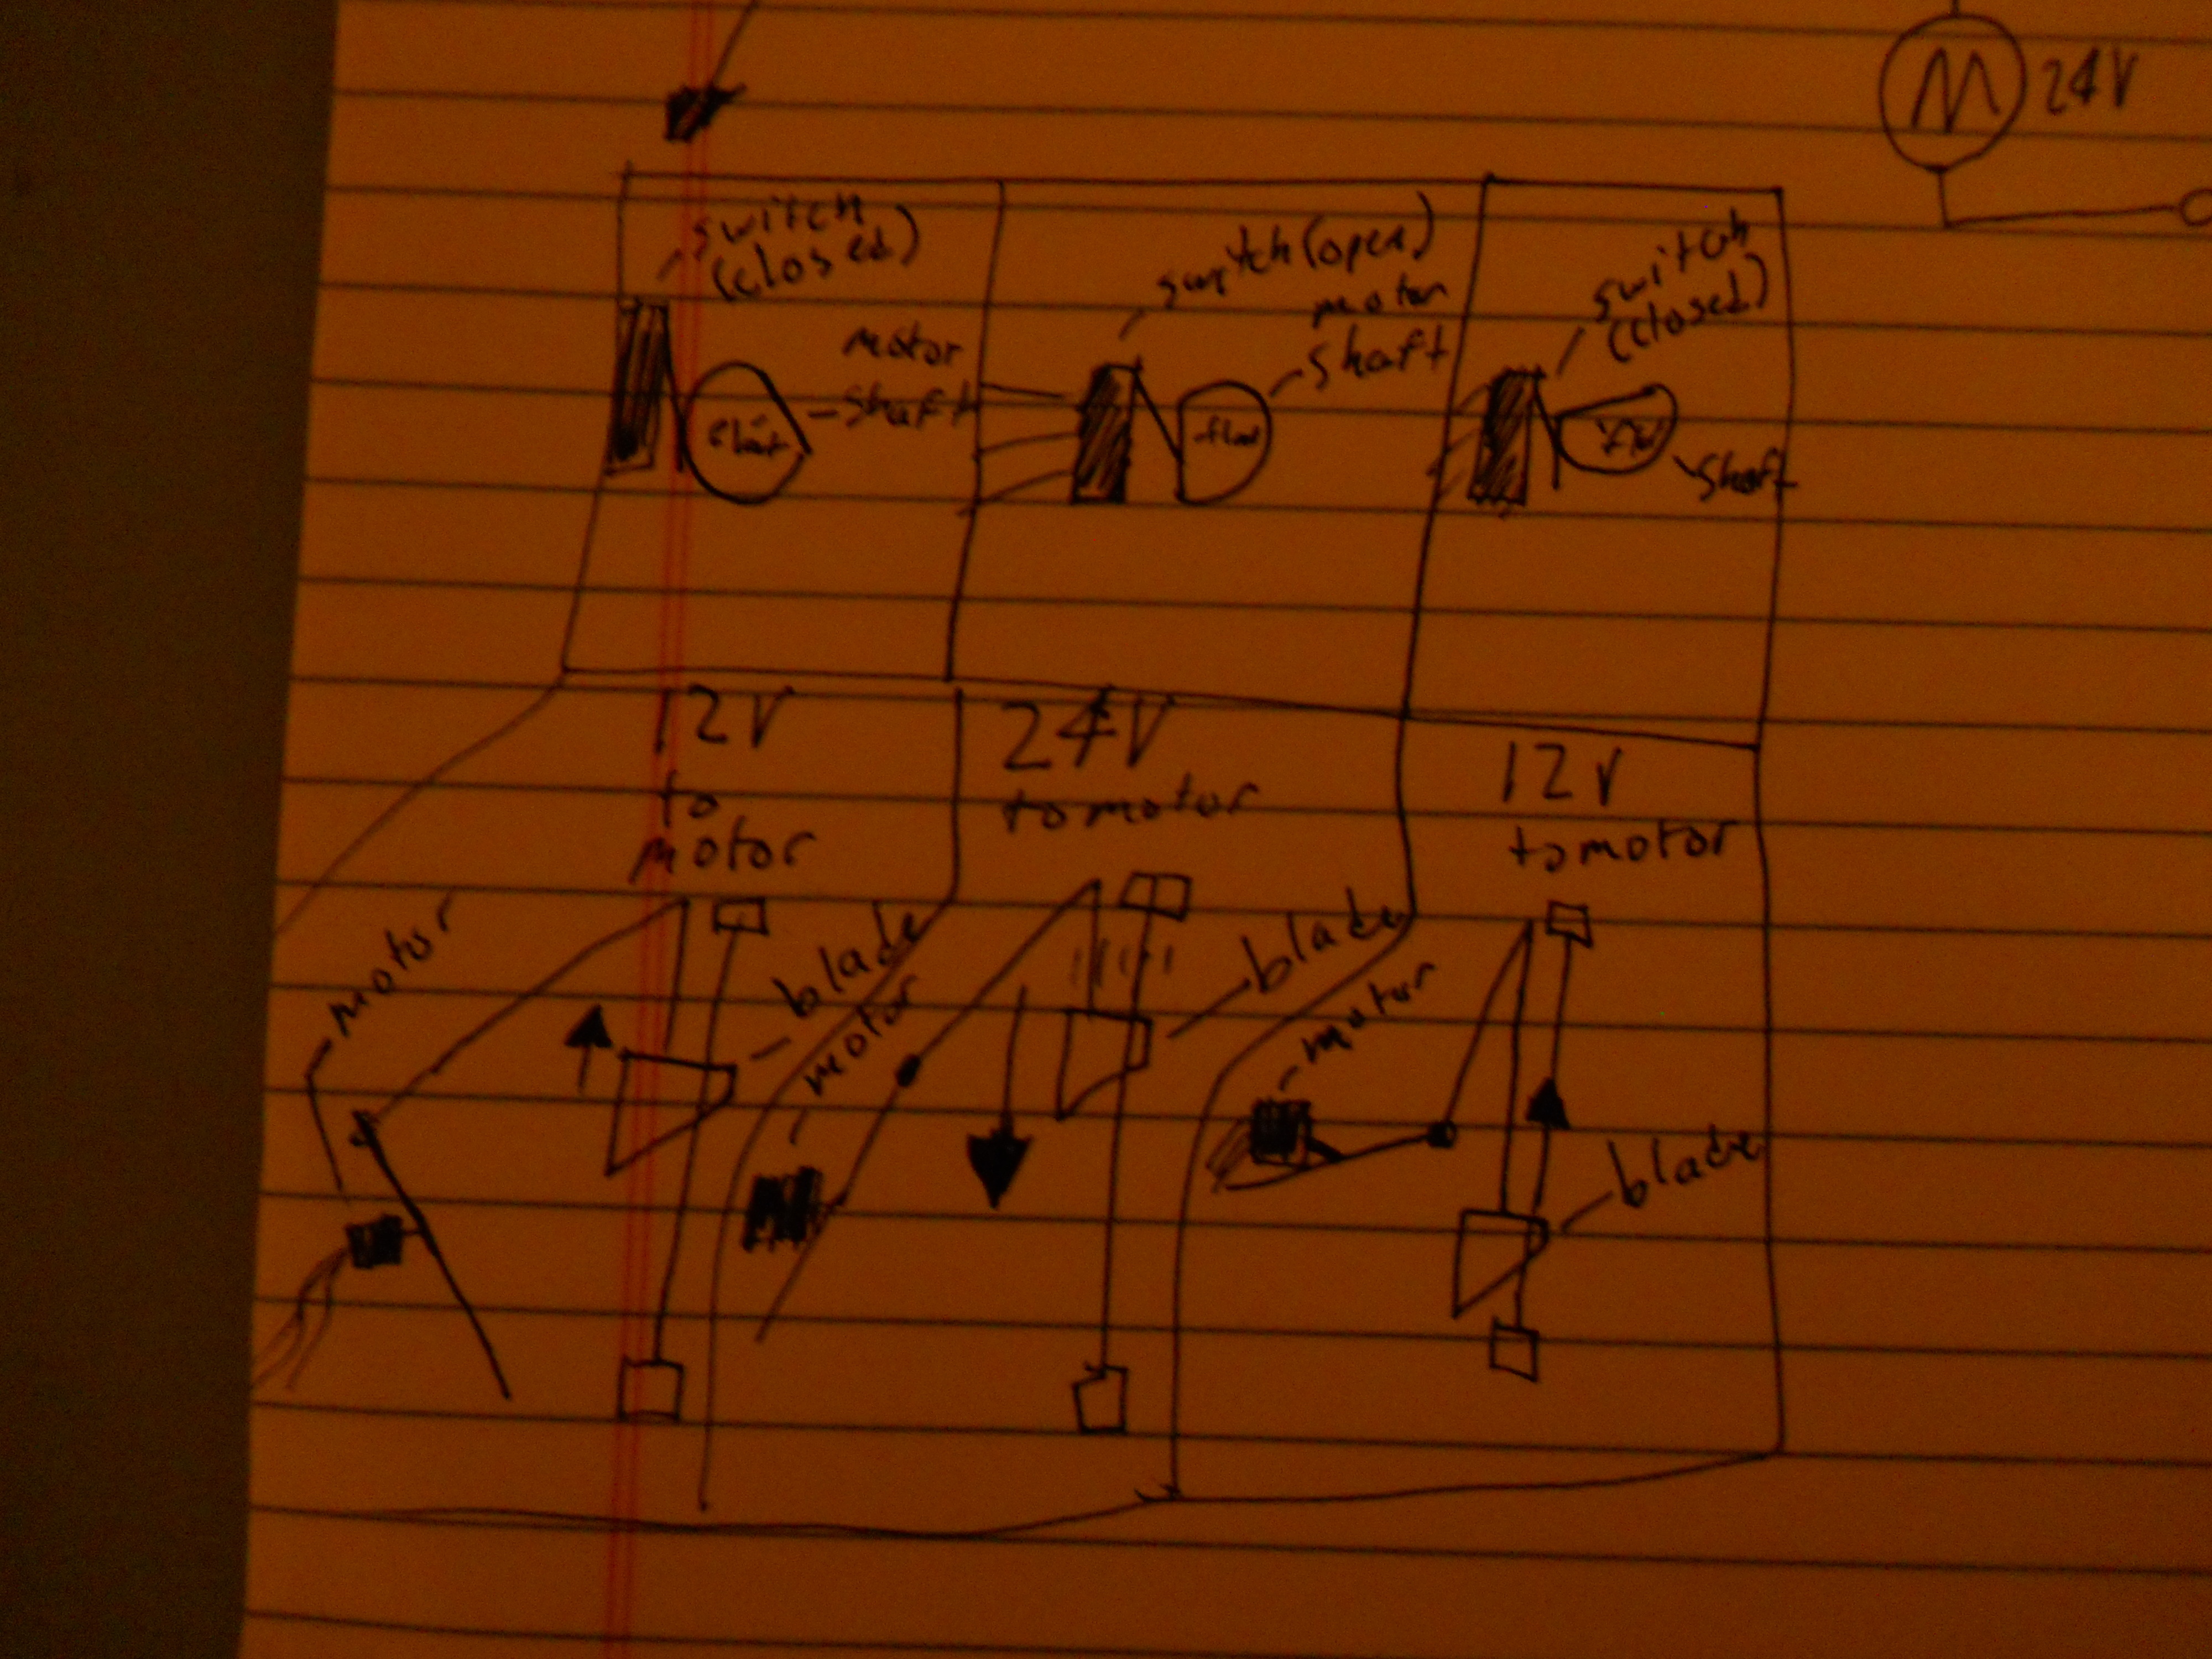
Next, wire your motor, microswitch, and power supplies according to the schematic shown here. The lower power supply should be more powerful than the upper, as it will be running the motor by itself most of the time. The diagram in the lower left shows how the guillotine runs in 3 stages.

After you finish the wiring and, if necesary, cutting the shaft, add an aditional N.O. switch between the positive side of the lower one and the N.O./N.C. microswitch, and test it. If you did it right it will rotate about 3/4 of the way, speed up suddenly, rotate the remaining 1/4 and slow down again.

The last steps are to make a blade out of cardboard and aluminum foil (do NOT use sheet metal, as it may actually decapitate someone!).

Then poke a hole in the weight center of the top (where it balances), put the fishing line through, and tie a knot so it doesn’t back out. Do not tie it directly to the blade, or the fishing line will not spin freely, and it will tangle.

Add your hook or suction cup a little over twice the length of the spinning arm above the ground.

Run the line from the blade through the hook. Mount the motor where you want it, and turn the motor so the arm faces directly away from the hook.

Extend the line from the blade so that the blade is a few inches below the hook, then run it to the arm and either tie it off, glue it, or tape it. This should leave you with the blade all the way up, and the arm at its farthest.

Remove the arm from the motor and apply power. Wait for it to finish its brief high-speed cycle, and stop it. Then replace the arm so that the blade is all the way in the down position.

If nothing catches on the line, then apply power and you should have a working guillotine.