braided_coaster_inventables2

Inventables is located in Chicago. If you’ve ever been to the city on St. Patricks day you know that everything turns green. The Chicago River is dyed green, people have green hair, they wear green clothes, and even drink green beer and Shamrock Shakes from McDonalds! We have a bunch of makers at our company and a sometimes we drink beer.

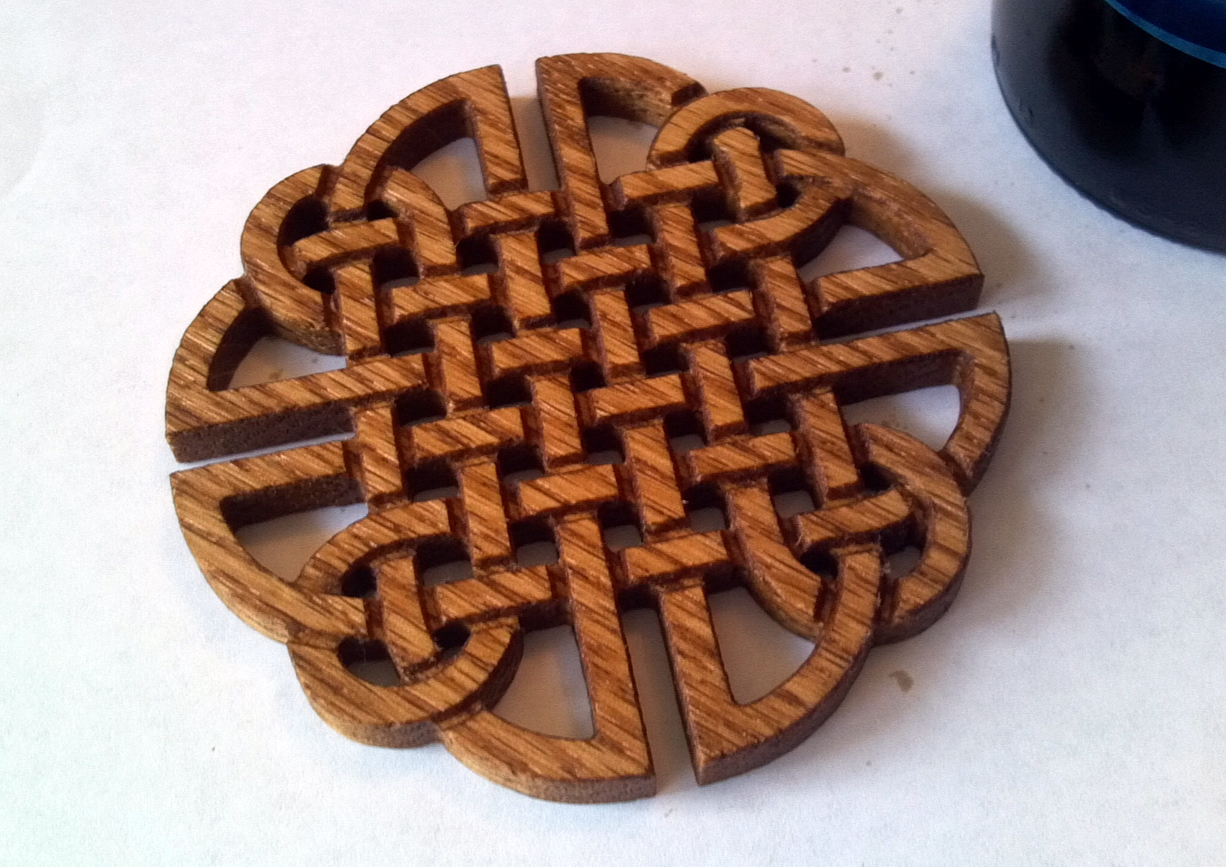
While everyone else was out running wild in the streets our very own Bart Dring inventor of MakerSlide was busy in his workshop getting into the St. Patrick’s day spirit maker style. He came up with this solid Oak Celtic Braid Beer Coaster and carved it using V Carve Pro and V Bits. In this tutorial I’m going to walk you through how Bart made this one.

What will the next generation of Make: look like? We’re inviting you to shape the future by investing in Make:. By becoming an investor, you help decide what’s next. The future of Make: is in your hands. Learn More.

Project Steps

Grab Inspiration

Bart has done several Vcarving projects with Celtic knots, and it was St. Patricks day, so he went in that direction. He was looking a simple design with plenty of areas he could cut through to give it a lace like look.

The idea was the areas in white would be wood. The black would be removed, except for the black lines between white that represent where the lines weave under another line.

TIP: When Bart starts a Vcarving project he generally start by doing Google image search to get some inspiration.

CAD: Convert Bitmap to Vector

Import the image. Open the bitmap up in a vector-based CAD program (like Inkscape or Illustrator) and trace it.

The weave lines will be created with a shallow cut with a V bit.

How Bart did it: He setup a new project in V Carve Pro that was 4″ x 4″ x 1/4″ thick. He imported the file into V Carve and converted the bitmap to vector, producing this image.

CAD: Modify the Knot Design

Offset the vectors. The next step is to create the geometry to cut the weave lines. Offset all the vectors with a line at a distance that is half the distance between the shapes.

Remove the outer lines, they will not be used in the design.

The distance was not perfectly consistent but was very close, the difference will not be noticed. The weave lines are in blue.

Bart’s Note: You can see a little inconsistency, but we are talking a few thousands of an inch in wood. The cutter would cut twice between each shape. This would add a little extra machine time, but way less time than it would take to clean that out. If I was making more than about 4 copies I would probably do that instead.

CAM: Create the Pocket Tool Paths

If you’ve been editing your vectors in a vector illustration program like Inkscape, export the vectors and open it up in your CAM program.

You’ll need to create two tool paths. One for the pocket cuts to carve the know lines and a second profile tool path to cut out the final piece.

The first tool path cuts the weave lines. Create a profile tool path on the lines. Use a 60° V bit at 0.05″ deep at 40 inches/minute feed and plunge.

The second tool path is a cuts out the voids and cuts out the final piece.

Bart used V Carve Pro to edit the vectors and then created the tool paths in the same program.

CAM: Create the Profile Tool Paths

To cut out the piece, Bart used a 1/16″ spiral upcut bit. It was cut in two passes at about 80 inches/min.

The cut order was “Vector Selection Order”. This insures all the inner features were cut before the part was cut out. Fortunately, the bit cannot fit between the features (on the weave lines) so all the outer features act as a cutout perimeter.

Select all the areas, deselect and then re-select the outer features to make them cut last.

Cut the Files and Finish the Coaster

The project worked out beautifully. The total cut time including a manual tool change was about 10 minutes.

The coaster pictured here was cut it in red oak, stained with a oil based “golden oak” stain. The grain is a little pronounced for such a small piece but that is a personal preference. The project might work better with a fine grain wood like bamboo. The other benefit to bamboo is it would not need to be stained. The grain does give it a rope-like look, though.

This is a super fast project. You could easily create almost a dozen of these as a gift in about an hour. The project was done in V Carve because it has some layering and offset feature that made the job easier. Bart exported the final file to DXF, so virtually any CAM program should be able to do it.