See the original article on our blog.

A sous vide device shouldn’t be just a popular trend in restaurants and foodie kitchens. It can be a practical and essential addition to any home. In fact, it’s not so unlike a convection oven; the only difference is that it uses water to conduct heat and it is more precisely controlled.

Oh, right, and that a sous vide could run you a few thousand dollars… and who can fit one in their apartment? Our design can be tucked away in a grocery bag after use.

Although sous vide is incredibly useful, many cooks are still unfamiliar with it because it is cost-prohibitive. But, why should such a simple machine be so expensive? The parts can be easily acquired and connected by anyone with an hour or so to spare.

We’ve put one together and are thrilled with the consistent, perfectly-cooked, and outer-worldly results (that are impossible to achieve by any other method)! Once you’ve “sous vided” a meal, we’re pretty sure you’ll be so inspired by the deliciousness of it all that you’ll incorporate vidin’ in your everyday cooking routine.

What will the next generation of Make: look like? We’re inviting you to shape the future by investing in Make:. By becoming an investor, you help decide what’s next. The future of Make: is in your hands. Learn More.

Project Steps

The PID will act as a switch for the immersion heater. In order to attach the heating element to the PID we need to cut the cable for the heater in half crosswise about 12″ from the heating element. Now we have two separate cables. The plug cable should be 24″ long.

The heating element and plug cable is made up of two wires. On both cables, separate these wires on the ends and strip them about 1/2″.

Now we’re just going to deal with the plug wire. Attach small ring terminals to the ends.

Tug the ring terminals to ensure they are securely attached, and wrap the connection in electrical tape.

Attach these ring terminals to connectors 1 and 2 on the PID controller.

While the thermocouple (at the tip of the screw) is stainless steel, the screw attached to it is not and will rust in the sous vide bath. Therefore, we’ll use electrical tape to wrap the screw and all parts of the wire that might come into contact with water.

Attach the thermocouple spade terminals to connectors 9 and 10 on the PID controller.

At this point, cover the back of the PID controller in electrical tape and plug it in. The PID should read “EEE.E” at the top.

To get it to read the correct temperature, hit SET and enter “0089″, and SET again

Then press SET when “Inty” is blinking and scroll up or down to “µ” (this is secretly a “k”, for the K-type thermocouple). Then press SET.

Press up so “outy” is blinking and press SET, then change the number to 1 (this sets the PID output to the built-in relay).

Press SET again and scroll to “End.” Press SET to exit.

The PID controller should now display the temperature on top, and may start to click. Unplug the controller, and we move on!

Strip and crimp small spade terminals onto the end of the heating element cord.

Attach the wires from the heating element to terminals 2 and 14 of the PID controller.

Take the 6-inch piece of wire and attach spade terminals to each end. Connect one end to terminal 1 and the other end to terminal 13 of the PID controller.

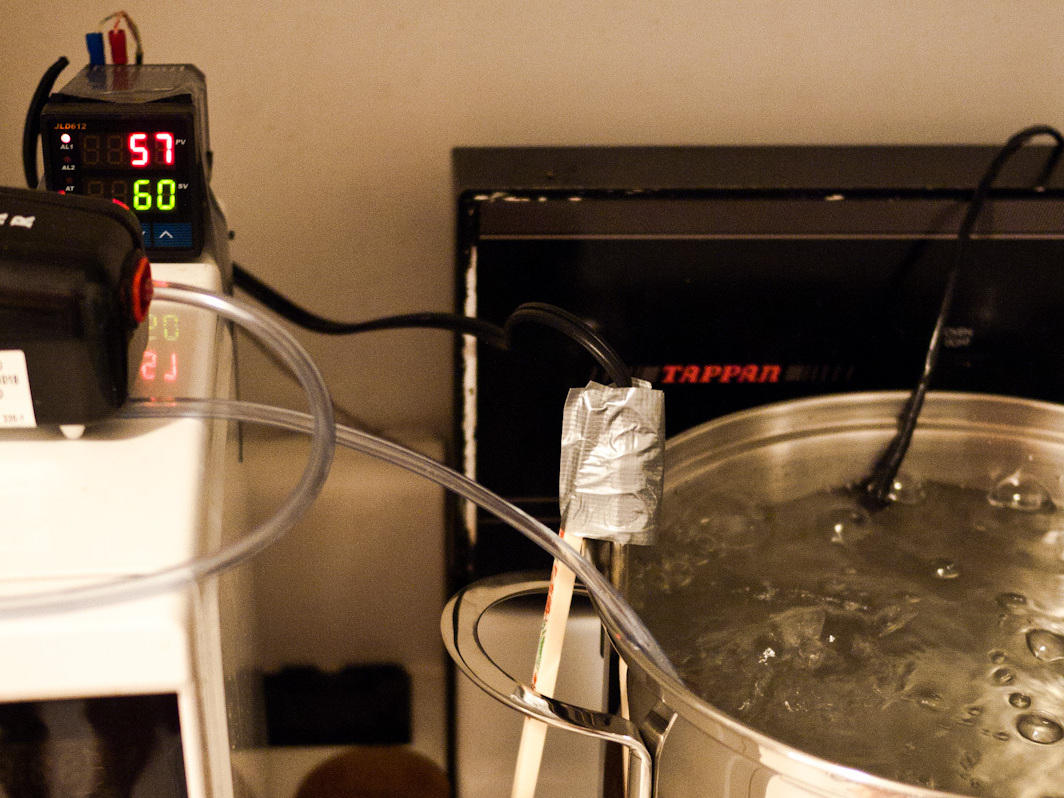
Finally, tape a popsicle stick or chopstick to the back of the heating element. Since the plastic nub attached to the back is short, this augmentation this will allow the heating coil to reach further into the water.

The bubbles produced by the aquarium air pump effectively mix temperatures into the layers in water. Just plug the pump into an adjacent socket.

In order to weigh down the end of the air tubing, we wedge the end between the tines of a fork. Easy!

Everything tech is done now. Just set up your sous vide and bubbler with a pot full of water. Because the heater is fairly low-powered, it may save time to put the pot on the stove to heat it to temp first. It’s also useful to cover the pot in saran wrap or aluminum foil.

Adjust your PID parameters to reach the target temperature faster.

Keep the PID controller and water pump elevated, to avoid damage by water spills.

Make sure the thermocouple is secure and deep in the water. If it comes above the water level, it will register a temperature that is too low, and the PID controller will turn up the heat indefinitely.

Make sure the coil of the heater is below the water’s surface, but watch out for water spilling over the edge from the bubbles.

Remove some water before putting food in to avoid spilling.

Find recipes and more DIY sous vide tips on our site Q and Abe.

Find safety tips and recipes on Douglas Baldwin’s Practical Guide to Sous Vide Cooking.

Read an excellent primer on low-temp cooking and sous vide on the FCI Cooking Issues blog.