M35_SS_DryIce_OpenerGH_03

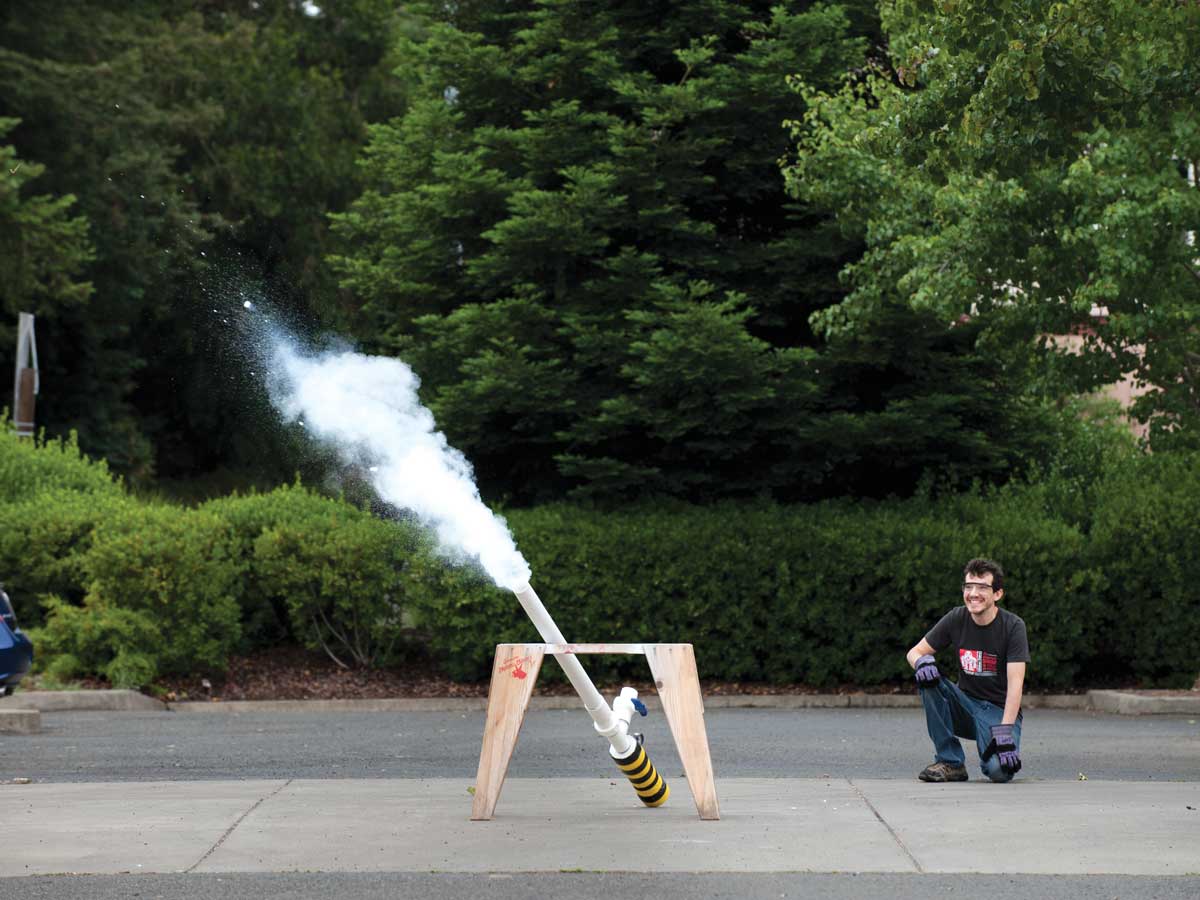
Is this project a bit dangerous? Sure. But with care and planning you can safely build a wicked-cool dry ice cannon that uses the power of sublimation to shoot a projectile high into the sky.

Frozen carbon dioxide is called “dry ice” because it doesn’t melt into liquid like normal ice. Water, as we all know, becomes solid ice below 32°F, exists as a liquid between 32°F and 212°F, and turns to steam at temperatures above that. Dry ice is different. There’s not enough pressure in our atmosphere for carbon dioxide to exist as a liquid. (On Venus, there are oceans of liquid CO2 because the atmospheric pressure is so high.) At an Earthly pressure of 14.7psi, dry ice never melts to a liquid state. Instead, at –109°F, it passes directly from a solid to a gas. That’s a physics phenomenon called sublimation.

It’s sublimation that makes this dry ice cannon shoot. As dry ice sublimates (or sublimes), the CO2 gas produced rapidly builds up pressure inside the cannon. To control the release of the pressure, we’ll install a burst valve that will suddenly but safely open when the pressure reaches a predetermined threshold.

Our burst valve is a disc of aluminum foil held in place between the 2 sections of a PVC pipe union and sealed tightly by the O-ring built into the union. When the pressure inside the cannon reaches about 25psi (far below the rupture strength of the PVC), the foil membrane bursts, the pressure escapes to the barrel, and whatever’s in the barrel is launched high into the air.

Dry Ice Safety Rules

  1. Do not store dry ice in an airtight container. The best place to store dry ice is in a styrofoam cooler with a loose-fitting lid.
  2. Do not touch dry ice with your bare skin; you could get frostbite. Always use insulated gloves or tongs.
  3. Open the windows in your car or workshop when you transport or experiment with dry ice. Breathing high concentrations of carbon
    dioxide is hazardous and can be deadly.
  4. Use only the amount of dry ice specified in the directions.

What will the next generation of Make: look like? We’re inviting you to shape the future by investing in Make:. By becoming an investor, you help decide what’s next. The future of Make: is in your hands. Learn More.

Project Steps

Build your Sublimator cannon.

CAUTION: Attempt this project at your own risk. Follow the directions carefully and be aware that material flaws and poorly constructed joints can lead to

big trouble.

Cut the pipe to length, referring to the assembly drawing. Before cementing, remove all PVC shavings with a cloth or water to get a clean bond (and to avoid painful high-speed PVC splinters upon firing).

Cement the 4″ end cap to the 4″ pipe. Cement the 4″–2″ reducer fitting to the other end of the 4″ pipe. This is your pressure chamber.

Connect the reducer to the tee fitting by cementing each to a 3″ length of 2″-diameter pipe.

Cement another 3″ length of 2″ pipe into the middle opening of the tee, then cement the ball valve to this short pipe.

Connect the threaded half of the pipe union (the side with the O-ring) to the remaining opening of the tee by using the third 3″ length of 2″ pipe.

Attach the 3′-long 2″ pipe to the remaining half of the pipe union. This is the barrel (first photo).

OPTIONAL: A bigger, 2-1/2″ barrel is perfect for launching tennis balls, though it won’t shoot T-shirts as far. To make one, cement a 3″ length of 2″ pipe into the pipe union (buy a spare union if you want swappable barrels), and on the other end cement the 2-1/2″ to 2″ reducer, then the 2-1/2″ coupling, then the 3′ length of 2-1/2″ pipe. Be sure to slide the threaded collar onto the pipe union before gluing on the reducer (second and third photos).

Wrap the pressure chamber in 3 layers of your favorite duct tape for an extra margin of safety in case it should crack.

Drill a 7/16″ hole in the pressure chamber, near the top of the 4″ pipe. Tap threads in the hole for a 1/4 NPT pipe. Apply plenty of thread sealant to the pressure gauge’s threads and screw it into the hole.

Drill a second 7/16″ hole in the pressure chamber, also near the top. Tap the hole for a 1/4″ NPT pipe. Apply thread sealant to the pressure-release valve and screw it in. Don’t mount this valve near the bottom of the chamber, or it’ll blow water instead of air.

Rinse all PVC shavings out of the cannon with plenty of water.

Operating the Sublimator cannon.

Roll up a T-shirt or towel to fit the barrel, and tape it to hold its shape. Use the dowel or broomstick to push it down the barrel.

Cut a 2-1/2″ disc of heavy-duty aluminum foil. Unscrew the pipe union and place the disc between the 2 halves of the union. Screw the union together tightly. The O-ring must seal the burst disc in place with no air leakage. Two discs can be used for greater range, but start out with one.

Open the ball valve and pour 3 or 4 pints of warm water into the chamber.

Secure the cannon so that it’s aimed straight up or nearly so.

Put on safety glasses and insulated gloves. Push 3 dry ice pellets through the valve, making sure they drop all the way into the water inside the pressure chamber. Use the broomstick to push them if necessary. Quickly close the valve completely.

Immediately, the dry ice will begin to boil inside the Sublimator. Step back a safe distance, and keep an eye on the pressure gauge. The sublimating dry ice causes the pressure to rise until it exceeds the ability of the burst disc to contain it. The disc bursts open, allowing the CO2 to escape all at once — pop! — launching the T-shirt out of the barrel and high into the air!

Conclusion

Keeping safety in mind

  • This cannon packs a wallop! Always aim it away from people and things you don’t want shot.
  • Use caution when handling dry ice. Use only the amount of dry ice recommended.
  • The time between loading the cannon and actual firing is variable, depending on water temperature, the amount of dry ice, and the amount of water used. Be patient and never, ever look down the barrel.
  • If you have a misfire where the pressure of the sublimating dry ice doesn’t build sufficiently to burst the aluminum discs, carefully open the ball valve to release the pressure. Clear the area when doing this, and stand off to the side as you work.
  • This device is designed to shoot T-shirts, towels, or other soft objects only.