As a home automation buff, I’ve used X10 powerline control products for over 30 years. And although the technology has some shortcomings, I still believe X10 is the cheapest and fastest way to automate a home.

One of the most powerful additions to an X10 system is macro capability, where a computer continuously monitors the powerline for trigger signals, and responds by executing a timed sequence of additional X10 commands. This capability can be implemented with canned automation software as offered by X10.com and others, but often only with serious limitations. These macros are usually developed with a graphical user interface that limits construction, nesting and conditional logic, and the capability often only works if a resident pc is on and running the software. X10’s Activehome code will download to a CM11a or CM15a interface for stand-alone macro operation, but I’ve found these interfaces to be unreliable and prone to frequent lock-ups.

This project uses the X10 powerline carrier home automation protocol, developed in the late 1970’s by Pico Electronics for British Sound Recording (BSR), and subsequently marketed through a Pico/BSR partnership known as X10 Ltd. With this technology, automation commands are transmitted and received using existing house wiring, so that appliances can be turned on and off and lamps can be dimmed or brightened remotely, with no need for dedicated control wires. X10 commands are injected onto the powerline in a binary format, where a binary 1 is represented by a 1ms burst of a 120KHz signal, and a binary 0 is the lack thereof.

Now because home power wiring is noisy, the signals are injected only at certain opportune times, to maximize signal integrity. Our homes are powered with alternating current, where the voltage polarity changes regularly from positive to negative with a sinusoidal frequency (in the USA) of 60 cycles per second, or 60 Hertz (Hz). Because of this sinusoidal polarity change, the voltage on our wiring actually crosses through zero volts 120 times each second. It is at these zero crossing moments that X10 bits are transmitted, as shown in Figure 2. To accommodate the 3-phase power in a typical house wiring system, each bit is actually transmitted 3 times, once for each phase.

Downloads

What will the next generation of Make: look like? We’re inviting you to shape the future by investing in Make:. By becoming an investor, you help decide what’s next. The future of Make: is in your hands. Learn More.

Project Steps

Wire the Arduino to the phone jack.

Begin creating the wiring arrangement by connecting the Arduino board to the phone jack receptacle.

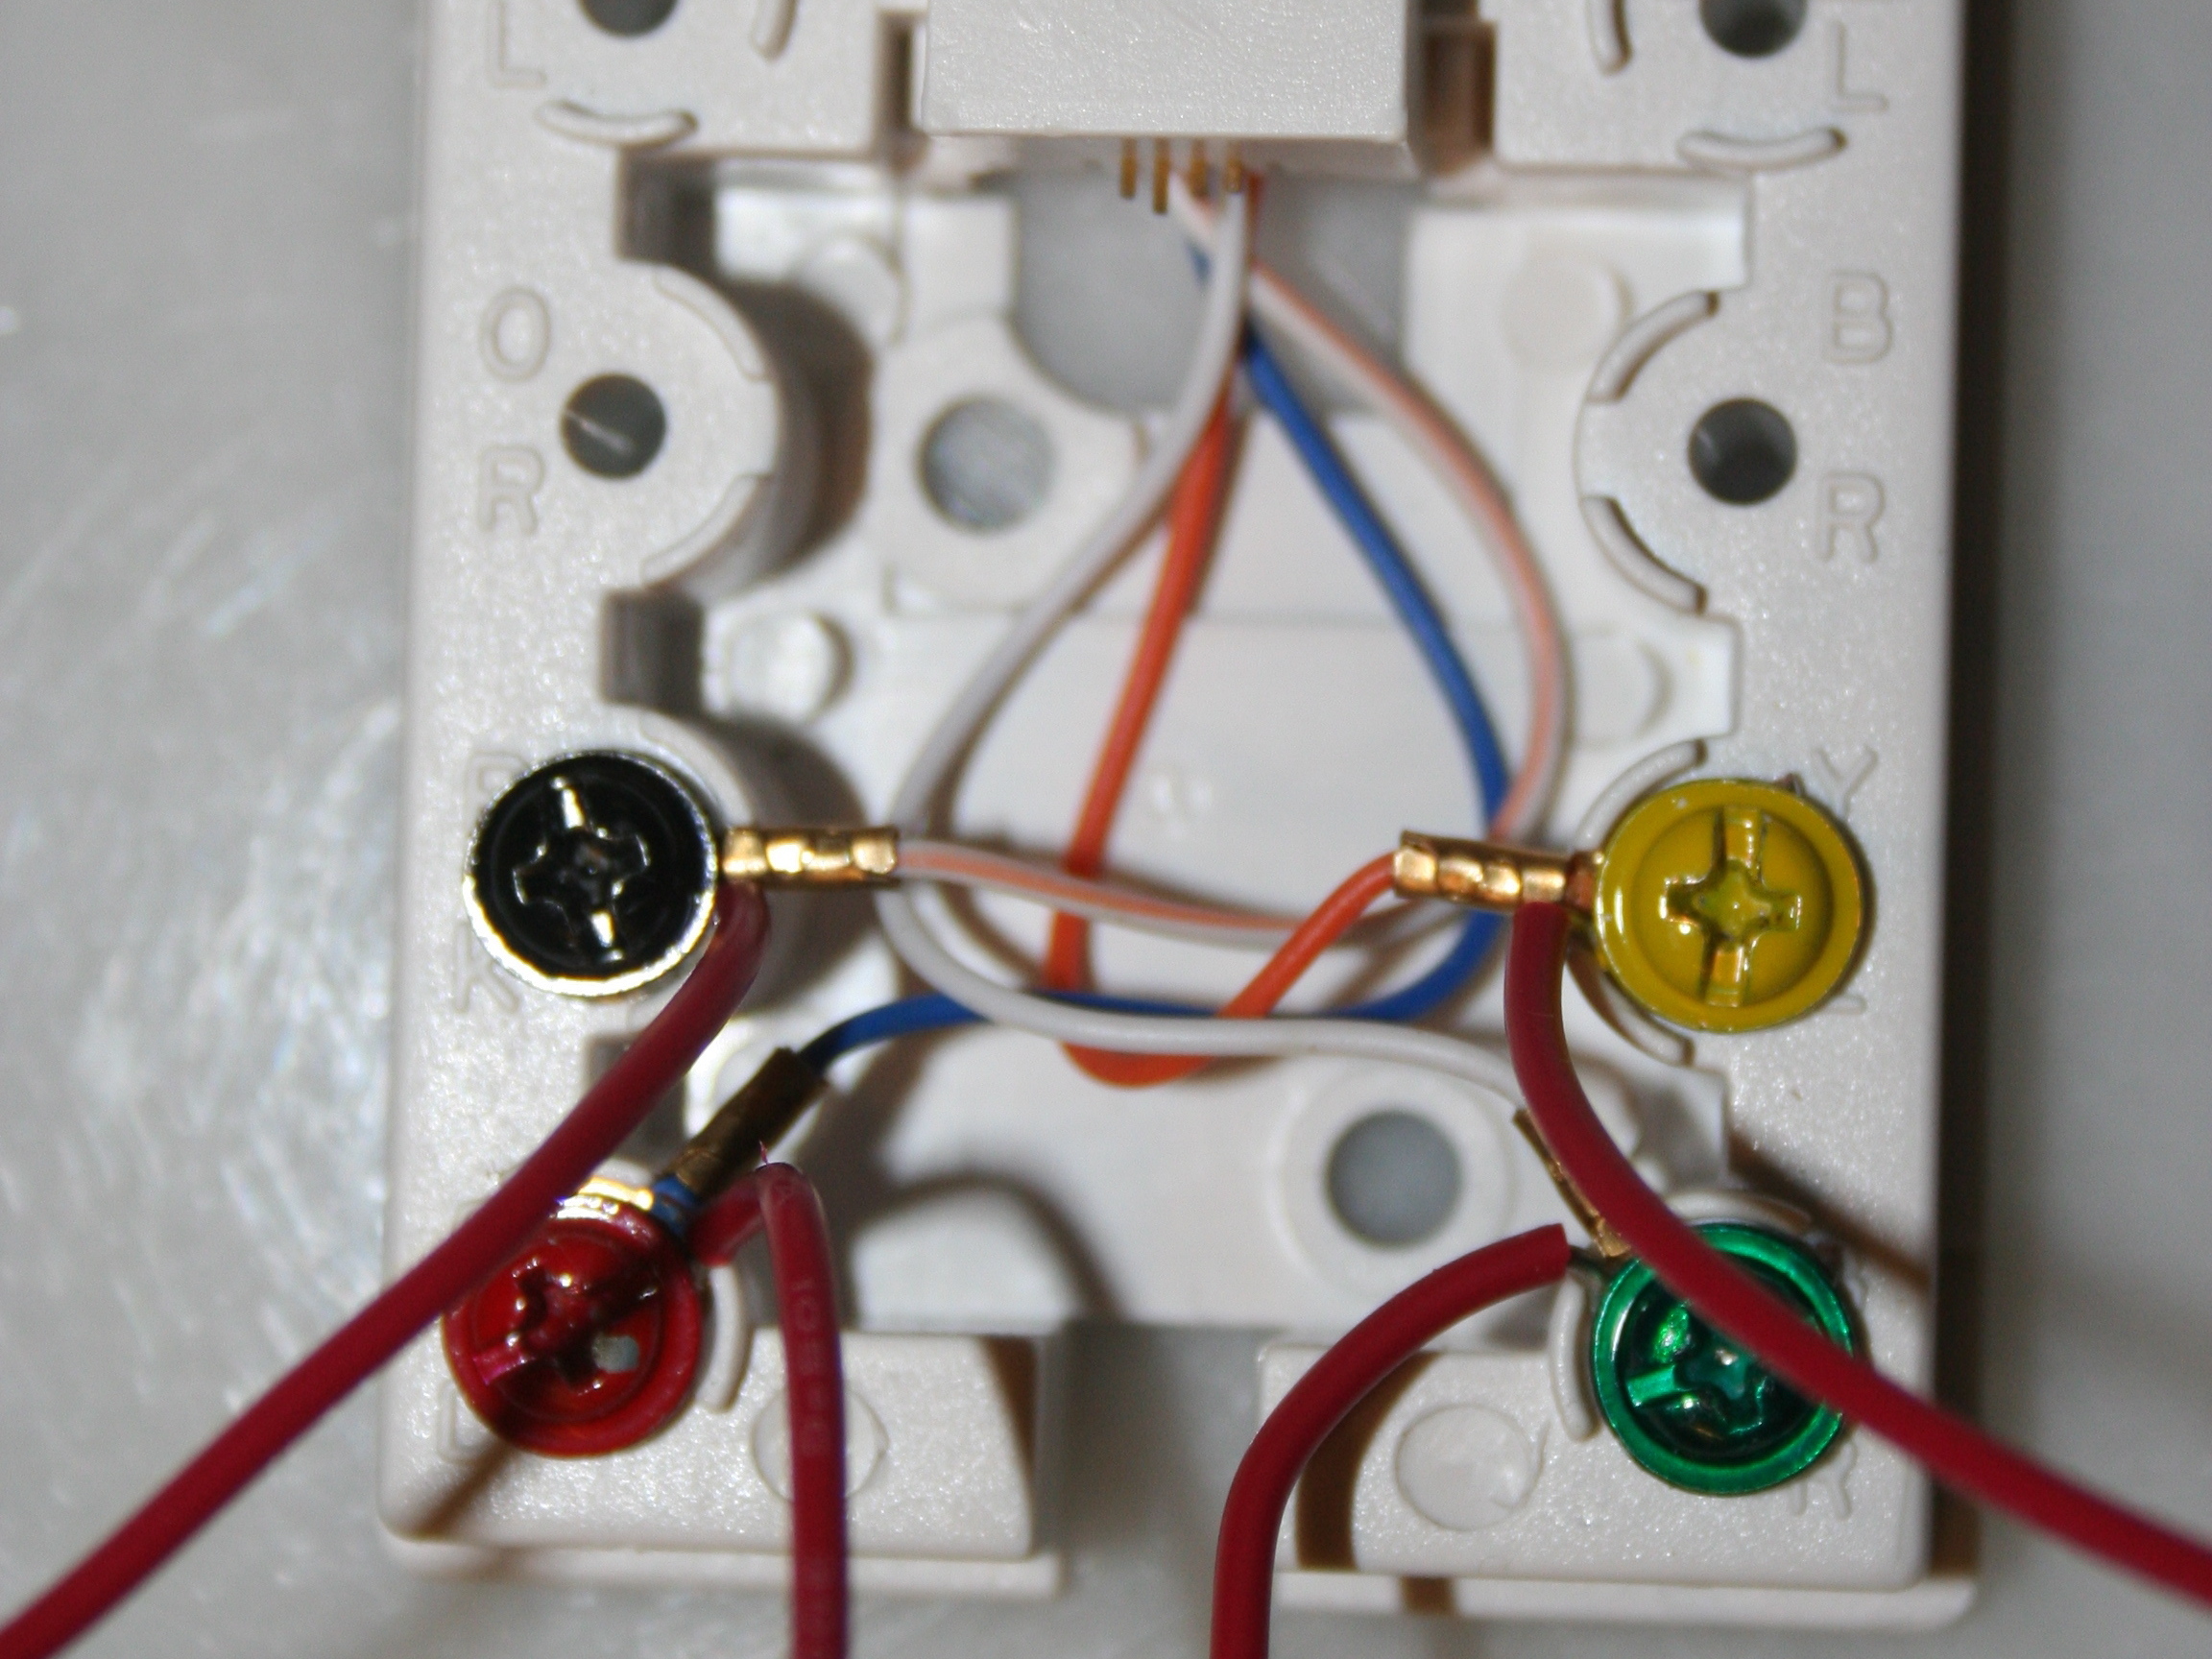
Remove the cover from the receptacle, and you’ll see four (4) color coded screw terminals. Attach a 3” length of 20-gauge wire to each of these.

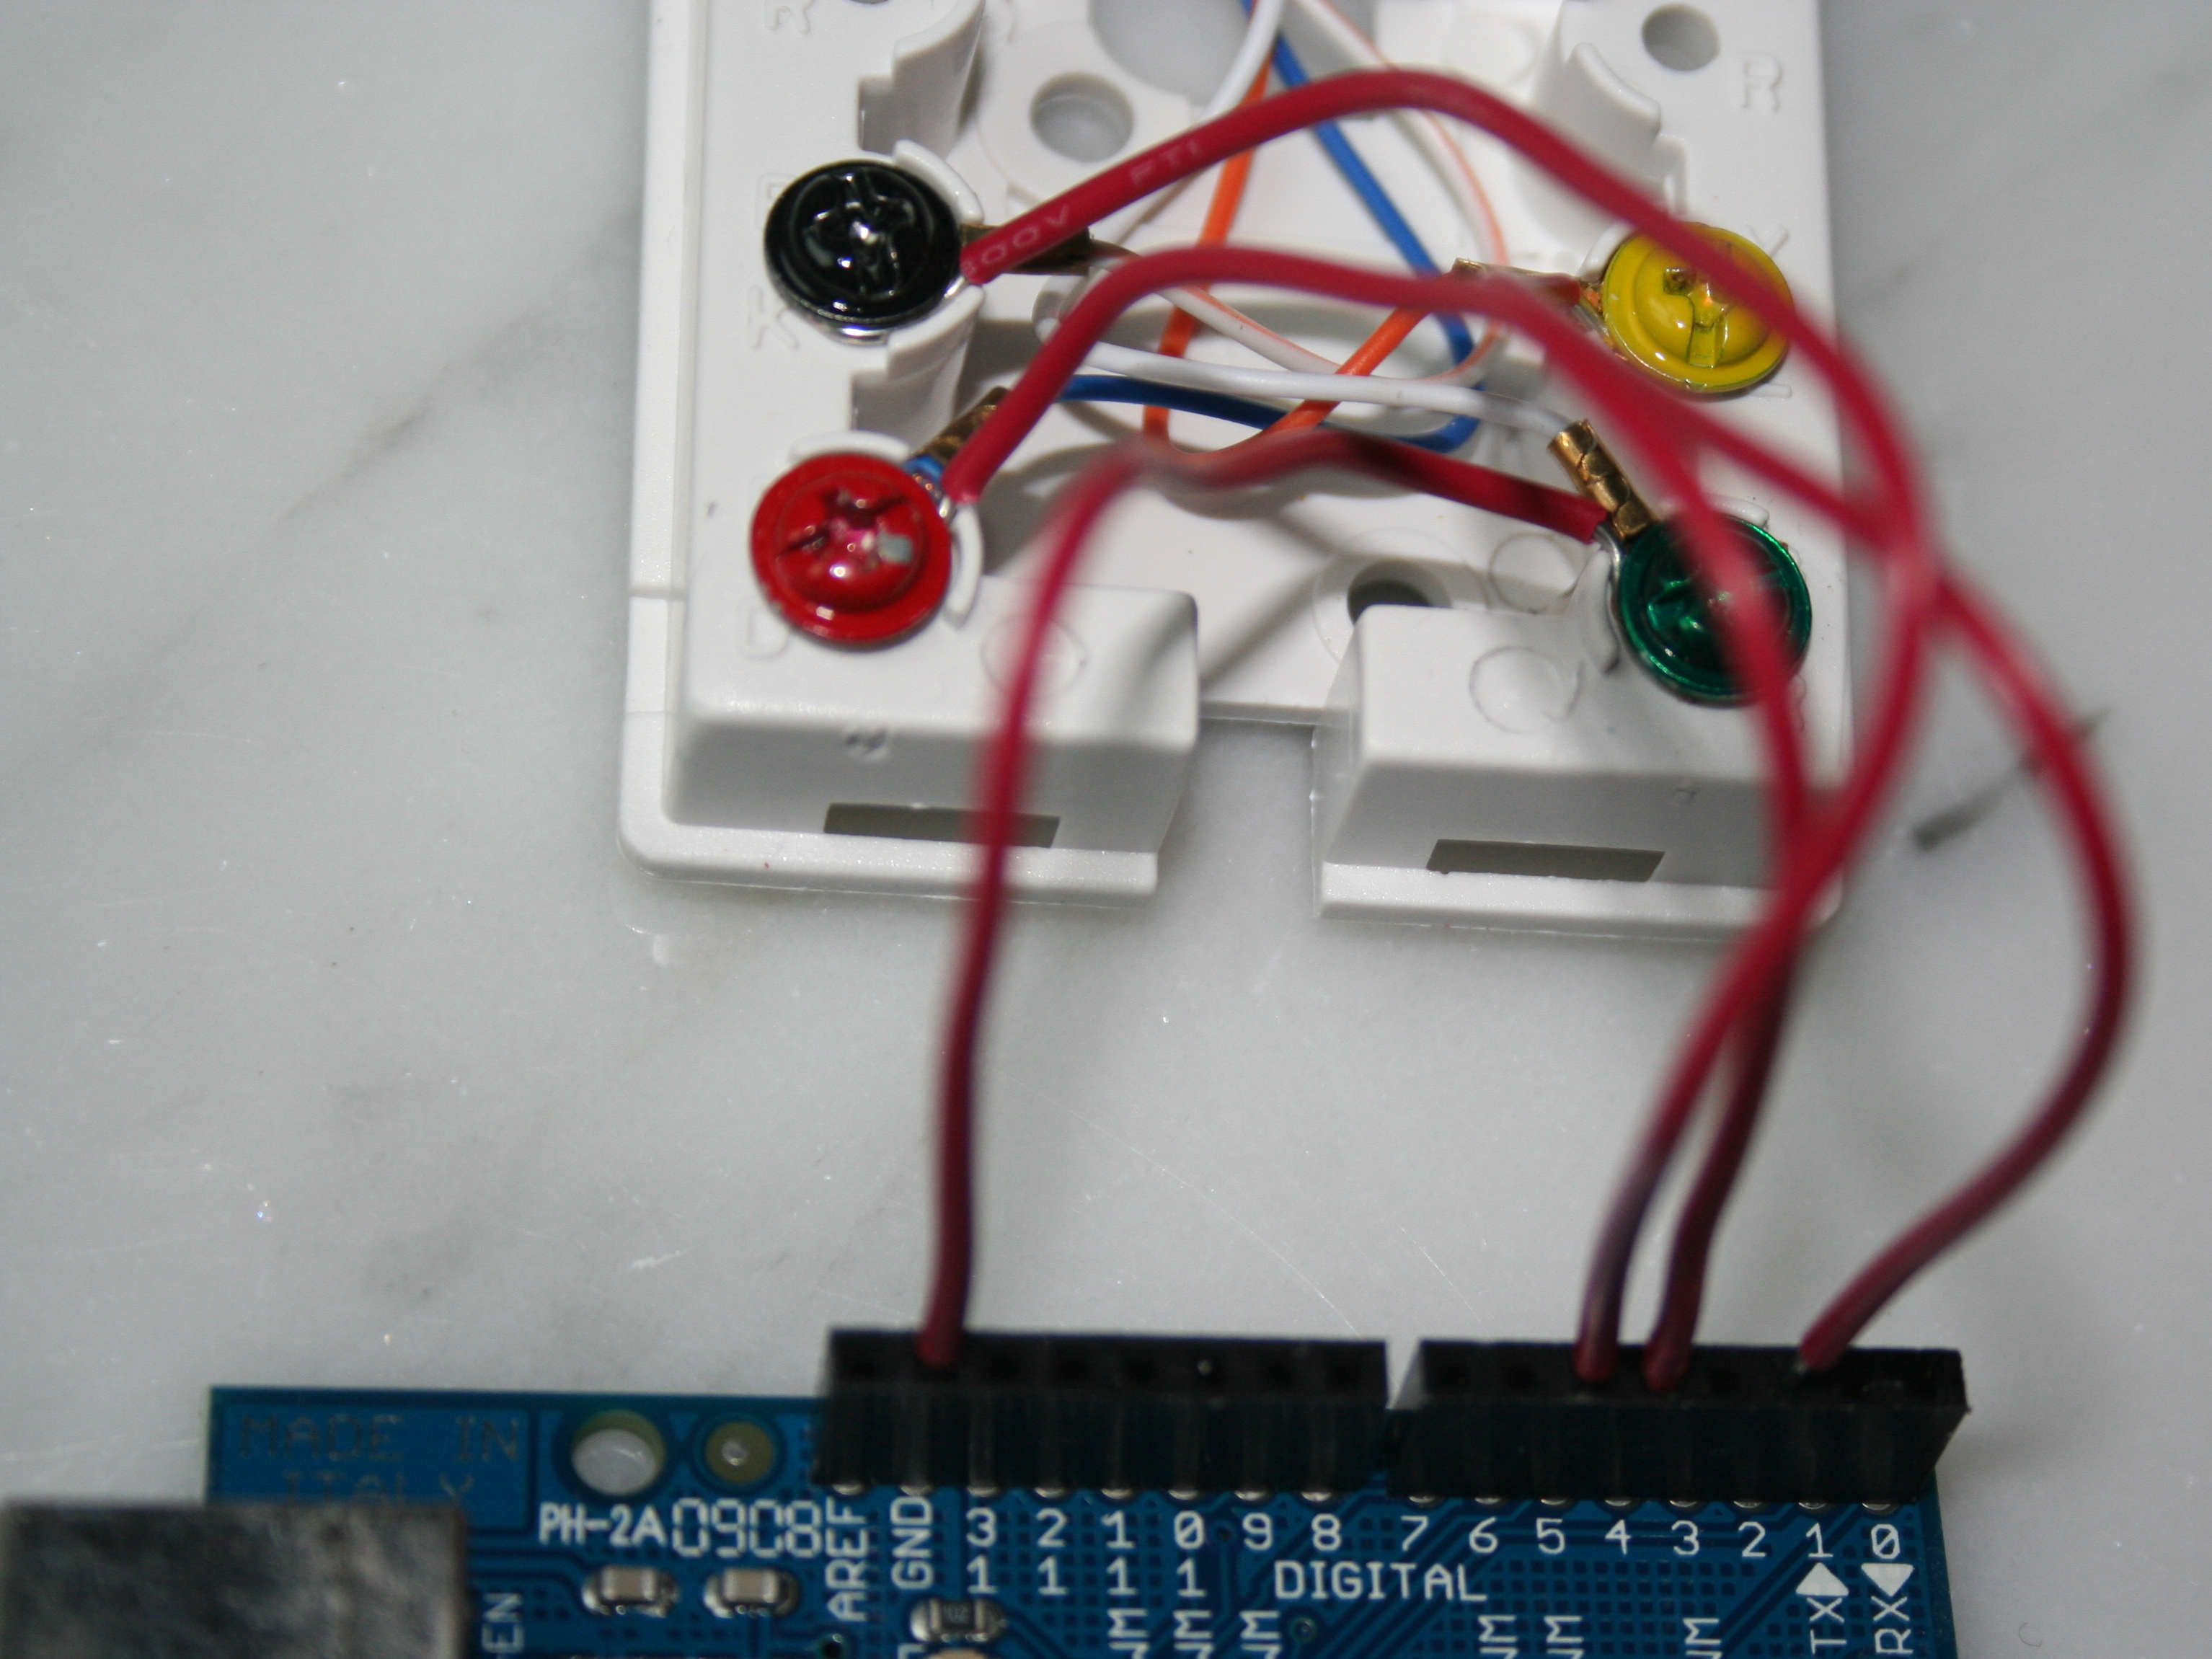
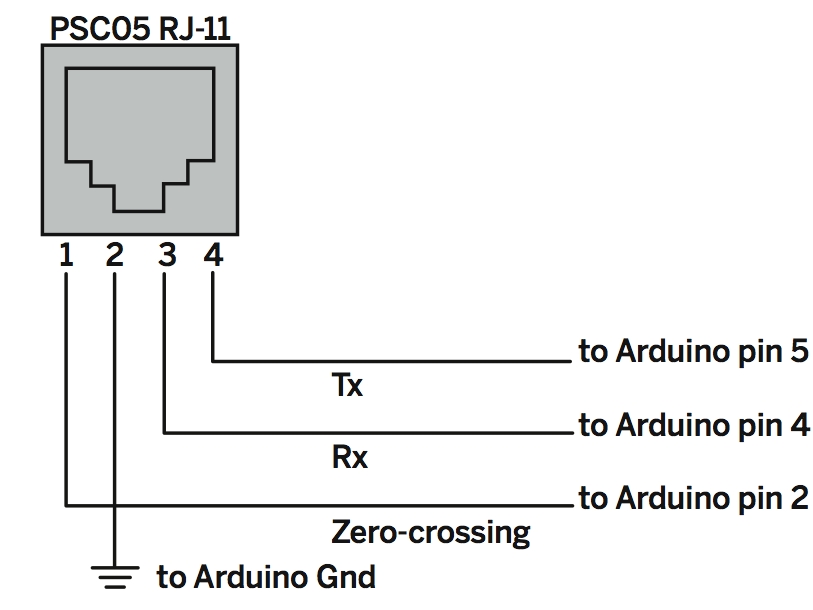
Then attach the wire from the Yellow screw terminal to Arduino digital pin 2, inserting the free end of the wire into the digital pin header on top of the board. Connect the wire from the Red screw terminal to Arduino digital pin 4, from the Black terminal to Arduino digital pin 5, and from the Green screw terminal to the Arduino GND pin.

Adhere the phone jack receptacle to the Arduino board.

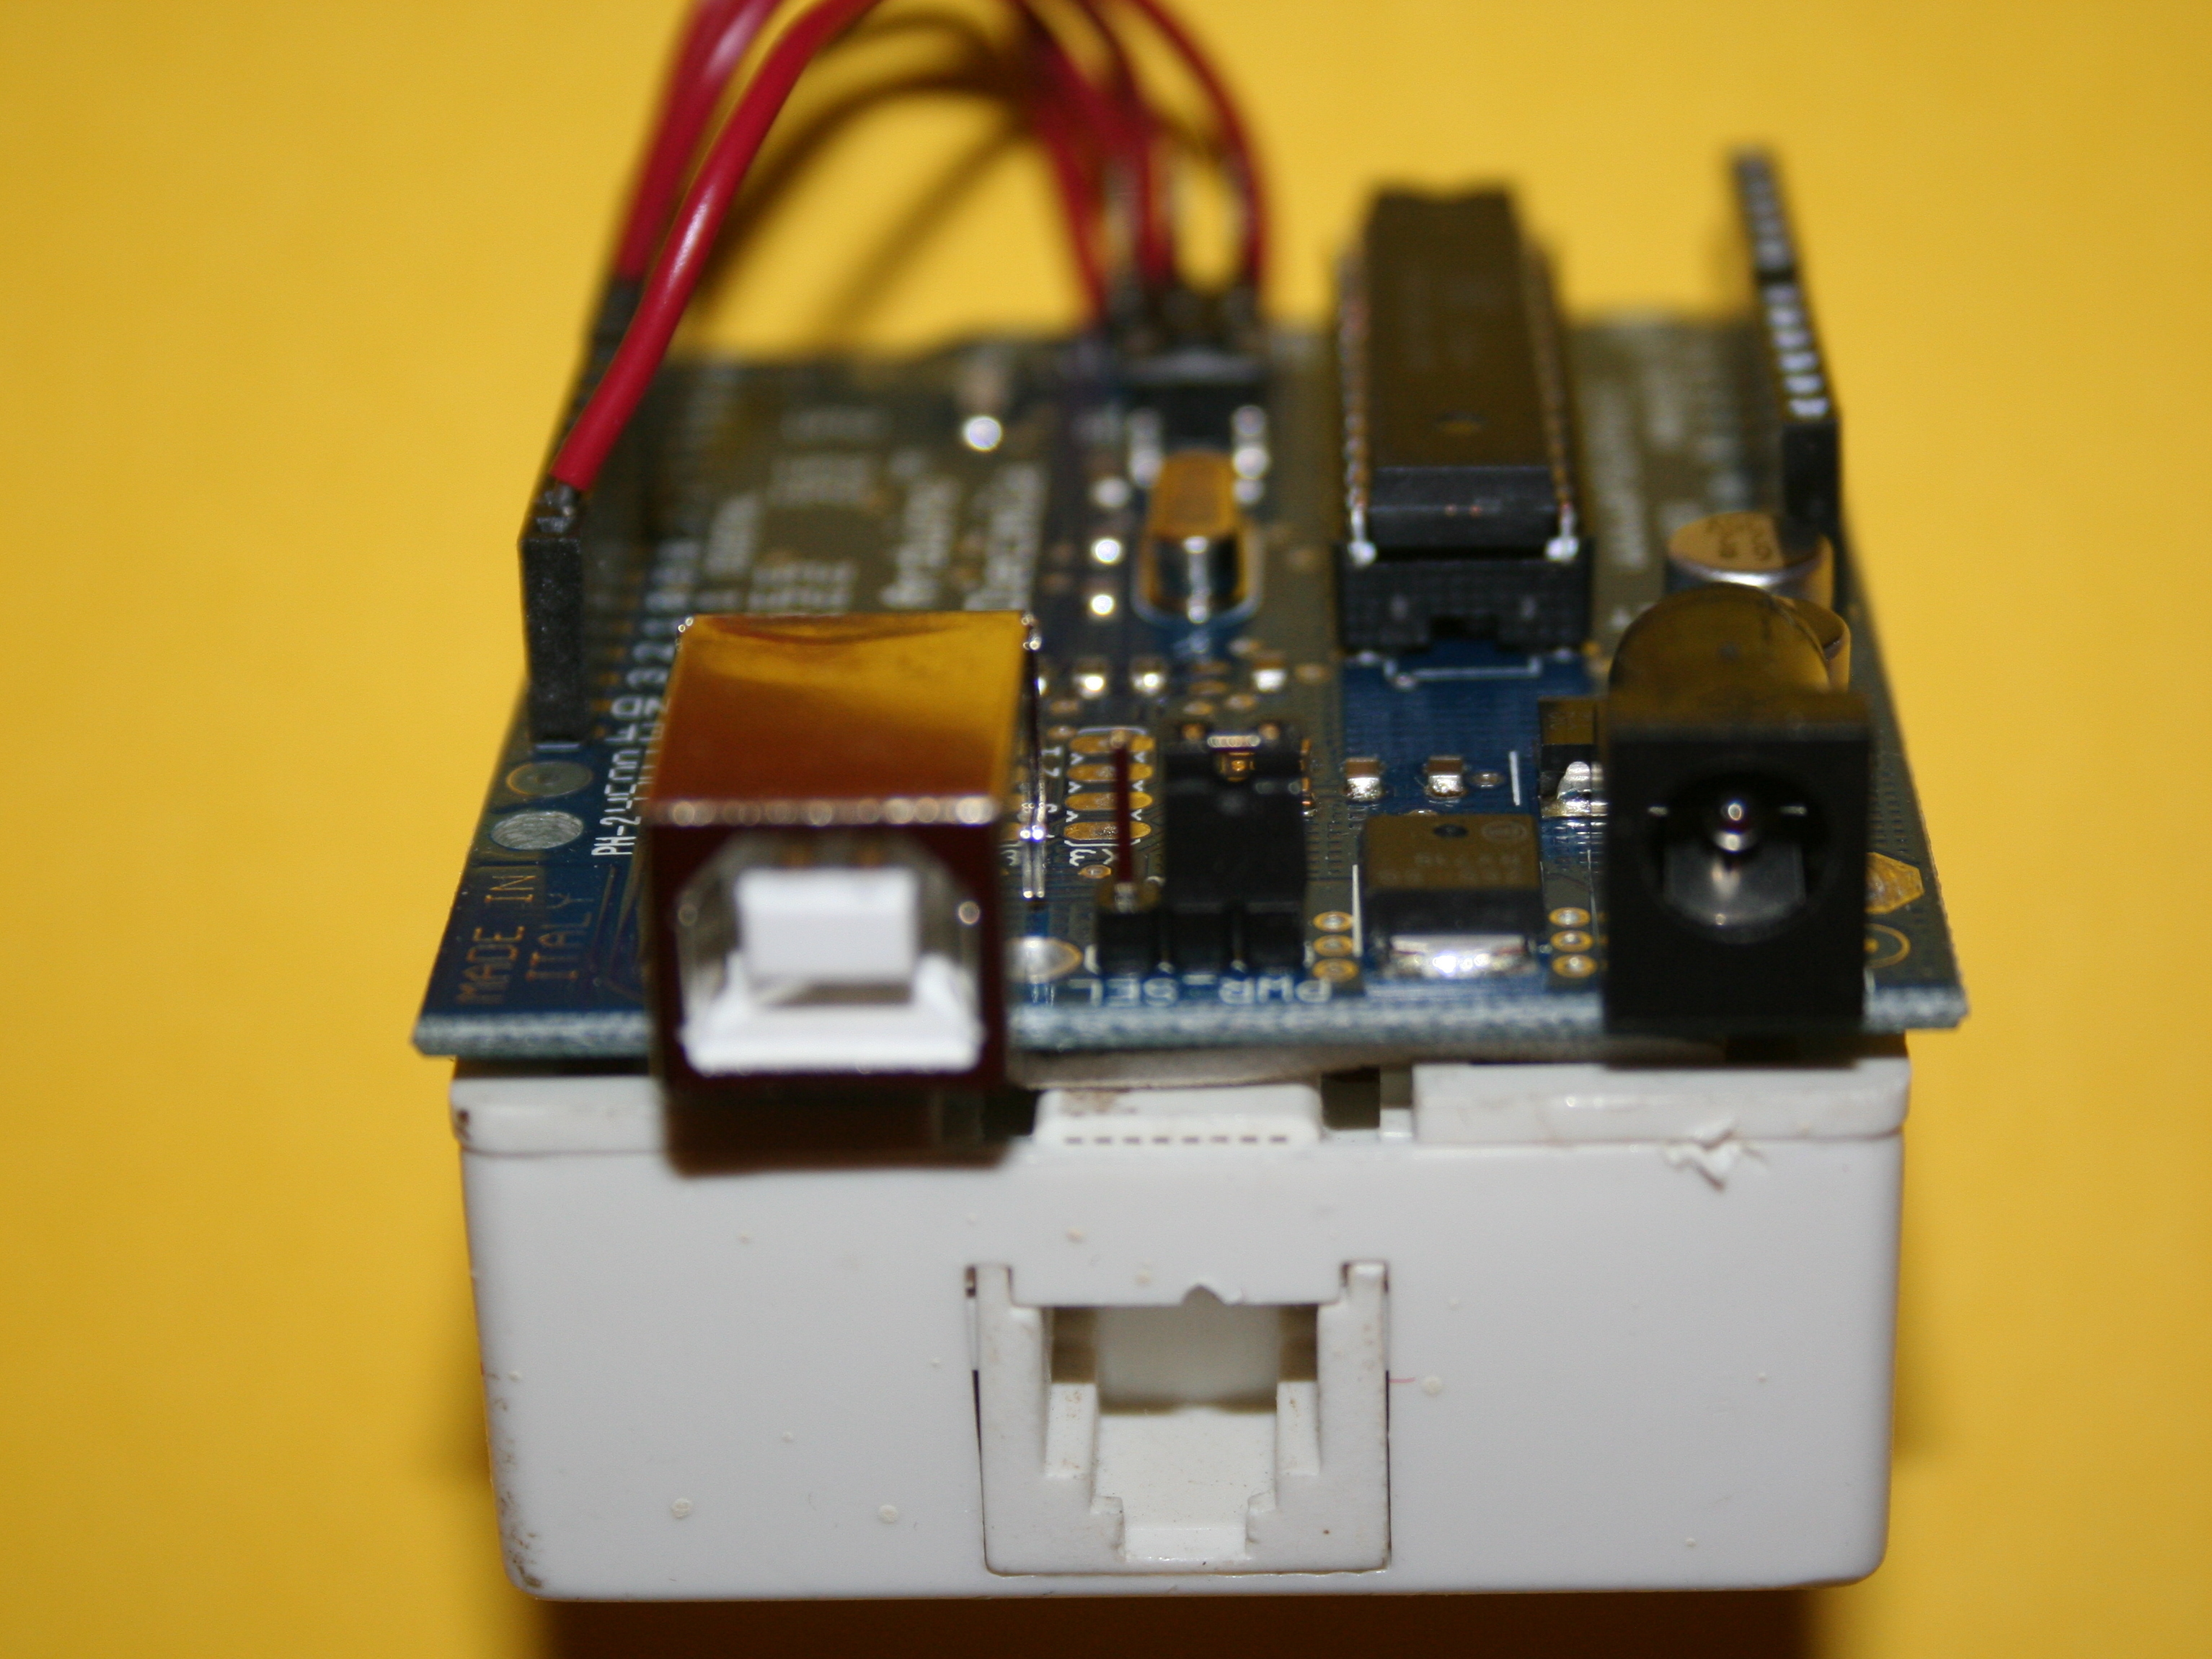
Carefully adhere the phone jack receptacle to the back of the Arduino using a double sided, foam adhesive patch. These patches are usually supplied with the surface mount phone jack receptacle illustrated here, but if not, just use a square of double-adhesive foam tape.

Snap the cover back on the phone receptacle, ensuring the wires are routed nicely out of the receptacle opening to the Arduino’s digital pin header.

Modify the project box.

Place the Arduino/phone receptacle assembly in the box. On the box exterior, mark the locations where the phone and power cables must attach, and remove the Arduino assembly. Now drill two 3/8” holes in the box at the marked locations.

Pass one end of a 4-conductor phone cable, along with the 9V power cable, into the box from the outside, through the bare holes we just drilled. Then slip grommets over the cable end connectors, and push the grommets into the box holes.

Add rubber bumpers to the bottom of the project box.

Connect the Arduino in the box.

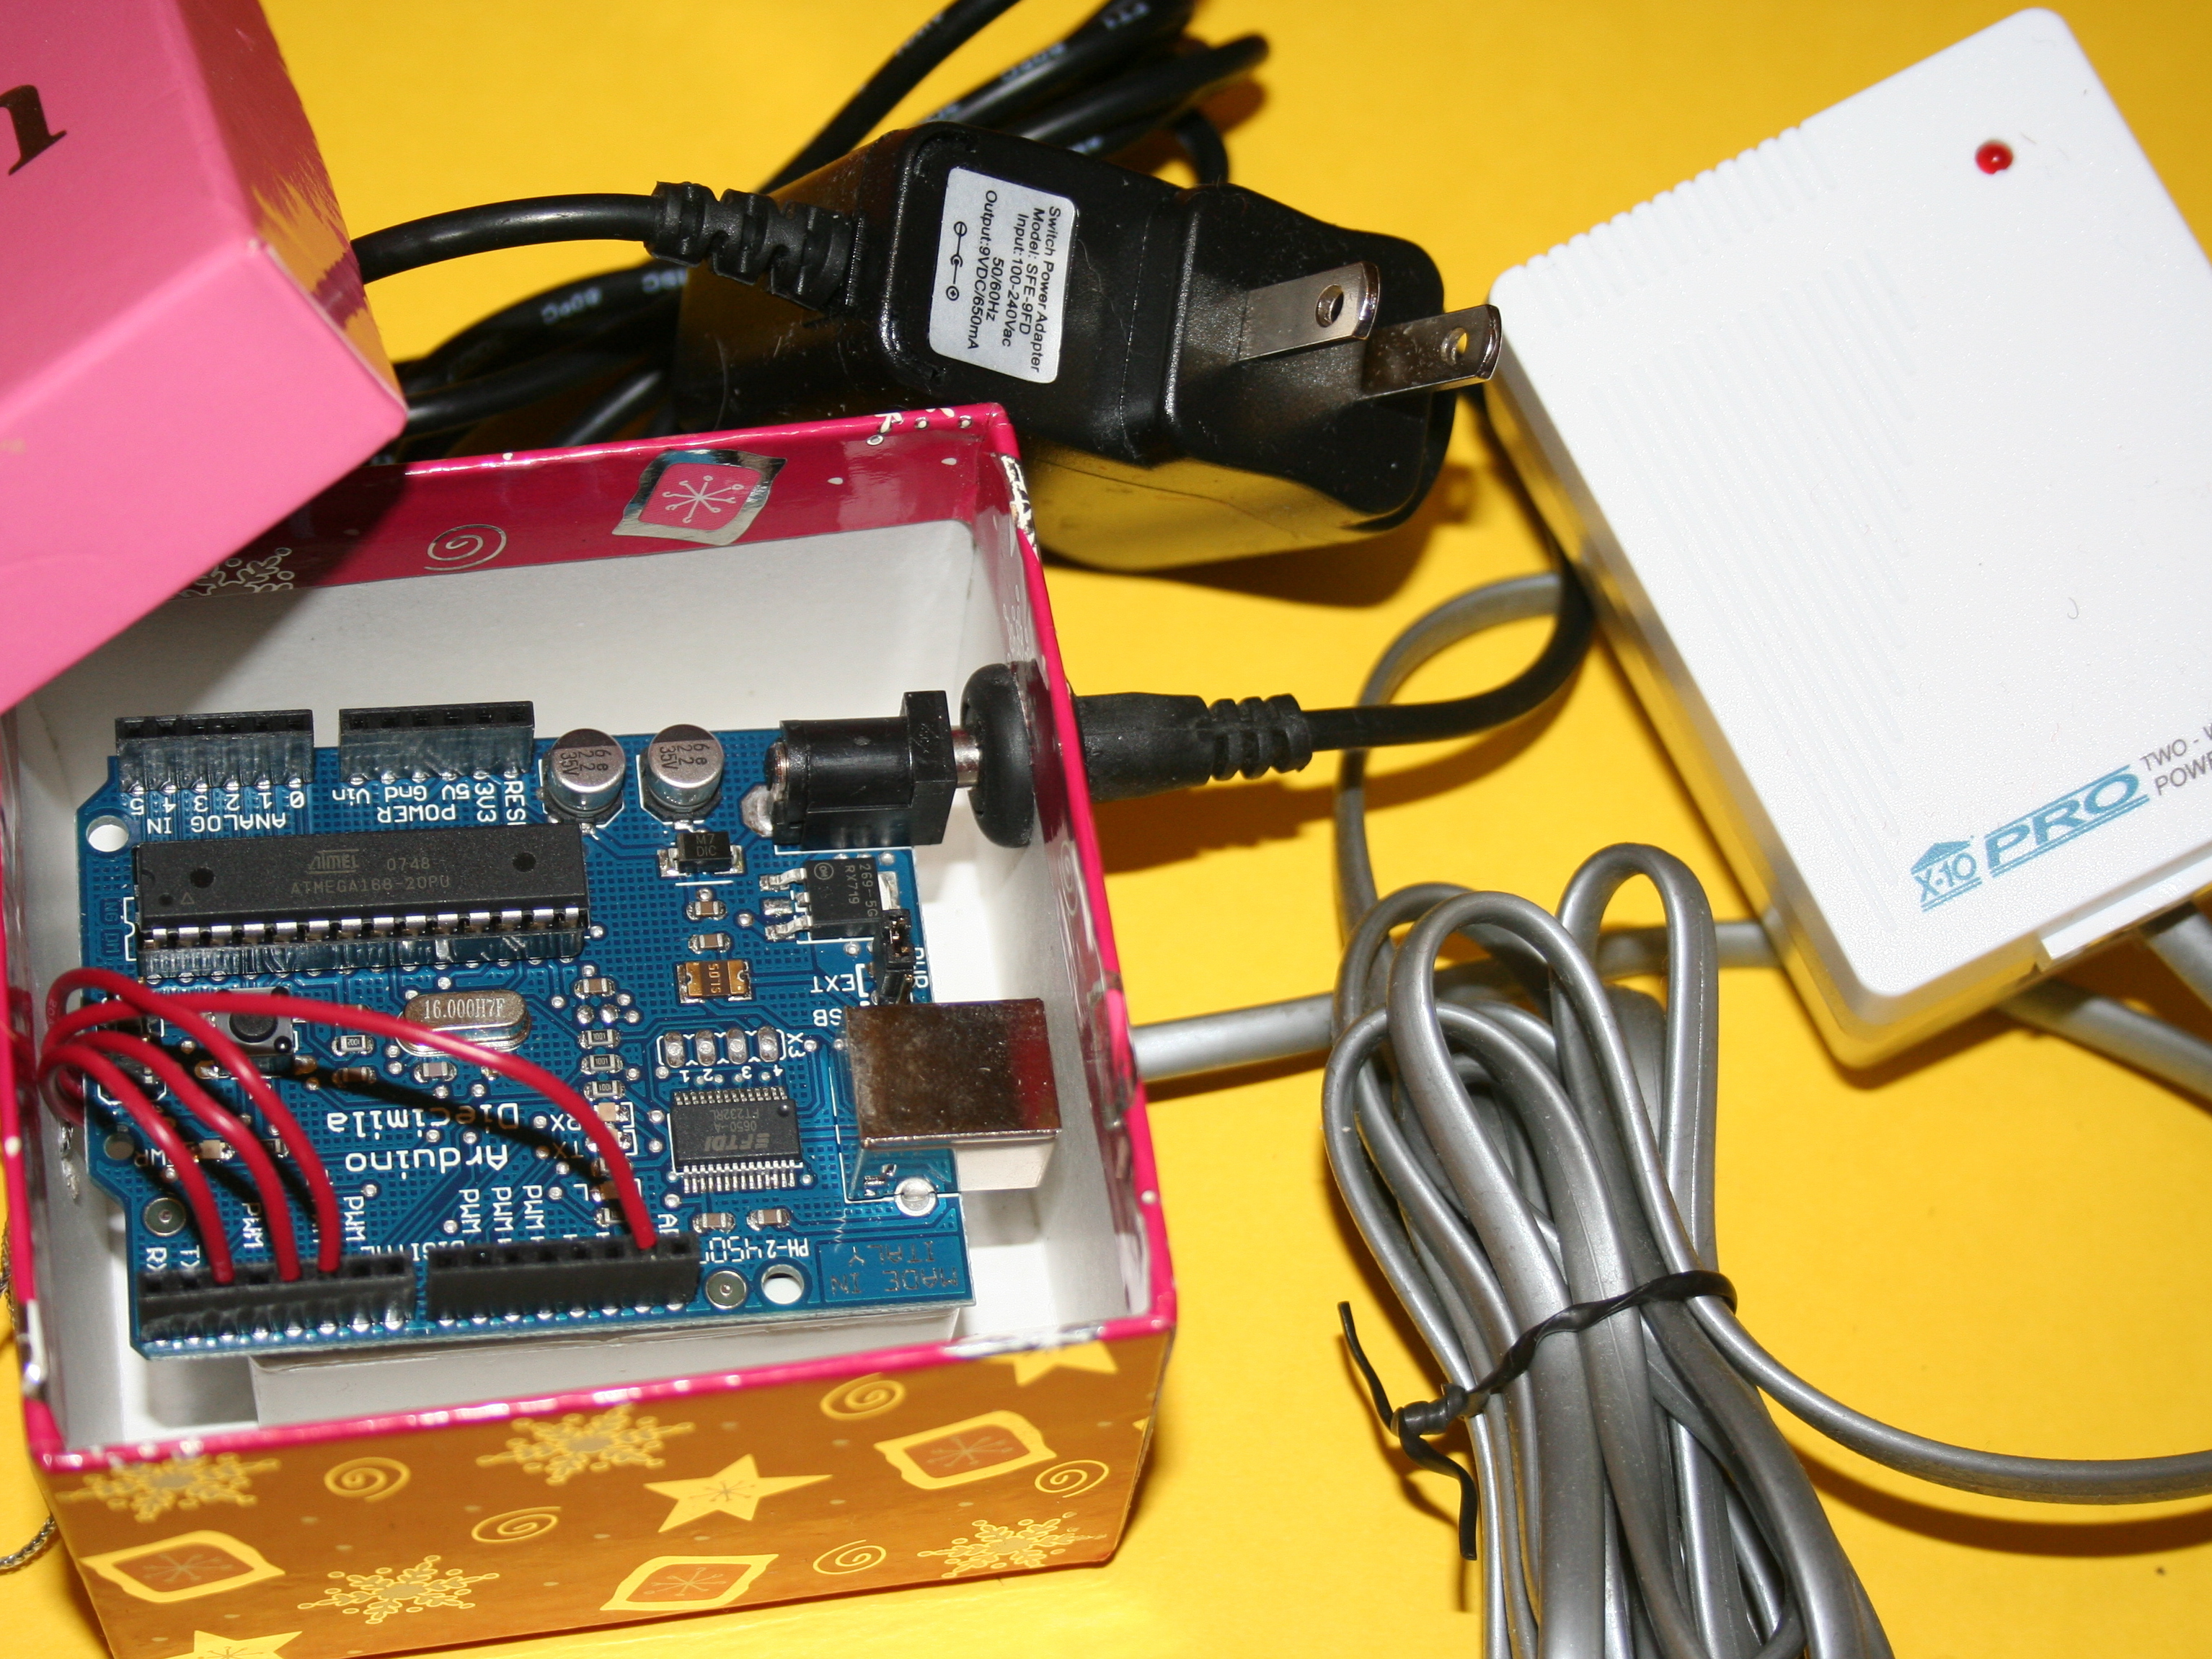
Place the Arduino assembly back in the box, and attach the 9V power supply to it. Plug one end of the phone cable into the phone jack, and the other end into the RJ-11 connector on the PSC05 transceiver.

Install the Arduino IDE.

Download the open source code from http://arduino.cc/en/Main/Software. The software is available for most computer operating systems including Windows, Mac and Linux. To setup for your platform, follow the straightforward instructions on the website.

For the Diecimila or Duemilanove boards used in this project, you’ll need to install a USB serial driver for the onboard FTDI chip; a version is included in the Arduino download package, but if needed you can get the latest driver from: http://www.ftdichip.com/Drivers/VCP.htm.

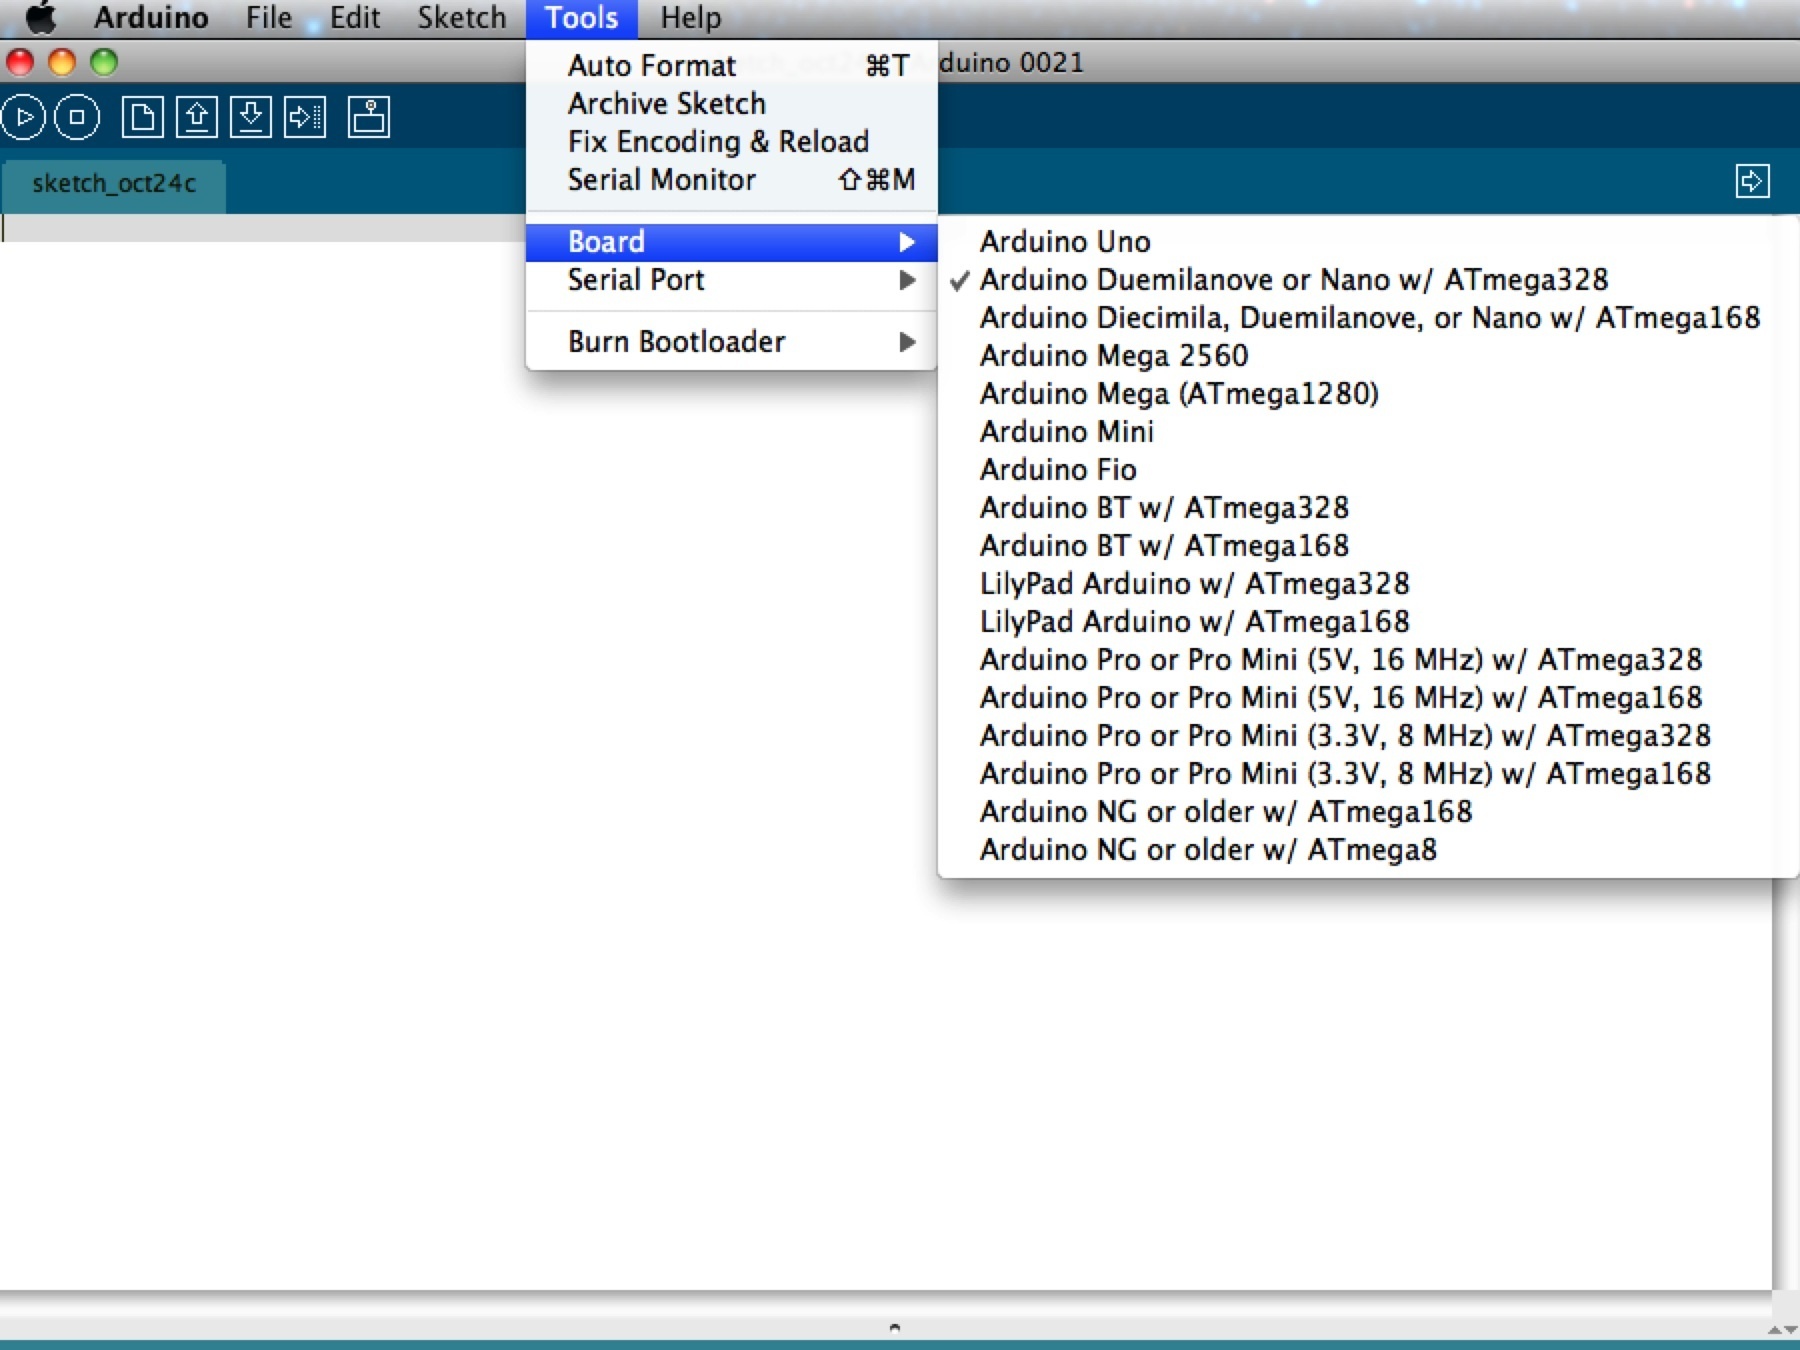
Once the IDE is running, click on the Tools pull down menu to select the proper version of Arduino board (there are many).

Install the X10 library.

Download the integrated X10 library from http://creatrope.com/make/arduino-x10/. The x10.zip file contains both X10 “send” and “receive” code elements.

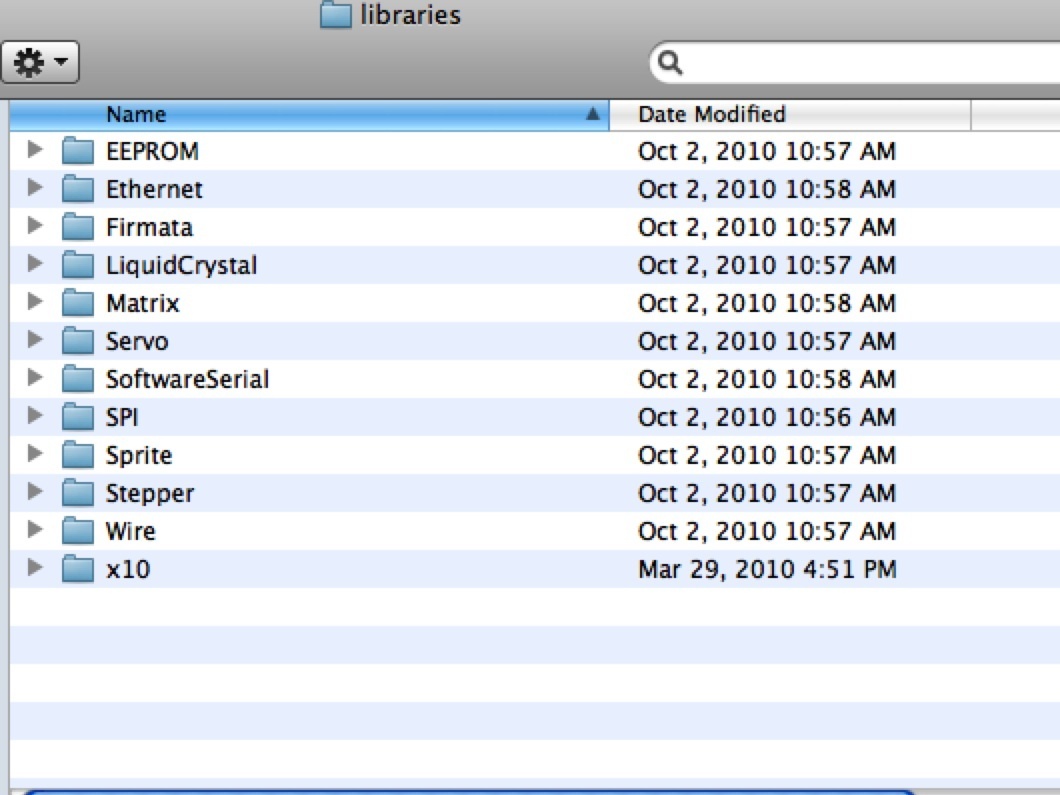
Copy the X10 folder into the Arduino libraries folder on your computer, located at Arduino.app/Contents/Resources/Java/libraries, by right clicking on the Arduino.app icon (or, on a Mac, holding the “Control” key while you click on the .app file).

Re-start the IDE.

Run a code checkout.

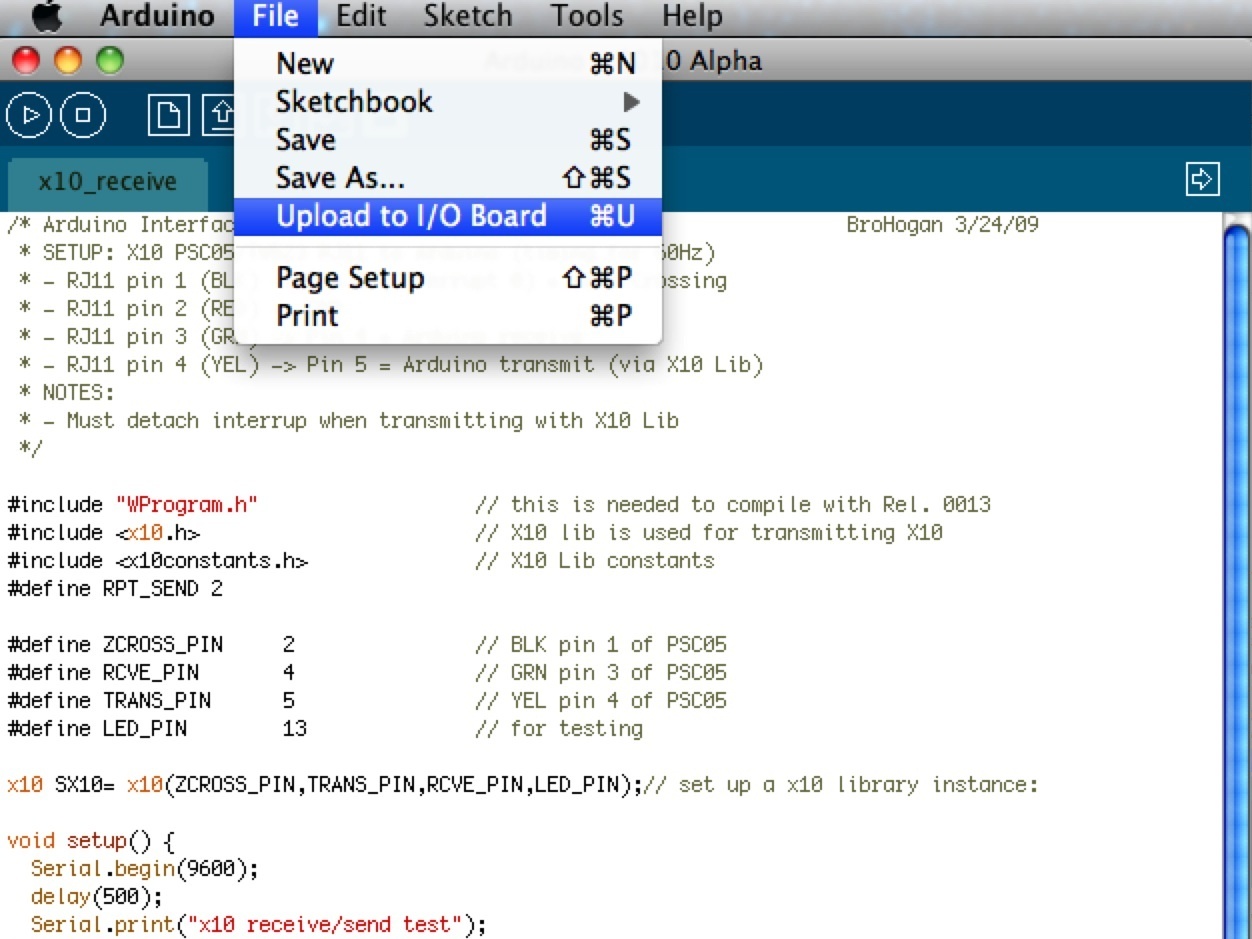
To check the Arduino’s X10 send and receive functions, load the X10_receive example.

Remove the macro module from its box, disconnecting the power and phone cables.

Connect a USB cable between your pc and the Arduino board. If you use a Diecimila, ensure that the plastic jumper near the square USB port is positioned on the 2 pins closest to the port, so that the pc will power the Arduino.

Connect a phone cable between the macro module’s RJ-11 jack and the PSC05, and plug the latter into a wall outlet.

Upload the X10_receive example code to the Arduino.

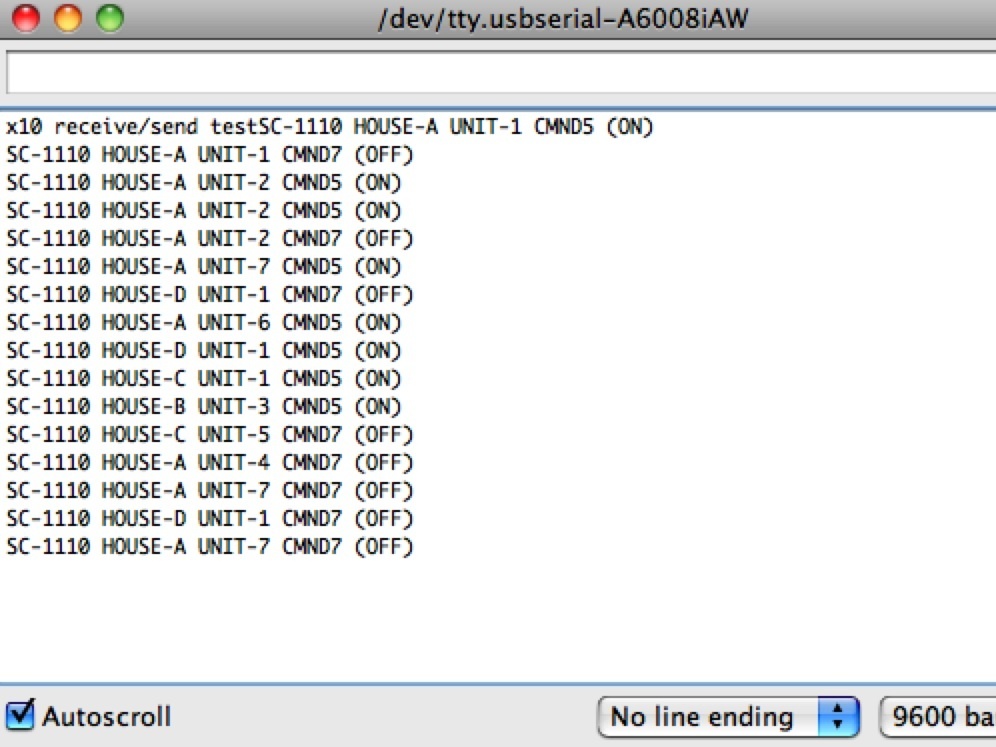
If you’ve done everything properly, X10 commands will appear in the Serial Monitor window.

Program the macro module.

Replace the “loop” function in the checkout example above with new code, that listens for macro triggers on the powerline and responds by sending a sequence of X10 control commands.

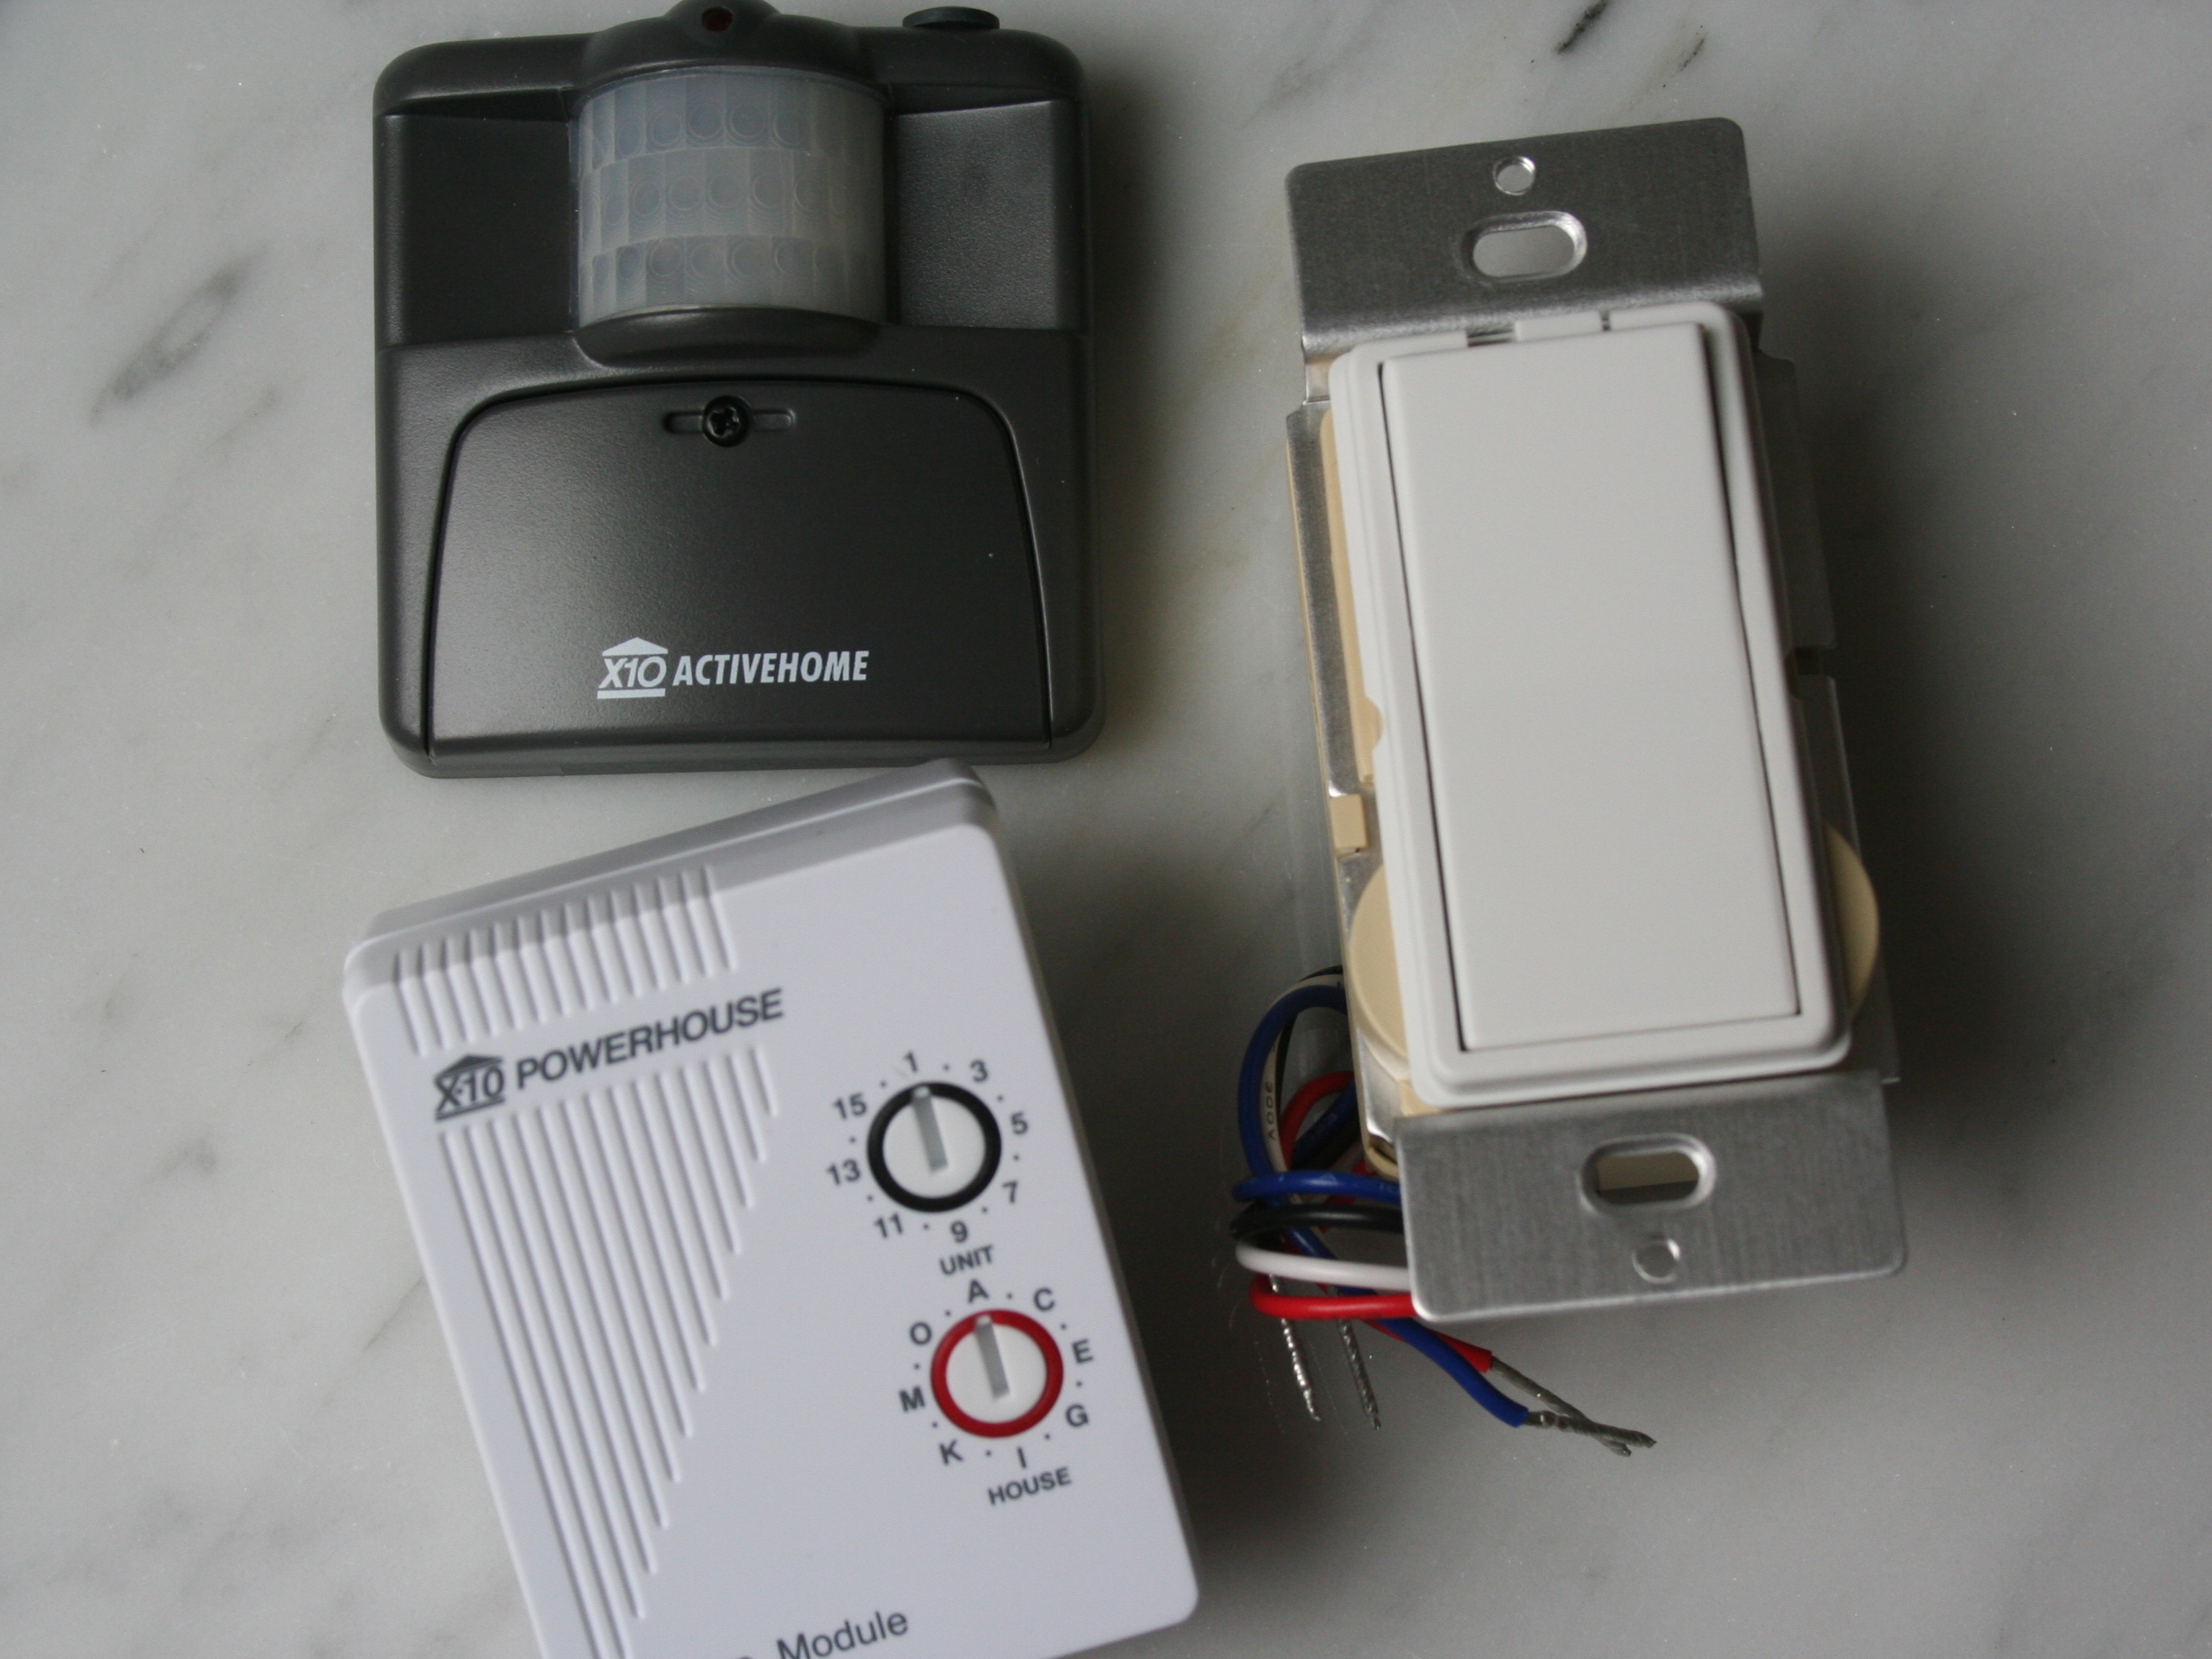
To illustrate a powerful macro sequence, I setup the following hardware:

Outdoor motion detector set to A1

Lamp module set to B1

Porch light switch module set to C1

PowerHorn chime module set to D1

IrrMaster sprinkler controller set to House Code E

Conclusion

Maximize Your Macros

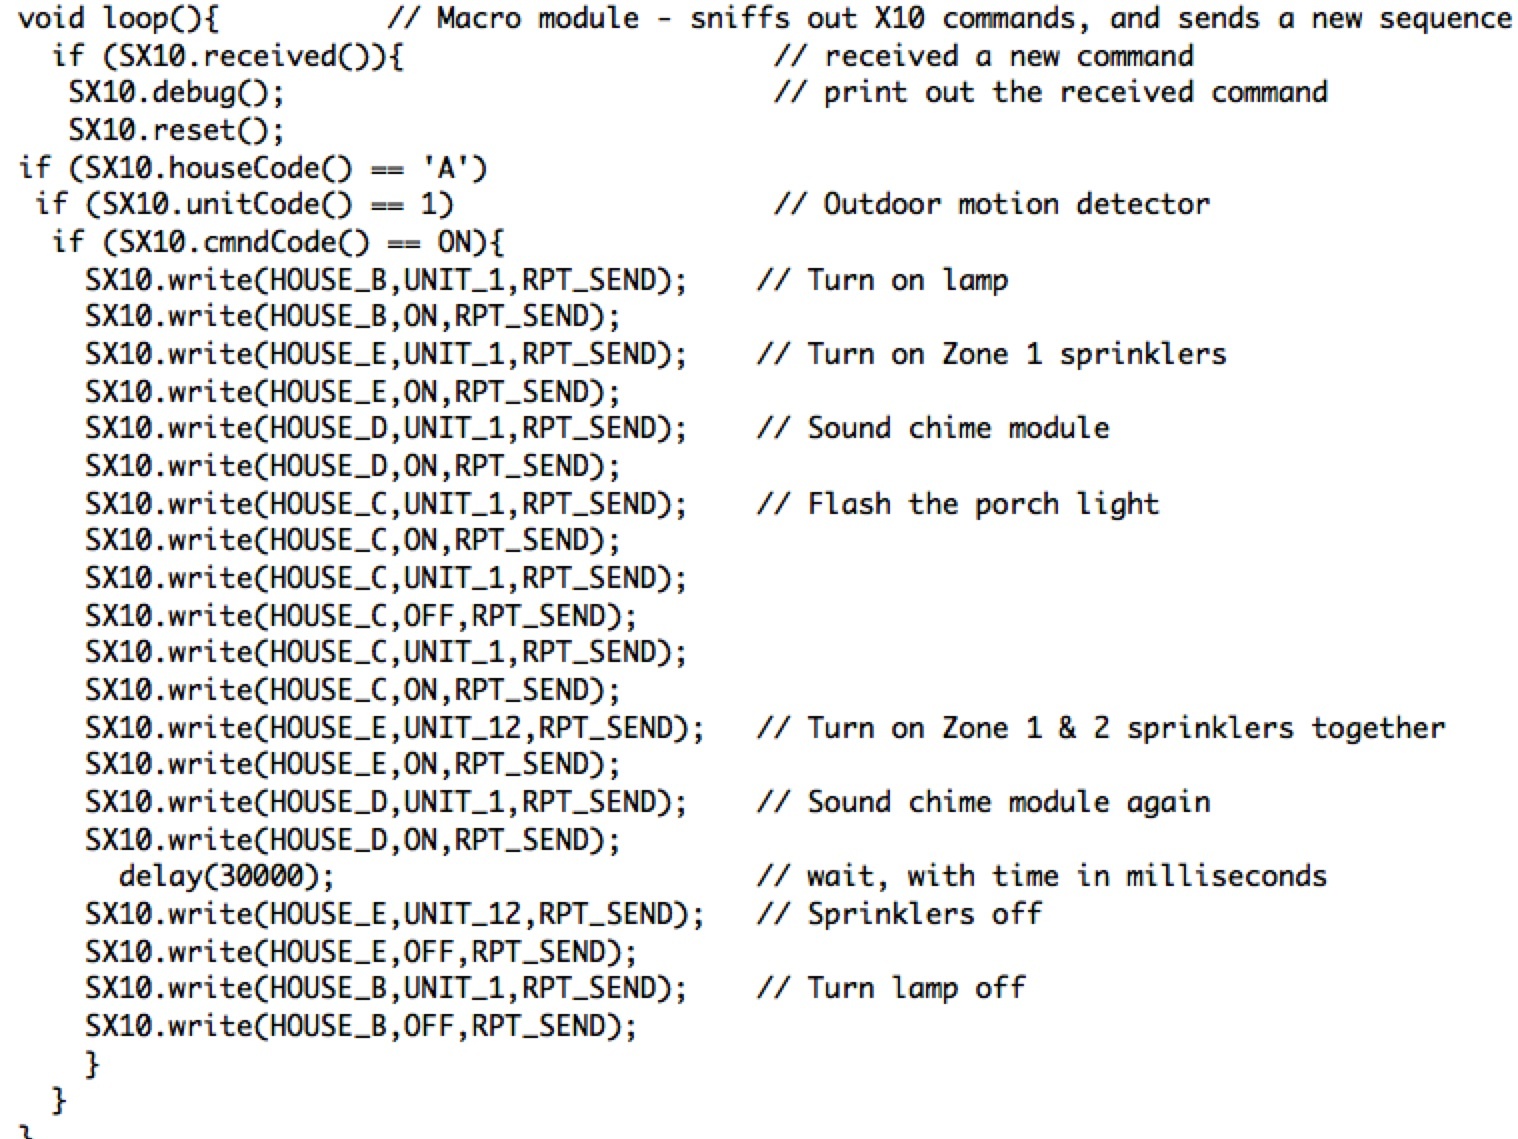
Extending your use of macros is easy. First, realize that if you copy the Appendix A example into the Arduino IDE and use it as a template, you need only change that portion of code following the conditional phrase

if (SX10.received()){.

Parse the received X10 data using the library functions SX10.houseCode(), SX10.unitCode() and SX10.cmdCode(). In the example of Figure 24, we search for X10 trigger “A1 ON” like this:

if (SX10.houseCode() =='A')

if (SX10.unitCode() == 1)

if (SX10.cmndCode() == ON)

If the parsing functions return a desired macro trigger address, we take further actions in the form of commands or delays. To send X10 commands, use the function SX10.write(). The write function must be invoked twice for every command, with the first call defining the X10 house and unit code, and the 2nd defining the X10 action. So to send an “ON” command to a module with address B1, we use the following:

SX10.write(HOUSE_B, UNIT_1, RPT_SEND);

SX10.write(HOUSE_B, ON, RPT_SEND);

Note that calls to this function must end with a semicolon.

Finally, invoke wait periods using the function delay(time), where time is an integer number of milliseconds. To program a 5 minute wait (which is 30000 milliseconds) we use the following:

delay(30000);

Again, don’t forget the semicolon.

That’s about it. With a little creativity, you can do some amazing things around the house. Place a motion detector in your mailbox, and have it turn on a light and sound a chime whenever the box is opened. Add a contact sensor and an X10 PowerFlash module to your garage door, to sound a chime if the door is left open for 5 minutes or more. Put a motion detector in your teenager’s car, so that when they drive up and get out, the porch light comes on and interior lights illuminate a path to their room. Or to the refrigerator. The possibilities for automation are limited only by your imagination.

The macro example waits for a signal from the outdoor motion detector, and then responds by turning on a lamp, sounding a chime, and activating sprinklers. After 30 seconds, the sprinklers and the lamp are turned off.

Even if you are not a C++ programmer, you can easily understand the logic used in our example, and alter the macro code to suit your needs. For instance, you can have the macro module sniff the powerline for an indoor motion detector signal, and then turn on a series of lights that illuminate a path to the bathroom. This example is included in the macro code listing of Appendix A, to show how multiple macros can coexist in the same Arduino file.