By Jamie Marie Chan
After I watched Becky Stern’s Ask Craft video about plying yarns, I was inspired to try plying some of my scrap commercial yarns together. Plying is simply twisting two or more single threads together, traditionally in the opposite direction from which they were spun. Plying puts more strength into a yarn, balances irregular singles, and in this case makes an interesting novelty yarn. I’ll show you how you can use up the yarn you have in your stash, to create your own plied yarn.
Materials
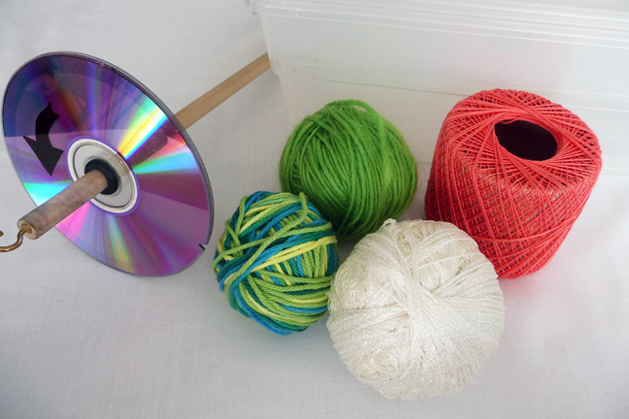
2 to 4 different kinds of yarn They do not have to be the same thickness or fiber content. I think a combination of thick and thin yarns looks more fun. I picked up most of these yarns at my local art supply reuse center, Scrap. I chose at least one bulky wool single. This was helpful because I used this yarn to help me determine which direction to ply in.
Spindle or spinning wheel
Plastic bins, bowls or boxes
Note: The tool that you will need to ply your yarns is a drop spindle or spinning wheel. Instructions for making an inexpensive drop spindle from a wooden dowel and recycled CD are can be found on the web, such as this tutorial. In this project, I am using a top whorl drop spindle.
Directions
Before you start, make sure your yarn is wound into a ball or center pull ball. The direction that yarn is spun is called “twist.” Yarns are characterized as S-twist or Z-twist according to the direction of spinning. Z-twist is when your yarn is spun in a clockwise direction; like writing the letter Z, it slants to the right. S-twist is when you spin yarns counter-clockwise, similar to the curve of the letter S. Often, single yarns are spun with a Z-twist so we will be plying with an S-twist direction.
(Illustration inset via wikipedia)
Step 1: Take a length of your bulkiest single yarn and twist it in both directions. The direction that untwists your yarn (makes it fluffier and loose) is the same direction you want to ply your yarns together. The other yarns may be plied and spun in different directions, but at least the bulky yarn will ply properly and grab hold of the other thinner yarns.
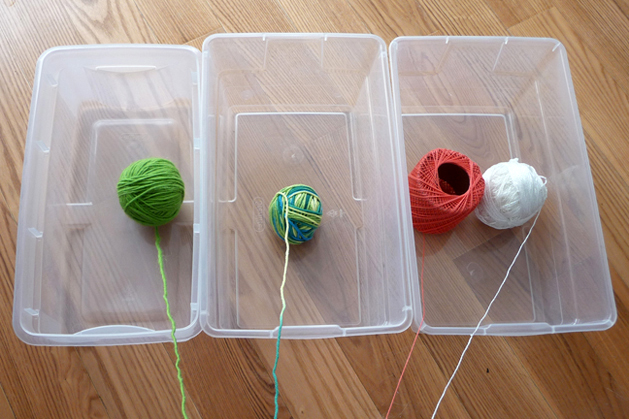
Step 2: Start by placing your balls of yarn in boxes or bowls to ensure they do not roll away when you start plying. In traditional spinning these yarns would be on bobbins under tension to ensure that the yarns are straight and even; just try your best to keep the yarns separated and straight.
Step 3: Take the ends of the yarn and tie them onto the shaft of your drop spindle, right under the whorl (CD) and hook it under your hook. Sometimes it helps to draw an arrow in the direction you are spinning at the top of your whorl to help you remember which way to spin.
Step 4: Try your best to hold the yarn between your fingers on your left hand (I am right-handed, so if you’re a lefty switch hands). Hold the 2 thinnest yarns together with one set of fingers and then hold the other 2 separately. Keep the yarns even and pull a length of both from the ball. Take the spindle in your right hand and the yarns in your left hand and begin by spinning the drop spindle from the shaft in the proper direction. You want the yarns to spin together but not to over twist.
Continue to pinch and maintain tension with your left-hand fingers on the un-plied yarn supply so that it does not twist all the way down to your balls of yarn. Pull equal lengths of yarn from each ball and allow the twist to travel up to your hand and repeat. Once you have a long length of plied yarn, you can wind it onto your spindle shaft under the whorl.
Step 5: To check your twist, inspect a 6″ section of your plied yarns, holding the yarn loosely. The yarn should hang in a loose, straight manner. It should not be curly and twist back on itself. If it’s very twisted you can pull out some un-plied supply yarn and allow the twist to work its way up the singles. A balanced yarn is when the amount of Z-twist and S-twist is identical.
Step 6: Wrap the newly spun plied yarn into a skein and secure it. Then soak your newly plied yarn in warm water. Gently squeeze the yarn and hang it to dry. This sets the twist of the new yarn. Now you have a fun, custom plied yarn!
About the Author:
Jamie Marie Chan is a fiber artist, shop owner, and educator in San Francisco, Calif. She co-owns Urban Fauna Studio, San Francisco’s only green-certified fiber arts workshop and supply store. The studio offers classes on spinning, knitting, weaving, felting, and more!
ADVERTISEMENT


