


By Diane Gilleland
Crafters are a very visually oriented audience. So, if you have a blog or website, fill it with the best photographs you can take – they’ll capture people’s attention far more effectively than blocks of text.
You don’t need a fancy camera or expensive equipment to produce better photography. Here are some easy tools that will give you better images with any camera – and won’t cost you more than a few dollars.

Get Better Sunlight
If you can, photograph in diffused sunlight whenever possible. Direct sunlight tends to wash your subject out and create harsh shadows, while diffused light shows off more detail. Depending on where you live, you might have access to diffused light all the time or only a couple hours a day. Do you know when there’s sunlight available in your house?
If not, try downloading this Sunlight Tracker Worksheet (PDF file, right click to download), and spend a day making note of the path of the sun through your rooms. This gives you a good basis for planning when to take pictures.

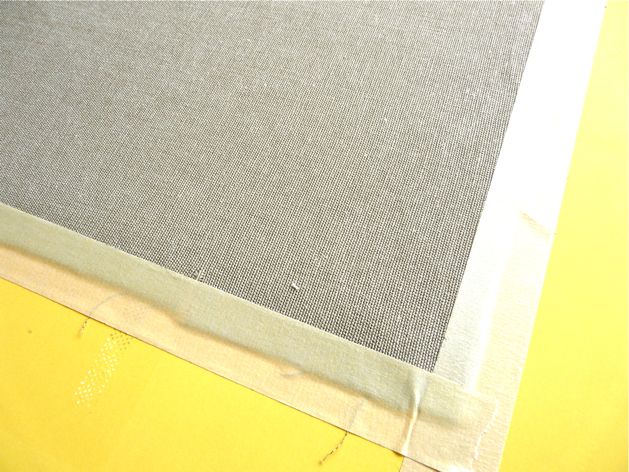
If you have only harsh, direct sunlight streaming in through your windows, that’s easy to soften. Just tape a sheet of white tissue to the glass. That will soften the light and keep it from casting hard shadows.
(Or, if you want a fancier solution, buy a sheet of diffusion plastic at your local home improvement store. It’s the material that covers ceiling fluorescent light fixtures. You can chip in with a few friends, have the sheet cut into smaller pieces, and then you’ll each have a great diffuser on the cheap.)

Get Better Indoor Light
If you don’t have access to sunlight, you can still get good photographs with indoor light. However, most home lights have two problems: they’re nowhere near bright enough, and their light has a sickly yellow or green cast. And using your camera’s flash in an indoor setting? Yuck. The flash blasts your subject with hard light, rendering it flat and usually a bit out of focus.
So, to shoot indoors, pick up a few cheap gooseneck office lamps at your local home or office supply store. (I often find these for under $10.00.) And then look for color balanced compact fluorescent light bulbs (which usually run about $7.00 each). The bulbs should be 27 watts or higher to give you enough light for indoor photography. If you see the words “full-spectrum” or “sunlight bulb” on the package, then the bulbs are color-balanced and will give off pure white light.
(However, even with bulbs this bright, you’ll still need three of them, so you can direct light from several angles.)

Photo: Upton, via Flickr Creative Commons
With your lamps ready to go, scrounge a large cardboard box from your recycle bin and get some sheets of white tissue paper. Follow this tutorial on Strobist to make a simple light box in just a few minutes. Position your lamps near each opening, put the item you’re shooting inside, and you’ll be amazed how great it looks.

Get Better Backgrounds
Your house may have a cute vintage table or a freshly-painted windowsill where the light is always nice and you can set up a photo at a moment’s notice. But if that’s not the case, you might want to build a little stash of simple backgrounds for your photographs.
Most art or craft supply stores carry sheets of poster board in assorted colors for just a couple dollars each. These are great for photographing things like tutorial steps, where you don’t want too much background detail. And they can be tucked behind a bookcase when you aren’t using them.
If you prefer a textured background, just press a piece of fabric and then tape it securely to an old sheet of foam board. That way, you’ll have a wrinkle-free fabric background at a moment’s notice.
Also, look for rolls of inexpensive butcher paper – it makes a great seamless background for photography. (IKEA sells a large, cheap roll of this stuff in their childrens’ department.)

Get Better Focus
If you’re having trouble getting your camera to focus, then more than likely, it needs more light. But you might be able to leave the light as is and simply steady your camera.
You can find table-top tripods for as little as $20, but if you’re looking for something more frugal, try setting up a stack of books and placing your camera on that.

Get Better… Everything
Whether you take photos with the inexpensive tools in this article or you have a fancy professional set-up, you’ll probably want to give your photos a little enhancement before you publish them. You may have heard of Photoshop, but there are plenty of free tools available that do many of the same things.
Picnik, which is integrated with Flickr, is a free web-based tool that will brighten, crop, improve color and contrast, and even let you add text to your photos. Or, you can download Google’s Picasa for either Mac or PC – it also improves brightness, color and contrast.
If you like the functionality of Photoshop, you might try GIMP, which is free and operates somewhat similarly.
Most photos, even those taken in perfect light conditions, can use a little brightening, a bit more contrast, and maybe a little more color saturation so they’ll have impact on a computer screen. Get in the habit of tuning up your images before you post them.
With these little upgrades, you should see a big difference in the quality of your images!
About the Author:

Diane Gilleland produces CraftyPod, a blog and bi-weekly podcast about making stuff. Her first book, Kanzashi In Bloom is currently out in bookstores.
ADVERTISEMENT


