Join Make: Community Today
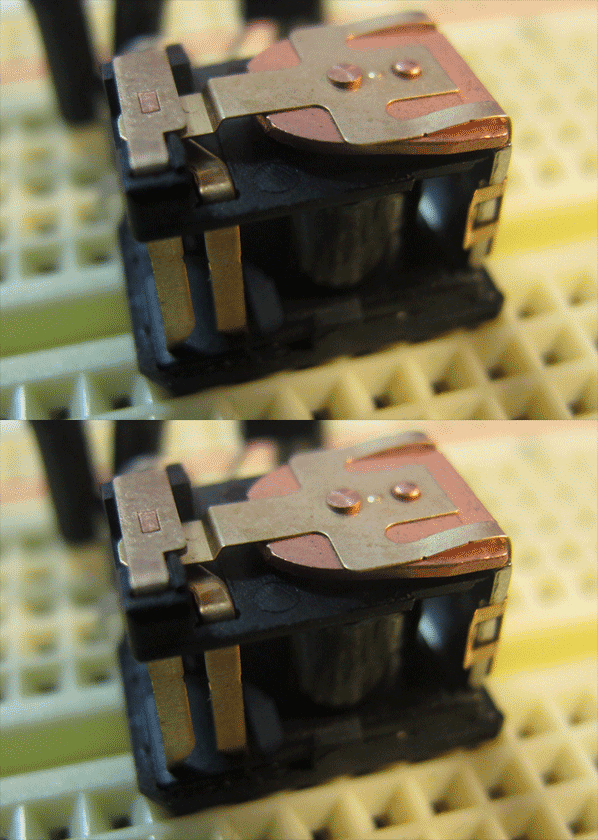
Relays come in many package configurations, but I specifically wanted to use the 5V DC micro relay we used to trigger the toy monkey. I carefully cut away the case around the relay using my utility knife, by slowly shaving down the corner edges until I could snap the lid and then the sides off, revealing the relay. Since I don’t have a PIR sensor available, and simply wanted to actuate the relay, I needed a novel circuit. Low and behold, a Flickr user posted this simple circuit to the MAKE Flickr pool in 2009 for driving a relay with the Arduino’s 5V power supply. For R1 I used a 1KΩ resistor; for TR1 I used a 2N2222 transistor; and for D1, I used the 1N4004 rectifier diode.
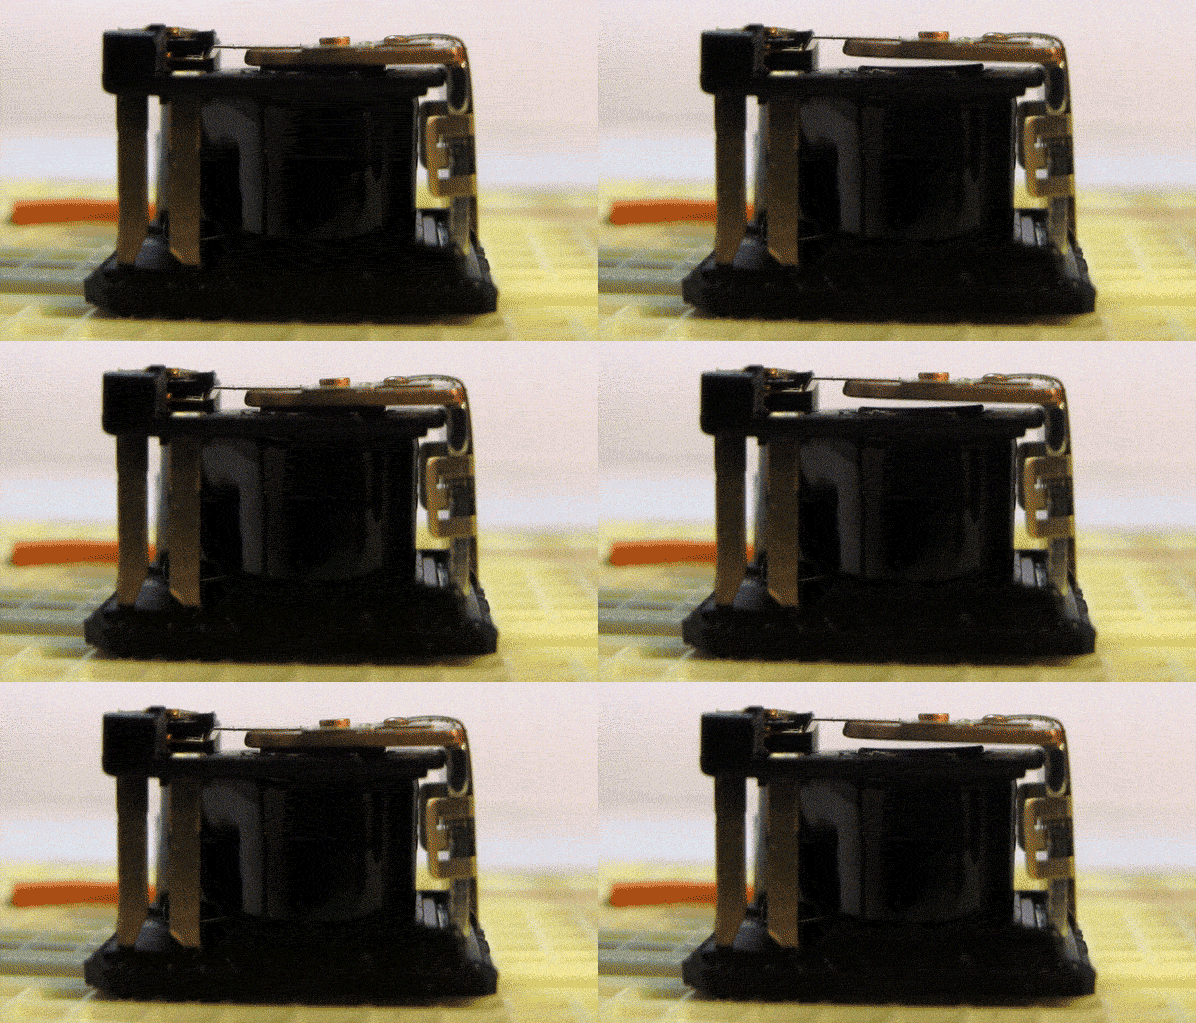
Now you can see below, when current passes through the coil it produces a magnetic field and triggers the springless armature. In our project, this switches the monkey from a silent toy into a cymbal-banging guardian, but you could easily use this to drive many types of switching circuits.


More:
See all of the Weekend Projects posts
32 thoughts on “A Micro Relay at Work”
Comments are closed.
ADVERTISEMENT
Join Make: Community Today


AHH! time to let my inner Shia shine: NO NO NO NO NO!
You are not changing the relay from NC to NO. You are simply actuating the relay. You could say you are moving the switch from the NC contact to the NO contact, but that’s still a little confusing.
NC and NO mean normally closed and normally open. With the wording you chose, it’s very confusing (even more confusing on a relay that only has 4 connections instead of 5, where it will be strictly NC or NO.
If you change the wording to “actuating the relay” it’s not ambiguous or confusing at all.
Hi adcurtin, Can you clarify when you say “has 4 connections” are you referring to the letters in the image, and not the physical pins? Thanks for reading!
Nick, I love all the cool stuff you do with animated GIFs, and I love the “lets open up the black box” approach, as well. This is a great post.
I agree the “NC” / “NO” terminology is confusing. To say that you are switching it from NC to NO suggests that you are somehow changing the default (“normal”) condition of the relay, when in fact what you’re doing is really much simpler–you’re just actuating the relay.
Yes, this is a great post, I didn’t mean to imply otherwise. It’s great to show how stuff works at this level, it can really clarify things. Just meant to suggest a clarification of terms.
The relay you use has 5 connections: 2 for the coil, 1 for the switch contact (this is a very ambiguous term, sorry), and 1 each for the NC and NO connections, totalling 5.
Many relays have only 4 terminals, 2 for the coil, and the other two are either NC or NO. For example, typical automotive relays have just 4 connections (and most are NO). Here’s a link to on from autozone: http://www.autozone.com/autozone/accessories/Santech-4-pin-universal-SPST-relay/
Thanks – great insight.
‘Normally’ just means ‘powered off’ – with no juice to the coil, the NC contact conducts and the NO one does not. Power the coil and the NC contact becomes an open circuit, and the NO one now makes the monkey bang.
— Olde Time electromechanical hacker
The first thing I noticed is that it’s sending ‘CQ’ in Morse code. Nice!
cold… warm, warm!
M-A-K-E — .- -.- .
+1!
the contact (or button as they are afectionally called) can be made of cadnium. best be careful and wash hands after touching
[…] Har du någon gång funderat på hur ett mikrorelä fungerar? MAKE tar sig tid att förklara och gå in under skalet i sitt helgprojekt ”A micro relay at work”. […]
[…] response to A Micro Relay at Work, allaa says: the contact (or button as they are afectionally called) can be made of cadnium. best […]
[…] response to A Micro Relay at Work, allaa says: the contact (or button as they are afectionally called) can be made of cadnium. best […]
[…] For more information about how a relay works, read MAKE | A Micro Relay at Work. […]