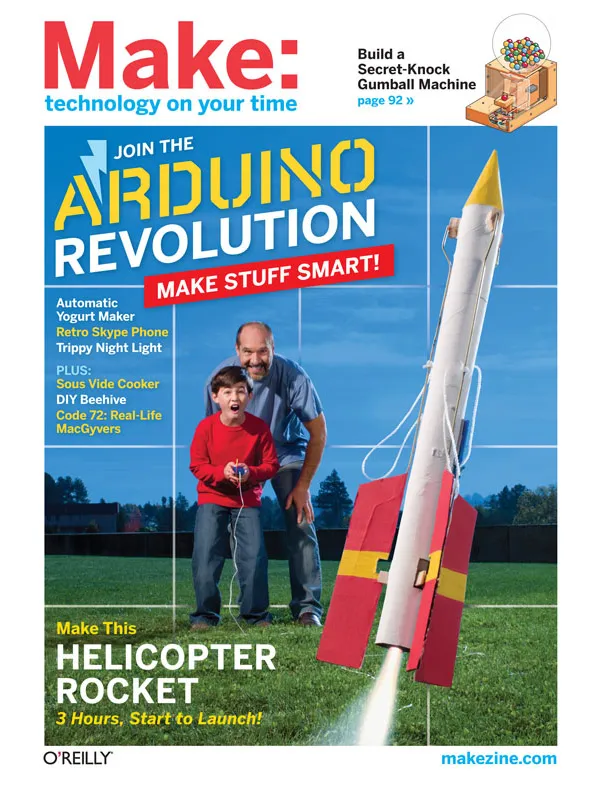
Vol. 25: Secret Knock Gumball Machine
Make a cute candy vending machine that only dispenses treats when you knock the secret rhythm on its front panel.
+ Downloads & Extras:
+Secret Knock Gumball Machine on Make: Live
Check out Make: Live, our live-streaming show-and-tell, every 2nd and 4th Wednesday of the month at 9pm ET/6pm PT.
+ Bonus spray paint stencils
Illustrations by Rob Nance
+ Layout/wiring diagram
+ Schematic diagram
+ secret_knock_gumball_machine.pde
+ servo_reset.zip
+ Templates for case
» MAKE: AMENDS Errata for This Article
Correction for page 95
Secret-Knock Gumball Machine" (MAKE 25), on page 95, the part number listed for the clear plastic globe from 1000bulbs.com was incorrect and should have read #3202-08020.
» MAKE: NOISE — Discuss this article
You must be logged in to post a talkback.[ Display main threads only] [ Oldest First]
Showing messages 1 through 51 of 51.
- Cheaper source for the globe?
You must be logged in to reply.
Anyone find a cheaper source for the globe than 1000bulbs? They want $15 to ship it -- and the globe only costs $10! Seems a bit excessive... Thanks.
Fun project, by the way! I'm done with the construction, about to wire it up.
-DanPosted by dchernikoff on May 28, 2013 at 11:42:16 Pacific Time
- Cheaper source for the globe?
You must be logged in to reply.
Anyone find a cheaper source for the globe than 1000bulbs? They want $15 to ship it -- and the globe only costs $10! Seems a bit excessive... Thanks.
Fun project, by the way! I'm done with the construction, about to wire it up.
-DanPosted by dchernikoff on May 28, 2013 at 11:42:11 Pacific Time
- Tooth graphics on case
You must be logged in to reply.
Looking at the fine detail for the spray paint template graphics I'm not sure I could cleanly create these.
Anyone try to decoupage color laser-printed graphics onto the outside? I was thinking of using a couple of coats of polyurethane over the exterior to protect them.
Any advice?
Thanks for a great project!Posted by ken.gentry707 on August 23, 2011 at 08:02:49 Pacific Time
- What size resistor for LEDs and piezo?
You must be logged in to reply.
1/4 watt? 1/2 watt? I didn't know there were more than one category.Posted by JDS212 on April 05, 2011 at 12:19:28 Pacific Time
- What size resistor for LEDs and piezo?
You must be logged in to reply.
1/4 watt is plenty. But use whatever you have, it won't hurt to go bigger.Posted by Vidman81 on April 05, 2011 at 13:41:48 Pacific Time
- #4 wood screws
You must be logged in to reply.
These caused a LOT of splitting, plus it's WAY more screw than you need. I went to the smaller #2 screw.
Posted by JDS212 on April 05, 2011 at 12:18:05 Pacific Time
- Lexan paneling?
You must be logged in to reply.
Can we use Lexan instead of the acrylic paneling? It's waht I have lying around.
-TheWaddleWaddlePosted by TheWaddleWaddle on April 04, 2011 at 15:01:43 Pacific Time
- Lexan paneling?
You must be logged in to reply.
You can use Lexan or other polycarbonate, but don't laser cut it as it gives off some pretty dangerous fumes when laser cut.Posted by Ookseer on April 05, 2011 at 14:33:26 Pacific Time
- Great Project
You must be logged in to reply.
Thanks to everyone at Make for this great project!! My son and I built it for his science fair; we modified it somewhat to fit our needs - added a switch instead of requiring a secret knock, then changed the software to comply. It's very cool. We ended up having the wheel wiggle at the bottom to assist in rolling the gumball out. So much fun!Posted by Vidman81 on March 22, 2011 at 11:47:21 Pacific Time
- Great Project
You must be logged in to reply.
That's awesome! If you have any pictures of your build up in Flickr, please add them to the MAKE Flickr Pool: http://www.flickr.com/groups/make/Posted by Laura Cochrane on August 19, 2011 at 13:29:46 Pacific Time
- parts errata
You must be logged in to reply.
Make sure that you procure a 3/16" bolt and t-nut rather than the 3/8" called for on the BOM (on my first go-around I followed the printed instructions, hammering in a 3/8" t-nut and destroying the side plate in the process)!Posted by kcornish on March 11, 2011 at 23:11:42 Pacific Time
- Secret-Knock Gumball Thingy
You must be logged in to reply.
I need a few pieces of info to start collecting items for building a gumball machine. First, a place to find these items at and the prices w/ tax: 1/4" thick plywood, a 64" long 1/2" square wood stock, wood screws #8 and #12, t-nut 3/8", bolts 3/8" and 1 1/4", 3/4" OD and 3/16" ID washers, 7/32" diameter; 2" length brass tube, 5.5mm red and green LEDs, Resistors (100Ώ, 150Ώ, 10kΏ, and 470kΏ), 8' length of insulated solid core wire (22 gauge, multiple colors, insulated stick-on rubber feet, small cable ties, round head wood screws #2, round head machine screws
#4-40, nuts #4-40, and sandpaper (80-grit and 120-grit). Anyone give me the info and no lying. All credit to Make: for the idea, Make:zine, and the TV series. Thank you dad for subscribing me.Posted by Chucky113 on March 02, 2011 at 14:24:31 Pacific Time
- Secret-Knock Gumball Thingy
You must be logged in to reply.
The idea is cool as heck, but one question. Any user feel free to answer: What are the measurements for the plywood casing? I wanna make this thing so bad. If you know, pls respond. TyPosted by Chucky113 on March 02, 2011 at 13:15:18 Pacific Time
- Success!
You must be logged in to reply.
I just wanted to thank everyone at Make for this project. The gumball machine is finished and working perfectly. I amazed everyone at the office and we are off to share it with my kids' classmates at school! Great project! Thanks again!!!Posted by jbub on February 18, 2011 at 17:53:54 Pacific Time
- Success!
You must be logged in to reply.
Hey jbub,
That's so awesome! Do you have any photos or video of the finished piece? We'd love to see. You can post here, or email editor@makezine.com.Posted by Laura Cochrane on March 02, 2011 at 13:38:28 Pacific Time
- Larger Globe
You must be logged in to reply.
Has anyone tried this with a bigger globe? I've acquired one with a 5 inch opening.Posted by metric_chicken on February 16, 2011 at 15:36:35 Pacific Time
- Servo horns and bolt size correction
You must be logged in to reply.
Did I get a different horn set with my servo?
http://www.dropbox.com/gallery/355931/1/GumballMachine?h=2536f5
The x horn seems too small and flimsy, and I can't see attaching it to the dispensing wheel with screws. The double arm is beefier, so I'm planning to go with that.
The materials list calls for 3/8" T-nut and bolt, when they should be 3/16", as mentioned later in the article. I'm also wondering why the bolt is only 1 1/4". It doesn't seem to extend very far into the dispensing wheel.Posted by kongorilla on February 09, 2011 at 11:57:53 Pacific Time
- Servo horns and bolt size correction
You must be logged in to reply.
Thanks, I didn't see the 3/16" vs 3/8".Posted by Vidman81 on February 19, 2011 at 10:52:08 Pacific Time
- Brass Tube
You must be logged in to reply.
Where are people finding the brass tube? It would be nice if I could source it locally, but I've not seen anything at the usual suspects (Home Depot, Lowes, etc).
Thanks.Posted by bgivens24 on February 08, 2011 at 09:29:22 Pacific Time
- Brass Tube
You must be logged in to reply.
I have some leftover brass tubing that I would send out for pennies if you want to pay shipping on it. Contact me on ebay - send a message to vidster55 through eBay Messages.Posted by Vidman81 on April 08, 2011 at 06:42:38 Pacific Time
- Brass Tube
You must be logged in to reply.
Thanks Ookseer and kongorilla! The local model train store had the tubes.Posted by bgivens24 on February 11, 2011 at 10:10:46 Pacific Time
- Brass Tube
You must be logged in to reply.
Ace hardware stores seem more likely to have smaller metal bits. (At least the two nearest me have them.)
Otherwise hobby/art/craft stores. Try Blick or Perls.
K&S Engineering is the common distributor if you want to search for them on the Internet. (You can find them on Amazon, among other places.)Posted by Ookseer on February 08, 2011 at 11:09:40 Pacific Time
- Brass Tube
You must be logged in to reply.
You're sure to find the tubing at the kind of hobby store that caters to modelers and RC folks. I've also seen it at Orchard Supply Hardware. My local Ace doesn't carry it.Posted by kongorilla on February 09, 2011 at 11:38:44 Pacific Time
- Brass Tube
You must be logged in to reply.
HobbyTown USA had 7/32" brass tubing in 3 foot lengths for about $5.50.
No luck as mentioned above at Lowe's or plumbing supply store.Posted by ken.gentry707 on August 19, 2011 at 11:59:52 Pacific Time
- Ponoko Files
You must be logged in to reply.
I took the dxf files posted below and cleaned them up a little bit.
http://www.ponoko.com/design-your-own/products/secret-knock-gumball-machine-5307
(Or go to Ponoko and search for gumball in the showroom.)
We tried to build it last night and there were a number of issues. Many of them are corrected here, but these could still use some work (eg mounting holes for the servo, and how do you mount the T-nut? and some others.)
Note that we used the wooden rails to assemble the body. The author uses brackets, and possibly acrylic glue. Be careful which sides you glue, since you still want access to some things. Not sure if the holes are good for brackets.
If you use these files and cut acrylic, please post your own changes and trials and tribulations here for all of us!
Kiki
Posted by Kikiorg on February 05, 2011 at 15:38:18 Pacific Time
- Ponoko Files
You must be logged in to reply.
OK, I'm gonna work on my ponoko chops and try to turn these into exactly what I want. Thanks much for the starting point!
My son has decided that he wants to build most of the body out of plywood, but use acrylic for the knock panel and the access panel as suggested in the article.
Wish me luck!Posted by Snibble on February 06, 2011 at 19:04:02 Pacific Time
- Ponoko Files
You must be logged in to reply.
OK, so opening .eps in Preview and saving as .pdf got the drawings into Inkscape...but...
I can't seem to get all of the artifacts to "ungroup" into their individual components. So, I can't delete just the two panels that I want from the P3 sized sheet and put them on a separate sheet for cutting out of acrylic.
I wonder how much it would actually reduce the cost of the ponoko project to remove those pieces. It doesn't look like I'd be able to (easily) get everything else onto one P3 sheet even with those two removed. So, maybe I'll just get the full set cut from plywood and then make up another P1 with just the pieces I want from acrylic.Posted by Snibble on February 07, 2011 at 12:57:27 Pacific Time
- Ponoko Files
You must be logged in to reply.
Snibble, I had Illustrator up, so I changed the files for you!
http://www.ponoko.com/design-your-own/products/gumball-plywood-and-acrylic-5365
So you will get 5 of the 6 disks cut from acrylic, plus the two funnel sides, as well as the front and knock plate which you wanted.
BTW, you can inscribe the front plate with whatever you like by typing text and changing it to outlines. Kinda fun to have your name on the machine!
Best of luck!
Kiki
PS We're *almost* done putting ours together! We opted to glue the walls for the disks in place, but can still access them from the sides which are screwed on.
The soldering was a tad difficult for novices, so my husband and I will likely solder it up ourselves.
We're hoping to be done by this Saturday for the next Young Makers meeting in San Francisco!
Posted by Kikiorg on February 15, 2011 at 10:09:36 Pacific Time
- Ponoko Files
You must be logged in to reply.
Select all and then keep ungrouping (Shift+Ctrl+G in Inkscape). You may have to do it 20-30 times to undo all of the various groupings to reach the individual components.Posted by ABHathaway on February 08, 2011 at 15:37:20 Pacific Time
- Ponoko Files
You must be logged in to reply.
Oh, and thanx again ABHathaway, for making the original files! That was 99.9% of the work right there!
Please let us know how it goes for you!
Kiki
PS Quick tip: print out the templates for the body then lay the pieces out on the printouts as you take them out of the Ponoko cutouts. Esp helpful for the acrylic because you have to peel off the paper. This will help you figure out what part is what.
Posted by Kikiorg on February 15, 2011 at 10:13:56 Pacific Time
- Ponoko Files
You must be logged in to reply.
What do you use for fasteners? I see that the plans have all the screw locations drilled out, so do you use a screw with a large head or a washer to hold the outer panel in place?Posted by Mousetrapper on February 16, 2011 at 10:46:55 Pacific Time
- Hobbyking shipping from *Singapore*?!?!
You must be logged in to reply.
I jumped on this when I got my Make in the mail and ordered the servo on Jan 26th. I just checked the tracking and it's coming from *Singapore*!! Egads!
When I ordered, it said "in stock" and the web page says "Located in USA."
I'm a bit bummed since I was mentoring a workshop for our group of Young Makers to build this on Friday. :..( I didn't order things online because of this reason.
We have a backup plan, so we'll be able to build. But wanted to warn others -- maybe call your order in.
Kiki
Posted by Kikiorg on February 03, 2011 at 09:18:45 Pacific Time
- Stencils?
You must be logged in to reply.
I'm unable to find the stencil design of the Evil Gumball sending the Tooth into orbit?Posted by marcel.grenier on February 02, 2011 at 15:25:23 Pacific Time
- Stencils?
You must be logged in to reply.
Thanks for the heads up, Marcel. The stencils are up now!Posted by Laura Cochrane on February 04, 2011 at 12:26:45 Pacific Time
- Stencils?
You must be logged in to reply.
The stencils are FANTASTIC!Posted by kongorilla on February 04, 2011 at 16:24:50 Pacific Time
- Started Project - A few questions
You must be logged in to reply.
I've been collecting the materials for this project and cutting the wood pieces while waiting for things like the servo to arrive in mail.
One thing that surprised me is that the acrylic globe has no neck, so no way of being held in place that I can see. Is that correct? Not a problem?
One mistake I've made in cutting is that I didn't check the measurements of my printed templates until I was halfway done using them. As a result, my stand will be about a 1/4" smaller overall (though the wheels are correct size). Should I anticipate problems from that? Or are the tolerances forgiving?
My 8 year-old son and I plan to work on the electronics tomorrow, and he can't wait. In the empty areas of the stand I plan to add happy and sad (or maybe angry) faces that get illuminated to indicate knocking success or failure.
Thanks for the fun project!Posted by kongorilla on January 29, 2011 at 15:33:24 Pacific Time
- Started Project - A few questions
You must be logged in to reply.
Kongorilla, I'm terribly sorry but it looks like the part number is off on the article. The correct part number for 1000bulbs.com is 3202-08020. It should have a 1/4" lip around the opening.
If you've already purchased the lipless one and can't manage a return you can visit the hardware store and look for a 4" diameter vent trim in the HVAC section or a 4" PVC flange in the pluming section and epoxy it to the globe opening.
A quarter inch off the top, front or back of the dispensing wheel holder :might: not be a problem. The danger is that it will make gaps big enough for gumballs to fall through or get jammed into. If you mount the dispensing wheel 1/4" low it may not have enough fall for the gumball to roll out.
Posted by Ookseer on January 29, 2011 at 16:33:15 Pacific Time
- Started Project - A few questions
You must be logged in to reply.
For people in the same boat as me:
It turns out that, yes, 1000bulbs will "exchange" the acrylic globe (in the form of refunding the first order, and then taking another order for the correct item). The bad news is they charge a 20% "restocking fee", and they don't refund or pay any of the shipping. So, depending on how much postage it takes to send the first one back, you're really only getting a few bucks back.
I'm thinking of keeping the "wrong" globe. It's screaming to be made into a space helmet for a large doll.Posted by kongorilla on February 01, 2011 at 19:58:39 Pacific Time
- Started Project - A few questions
You must be logged in to reply.
I've now received the correct globe and have to say that, except for having no neck, the "wrong" globe erroneously called for in the materials list is in some ways nicer. The correct one seems flimsier and has an unsightly seam around its middle. So, if you've ordered the globe called for in the article, consider fabricating a neck as mentioned above.Posted by kongorilla on February 09, 2011 at 11:21:09 Pacific Time
- Templates
You must be logged in to reply.
What is up with the templates? Every time I go to open the link it just stops and gives me a blank page and does nothing.
TomPosted by kf4mat on January 24, 2011 at 09:03:54 Pacific Time
- Templates
You must be logged in to reply.
Hey Tom,
The templates seem to be working for me. Try right clicking and saving the file. Let me know if that works, thanks!Posted by Laura Cochrane on January 24, 2011 at 09:29:00 Pacific Time
- Templates
You must be logged in to reply.
Yeah that worked Thanks!... You know it's a Monday when you can't think of the obvious answer.Posted by kf4mat on January 24, 2011 at 09:50:29 Pacific Time
- Servo Reset
You must be logged in to reply.
That worked great Laura! Thanks!!Posted by jbub on January 22, 2011 at 13:45:31 Pacific Time
- Servo reset
You must be logged in to reply.
I have nearly all the parts purchased and am getting ready to put this one together! I can't wait to get started!! In my preparation I found that the web link to servo_reset.pde is not working. Can the link be fixed or are there any other suggestions for getting that file? Your help is much appreciated!Posted by jbub on January 20, 2011 at 09:29:36 Pacific Time
- Servo reset
You must be logged in to reply.
Hi jbub,
servo_reset.pde has been replaced with servo_reset.zip and should be working properly. Sorry for the delay!Posted by Laura Cochrane on January 21, 2011 at 22:20:43 Pacific Time
- DXF
You must be logged in to reply.
Great article! My son and I are excited to build this, but I was wondering if you had the template in DXF format so we could cut the part with a laser.Posted by rat396 on January 18, 2011 at 06:22:06 Pacific Time
- DXF
You must be logged in to reply.
Hi guys,
My son and I are looking at building this as well. I am creating the parts in SolidWorks and then hope to DXF for the water jet machine at work. If I finish this before anyone else I will get them to all who would like a copy.
I am thinking of through holes and tapped holes to build.
Cheers
robli67Posted by robli67 on February 08, 2011 at 07:00:55 Pacific Time
- DXF
You must be logged in to reply.
Greetings, I made a first effort at adapting the PDF intolaser-ready SVG files.
Note that these use Ponoko's Inkscape templates. Feel free to comment or improve!
Posted by ABHathaway on January 24, 2011 at 17:31:44 Pacific Time
- DXF
You must be logged in to reply.
If you do create DXF files, i'd love to use them on my CNC machine as well. CamBam or g-code would be great too. It just seems this project is screaming out for machine cut pieces.Posted by viperific on January 22, 2011 at 11:02:56 Pacific Time
- DXF
You must be logged in to reply.
You can use the free an Open Source software Inkscape to load PDFs, clean them up for laser cutting and save as DXF. They will need some cleanup as they were not intended as a laser cutting reference.
Ponoko has some good tutorials on getting up to speed using Inkscape for laser cutting here and here.Posted by Ookseer on January 19, 2011 at 12:11:18 Pacific Time
|
Showing messages 1 through 51 of 51. |
Join the conversation -- every MAKE article has an online page that includes a place for discussion. We've made these RSS and Atom feeds to help you watch the discussions: subscribe.


