


Back to school is a great slogan for selling things. Every fall a frenzy of shopping begins and old and worn supplies are replaced with something brand spankin’ new. Last year’s clothes are outgrown, last year’s lunchbox was misplaced, last year’s backpack is filthy and broken. Manufacturers know this, and they capitalize on it. As consumers, we can change that pattern. Instead of buying something new for back to school, try mending, renewing, and repairing something. My old backpack was almost worthless. The zipper was broken, the clips were broken, and it was filthy. Instead of replacing it, I set to work fixing it up. It is a very rewarding process, proving that a little elbow grease always beats spending hard-earned dollars.

Materials
Old backpack
Scrub brush
Dish soap
Needle and heavy duty thread
Scissors
Donor source for new clips I used a $1 fanny pack from the thrift store.

Step 1: Use hot soapy dish water and scrub the backpack with the brush. The bottom of my backpack was the worst, followed by the handle at the top. If the dingy spots linger, try scrubbing the back of the spot, on the inside of the fabric. That will help loosen the grime. Rinse it clean, and let it dry.


Step 2: The zipper on my pack was separating from the fabric. The threads that held the plastic teeth to the flap were broken, and the teeth were pulling loose. It’s the kind of problem that warrants replacing the backpack. But, with some strong thread and a little patience, it can be repaired.
Thread the needle, double the thread, and knot it at the end. Starting at the inside of the zipper, push the needle through the backpack, and run the thread in between the teeth. Sew the teeth tightly to the fabric, with a simple whipstitch (over, under, over, under, over, under). I skipped every other plastic tooth, and yes, my stitches could have been made more neatly, but it’s all about utility, right?
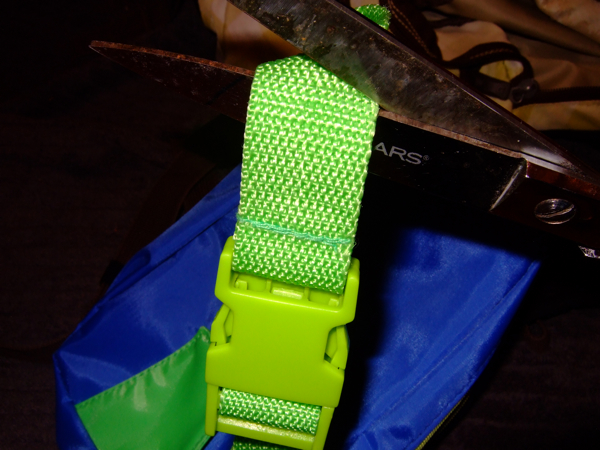


Step 3: Besides the zipper, one of the plastic clips on my bag was also broken. To repair the clip, first find a suitable donor. An ugly fanny pack from the thrift store is a great choice. Cut the clips from the donor bag. Then remove the broken clips from the backpack. If you can avoid it, don’t cut the straps on the backpack. I pushed and pulled and tugged until the clips came off the old backpack. And then I pushed and pulled and tugged the new clips onto the same straps. No sewing necessary.
ADVERTISEMENT


