

Projects from Make: Magazine
Arduino GRANDE
How to build a nearly 6x larger than real life, functioning Arduino.
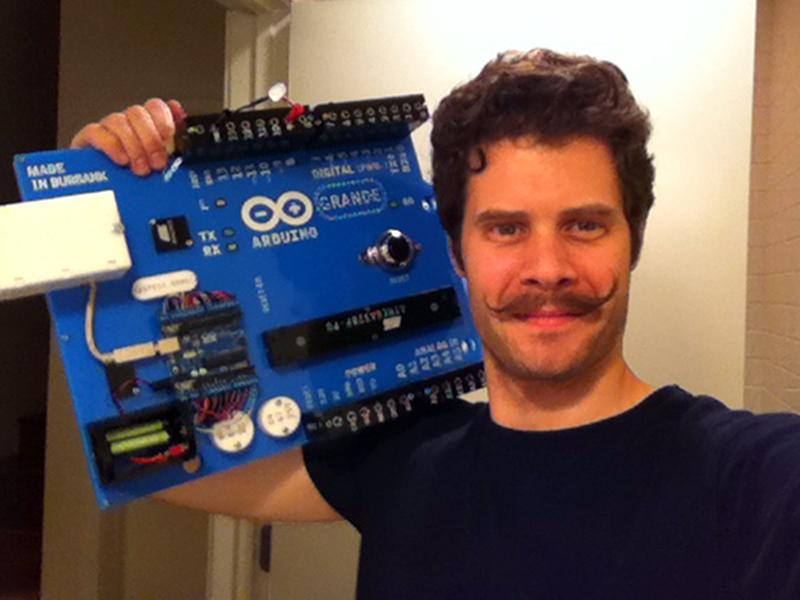
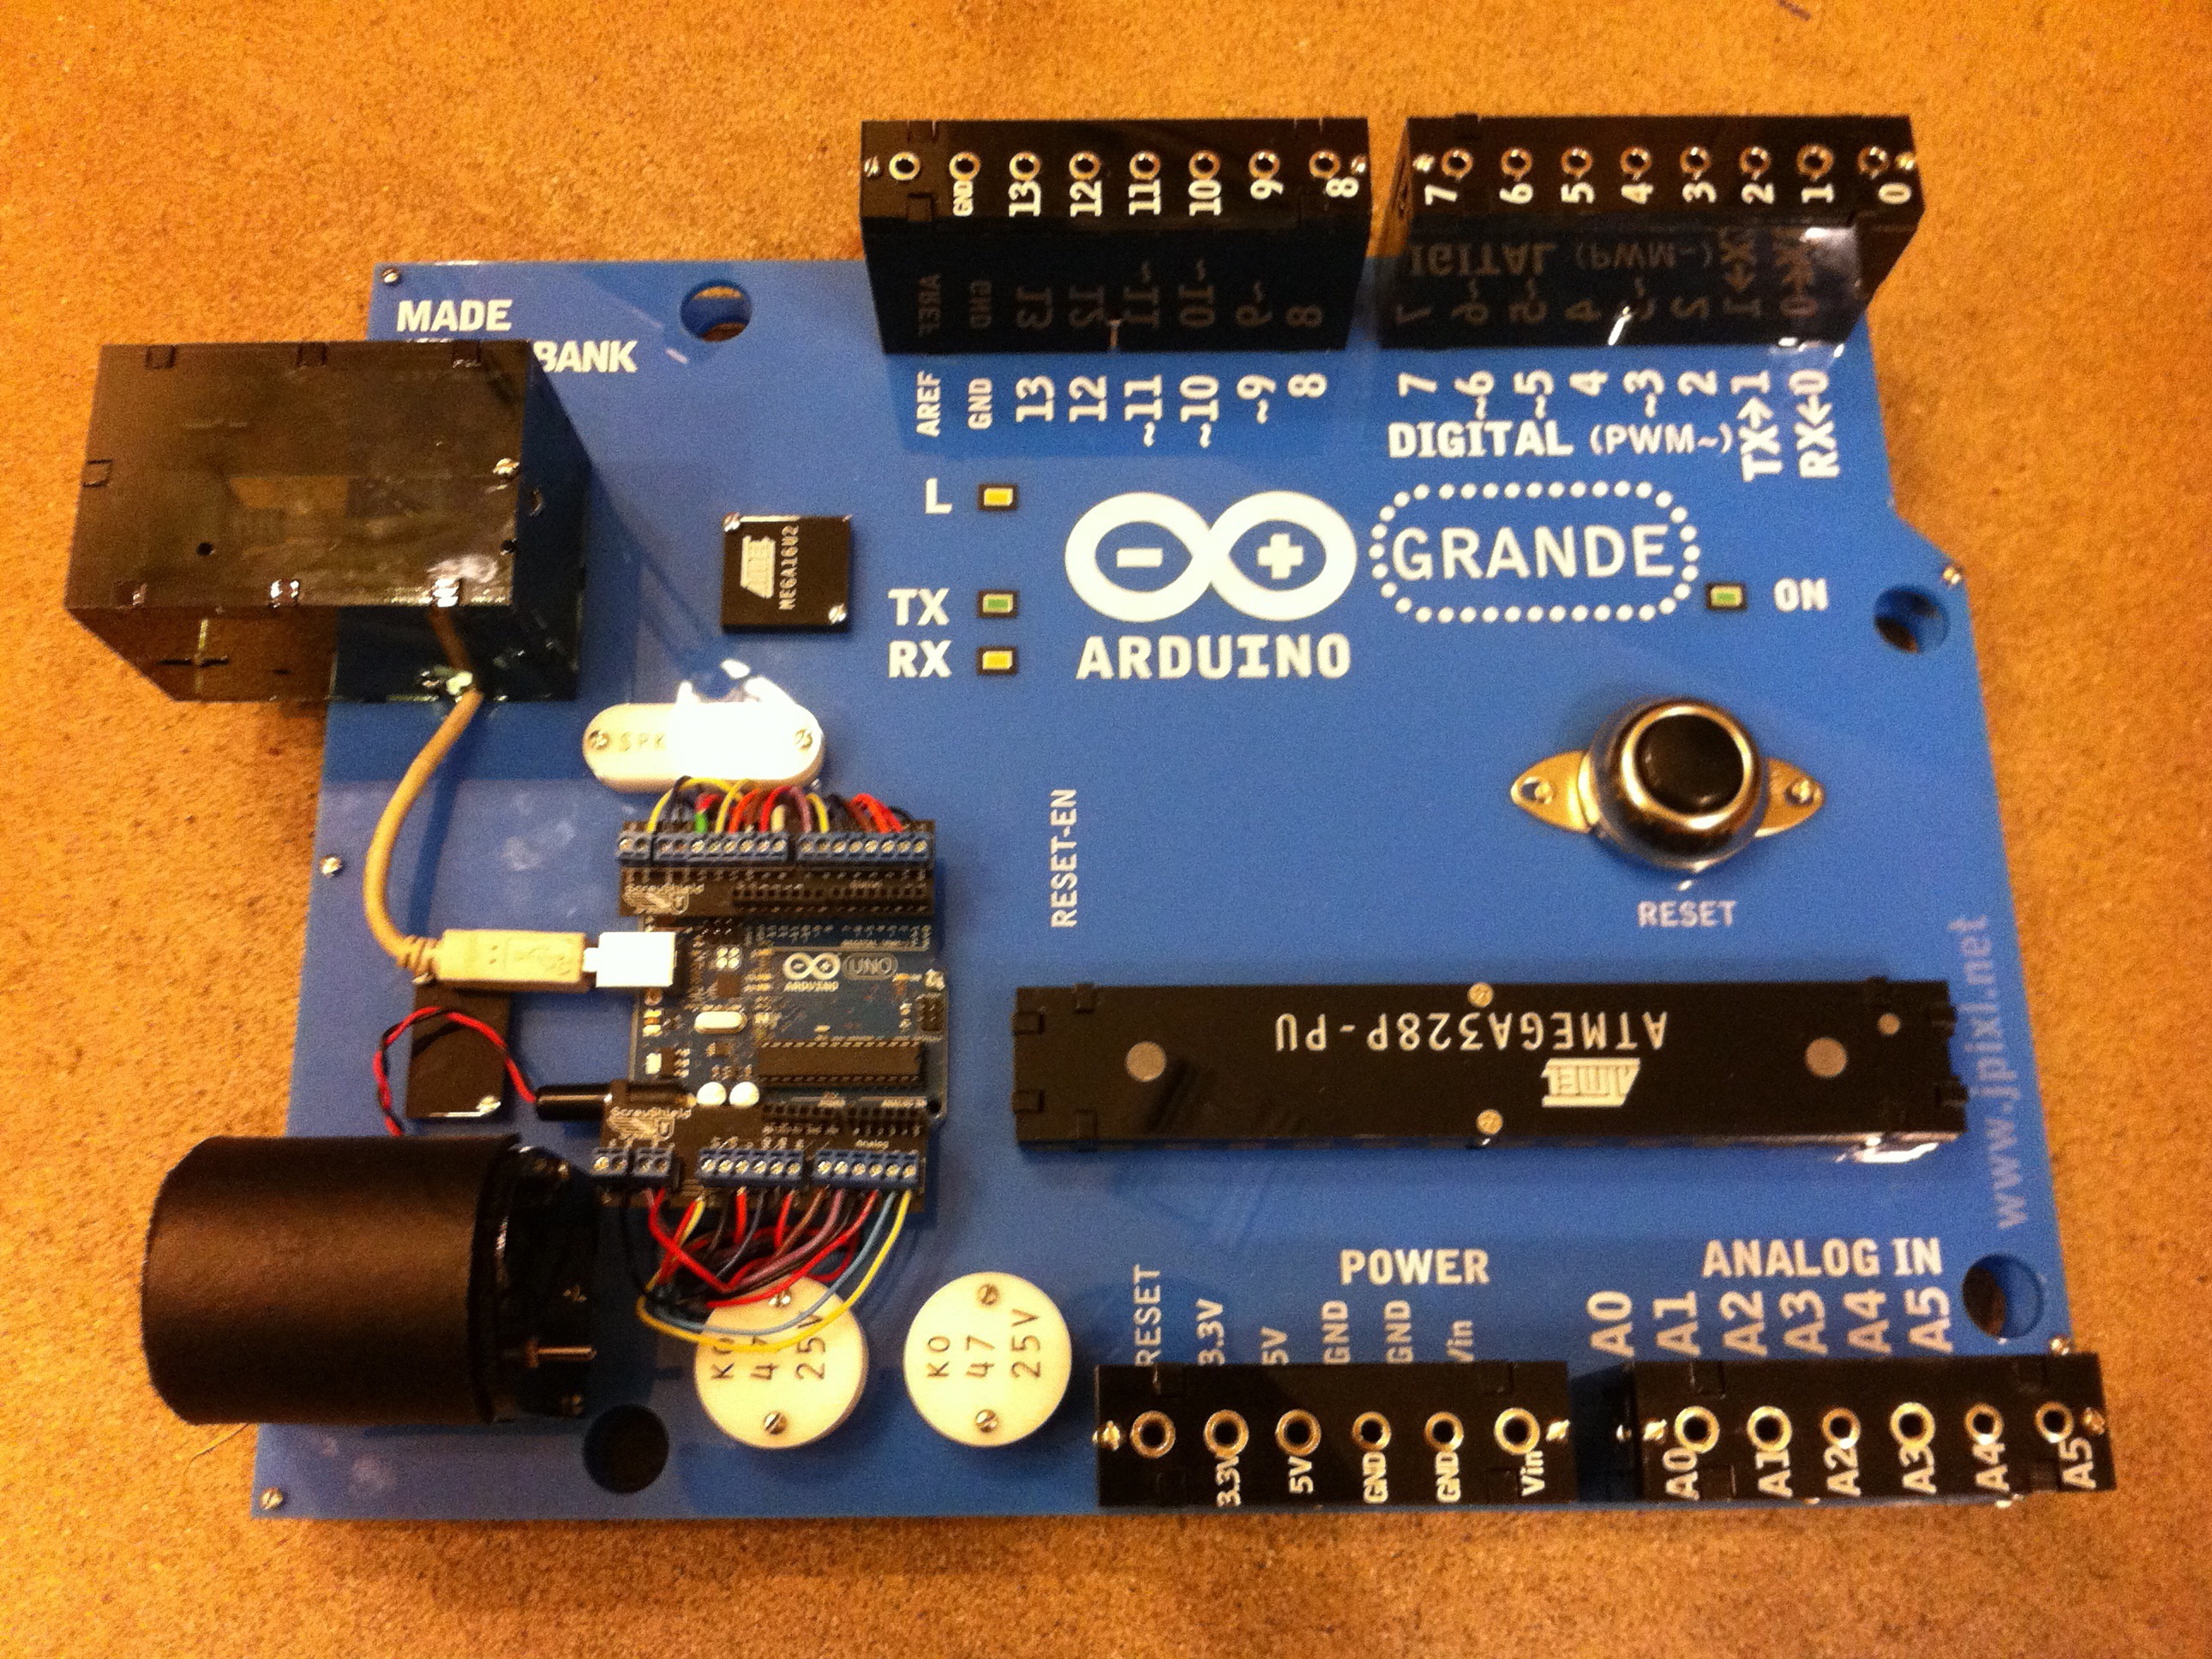
This is the Arduino GRANDE. It acts like an oversized, fully functional Arduino, but it is actually a shield of sorts.
Wiring an actual Arduino board to the GRAND allows you to demonstrate Arduino programing and use on a much larger scale.
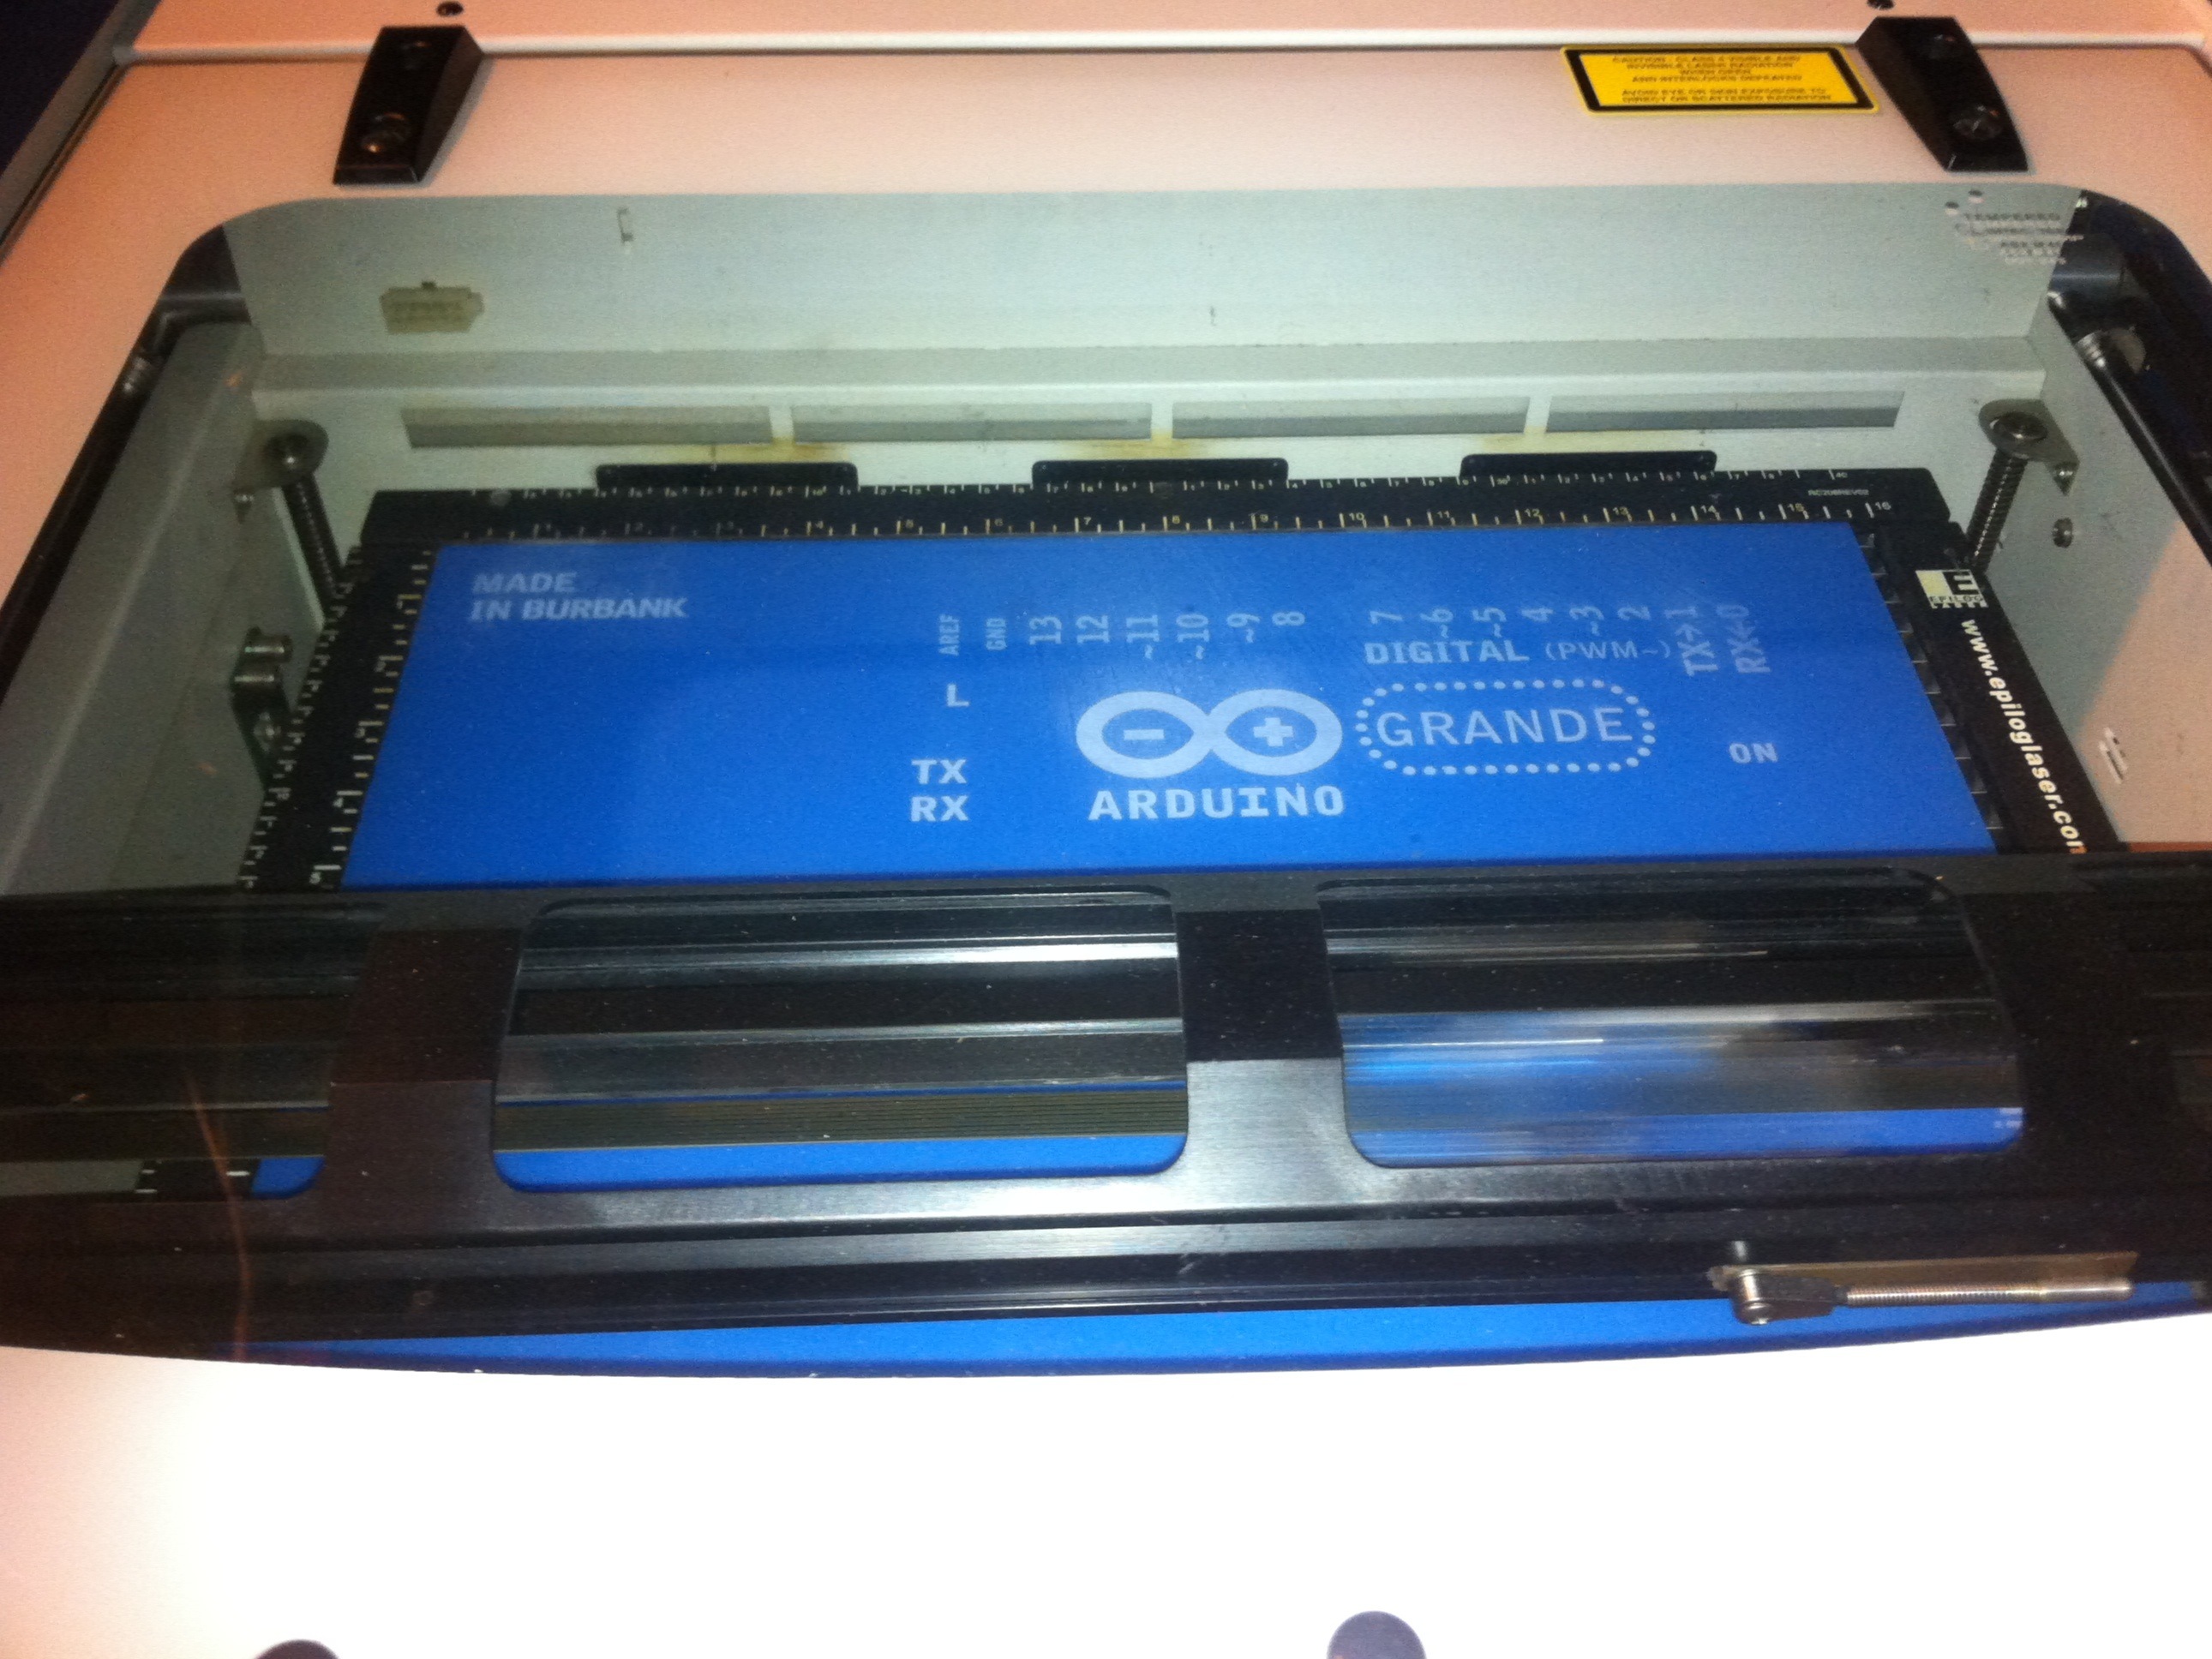
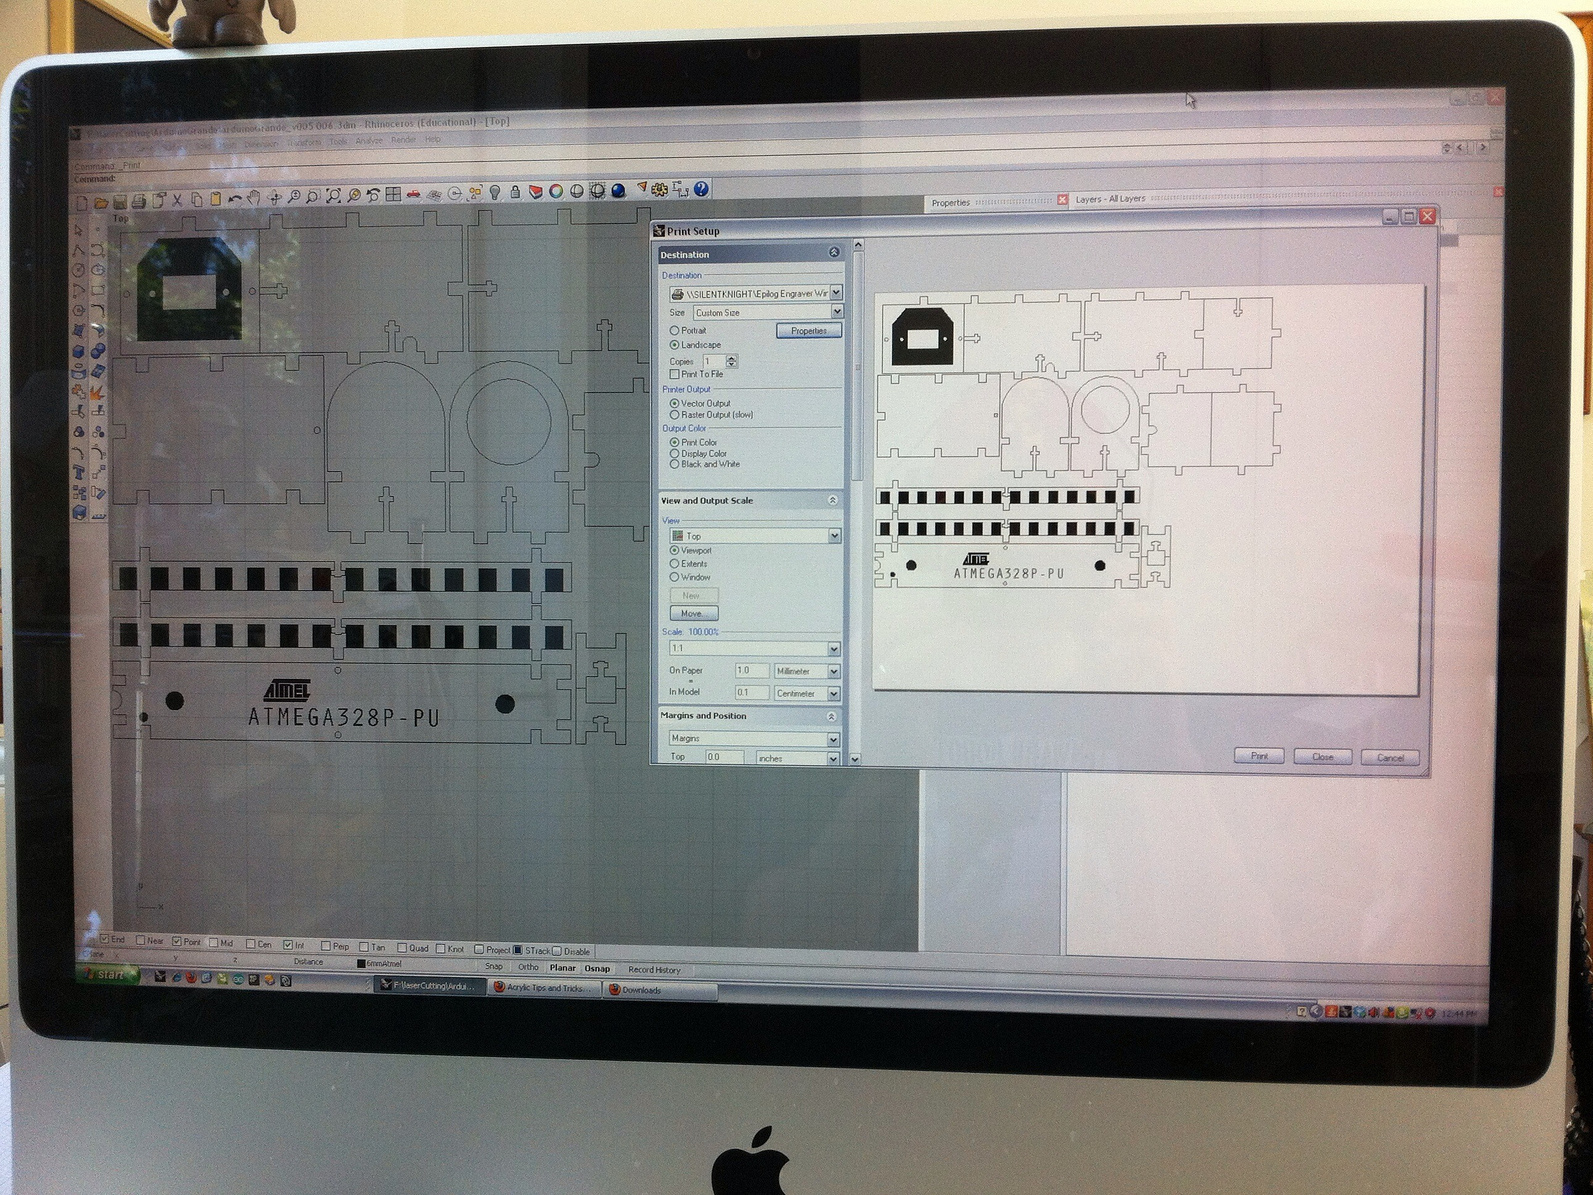
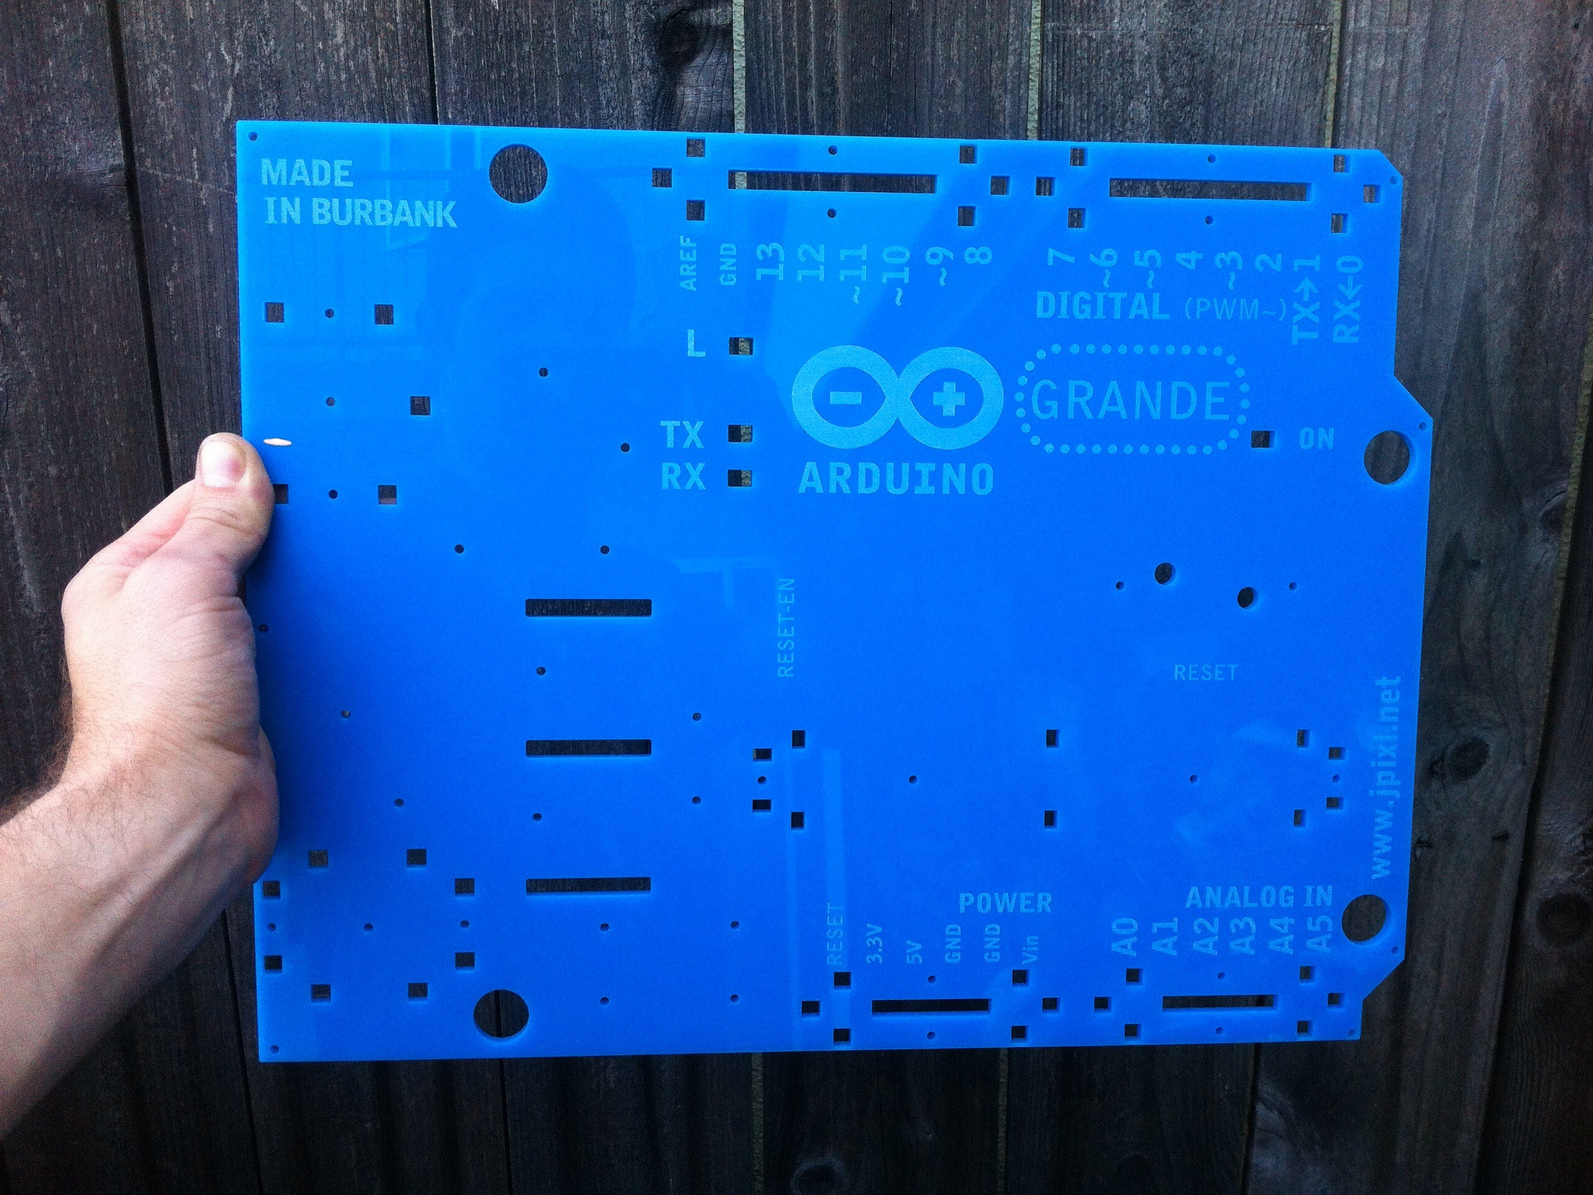
Vector cut and raster etch the board file onto 5mm acrylic using a laser cutter.
The files were created with Rhino, but can be printed with any laser cutter software that accepts common file formats.
Test speed and power settings to get a good, clean cut and neat etching.
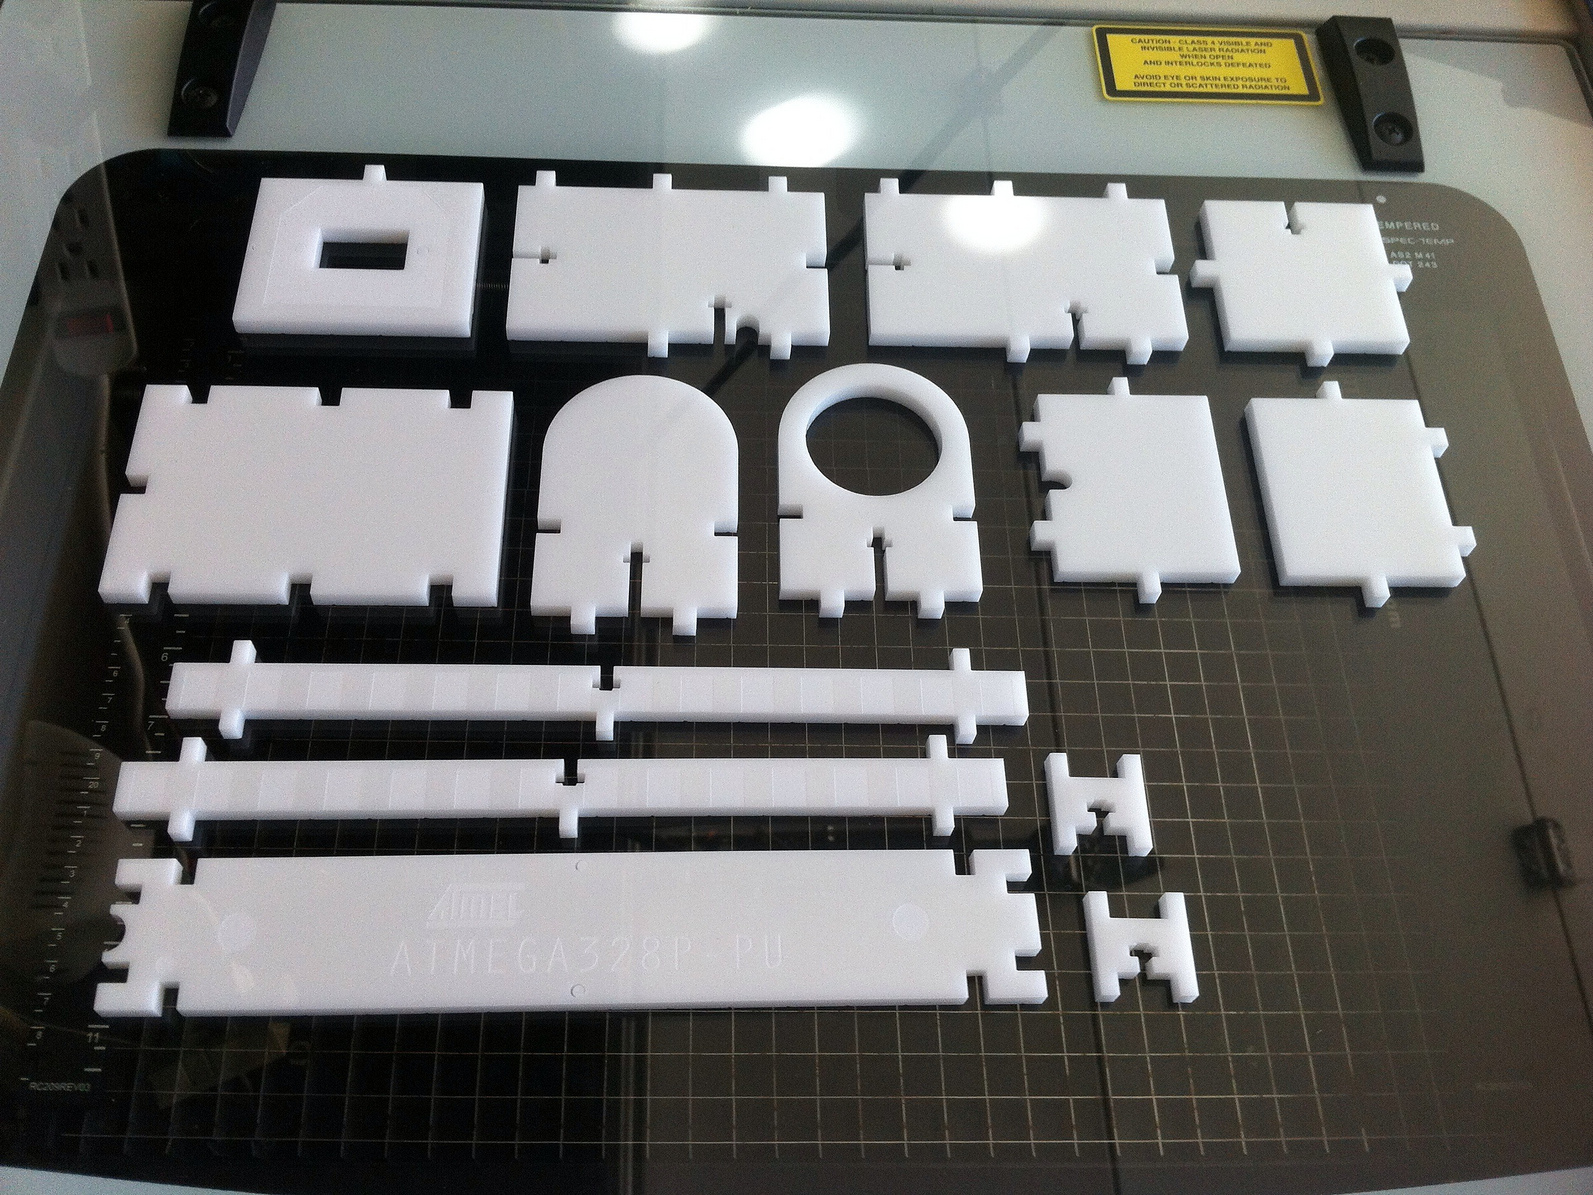
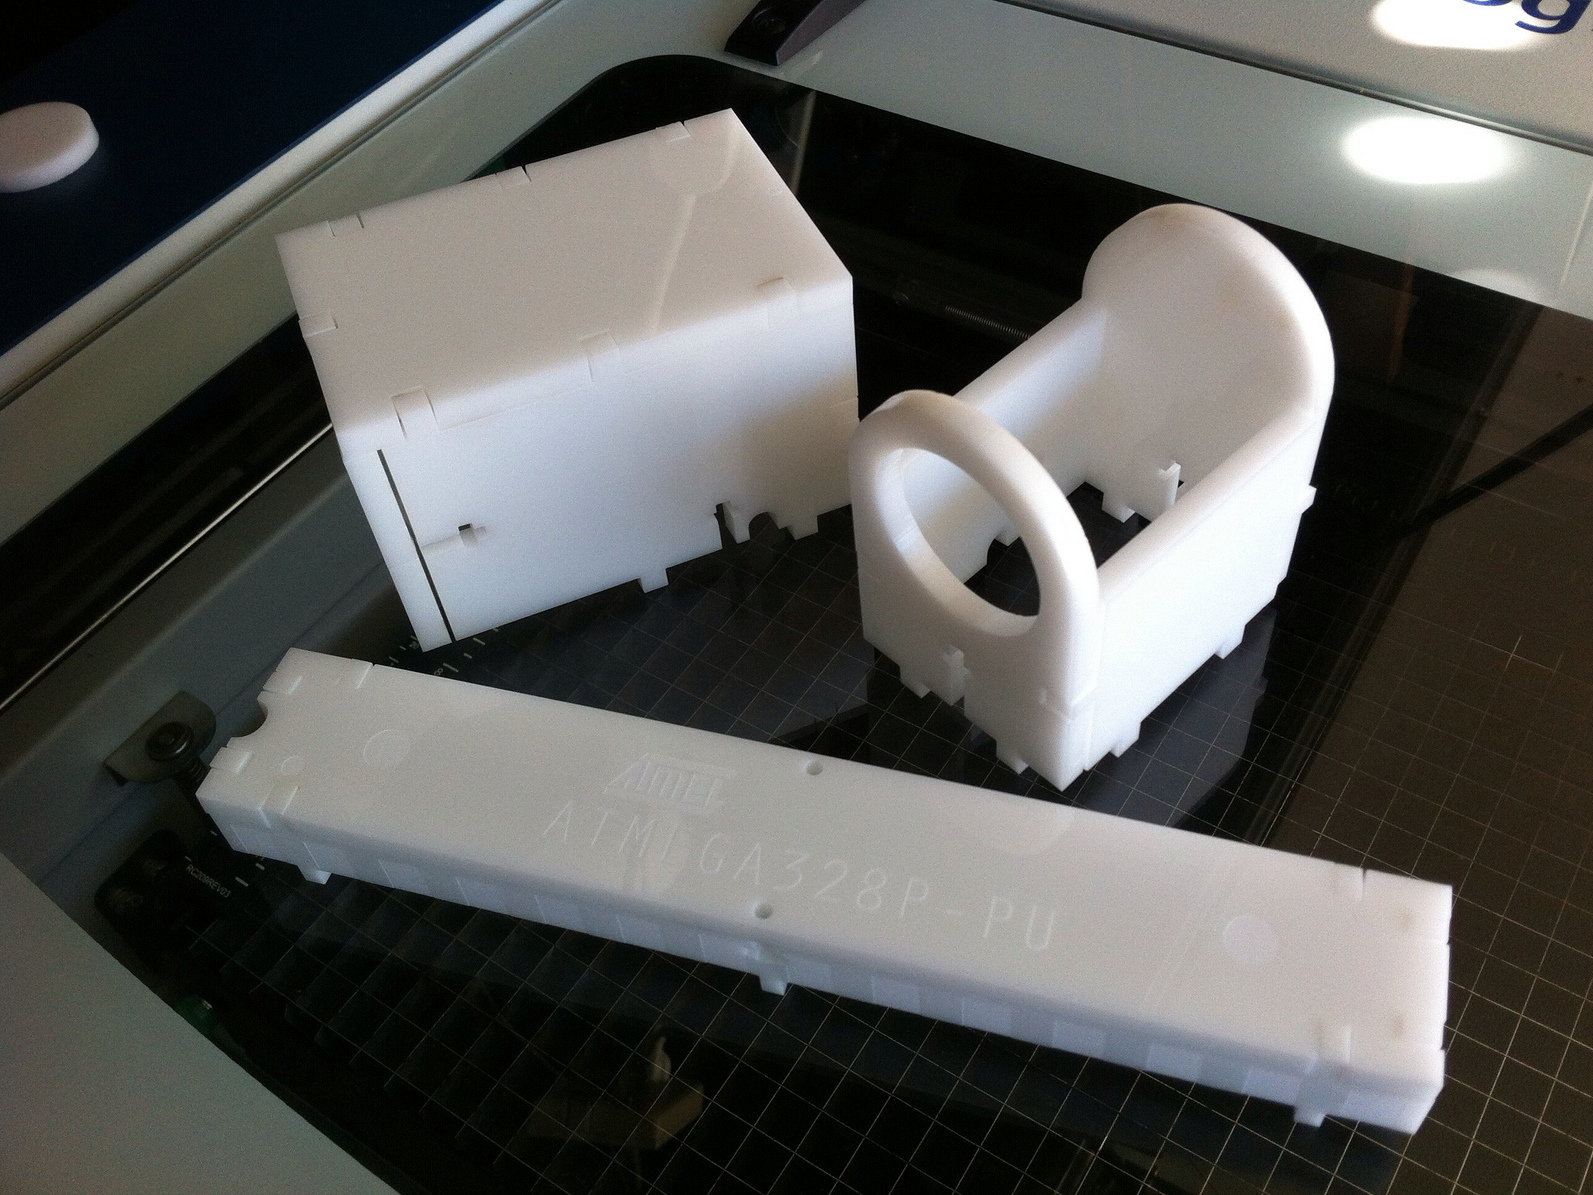
Cut the headers, USB, and power jack parts out of 6mm acrylic.
Test fit them together.
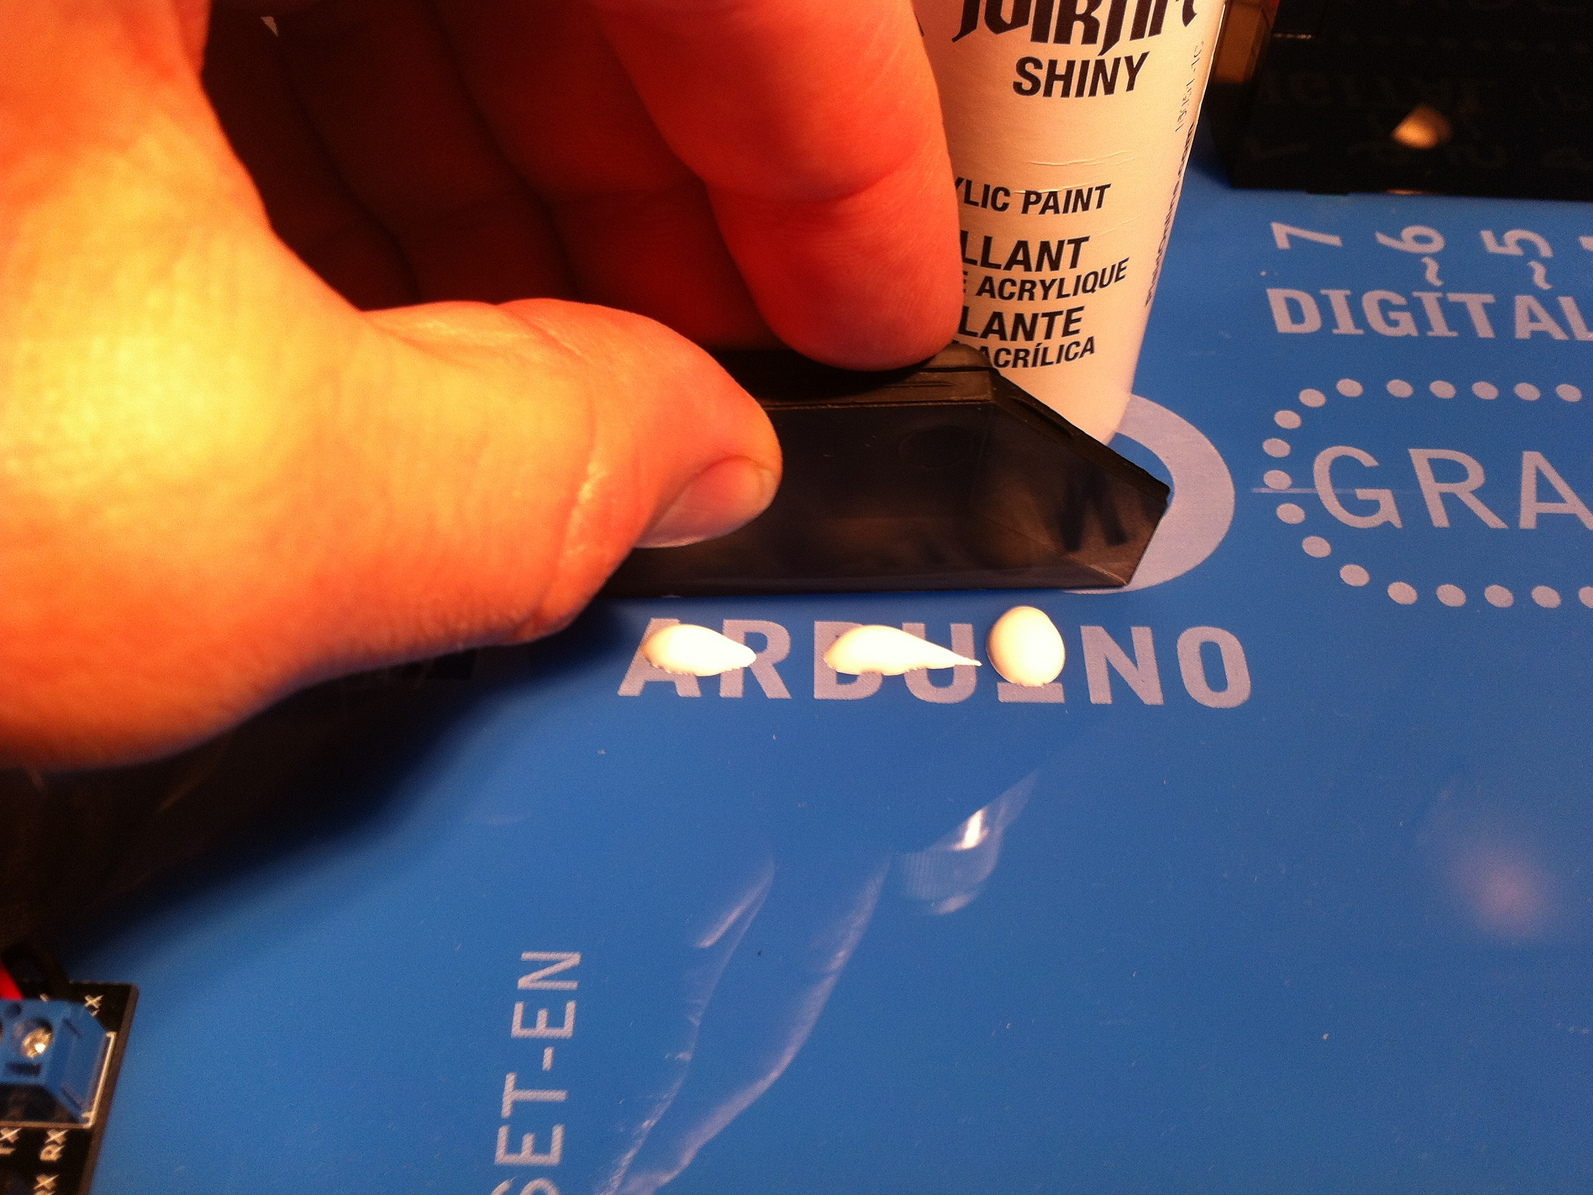
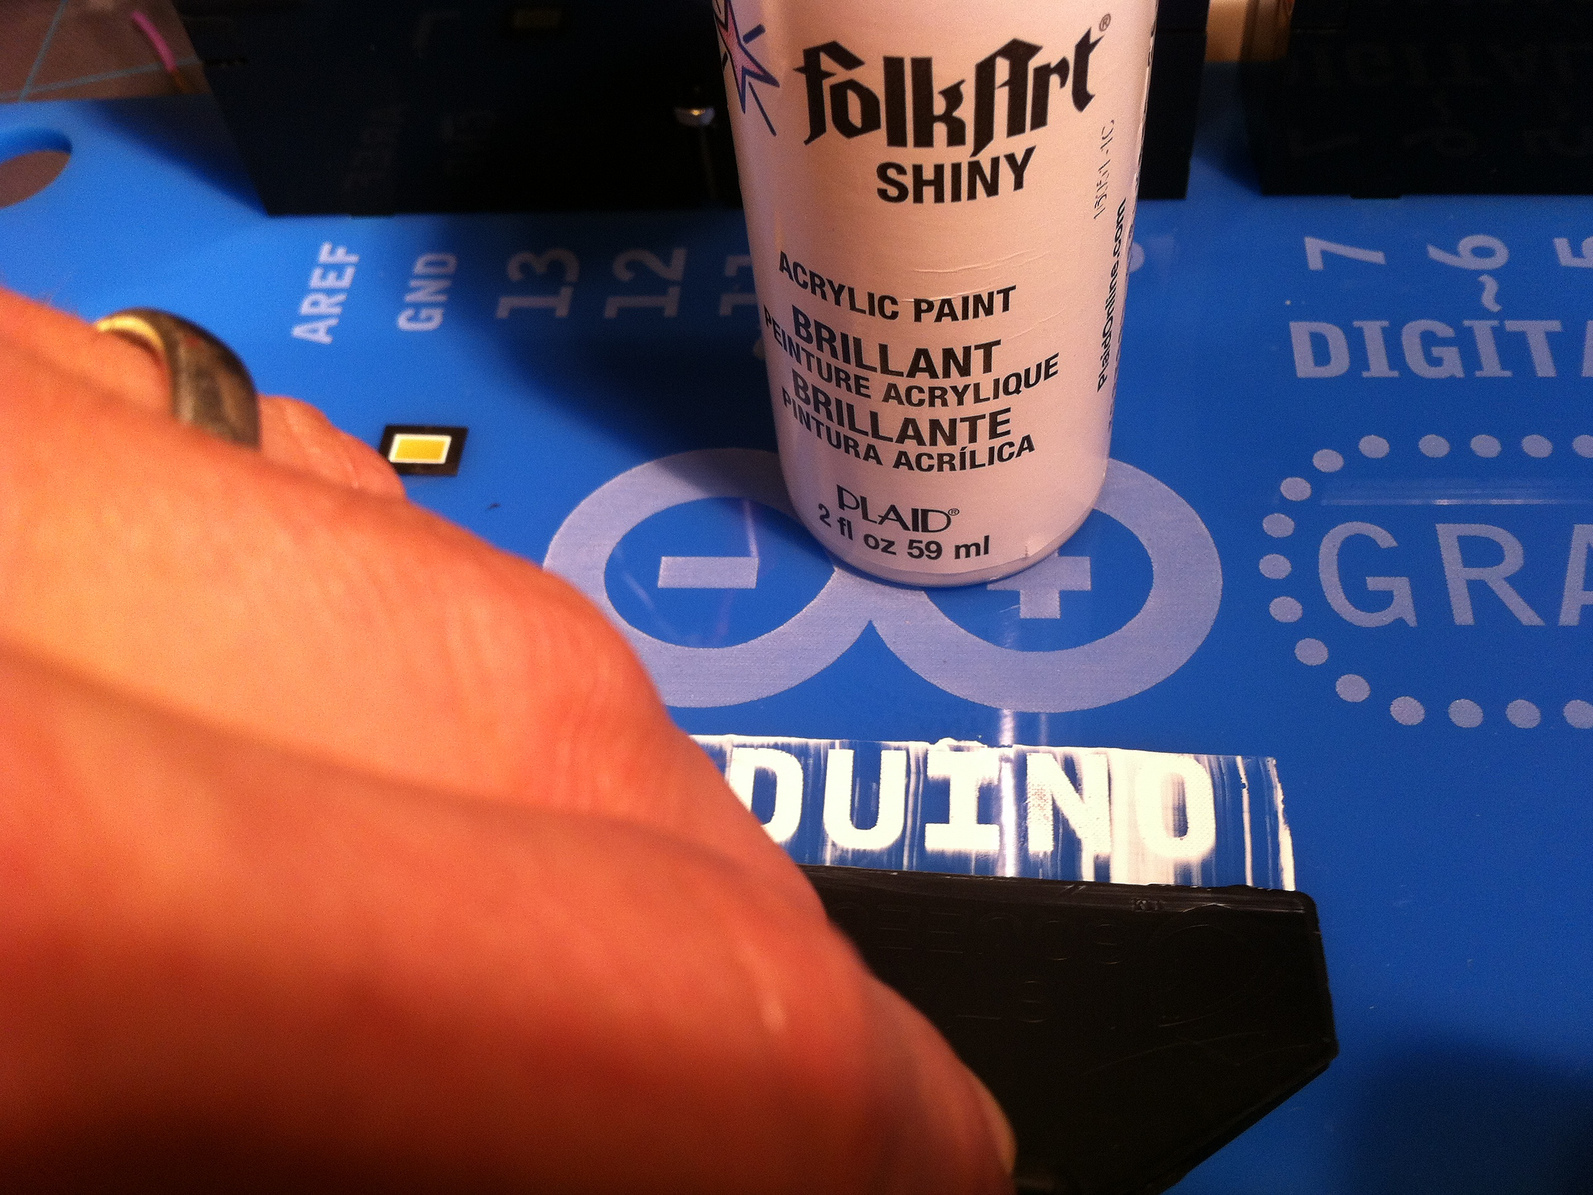
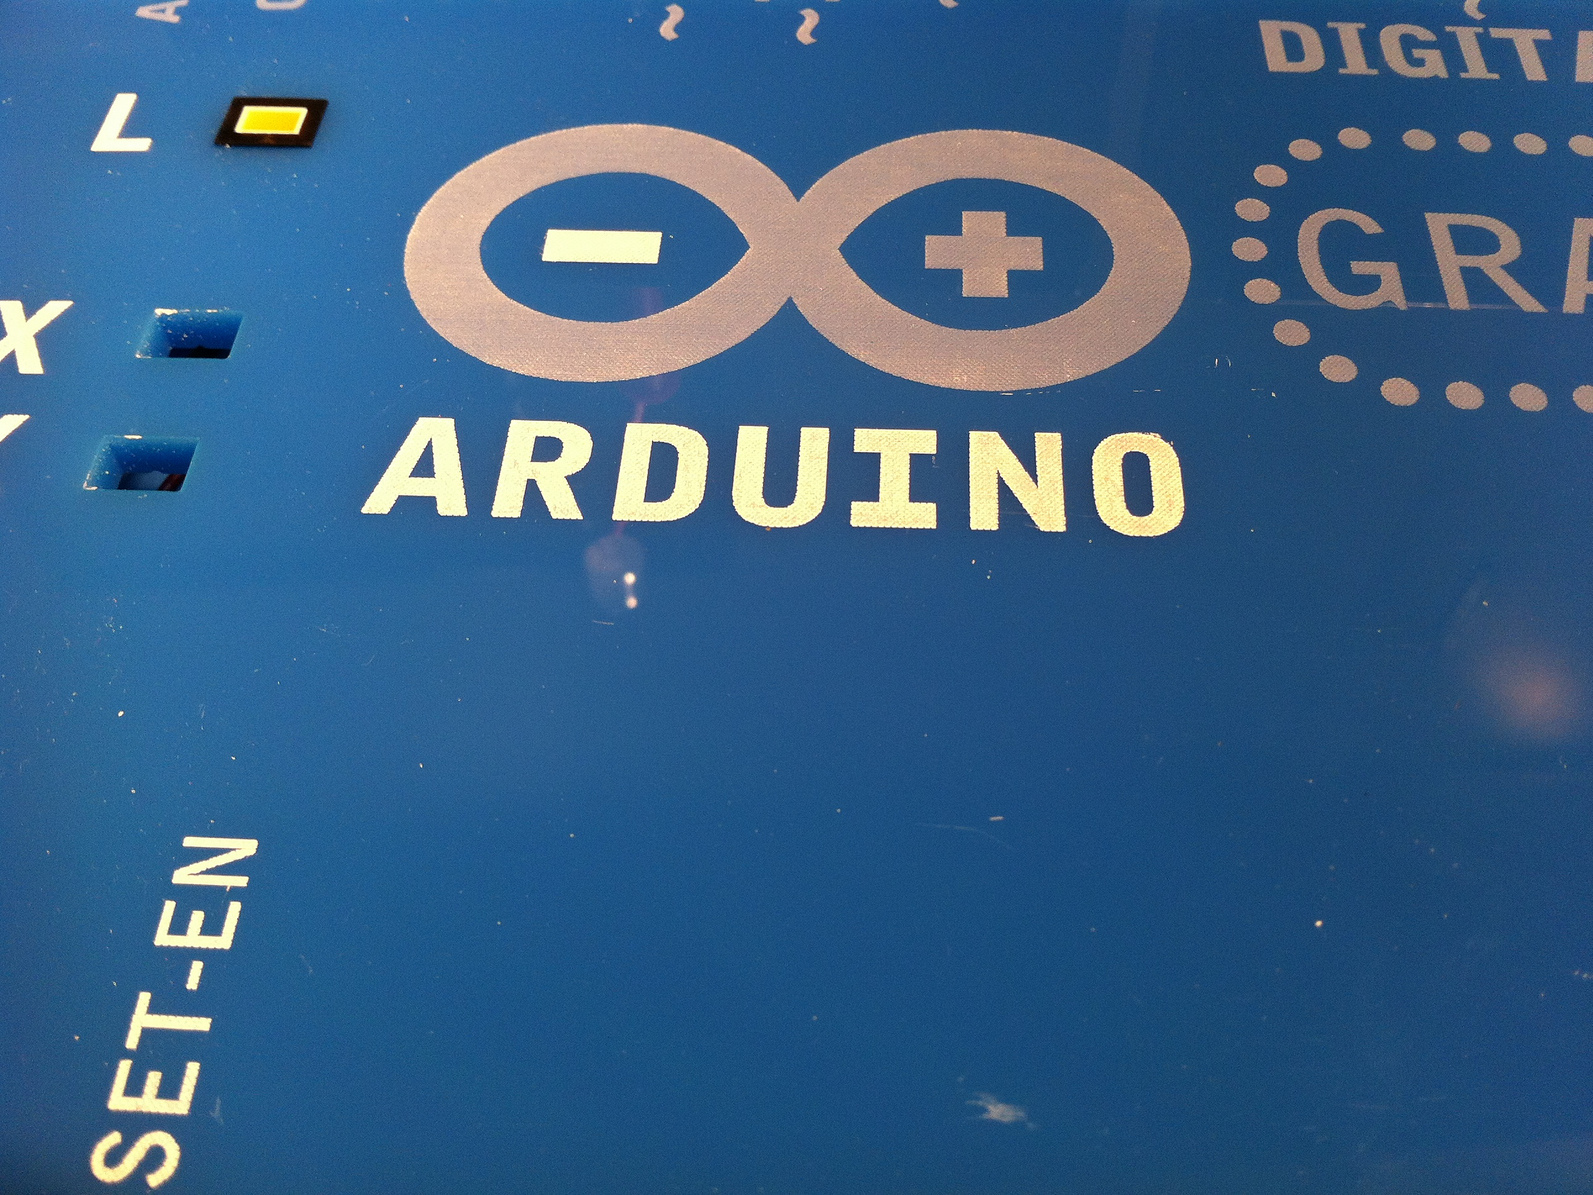
Fill in the etching with white acrylic craft paint.
You can wipe off any excess from the smooth board surface, or do extra clean up with rubbing alcohol.


