It’s a golden time for makers. With a handful of components and access to common maker tools, it is now possible to build your own functioning cellphone that makes and receives calls and SMS texts, and even plays FM radio.

Adafruit’s Fona microcontroller, with a GSM phone module, came out around the time I had just discovered dieselpunk (like steampunk, only the era begins roughly in the 1930s and concludes at the end of Word War II), and I was inspired to make a cellphone in an imagined retrofuture style. Something fun and artsy that actually made you think about our relationship to tech and culture.

I started out just drawing sketches on napkins at the coffee shop. I’m no artist, but these little sketches helped me visualize what I wanted.

Most of the concepts I came up with were way too advanced for me. I would have to improve my 3D printing skills (from rank beginner) to make the sketch shown in Figure A.

Figure A

After a lot of thought and some prototypes (Figures B and C), I inched closer to the final concept.

I kept refining things and finally made a critical design decision. Up until late 2016, I had been trying to “re-invent the wheel” and create custom parts and features that already had available solutions. I thought, “Gee, why not use off-the-shelf parts?”

Finally, I settled on a case I could make that could fit all the off-the-shelf components.

Read articles from the magazine right here on Make:. Don’t have a subscription yet? Get one today.

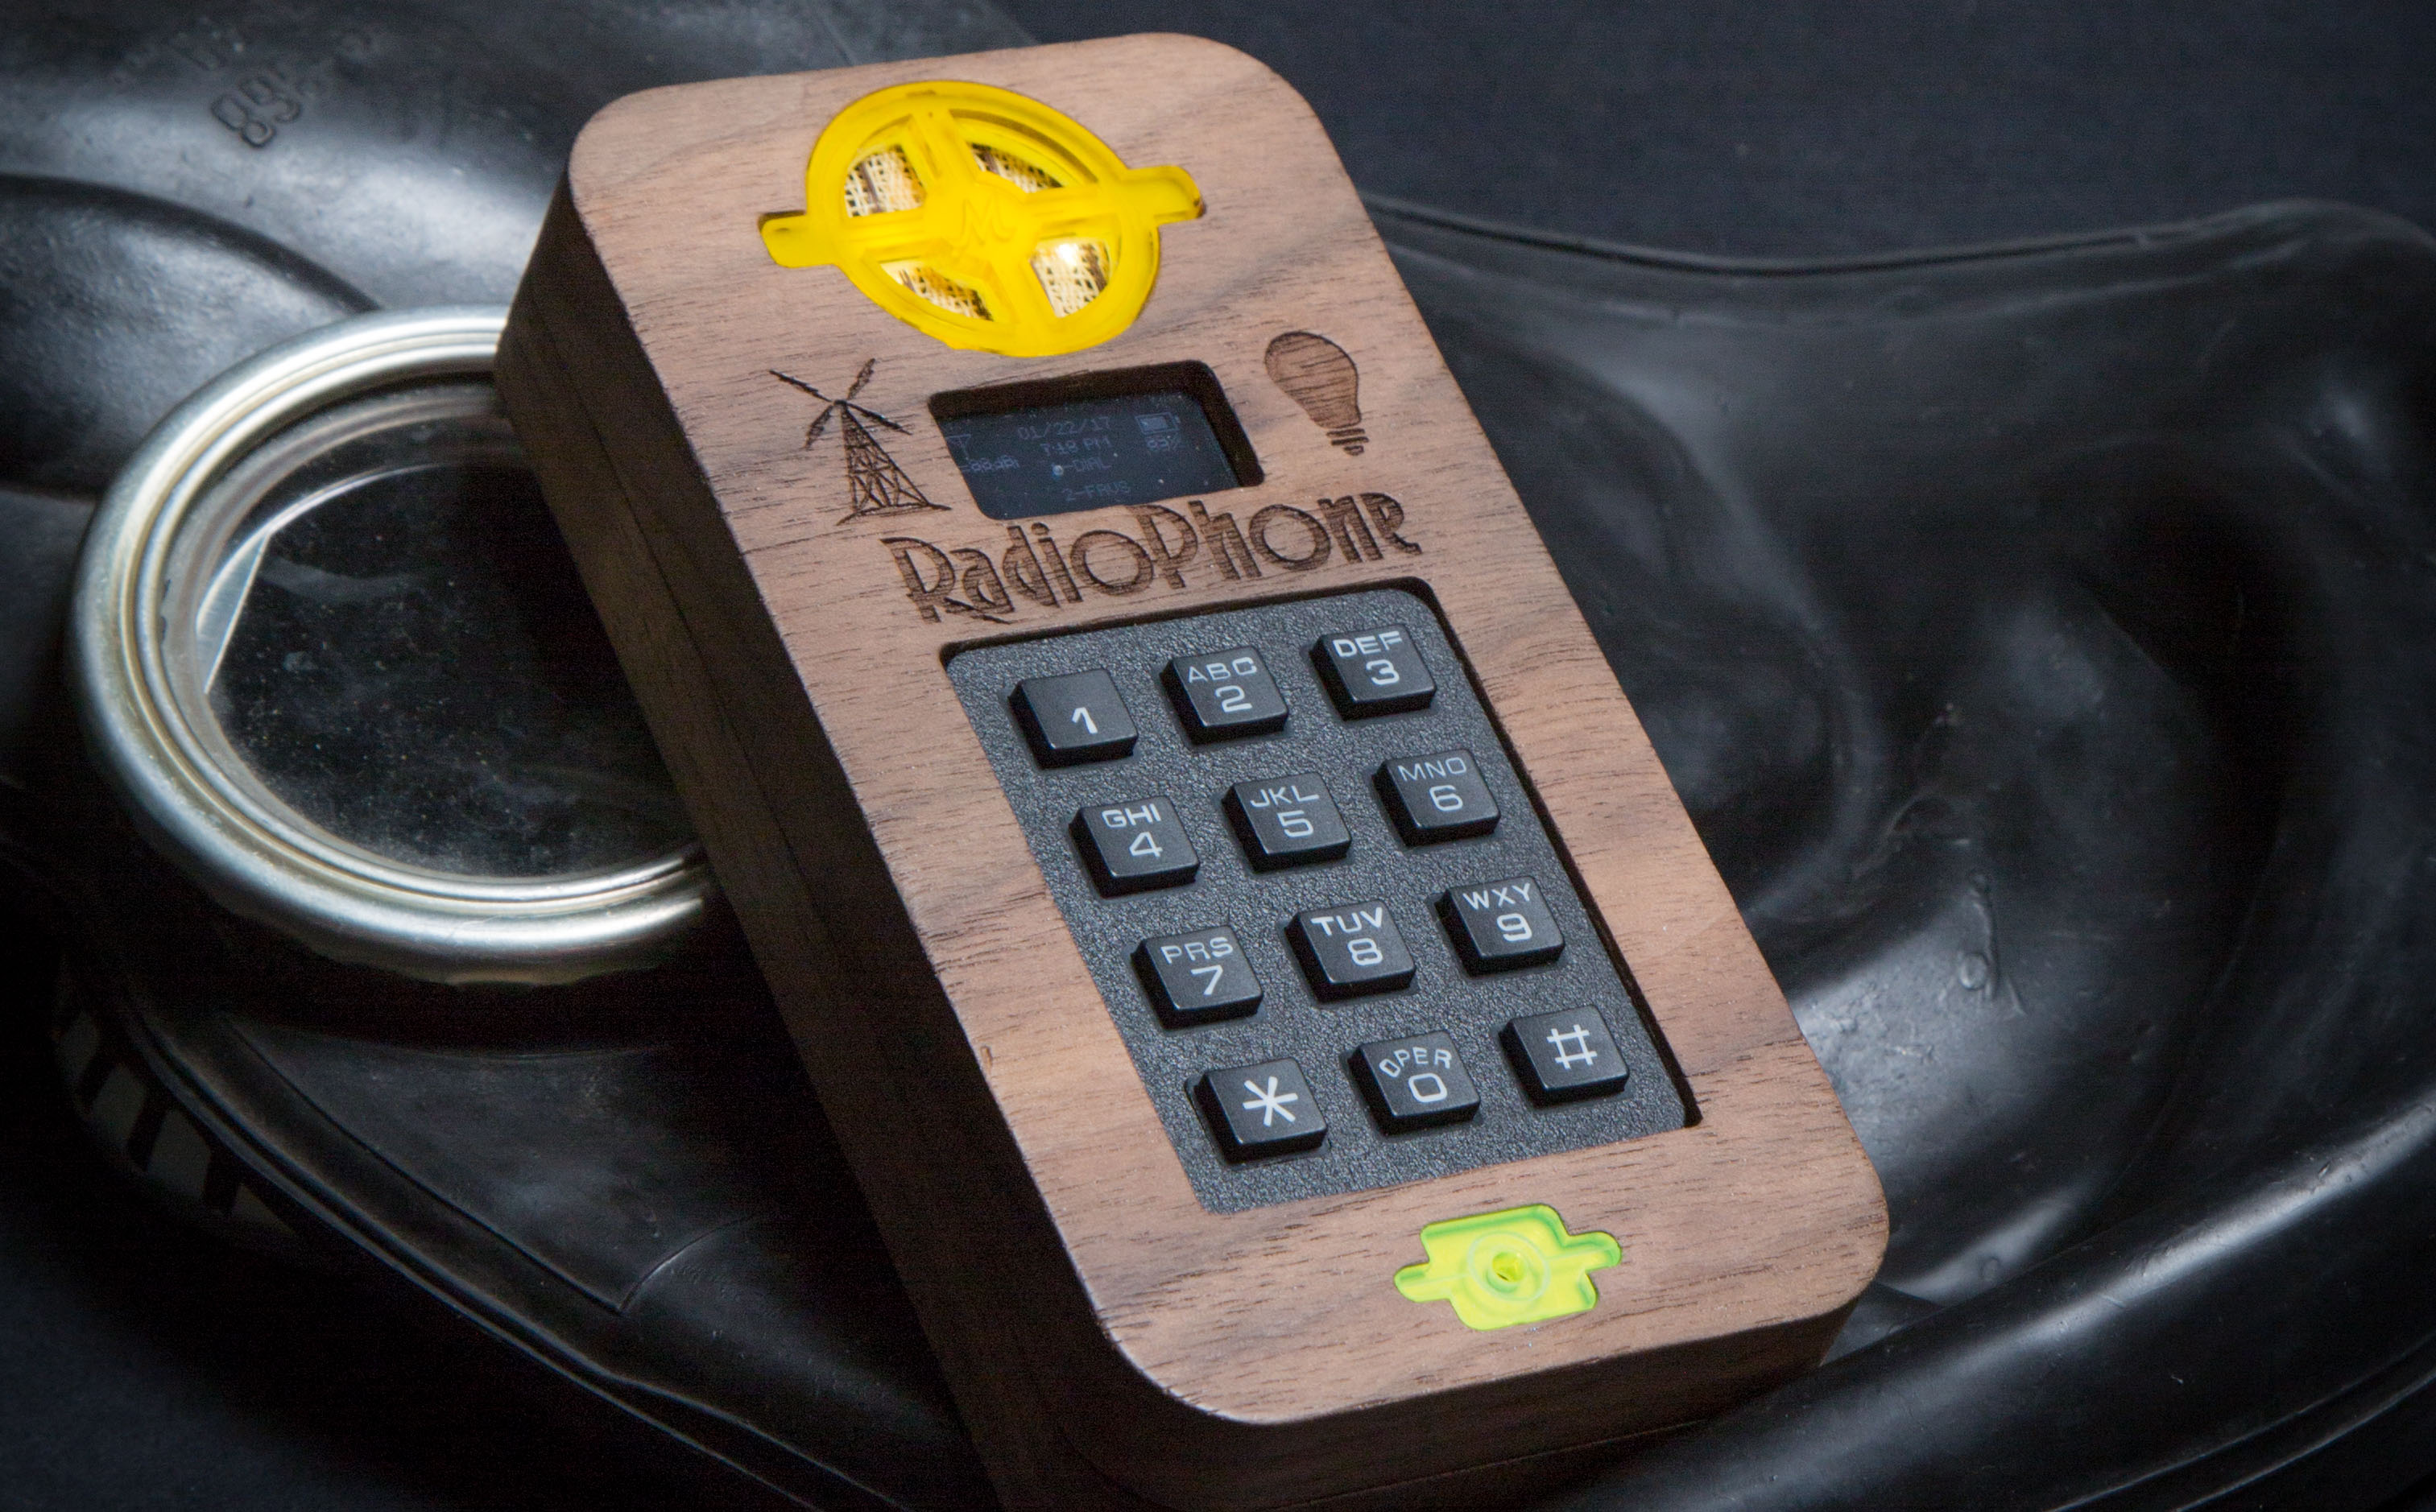
There were still design constraints. I wanted this cellphone to have the footprint of an iPhone 6. It would be thicker, of course, by about one inch. Then Adafruit released its Feather Fona update. This was a great improvement over what I was doing. It made everything compact: processor, Fona module, and battery charger on one board! I had to modify my design a bit to fit the Feather Fona in — the case had to be made wider and I had to move a cutout for the USB charging port, among other changes.

At last, I had a case that achieved my goals with a few given compromises for what I could do. Let’s go over how I put the whole thing together. Please visit my project page if you need additional help. I will also be referencing several different code and CAD design files throughout this project. You can find those on this project’s Github page.

Tip: Starting with the case is exactly the opposite of what you should do! I should have begun with the components in the first place, gotten them to work, and then figured out how to make a case for them.

Project Steps

DOWNLOAD SKETCH AND ASSEMBLE COMPONENTS

Download the Arduino sketch from the Github repository and upload it to the Fona. Assemble the components (Figure D) and make sure everything works.

Figure D

CUT THE CASE AND BEZELS

Mill the case from ½” wood using the design files (with or without the back badge bezel) on the project’s Github page. Sand the case and remove the holding tabs.

Laser-etch the front of the top case. I created a logo and graphics that are available on the Github page. You will have to center the art on the OLED cutout for this (Figure E).

MAKE THE CALL

To use the cellphone, push the red on-off button on the back. The microphone will light up and you will see a brief “Welcome to RadioPhone” splash screen. Next, the screen displays “Looking for Network.” If the phone connects to the carrier, you will see the message “Connected to Network!” for a few seconds. The speaker backlight will illuminate and the menu will appear. Otherwise, with no carrier signal, you will just be stuck on “Looking for Network.” 

The menu screen displays signal strength in the upper left corner and battery percentage charged in the upper right corner. The date and time from the carrier network shows up in the center top of the screen. Below that are the function choices. You can dial a number (press 1 on the keypad), call one of five favorite numbers (press 2), or listen to one of five pre-stored FM radio stations (press 3). In the lower right corner, there is a pound sign (#). An incoming call will be signaled by tones; just press pound on the keypad from the menu screen to answer it. There is also an asterisk (*) in the lower left corner. Toggle this for a flashlight — it turns on all seven LEDs under the speaker grille.

To make a call, press 1, enter a number on the next “Number Please!” display, and press asterisk. You can back out of this screen by pressing pound. To hang up outgoing or incoming calls, press pound. If you want to call one of your favorites, press 2. Then the number of the favorite you want to call from the next displayed screen. You have to pre-store these by changing code in the sketch. Pressing 3 brings up your favorite FM radio choices. This is also stored in code (no decimals included — “98.1 FM” becomes “981”). Press one of the numbers shown to play that radio station.

When you are done using your phone, just push the red button on the back again. It should instantly turn off without a power down sequence. So gratifying!