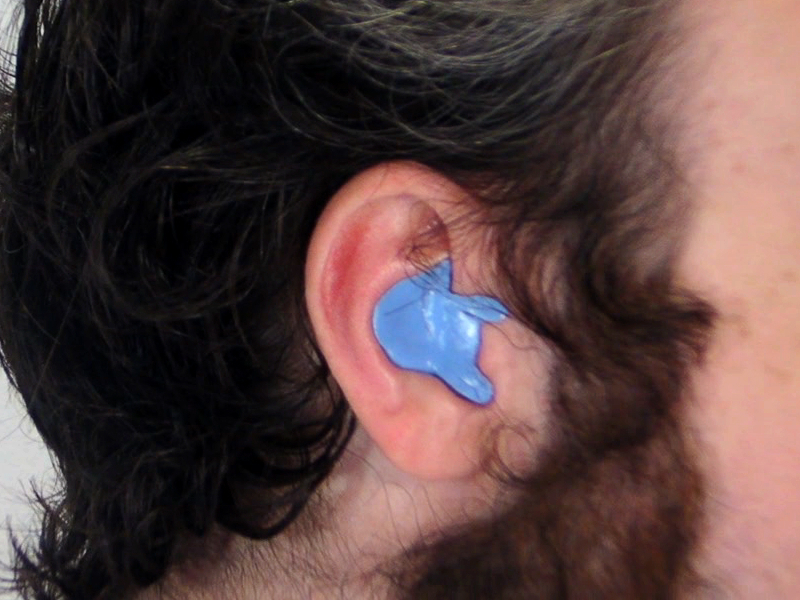
I’ve used quite a variety of sound-isolating personal audio gear; around-ear cans, in-ear buds, as well as active noise-canceling models. All of them posed problems for me in one way or another. Most often, it came down to issues with comfort and how well each design could maintain a good seal on my noggin.

I was excited to find out that there are custom-fit headphone services out there, but my enthusiasm withered upon learning the price for such a thing.

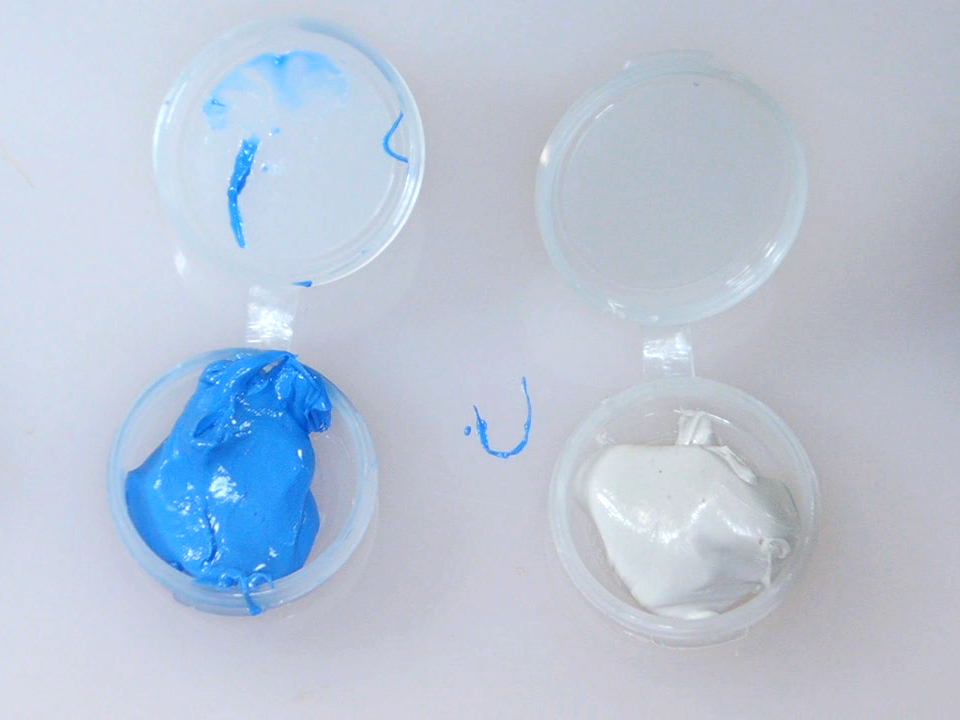
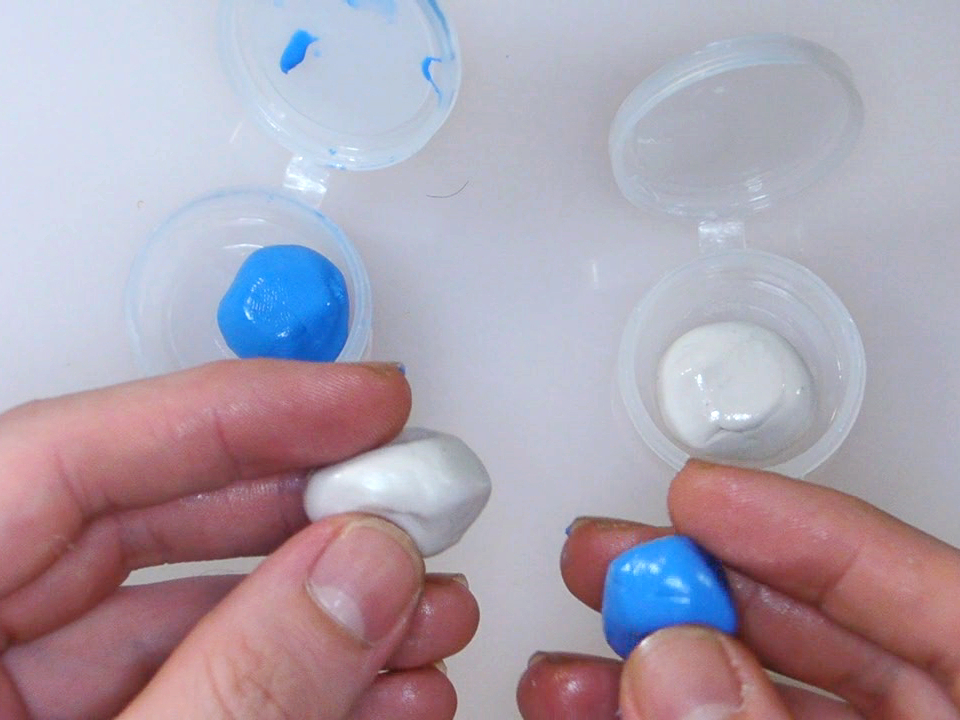
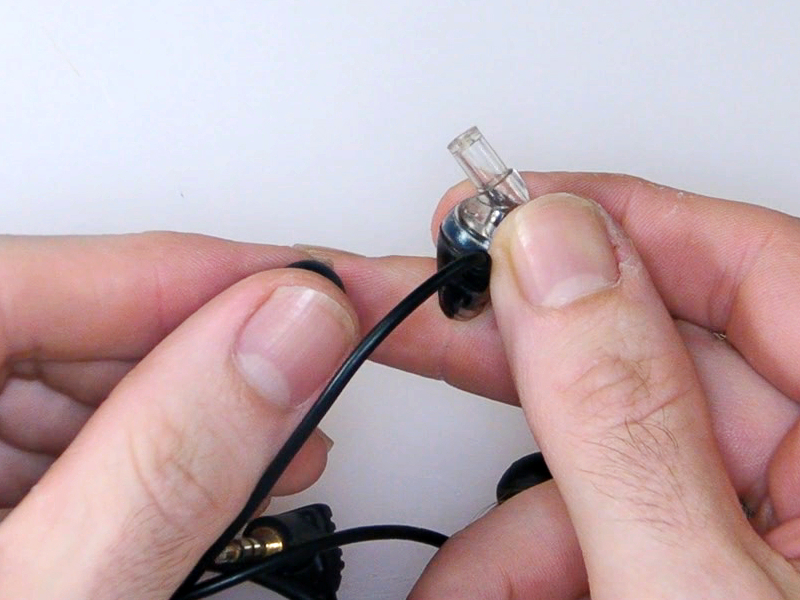
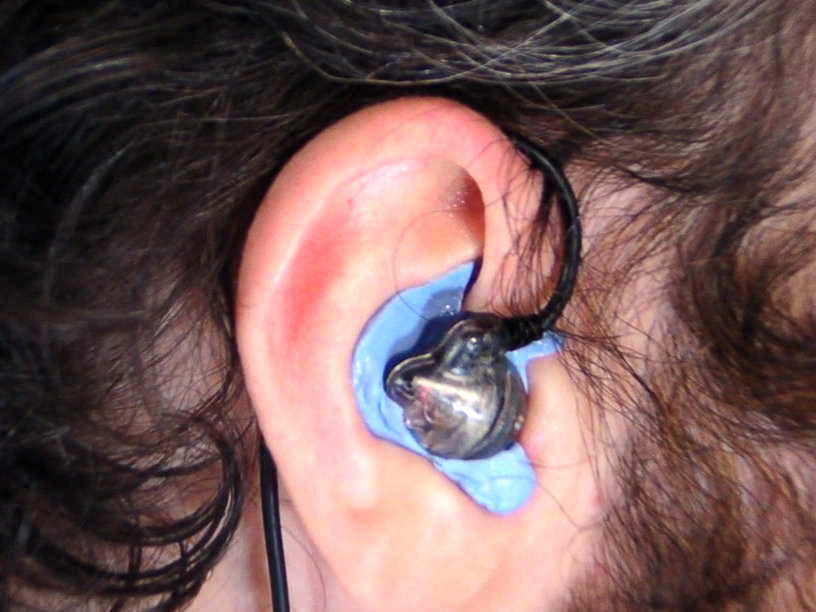
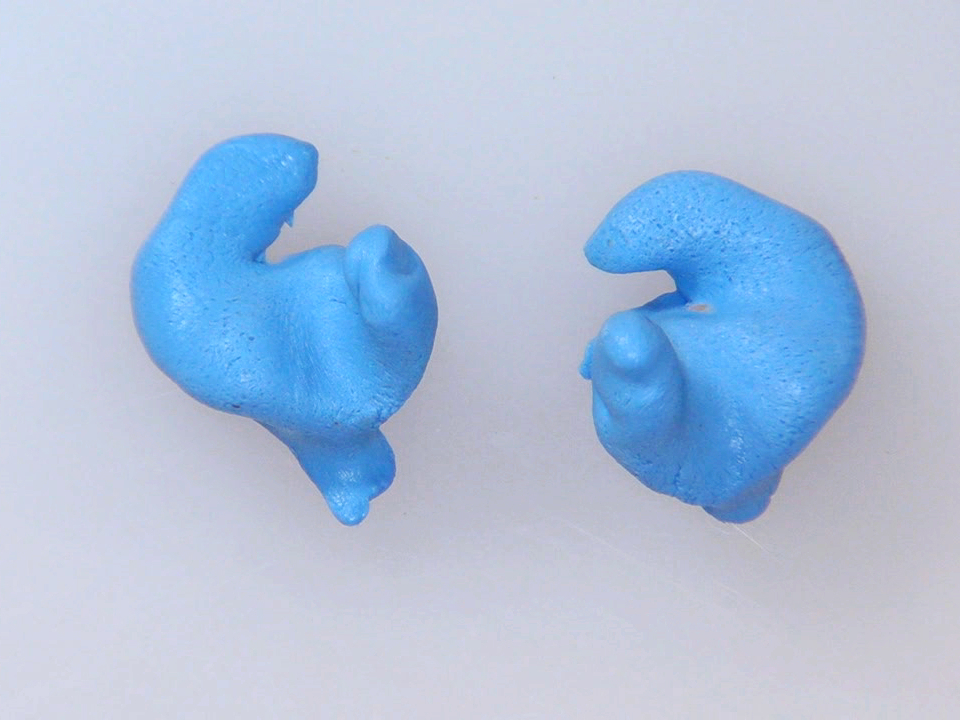
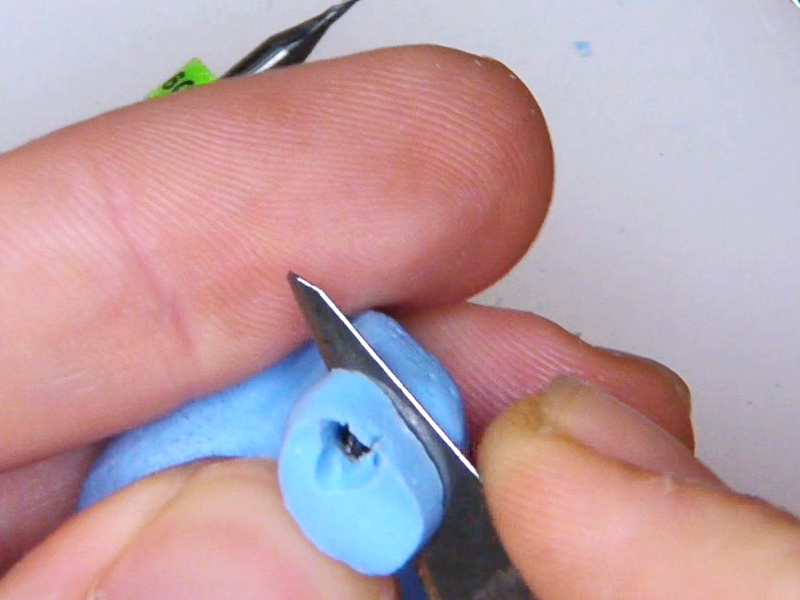
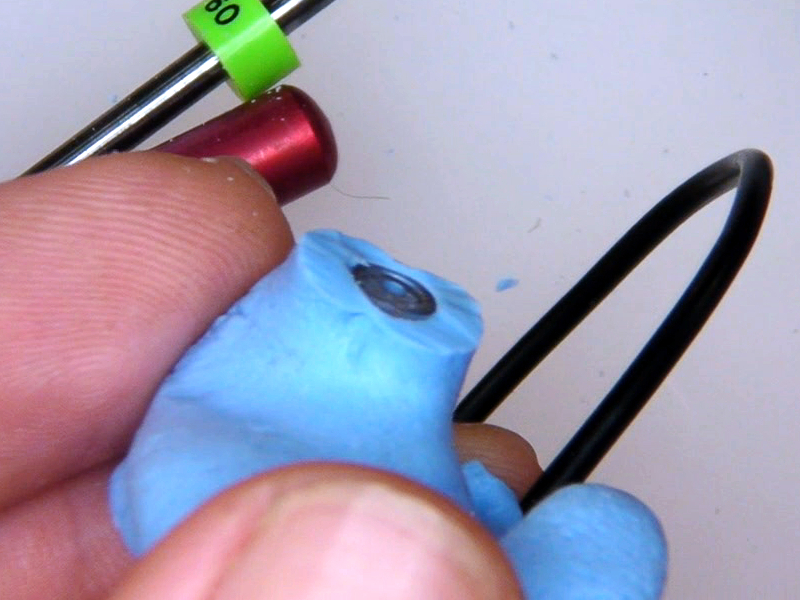
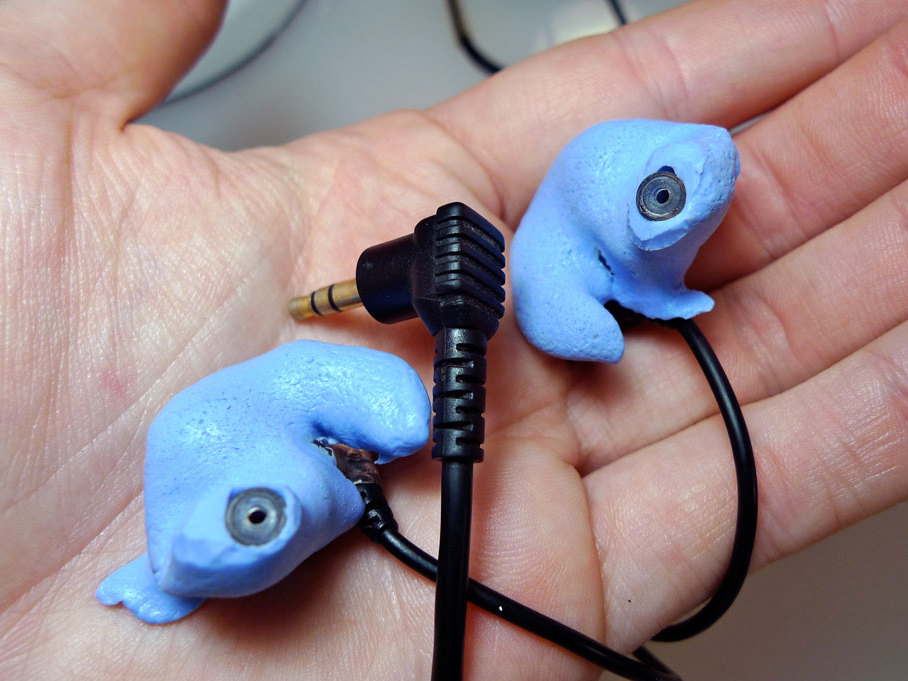
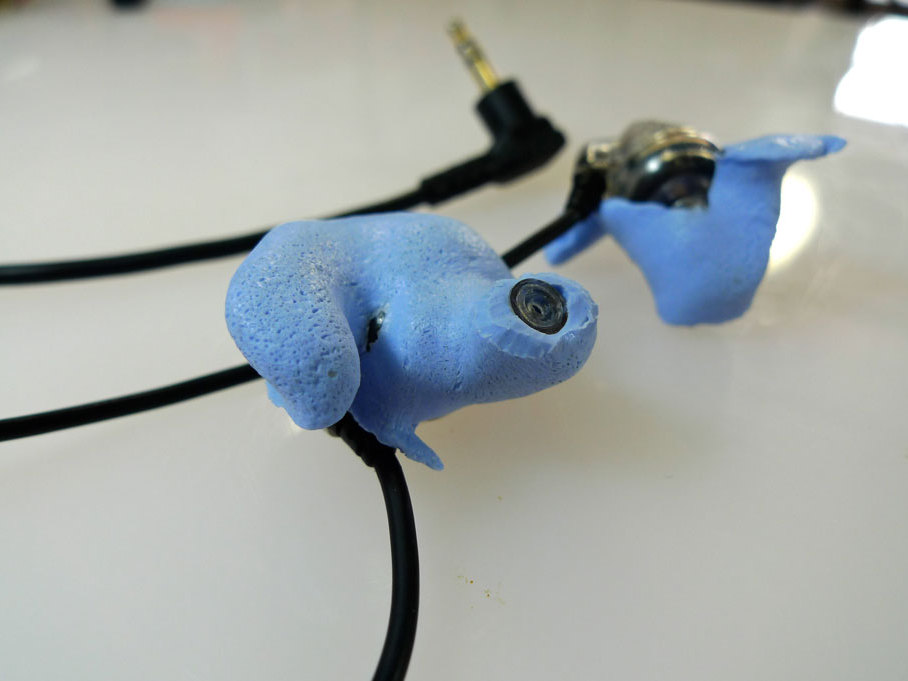
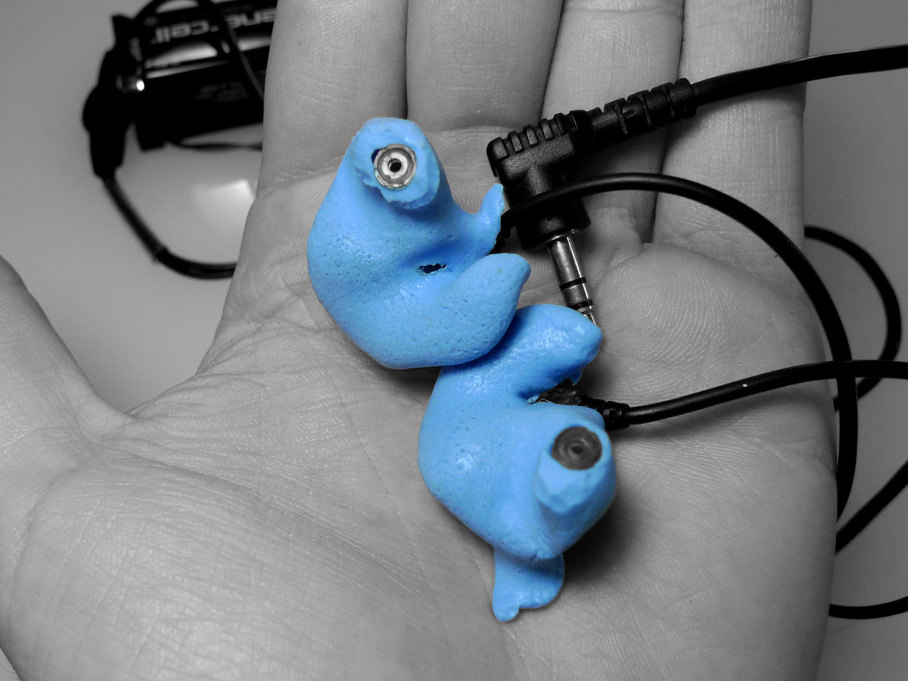
Luckily there are simple DIY custom-mold earplug kits available for relatively cheap, so I dug out my old pair of quality earbuds, ordered a kit, and well, put together a very simple but satisfyingly effective project.

YouTube player

Project Steps

Mix the two separate putties included with the earplug kit.

The earbuds I’m using are quite bulky, so I decided to use only half the amount specified by the kit’s instructions (in other words, 1/4 of the total material for each ear). This leaves me enough to make another pair if need be.

Before proceeding with this, take into account the following considerations. If you are going to DIY instead of getting a professional (such as an audiologist) to make your custom devices then at least follow the follow steps

DO NOT ATTEMPT if you have ever had a mastoidectomy or any ear surgery or the putty will end up in a very bad place and will require surgery. Meningitis = VERY BAD.

Wait until the putty is definitely set; if it isn’t then it may be left behind in your ear, setting yourself up for a visit to the emergency room.

When removing the mold from your ear, VERY SLOWLY release the seal around the top part of your ear and VERY SLOWLY twist the mold forwards and outwards. If you just pull it out then the suction can burst your eardrum, causing immense pain, possible loss in hearing, perhaps requiring EXPENSIVE surgery and a trip to the emergency room. Plus, you won’t be able to get your ears wet until the perforation has healed or risk massive pain and infection.

Remove the rubber or foam sleeves from the earbuds and evenly press half of the putty mixture into each ear.

Insert the sleeveless earbuds into your putty-filled ears as you would normally wear them.

Wait at least 10 minutes as the mixtures cure and solidify.

Once they are fully cured, you should be able to remove the molds and earbuds together as one piece – though it’s not a problem if they come out separately.

Trim the excess mold to expose the end of each earbud’s stem/sound-pipe.

For comfort’s sake, it’s also a good idea to trim any abrupt edges that result.

And in the interest of safety – do remember to cut away from fingers (unlike me in this photo!)

Try them on for a sound-check.

If all goes well – you’re done! The small pouch included with the earplug kit makes for a decent (perhaps a bit snug) carrying case.