

Ever since I can remember, I’ve had a fascination with the night sky. As a young kid I’d stare up at the stars. Later, I’d take my daughter out during meteor showers to see how many shooting stars we could count. And throughout, I’ve experienced an uncanny need to keep staring at the full moon for about an hour after it rises. Yet my fascination with the night sky grew exponentially about six years ago when I learned that my digital SLR had the capabilities to capture the brilliance of the night sky, including details that my own eyes weren’t able to resolve. After capturing a sequence of photos, it’s a simple matter to turn them into breathtaking time-lapse videos.
If you’re an avid photographer it’s likely you already have the tools you need to start capturing the night sky. Beyond the right tools, all you really need is the right camera settings. In the chart below I have listed the basics you’ll need, as well as a list of the key settings.
| Tools | Camera Setup |
| Digital SLR or mirrorless system camera | Aperture value |
| Wide-angle lens with f/2.8 or faster aperture | Shutter speed |
| Sturdy tripod | ISO sensitivity |
| Timer remote (intervalometer) | Finding sharp focus |
| Large memory card (16GB, 32GB Preferred) | White balance |
| Fully charged camera battery | Sky conditions |
Why Time-lapse Photography?
Time-lapse photography is an art form that allows us to see the world in a different way. Most of us have witnessed a star-filled sky, but the sky in motion is not something that happens fast enough for the naked eye to perceive. Up until the introduction of high-ISO capable DSLRs, there wasn’t an easy or affordable way to capture the beauty of the night sky in motion.
To capture the night sky as a single photograph involves taking just one picture, but to capture the night sky in motion will require a series of pictures that, when assembled using software, will turn into a motion video; it’s the digital equivalent of a flip-book. This tutorial will help you get started.
CAMERA SETTINGS
Let me first give a simple overview of the key settings that go into capturing the night sky.
RAW versus JPEG

All of today’s digital SLRs have the ability to capture images in either JPEG or RAW format.
JPEG format applies in-camera effects, filters, and sharpening to an image before compressing and saving the image to a memory card. JPEG photos often look ‘finished’ right out of the camera but have much less flexibility when it comes to tweaking things later or bringing back blown-out highlights. Since JPEG is a compressed (lossy) image format, you’ll also notice banding in areas of solid color, like blue skies. You can fit more images on a card using the JPEG format, but it comes with quite a few trade-offs.
RAW format actually saves the exact image — what the sensor sees through the lens — onto a memory card. By preserving the original scene and not altering or compressing it in-camera, the image becomes a true digital “negative.” Since you’ll need to post-process your still images in order to turn them into a time-lapse, capturing in RAW format doesn’t really add complexity to the workflow. Of course, RAW images take up more space on a memory card, but this can easily be countered by shooting with larger cards. SD/SDXC memory cards are relatively inexpensive, so jumping from an 8GB to 16GB or 32GB card might only add $10–$20 to the overall cost of the card.
The real advantage to shooting RAW is an extra one to two stops of exposure latitude. Skies that are just a tad too bright can be “dialed down” in post, and shadow areas can be brightened up a bit without adding a ton of extra noise. Also, solid colors won’t have the appearance of “banding” that’s often visible in JPEG images, especially as you edit and re-save the images.
Aperture

The aperture value (Av) refers to the size of the lens opening, which determines how much light makes it through the lens. Since aperture values (or f-stops) are represented as fractions, the smaller values actually provide a larger lens opening – and a larger lens opening means more light will pass through the lens. This is a very simple definition of course, but what’s important to know is that a lens with a larger aperture will let a lot more light through to the camera sensor. To shoot the night sky it is highly recommended that you use a lens with a maximum aperture value of at least f/2.8.
Shutter Speed

Digital SLR cameras feature a mechanical shutter or “curtain” that sits between the camera’s image sensor and the rear opening of the lens. This shutter opens and closes based on the settings you choose and ultimately determines how long the image sensor will be exposed to the light coming in through the lens. Faster shutter speeds (1/250th, 1/500th, etc.) are used in sports because their speed helps to freeze the action, while slower shutter speeds (1 second, .5 second) are often used to create silky images of flowing rivers, since a slower shutter allows the image sensor to be exposed to light for a longer period of time, blurring and softening any motion in a scene.
A slower shutter speed allows more light to reach the image sensor (great for night photography), while a faster shutter speed allows less light to reach the image sensor (great for controlling too much light on a bright sunny afternoon).
When shooting the night sky we’ll be setting a very slow shutter duration of between 20 and 30 seconds. Because the sensor will be exposed for a long time, it is important to make sure that when framing the night sky you don’t have any bright lights around the area you’ll be shooting. Street lights, car headlights, and even a full moon may prove too bright for a slow exposure, and may ruin your attempt at capturing the night sky.
ISO Sensitivity

The ISO value is the digital equivalent of film speed. The higher you set it, the more light-sensitive the sensor becomes, with the trade-off being increased noise or “grain.” Despite some noise at a higher ISO setting, today’s cameras are still quite amazing. In fact, setting a newer model DSLR to ISO 1600 will produce less noise than a 4-year-old camera shooting at ISO 400. Not only have cameras become cleaner at higher ISO settings, software tools such as Adobe Lightroom allow you to clean up images even further.
Keep in mind that all cameras have a sweet spot and just because the camera claims its ISO can reach 52,000 or 102,400 doesn’t mean the image will look good at those settings. The Canon 5D Mark III, a camera I’ve been shooting with for a couple of years, has a maximum ISO rating of 102,400 – yet the highest setting I’ll shoot at is ISO 6,400. Any higher and noise really becomes a problem. Test your camera’s limits before deciding how high is too high.
When shooting the night sky, you’re asking your camera to record an image that even your eyes can’t see all that well. To do that will require using a “fast” lens (large aperture), a very slow shutter speed (25 seconds), and a high ISO setting (1,600–6,400). When these three items (aperture, shutter, and ISO) are combined, your camera will be able to record images that you won’t believe.
Focus
When shooting still frames for time-lapse, you don’t want your camera to change focus every time it takes another picture, so it is important to shut off autofocus when shooting time-lapses. Many photographers have never used manual focus before, but don’t let that scare you away. It’s as easy as turning on your camera’s Live View mode, switching your lens to manual focus, and turning the focus ring until the subject looks sharp on the monitor.
When shooting the night sky, focusing becomes a greater challenge. Since the camera is aimed into darkness, it’s difficult to know when the scene is in focus. A trick to focusing on the night sky is to aim the camera at whatever the brightest star is at that time, use the Live View zoom and magnify feature to make this object larger, and then turn the focus ring until the star looks sharp. Now you can re-compose your shot, being careful not to touch the focus ring.
NOTE: You may also have to turn on your camera’s Exposure Simulation mode, which makes it easier to view low-light scenarios on the camera’s LCD display.
White Balance
When shooting in RAW mode, the white balance setting isn’t really important; you can change it later. But you don’t want your white balance to shift from frame to frame, so it’s important that you do not set it to Auto. I usually set the camera’s white balance manually to between 3,800 and 4,200 degrees Kelvin when shooting the night sky, as this gives the sky a bit more of a blue hue. But ultimately I make my final decisions about white balance during post-production.
SETTING UP YOUR NIGHT SKY SHOOT
Sky Conditions

Sky Guide for iPad
When I refer to sky conditions, I’m not talking about the weather. It’s obvious that clouds will prevent a view of a star-filled sky, but less obvious is that there are better and worse times to shoot the night sky — and these change throughout the year. For example, as I write this article it’s 12:19 a.m. on Saturday, March 29, 2014. If my goal was to capture the Milky Way, I wouldn’t have much luck until after 2:00 a.m., since that’s when the brightest part of the Milky Way starts to rise in the east. As spring and summer progress, that time will get earlier and earlier.
You’ll also want to make sure that the moon has either already set or won’t be rising until you’re done capturing the sky. Most avid night sky photographers will wait for the days just before, during, and after a new moon.
How do you learn about sky conditions? Simple! Download one of many free or inexpensive apps. The ones I use are Sky Guide (iOS), Photo Pills (iOS), and Star Walk (iOS, Android, Kindle Fire, Windows Phone), but there are plenty of great apps for both Android and iOS platforms. These mobile apps will use the device’s built-in GPS and compass to know exactly where you are and will show you the sky as it appears above you at any given day and time.
A popular app for the desktop is the free Stellarium app for Windows, Mac, and Linux.
Good Composition
This is a very subjective aspect of photography, so I won’t go into what makes a good or bad composition. I will say that shooting the sky without anything else in the frame tends to be boring, so try to include something in the foreground. Photographs with layers tend to be more interesting than an image without.
Finding a Dark Sky Location
If you live near a major city (L.A., Boston, Houston, Chicago, Miami, Orlando, Salt Lake, Denver, etc.) you’re not going to have any success capturing the night sky; the light pollution will wash out any attempt. Remember the high ISO and long shutter speeds you’ll be using? These settings are designed to flood the camera sensor with as much light as possible — from the sky itself. Any ambient light from the ground will throw way too much light onto the sensor, thus washing out your attempts.
I teach night-sky workshops in Moab, Utah, because the sky there is so incredibly dark that you can see the Milky Way with just your eyes (after they adjust). However, you don’t need to travel to southern Utah to capture spectacular night sky photographs. Just drive 60–90 minutes away from the brightest, largest towns in your area. The darker the sky, the more stars you’ll see, but you don’t need total darkness to still have a decent viewing and time-lapse experience.
In the Boston area, for example, this means driving west towards the Berkshires, northwest towards Groton, Mass., or north into New Hampshire towards the Lake Region or White Mountains (beyond Manchester and Concord).
In Salt Lake City you could drive up into the mountains near Solitude, Alta, or Snowbird, which puts you above much of the light pollution from the city. You can also drive south to places around Spanish Fork or further south to the national parks.
A free iPhone app called DSM Lite (Dark Sky Meter Lite) will give you a light measurement of the night sky above you. There’s also a great tool online called the Clear-Sky Chart that will help identify the best time(s) in the next 24 to 48 hours to capture the night sky.
PHOTOGRAPHING THE NIGHT SKY
Okay, so now that you know where to shoot, it’s time to jump in and set up your camera to capture your first images of the night sky. Here are some settings that will get you started. Once you’ve seen the results from your camera, feel free to tweak these settings to achieve the best results from your setup.
- Install a freshly charged battery
- Nothing will ruin a time-lapse quicker than a dead battery or full memory card.
- Insert an empty 16GB or 32GB memory card
- A smaller 8GB card may work as well, depending on how many images your camera can capture in RAW mode.
- Manual mode
- Place your camera into “M” or “MANUAL” mode.
- f/2.8 aperture
- Set the lens aperture to its maximum setting. A lens with an aperture of at least f/2.8 works best, remembering that faster is better for night photography.
- Wide-angle lens
- A lens with a focal length of 24mm or wider works best when capturing the night sky. But keep in mind your camera’s “crop” factor; if you’re shooting with a cropped-sensor camera then a 24mm lens actually performs more like a 36mm or 38mm lens, which isn’t ideal for night sky capture. Instead, you’ll want to shoot with a 14mm–16mm lens (or wider), which is equivalent to a 24mm lens on a full-frame camera. A lens in the 8mm–16mm f/2.8 range is a good choice for cropped-sensor cameras, while a 14mm–20mm f/2.8 (or faster) lens is a good choice for full-frame cameras.
- Shutter speed of 25 seconds
- Set your camera’s shutter speed to 25 seconds. This should show up on your camera’s LCD display as 25". Don’t confuse this with 1/25th of a second.
- ISO 1,600
- Set your cameras ISO to 1,600.
- Set white balance to “Incandescent” or 3,800°–4,200° Kelvin
- Feel free to experiment with white balance settings; just don’t select Auto, as you risk having the white balance change between captured frames.
- Manually focus to infinity (~)
- Keep in mind that many lenses actually fall short of sharp focus at the exact infinity point, so make sure to take test images and tweak as needed before finalizing the focus point.
Set Up the Intervalometer
Now that your camera is set up and ready to shoot, it’s time to connect the external intervalometer to the remote port of your camera. You can also use your camera’s built-in intervalometer if it has one.
First, set the maximum number of pictures on the intervalometer to infinity (“- – ”). If it shows a number (i.e. “99"), it is telling you at what shutter count it will stop taking pictures. The only other mode on your intervalometer that you’ll be using is the Interval mode. This is basically a countdown timer that takes a photo each time the counter reaches 0:00. It then starts again, and will take pictures indefinitely until you stop it. When you set the Interval timer to 30 seconds, you’re telling the intervalometer to keep taking photos every 30 seconds. Since you’re setting the exposure time (shutter speed) of the camera to 25 seconds, there will be a 5-second delay between pictures. This 5-second delay should be enough time for your camera to write the captured image to the memory card and get ready to capture the next photo. If you find that your camera needs a second or two more, then change the interval setting to 32 or 33 seconds.
NOTE: If you’ve set a 25-second shutter speed but your camera seems to be taking 50 seconds for each still image, you need to turn off a feature called Long Exposure Noise Reduction or High ISO Noise Reduction. This noise-reduction mode will take a black image equal in length to your set shutter speed and compare it to the snapped image in order to reduce noise. Not only will this slow your capture process to a crawl, I’ve found that noise reduction is best left to more advanced desktop software instead of your camera.
How Many Photos Do I Need to Capture?

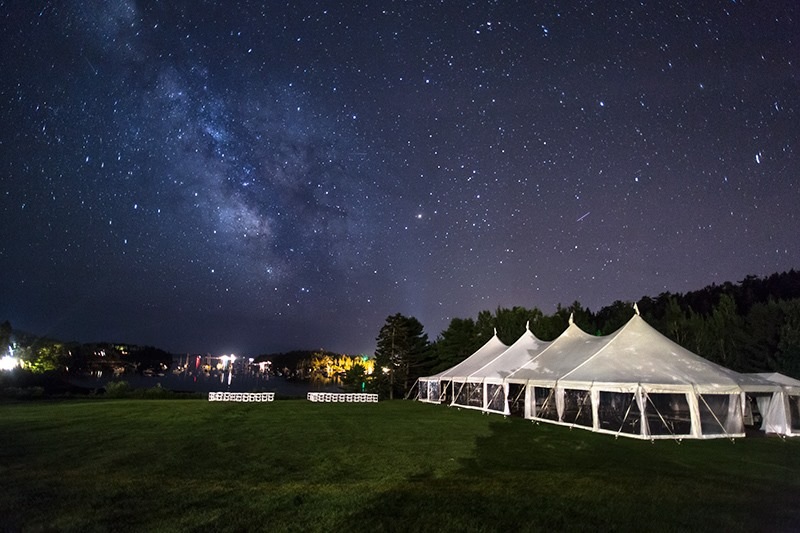
The photo above is one frame from a sequence. Since video plays 24 frames per second, a single picture would only stay on the screen for 1/24 second. However if you capture enough images, you can create a short time-lapse segment. In the final video (see below) I captured 408 photographs over a period of 2.5 hours.
Here’s the full 17-second video (roughly 408 photographs captured).
Capturing night sky time-lapses is equivalent to watching paint dry. It’s a slow process. The reason is twofold: You need to capture quite a few frames to make even a short video, and each frame can take 20, 30, or 40 seconds to capture. In order to figure out how many photos you’ll need, you’ll first want to know how many photos make up each second of video. At the theater most films are played back at a frame rate of 24 frames per second, while the TV standard is 30fps. In the field, when I’m figuring out how many frames I should capture, I usually use the TV standard of 30fps since it makes the math a bit simpler.
Don’t make the mistake of believing that more is always better. In reality, most people don’t enjoy watching any one scene for much more than 6 or 7 seconds. Why stay out all night capturing a one-scene time-lapse that lasts 30 or 40 seconds, when you’ll likely end up trimming away more than half of the final product? Instead, capture enough for 6–8 seconds of video, then change the composition and shoot a second time-lapse if time allows. Put these two (or more) time-lapses together and you’ll have a much more interesting end product.
How Long Will It Take?
Now the question is how long will this take? The answer is known once we take into account the interval between pictures. Since a new photo is being taken every 30 seconds I know that my camera will be taking 2 pictures every minute. If I need 180 pictures, I’ll need to let the camera continue for 90 minutes.
Remember I said it’s equivalent to watching paint dry? For me, that’s not really true. I now have 90 minutes where I have nothing to do except gaze and marvel at the night sky. You’ll see satellites move across the sky, you’ll likely see a few shooting stars or meteors, and if you live in the northern United States and the timing is right, you might get to witness the northern lights, also known as the aurora borealis. It’s a time when you’re free from the stresses of everyday life. It’s quiet, meditative, and a gift that you’ll be thankful to have.
ASSEMBLING THE TIME-LAPSE VIDEO (Post Production)
Now that you’ve captured your first batch of photos, let me step you through a simple but effective way of assembling them into a movie. The software I’ll be using for this tutorial is:
- LRTimelapse (Free to use for sequences up to 400 frames)
- Adobe Lightroom 4.x, 5.x
Adobe Lightroom is a photo editing software package for PCs and Macs that allows you to import, catalog, and enhance photographs without actually making any changes to the original file. Lightroom does this by saving the edits and changes you make in a small “sidecar” metadata file in Adobe’s XMP format. Anytime you want to re-edit a photograph, Lightroom looks for this sidecar file and loads in the series of changes you previously made.
LRTimelapse is a program designed to read and write the sidecar metadata files that Adobe programs create, to “ramp” the changes you make in Lightroom, and to assemble the final images into a video.
What is ramping? Let’s assume you started a time-lapse before the sun set and ended it after the sun set. Your camera’s white balance was preset to Tungsten. This might have been the perfect setting for the beginning of the time-lapse, but as the sun set the color of the ambient light changed, yet the camera was still fixed on Tungsten. LRTimelapse allows you to set key frames (stars) on your images and then make adjustments to just those key frames inside Adobe Lightroom. So now, instead of making incremental changes to every image, you just have to worry about two of them — the start and end key frames. You then make the adjustments needed in Lightroom and save the metadata changes to those two files. Reload the folder in LRTimelapse and it will ramp the changes you made in as many steps as there are photos. If you have a 180-frame time-lapse, LRTimelapse will change the color temperature over the 180 frames, making the change gradual and smooth. LRTimelapse can ramp virtually any setting in Lightroom, making it a powerful tool for time-lapse photographers.
Post-Production Workflow
This section is not really designed to teach you how to use Lightroom or LRTimelapse, but instead will take you through the basics that are needed to enhance your captured photos and turn them into a rendered time-lapse video sequence.
- Transfer the images to your computer. Connect your camera to your PC’s USB port or use a card reader. Open up Adobe Lightroom and import the captured photos into your PC. Lightroom creates thumbnail images automatically as it moves each photo.
- Once the photos have all been imported into Lightroom, take a look at the first 10 or 20 photos. This is the time to delete or move any of your test images out of the folder that contains the time-lapse images (test images are the ones where you were playing around with composition or focus prior to starting the time-lapse capture).
- Now open up LRTimelapse and locate the folder that was created when you imported your images into Lightroom. Once the folder has been read by LRTimelapse, click on Initialize, under the Basic Workflow tab. This will take a few minutes, but is an important step. Once LRTimelapse initializes your images, it will display an overlay graph showing the luminance progression in your time-lapse sequence.


- Click the Key Frames Wizard button in LRTimelapse. (It’s located next to the Initialize button.) This will set a key frame on the first and last image in your sequence. NOTE: If a warning dialog box pops up just click on OK to close it.
- Now click the XMP Save button in LRTimelapse (to the right of the Key Frames Wizard button).If you haven’t noticed, LRTimelapse was designed with simplicity in mind. The layout was designed so that you start with the first button, move right to the second button, and so on. You won’t use the next row of buttons until you’ve tweaked the key frame images inside of Lightroom itself.
- Now go back into Adobe Lightroom and select all the images in the folder by holding down the Ctrl and A keys on your keyboard. This action will highlight all of the images in the selected folder.


- Now right-click over any one of the images and select Metadata –> Read Metadata From Files. This will import and update the XMP files that were altered by the steps in LRTimelapse.


- Once Lightroom is done reading the metadata, you’ll notice that the first and last images in the folder have a 1-star rating. This 1-star rating is LRTimelapse’s way of letting you know that these are the “key frames” that should be edited. You don’t have to worry about the in-between images — LRTimelapse will take care of those automatically by ramping the settings between the first and last frame.
- Start with the first keyframed photo and make any adjustments as you see fit — staying away from the brush tool*. In this step I will usually add some noise reduction (luminance and chroma), a little bit of clarity, bring up the contrast just a bit, and change the white balance settings until the composition has the feel that I’m looking for.* NOTE: LRtimelapse will work with the gradient filter tool and actually adds 3 to the keyframed images. These can be left alone or altered if you feel your composition will benefit from them. Gradient filters are a great way to make enhancements to just a part of the image. For example, you could increase the clarity and color saturation in the area of the Milky Way, leaving the ground or foreground untouched.
- Once you’re finished editing the first keyframed image, it’s time to copy the changes you made to the last keyframed image. Use the keyboard shortcut Shift-Ctrl-C (pressing them together) to bring up the copy settings dialog box. Make sure that all checkboxes are selected by clicking the Check All button, then click Copy. Now go to the last keyframed image (last image in the folder) and press Shift-Ctrl-V to paste the settings you just copied over to this image.


- Now it’s time to enhance the last image to get it to where you want it. Since the changes you made from the first image have already been copied over to this image, you’ll likely find that less tweaking is needed. In either case, make the changes you feel necessary (increasing or decreasing exposure, altering the color temperature, etc.).
- Once you’ve finished enhancing the last image, it’s time to have Lightroom save the changes. Do this by highlighting both the first and last image and then right-clicking over one of them and selecting Metadata –> Save Metadata to File.
- Now go back to LRTimelapse and click Reload (the first button on the second row). This will take just a second or two.
- Now click the Auto Transition button. This tells LRTimelapse to adjust the settings of all images between the first and last image so that the changes are gradual. Once that step is complete, click the XMP Save button to write the changes to the XMP sidecar files.
- Now jump back into Lightroom and highlight all the images in the folder (Ctrl-A). Right-click on any of the images and select Metadata –> Read Metadata from File. This tells Lightroom to load in all the updates that LRTimelapse just made to the XMP sidecar files.
- This will likely take a minute or two. Once completed you’ll probably notice that the thumbnails in view are starting to update themselves to reflect the changes that LRTimelapse made for you as it ramps the settings between the first and last image.
- In Lightroom, make sure you’re in the Library module (pressing the G key will get you there) and click the Export button on the bottom left of the screen. When the Export dialog box opens, select the LRTimelapse option on the left column. This box will send the enhanced images over to LRTimelapse so that LRTimelapse can build your final video from the original images. You’ll need to select the output path where you want LRTimelapse to save your video, then click Export.


- This process will take a while depending on the number of images in your sequence and the speed of your computer, but plan on at least 20–30 minutes. Once the images have been exported you’ll automatically be taken back to LRTimelapse where you can choose the output format for the final video. I suggest rendering in either QuickTime or ProRes format at full 1080p resolution.
- When LRTimelapse is finished, your final time-lapse video will be located in the folder that you selected as the output folder. Navigate to that folder and enjoy!
Capturing and creating time-lapse videos require a great deal of patience, but the steps do become secondary once you have done them a couple of times. There are other workflows that might make more sense when rendering multiple time-lapses sequentially, but for rendering one sequence at a time this is a popular workflow.
I encourage you to make the time to shoot the night sky. In photography it’s often difficult to set yourself apart, but because of the time required to capture time-lapses of the night sky, most photographers don’t bother. This means that you’ll likely be one of only a few in your area doing it. It’s a lot of fun and a great way to stand out in a crowded industry.
About Ron Risman
Ron Risman is an award-winning cinematographer and founder of Cinematic Stories Event Films and Timelapse Moab Workshops. Ron’s client list includes Liberty Mutual, Restoration Hardware, Scorpion Helmets, Revit! Sports International, Berklee College of Music, FOX CT News, WFTV-9 Orlando, and some of his time-lapses can be seen in the 2013 HBO Documentary The Crash Reel.


