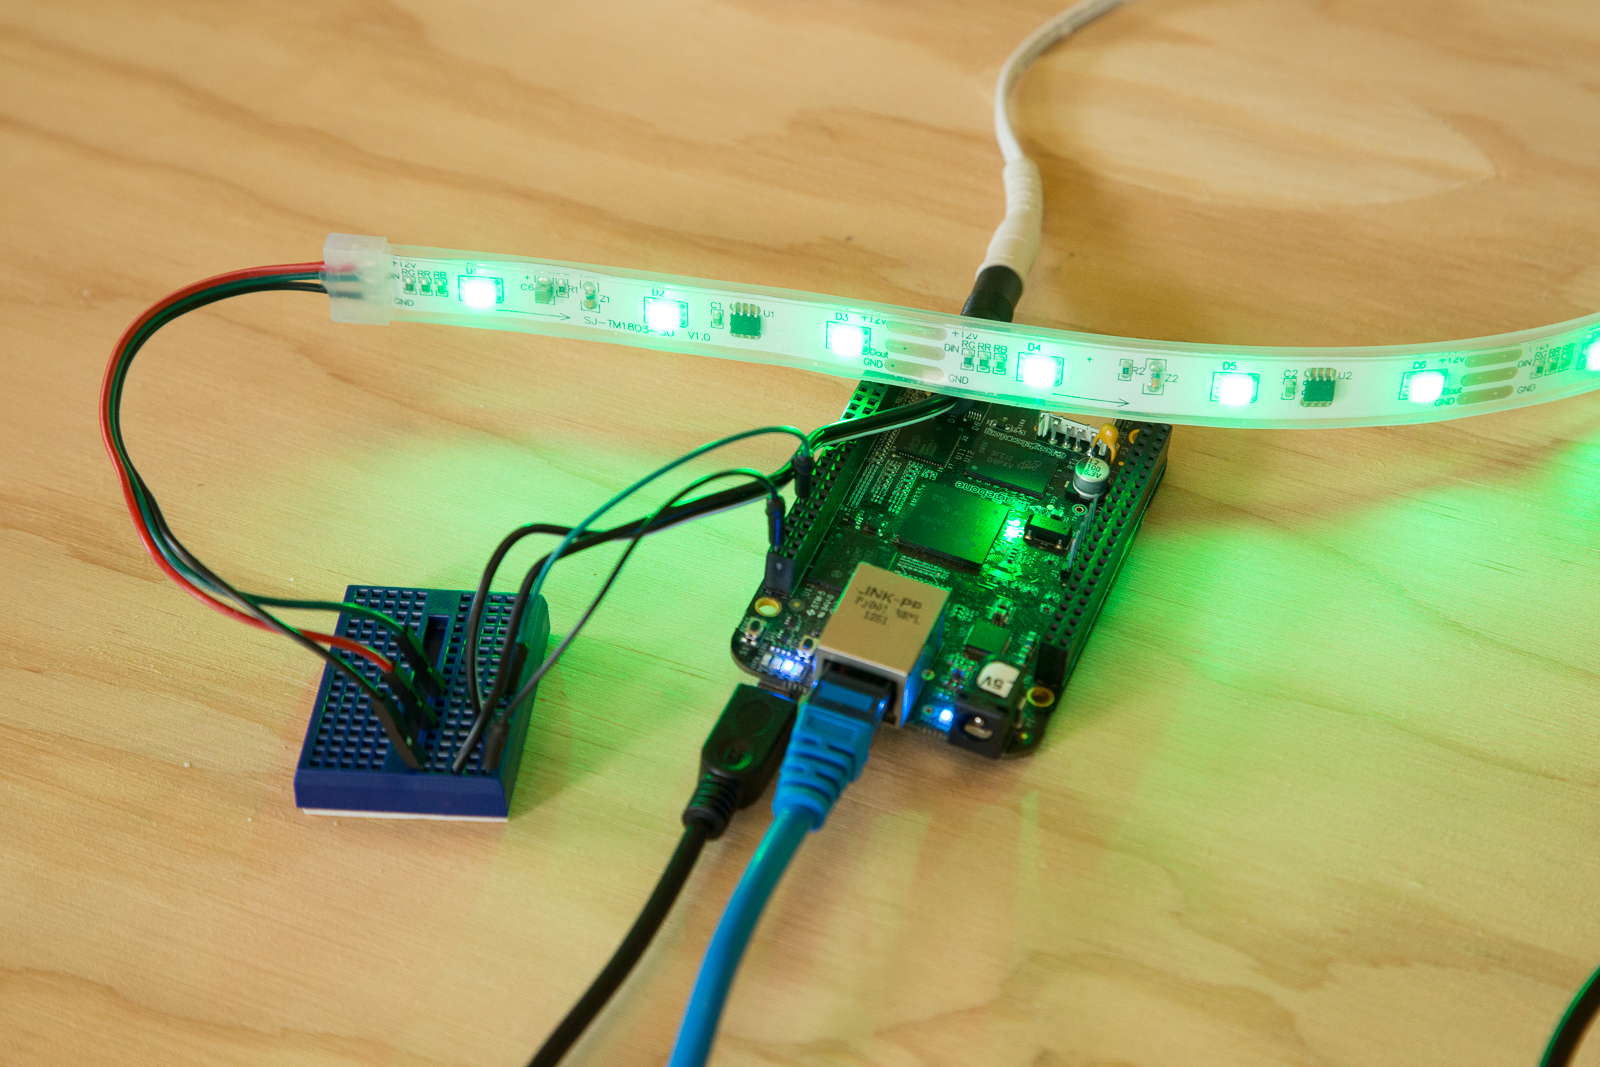
Monitoring network and internet speeds can be a major concern, especially in the case of LAN parties or video streaming. Modern Operating Systems provide utilities to track all the bits and bytes that pass over a network connection, but typically these tools lack obvious visualization. That’s where the Internet Speedometer can help. Using a BeagleBone Black and the power of its two Programable Realtime Units (PRUs), the Internet Speedometer will not only test download times, but also output the speed results visually to the tricolor LED strip.

But what are PRUs and why use them? PRUs are quite possibly the coolest feature of the BeagleBone Black, and one that sets it apart from other single board computers. They function much like microcontrollers; however, the two PRU cores on the BeagleBone Black operate at 200mhz with instructions executing on them at a fixed time of 5NS. That’s fast! What’s more is this speed does not come at a cost to the main processor’s load. Applications run in Linux will not take a performance hit even if there is high PRU activity. The two cores are not completely isolated and can share data between themselves and the CPU making interoperation possible. Programming of the cores is done using assembler in Linux and the execution of code is started by the main CPU. And this sharing of data and signaling features enable clever developers to offload work from the main processor and parallelize their applications. The result is a BeagleBone Black can perform high speed I/O with no performance hit to user experience — other boards simply don’t have this combination.

M41_WP_Speed-7

NOTE: Recently the BeagleBone Black switched Linux distributions from Ångström to Debian, and to anticipate this the Internet Speedometer uses Debian. If your BeagleBone Black is not a Rev C. or is not running Debian, consult our guides for Installing Debian on the BeagleBone Black (for OSX and Windows users).

Project Steps

Programable Real-time Units

The tricolor LED strip from RadioShack comes with support files including example Arduino code and data sheets for the Integrated Circuit controlling the LED segments.

Though the example code is only for Arduino, the data sheets contain necessary timing waveform information for the tricolor LED strip and it was possible to write a custom BeagleBone PRU driver for an LED strip.

In order to run this custom driver, however, the PRUs need to be accessible to Linux. To do this it is necessary to install and configure a library called PyPRUSS, which handles access to the PRU on the BeagleBone Black and is not preinstalled.

Connect the BeagleBone Black

Plug an ethernet cable into the BeagleBone Black and then power the board on by connecting a Mini-USB cable to the BeagleBone Black and your laptop or computer.

Login using SSH to the BeagleBone Black as the root user.

ssh root@192.168.7.2

At the password prompt enter:

root

Note: Windows users can use an SSH program such as PuTTY.

Install PyPRUSS

PyPRUSS is available prepackaged for Ångström, but not for Debian. This means downloading and configuration is necessary to get everything running smoothly.

Login to the BeagleBone Black either over SSH or by attaching a monitor and keyboard.

On the command line clone the git repository of PyPRUSS by typing the following and hitting return:

git clone https://bitbucket.org/intelligentagent/pypruss.git

Change the working directory to the newly cloned PyPRUSS directory:

cd pypruss

Execute the Python setup script, setup.py:

python setup.py install

Then export the library path:

export LD_LIBRARY_PATH=/usr/local/lib

And finally, load the module uio_pruss:

modprobe uio_pruss

Note: If you’re experiencing any issues with this step, consult Step 1 of PyPRUSS repository page.

Install am335x_pru_package

The assembler that is bundled with PyPRUSS does not work properly. Thankfully, the am335x_pru_package does contain a working assembler.

Change working directories back to home:

cd

Clone the am33x_pru_package repository:

git clone https://github.com/beagleboard/am335x_pru_package.git

PASM Setup

Change directories to ~/am335x_pru_package:

cd ~/am335x_pru_package

Compile the assembler:

make

Copy the assembler to the PyPRUSS directory structure:

cp pru_sw/utils/pasm ~/pypruss/PASM/pasm

Device Tree Setup

In order to use the PRUs in Linux a device tree needs to be setup and loaded at boot up. In short, a device tree is a “data structure describing hardware.”

Change directories to /lib/firmware:

cd /lib/firmware

Run the text editor nano:

nano BB-BONE-PRU-00A0.dts

And copy in the lines of code below into nano:

[protected-iframe id=”f93bb3df679254b695c8dd27bdaa4241-30206320-52394698″ info=”https://gist.github.com/interested1/1058b425150226d17077.js” width=”600″ height=”1000″]

Save the device tree file by holding control and pressing o. When prompted to write out the file, simply hit return.

Once saved, quit nano by holding control and pressing x.

Convert the device tree file just created into a .dtbo file using this command:

dtc -@ -O dtb -o BB-BONE-PRU-00A0.dtbo BB-BONE-PRU-00A0.dts

Finally, shutdown the BeagleBone Black so the new device tree files will cleanly load and to allow for safe wiring.

shutdown -h now

Wiring the Tricolor LED Strip

While the power is off connect a jumper wire from pin 12 on the BeagleBone’s P8 header rail to a breadboard. This wire controls the signal from the BeagleBone to the tricolor LED strip.

On the same P8 header rail, connect a jumper wire to pin 2 on the board and the other end to the breadboard. This wire is used for grounding the board and the LED strip. If this wire is not connected the time of the entire circuit will not be in sync and the LED strip will not work as expected.

The tricolor LED strips wires follow a standard color scheme: red for power, green for signal, and black for ground.

Connect the red wire in its own row on the breadboard.

Connect the green wire to the same row as the wire going to pin 12 on the BeagleBone Black.

Connect the black wire to the same row as the wire going to pin 2 on the BeagleBone Black.

With the wall wart unplugged, connect the adaptaplug so the stripes on the plug match the stripes on the wall wart.

Connect the striped wire of the adaptaplug to the same row as the red wire of the LED strip.

Connect the solid black wire of the adaptaplug to the same row as the black wire of the LED strip.

Warning: If the power and ground wires are improperly connected and power is applied, the BeagleBone Black will not function. Before plugging in the wall wart, double and triple check your wiring of the power and ground wires!

Finally, plug in the wall wart to a wall outlet and plug a USB cable between your BeagleBone and your computer.

Capemgr Setup

Now that the wiring is complete and the BeagleBone has been booted up, login as root and load the module uio_pruss:

modprobe uio_pruss

Change working directories to /lib/firmware:

cd /lib/firmware

Export the variables PINS and SLOTS with the following values:

export PINS=/sys/kernel/debug/pinctrl/44e10800.pinmux/pins

export SLOTS=/sys/devices/bone_capemgr.9/slots

Note: Rather than typing out the entire pathname at a command line, tapping the tab button autocompletes the path. Try typing in only the command below and after typing y, type tab:

export PINS=/sy

Autocomplete has its limitations, however, it can save a bit of typing.

Capemgr Setup cont.

Load the PRU by running:

echo BB-BONE-PRU > $SLOTS

Verify the PRU is loaded by checking the following command’s output. It should match image one.

cat $SLOTS

To test out the configuration, navigate back to ~/pypruss/examples/blinkled:

cd ~/pypruss/examples/blinkled

Run blinkled.py:

python blinkled.py

The onboard LED should blink a few times, letting you know it is working.

Install the Speedometer code

Now that we have proper PRU access, we can setup the speedometer code.

Change directories to ~/pypruss/examples:

~/pypruss/examples

Clone the git repository:

git clone https://github.com/Make-Magazine/bb-led-internet-speedometer.git

Change directory to bb-led-internet-speedometer:

cd bb-led-internet-speedometer

Run pyGet.py

Run the Speedometer by running the python script pyGet.py:

sudo python pyGet.py

The pyGet script is configured to download a test file on speedtest.net’s servers that is 10Mb. Under normal circumstances, a file this size will download quickly and the tricolor LED strip will be green. When the download is not as quick, the output color will be orange. And when the download speed is very slow, the output color will be red. (Image 1)

Each time a 10Mb file is downloaded, pyGet.py notes how long it took and stores the result in speed.txt.

Depending on the contents of speed.txt, one of three .bin files is invoked from the pyGet.py script: either red.bin, orange.bin, or green.bin. (Image 2)

NOTE: The speedometer code also contains a blue.bin and a other.bin. The blue.bin is simply an extra color that never gets used by pyGet.py, but is included. The other.bin is used as a failsafe in the conditional statements of pyGet.py.

NOTE: If you want to hack around the code — which is strongly encouraged — remember to run make in the bb-led-internet-speedometer directory or else the code changes will not be compiled into the .bin files.