kitchen floor vacuum former

Vacuum-formed plastic is everywhere, from take-out coffee lids and blister packaging to airplane interior panels. I use vacuum forming to make toy prototypes in my own shop. I usually use a professional machine, but in a pinch I’ve used this ultra-cheap, homebrew rig with great results. You just need to build a simple wooden frame and a hollow box, and then your oven melts the plastic and a household vacuum cleaner supplies the suction. I’ll show you how to build the device and then use it to create a tiki mask that also makes a great Jell-O mold.

[vimeo http://www.vimeo.com/17399990 w=560&h=315]

Project Steps

Make the frame.

Measure the interior of your oven, then subtract a few inches from the width and depth for clearance. This gives the size of the biggest frame you can make, which in turn determines the maximum size sheet of plastic you’ll be able to mold. My oven is 21″ x 16″, so I made an 18″ x 13″ frame.

Measure and cut the lengths of 2 x 4 you need to make your frame, allowing for the thickness of the sides. Make square cuts with your favorite saw: circular, jig, or handsaw. My frame called for two 18″ pieces and two 10″ pieces.

Assemble the frame using 2 screws in each corner, for maximum strength. Drill pilot and clearance holes before fastening, and stagger the screws so as not to split the wood.

NOTE: The only critical feature of the frame is that it must lay flat with no gaps or high spots. This will ensure a good air seal when you vacuum form.

Make the vacuum box.

Calculate the dimensions of a shallow box with a footprint slightly larger than your frame; mine was 20″ x 15″. The height should be enough to let you mount the vacuum nozzle attachment along one side.

When you have the dimensions, cut 4 side pieces and a bottom out of plywood or other material, accounting for material thickness again.

Cut a top panel for the box out of pegboard, large enough to overlap all 4 sides. The pegboard’s holes are used to suck air from under and around the form.

Drill a large hole in the side of the box where you’ll mount the vacuum floor tool. This is the main air vent.

Use screws to assemble the 4 sides of the box, then add the back.

Cut a piece of wood dowel or 2 x 2 to make a post that will support the center of the top panel. During vacuum forming, the top panel tends to bow in, and this support post prevents that, like one of those little plastic “pizza stacks.”

Screw in the center post from the back of the box, then use screws to fasten the pegboard to the box sides.

Mount the vacuum attachment over the side hole with small screws.

Seal all edges with duct tape. Don’t forget the seams around the vacuum tool.

Also tape a border around the top, leaving an open area in the center slightly smaller than your frame.

Plan your form.

For my tiki head, I decided to use rigid urethane foam because it’s easy to cut with woodworking tools, and my surfaces didn’t need to be super smooth. But you can make your form out of nearly anything. Here are some other possibilities:

Wood is a good choice: it’s cheap; easy to drill, saw, and sand; and strong enough to form many parts.

For finely detailed forms, you can sculpt clay and then cast liquid plaster all around it. After the plaster hardens, remove the clay and drill air vents (see the next step). Parts made with this “female” mold will have details that match your clay original perfectly.

Found objects are a great source of shapes and details. You can add small plastic letters, caps and lids, or pieces of toys onto forms.

When designing a vacuum-form mold, there are a few guidelines to follow:

Avoid undercuts. Otherwise the plastic will wrap around underneath your form, trapping it.

Maintain some draft. For easier part release, avoid using vertical sides. Make your form with a few degrees of angle (draft) on all sides.

Add height. If you’ll trim your part away from the sheet, add a little extra height to the form, so that your part won’t have any unformed edges.
Make the form.

I cut my tiki’s profile using a bandsaw and made its basic shape with a small X-Acto saw. After sanding and filing the shape smooth, I carved in features and details with a Dremel tool, then used a set of model maker’s “dental tools” for the smallest grooves and details.

If your form has concave parts, use an extra long 1/16″ drill bit to drill a series of 1/16″ holes completely through at the bottoms (at the surface’s local minima). These vents will allow the softened plastic to be sucked into the details.

NOTE: Long 1/16″ drill bits are useful but fragile. Their flutes are only on the end of the shaft, so you have to be careful. Drill only partway, withdraw the drill to free the chips, then reinsert and drill some more. Repeat until you’ve drilled completely through.

Set everything up.

Set up on the kitchen floor near your oven. Hook the vacuum cleaner up to the vacuum box nozzle, and test. The pegboard top should act like an air hockey table, but in reverse.

Place your form onto the box. To help air flow under the mold, rest it on top of some coins as spacers. You can also put it on a piece of window screen.

Mount the plastic.

Measure the plastic to just fit over your frame. Cut it down to size by scoring with a sharp knife, then bending it backward to snap along the score.

WARNING: Avoid using a table saw to cut plastic. If you must use one, install a special plastic-cutting blade.

Place the plastic over the frame and staple liberally. Don’t skimp; the softened plastic will try to pull away, so you need to staple every inch or so.

Melt the plastic.

Place the frame in the oven, plastic side up, 4″–5″ inches away from the broiler. Have your oven mitts ready, and set the broiler on high. Watch the plastic throughout its warming sequence, and be careful! First it will look wavy, then it will relax back flat, and finally the plastic will begin to sag in the center.

Test the plastic by pressing down near a corner with a pencil eraser or chopstick: if it’s soft, it’s ready to remove. If left too long under the heating element, the plastic will continue to melt, then smoke and burn!

This part sucks!

With your mitts on, remove the frame from the oven and flip it, plastic side down. Quickly and carefully place it over the form and press down. When the frame is pressed firmly flat against the top of the box, switch on the vacuum. Whoosh! The plastic is instantly sucked down over the form by vacuum power.

If your part has some intricate detail or a hard-to-mold feature, use a heat gun to soften the plastic in that area. Be careful, though — you could melt a hole right through the plastic.

Continue pressing down on the frame for 20 more seconds with the vacuum on, until the plastic has cooled. Then turn it off and lift up the frame. Your form may fall out, but typically it will stay inside the formed plastic.

To remove the form, press on the back gently, or tap one edge of the frame firmly on a table or counter so that the form can fall away freely. You may even have to (carefully) pry the form out a little at a time with a screwdriver or knife.

Trim and finish.

Carefully remove the plastic from the frame. Look out for sharp staples!

With a sharp knife or plastic scribe, score the plastic part to ready it for removal from the rest of the plastic. For a more precise trim, start by using a surface gauge to scribe a mark all the way around the part.

NOTE: If you need a lip on your part, trace around the shape, leaving a flat border all around.

Clean up the edges of the plastic with sandpaper, and trim as needed for your final application. That’s it — you’re done! But while you’re at it, why not mold a few more?

Fun with Molds

Like any plastic mold, this mask has many applications, many of which happen to be party-related:

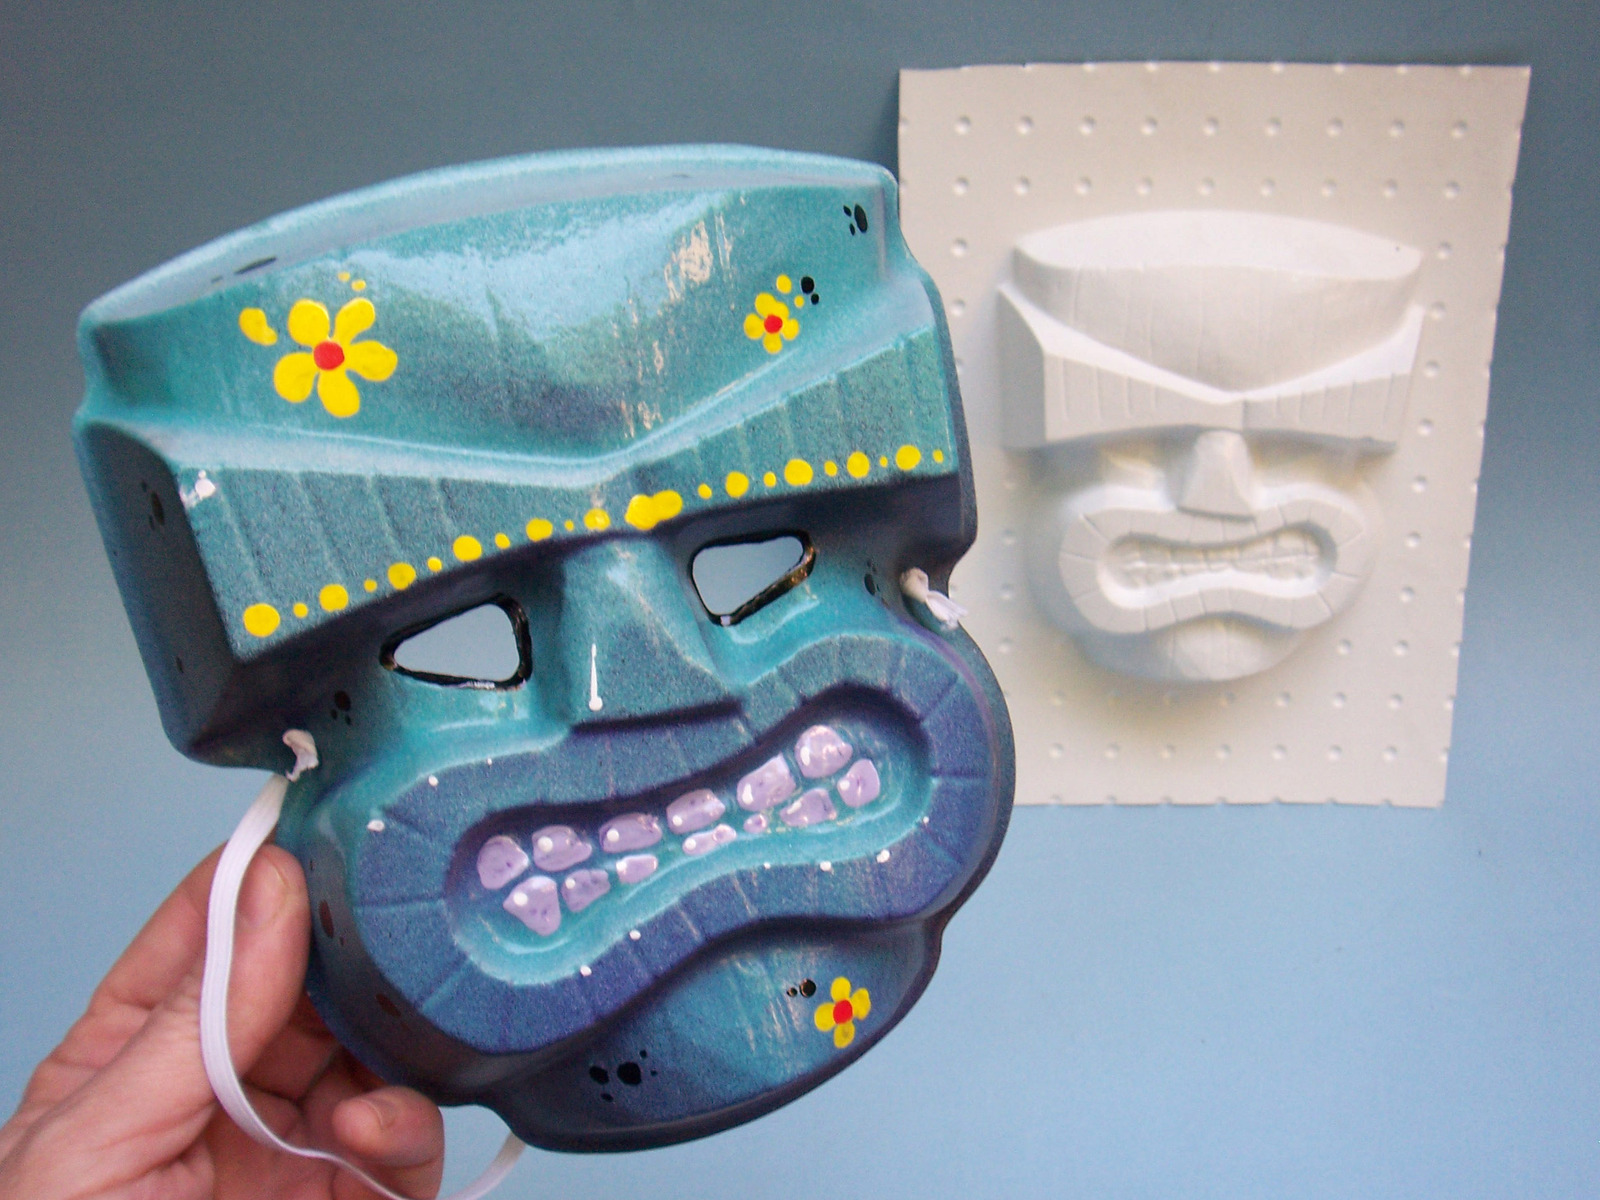
Paint and add elastic to make the mask wearable.

Use untrimmed, unpainted masks to make tiki-shaped Jell-O molds and punch bowl ice blocks for your next luau.

Glue two masks back-to-back and install a bulb inside to make a glowing tiki lamp.

Or enclose small speakers for an outdoor sound system.

What will you make with your Guerrilla Vacuum Former?

Conclusion

Related posts on Make: Online:

How to make a vacuum form table

http://blog.makezine.com/archive/2005/09...

DIY Vacuum Former

http://blog.makezine.com/archive/2010/07...

This project first appeared in MAKE Volume 11.