


“Percusso” isn’t a real set of percussion instruments and it’s probably too noisy to accompany serious music. But it’s a ton of fun to play with, and can suggest some creative licks. Some sounds are recognizable — the snare drum (The Laptop by Rhythm Tech), the maraca, a triangle, and a shaken tambourine — but that’s about it. The other “instruments” — BBs in a tomato sauce can, a 4-sided block, popcorn in a Chobani yogurt container, a mallet and damper for the tambourine, Tic Tacs, and my editor’s favorite, a red mallet hammering on a 10″ pizza box — mostly just make interesting noises (Figure A).
They’re all computer-controlled by my Yamaha P-105 digital piano via MIDI. I’ve temporarily dedicated 12 high notes of that keyboard to Percusso. MIDI, if you don’t know by now, is how computers and (typically) musical devices communicate. With the proper hardware and software, any key on a digital keyboard can be “mapped” to play another electronic musical or percussive instrument — or most any electromechanical thing.
MIDI signals can control solenoids, which is what I’ve done here, or lights, valves, relays, electro-pneumatic devices, motors (stepper and ordinary), and more. Scary Halloween scenes and Christmas light extravaganzas are often controlled by MIDI. (More about MIDI later.)

Tips, Tools, and Materials for Using Solenoids for Percussion
1. Try to make the solenoid plungers (cores), and whatever is connected to them, move with as little friction as possible and with enough travel to hit or shake something. Keep parts in alignment. Don’t depend on the solenoid for too much strength or stroke.
2. When a solenoid plunger returns after making a percussive strike, you may not want to hear its return noise. To keep these incidental noises to a minimum, plan to use lots of foam between and around parts that hit each other. Use springs that are easily compressible, yet quickly return the plungers to their home positions.
3. The solenoids I bought are “pull” type, but the “push” end of the solenoid is usable too by enlarging a small hole in the other end of the housing.
4. Different sound modules may need different voltages. 12V DC seems adequate to do simple horizontal movements, but you may need 18V to 24V to do vertical, elaborate, longer, or stronger movements.
5. Ensure your power supplies can supply adequate current to the solenoids. If you plan to drive several simultaneously, the current is additive. I find playing no more than 2 instruments simultaneously to be satisfactory.
6. Connect MIDIWidget and the noise modules with RCA plugs, sockets,
and cable.
7. Add diodes across the solenoids to minimize transient voltage spikes. Watch their polarity.
Building Percusso
I chose my instruments largely by what I had on hand. I did buy a triangle because Percusso seemed to need something tinkly to go with the other sounds.
After much trial-and-mostly-error experimentation, I settled on the noisemakers and sketched a tentative physical arrangement. Since my music studio is pretty full of, um, stuff already, I decided on a vertical layout, with the smallest instruments on top and the larger ones near the bottom. The whole shebang doesn’t take up very much floor space and can be moved relatively easily. I used a 4-foot piece of 2″-diameter PVC pipe for the main support structure, cutting ½”-wide slots in it to hold the percussion instruments. Two half-lap-jointed pieces of ½” plywood serve as legs.
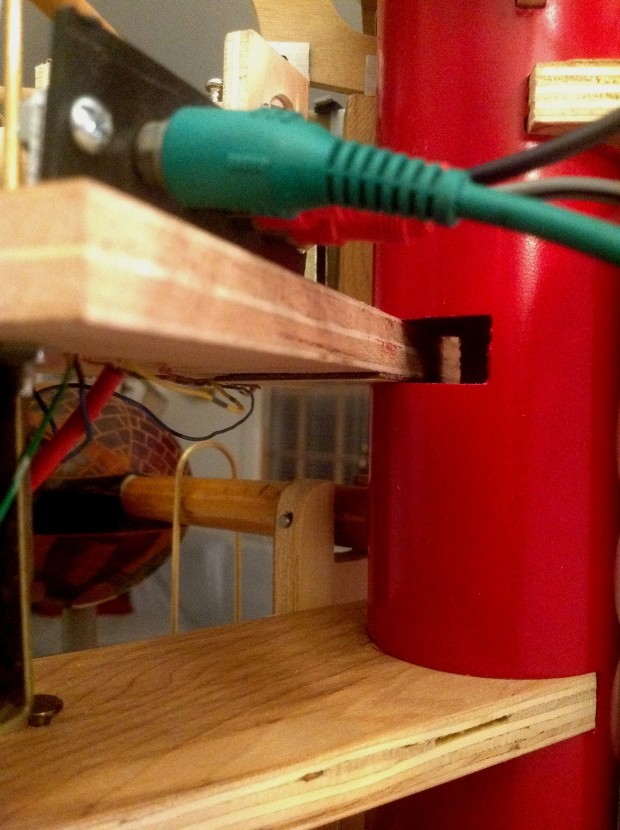
For assembly, portability, and trouble-shooting, I wanted the instruments to be self-contained, easily removable modules. Each module includes a sound-creator, its solenoid, the mechanical strikers and pivots, an RCA jack, and a mounting surface, generally ½” plywood (Figures B, C, D, and E).


Since the different instruments need to be shaken or struck in different ways, I improvised several strikers, brackets, and linkages to the solenoids. These I made primarily from standard sizes of aluminum and wood.
The most challenging mechanism was the maraca shaker. Shaking a maraca by hand requires a bit of wrist motion to sync the beans’ movements in the shell. Human wrists turn out to be rather tricky to emulate with a solenoid, so I added a spring and some padding here and there. The solenoid actually lifts the maraca’s shell, and its handle pivots at its far end, so 24V DC were necessary. The keyboard should be played in sync with the natural rattle of the beans.
Interface Board

My computer and solenoids are interfaced with John Staskevich’s MIDIWidget (Figure F). It’s widely available now, but I got mine as an early reward from his Kickstarter campaign. John has mass-produced many similar products, such as the MD24 decoders I used for my MIDI marimba (watch it below). Check out some of his other activities at highlyliquid.com and codeandcopper.com.

MIDIWidget, which can control up to 24 devices, is quite easy to use and eliminates the arcane programming associated with earlier interfaces. I connected MIDIWidget to my computer, launched its software configurator (where the keyboard notes are mapped to the solenoids), and connected my solenoid control circuits to MIDIWidget. I elected to pay a bit more for the screw terminals (I used half of them) and highly recommend this. The board receives power either via USB or a 5V DC regulated supply and comes with a standard MIDI connector.
The MIDIWidget’s signals are tiny 5V pulses not strong enough to directly drive solenoids or anything that requires significant current, such as motors or relays. John recommends using a Darlington transistor array chip ULN2803A between MIDIWidget and solenoids, but I had a bunch of TIP120 Darlington transistors, so I used them instead. Bonus: Each TIP120 can handle more current than a single output of the ULN2803A. When MIDIWidget decodes a MIDI stream, the Darlingtons amplify the 5V pulses to drive the higher-current devices. Figure G shows the circuitry necessary for each note.

My solenoids run on 12V–24V DC and draw a fair amount of current, so I used a couple of beefy power supplies (12V and 24V DC) I had on hand. Most wall-warts won’t be up to this task unless they’re switching power supplies with higher rated loads.
Software
A computer records what’s being played on a digital keyboard using MIDI sequencing software. MIDI sequencers can handle far more than the 12 tracks I can record for Percusso. Fortunately, you don’t need to know how to play a keyboard: Think of the keys as just a bunch of sophisticated switches that turn stuff on and off.
You can play and edit a MIDI “performance” with basic software. To include audio (.wav or .mp3 files), you’ll need Digital Audio Workstation (DAW) software, which is more sophisticated. With a DAW, your audio and MIDI tracks (sequences of signals) can be synced to each other.
I use an ancient DAW — Home Studio 2002 by Cakewalk — which runs fine under Windows 7. Cakewalk’s newer offering is SONAR. Other people like Steinberg’s Cubase MIDI sequencing software. Anvil Studio offers a free sequencer that can record unlimited MIDI tracks and two 1-minute audio tracks. For another $20, you can add up to 8 audio tracks.
Should you decide to build your own version of Percusso, I urge you to experiment, be creative, and plan to make lots of mistakes. Most of all, have fun!


