


“Cool! But what the heck makes them move forward?!”
When I first read about Bob Knetzger’s “Hog Holler” toy in Make: Volume 41, I was captivated. I knew I had to make something similar for my 6th-grade science students to investigate. The concept seemed simple: vibrations from the player’s voice jiggled a platform, causing little plastic “hogs” to move down a path. But wouldn’t their movements be random, not directional? Perhaps the path angled slightly downhill? Hmmm.
I contacted Bob and he explained that angled “legs” are the key to directional movement. Folk toys often used broom bristles or thin wooden strips, he explained. Aha! Progress.

The next problem was devising a new source of vibrations. Initially, I banged drumsticks on a large plastic pan, which did move my critters forward. Still, I sought a more consistent vibration. I considered speakers playing set tones, or motors with off-center weights attached to their shafts. After making little progress, I again reached out to Bob. He sent me a video in which the teeth of a gear turned by hand engaged the edge of the track. How simple! Here’s my classroom version of Bob’s invention.
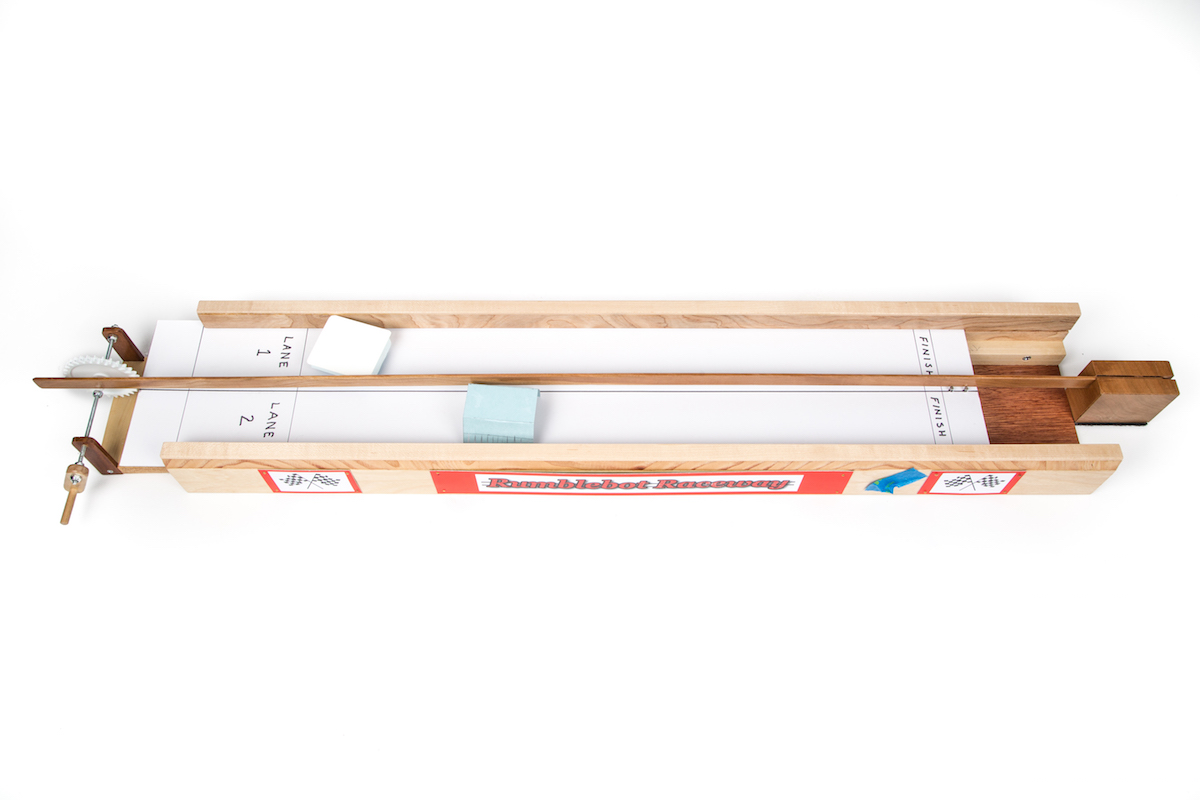
My Rumblebot Raceway
The vibrating track is a 6″×30″ piece of poster board, about 1/16″ thick, as shown below.

This track rests in table saw blade grooves cut into 2 wooden sides made from ¾” plywood, 32″ long and 6″ tall. The grooves begin about 1½” up from the bottom and are about 3/8″ deep. (None of these exact dimensions are crucial.)
A wooden strip, cantilevered over the track, creates 2 lanes for the racers.
A single gear about 2½” in diameter, mounted on an axle, grates against one end of the track to drive my Rumblebots. A freestanding base allows adjustment of the gear’s position on the track.

The Rumblebots
For the bots themselves, I settled on two basic designs. In the first, I cut a block of styrofoam to fit in a given lane. On its bottom, I cut angled grooves with a razor saw, perpendicular to its length. Into these grooves I placed paper, cardboard, pine needles, pins — most anything imaginable — to serve as legs:

In the second design, I took index cards and angled the front and back in similar directions. I then cut wedge-shaped legs on the front and back, as shown below.

Rumblebot Racers — A Family Science Project
I offered Rumblebot Racers as a Family Science project to my 6th graders. This means it was not required, nor were any rewards (candy, extra credit) given. Rather, the joy of learning was the motivator for students. I encouraged them to work with friends or family members. I made them a video to explain the project:

Nineteen students built rumblebots. Two of our custodians even participated. (Their first design featured porcupine quill legs!) Many of my students, taking my suggestion of researching “bristlebots,” used toothbrushes. To my dismay, I finished second to one of my students! Here is Alex with her winning rumblebot:


How Do Students Benefit?
Here’s what Alex had to say about the project: “I watched the video and made a list of materials I needed. I followed your suggestion on the video and researched Bristlebots. I saw they were made from toothbrushes and motors. I tried using some old, used toothbrushes, and also hairbrushes. Toothbrushes worked best. The toothbrush tipped over easily, so I attached a cardboard top to keep it upright. To test my rumblebots, I placed a piece of cardboard over two pencils and tapped on the cardboard. Once I knew they worked, my mom bought some new toothbrushes. I tried connecting two and three together, but one by itself worked best for me. I liked beating Mr. Stith!”

Another student, Felicia, built a bot (above) that did not move forward, only bounced up and down. Her design problem? Vertical legs. Did this mean Felicia’s effort was a waste of time? “I still had fun thinking up my own design, and I’m glad I did the project. I saw that when we put the Q-tips into the block at an angle, it did move forward!” (Learning achievement unlocked!)
The world our students inhabit grows more and more virtual every year. Much of what they experience is through a screen. I love seeing students manipulate materials according to their own designs (as opposed to fitting one Lego into another). You can see all the student rumblebot designs and watch actual races below:

Next, I’ll challenge my students to create Rumblebot Sumos (push opponents out of a central zone) and a Rumblebot U-Turn (execute a half-circle turn, and exit the surface on the same edge as they started). Who knows what projects my students may soon be designing for others?


