Photos: Tristan Copley Smith
This article is from the pages of Make: Magazine Vol. 75. Subscribe today!

Here’s how to make a highly efficient, cheap, and easy-to-build rocket stove, optimized for cooking in off-grid environments. It can be made in less than an hour from a couple dollars’ worth of easily sourced, mostly scrap materials.

This is a good option for homesteaders, preppers, survivalists, and anyone camping or living off grid, but it’s also useful and fast to deploy in disaster areas and refugee camps.

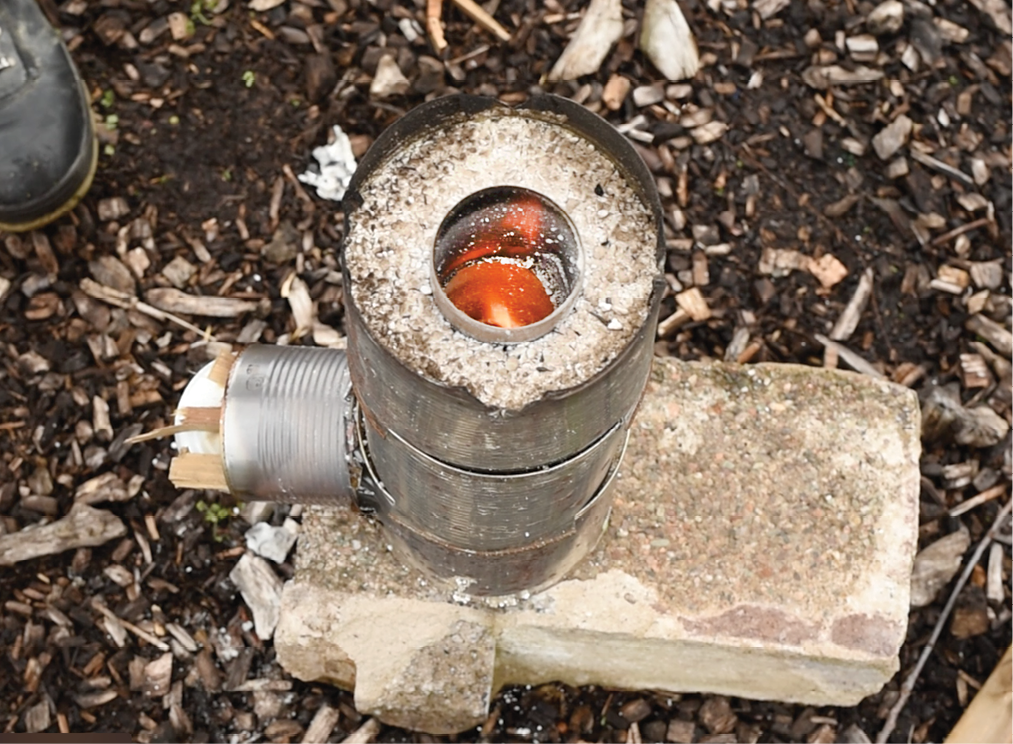
Rocket Stove: How It Works

Illustration: artinspiring and Oqvector

Rocket stoves burn hot but consume only half the fuel of other woodstoves, for two key reasons: efficient combustion, and efficient direction of heat. This makes them healthier too: They emit little or no smoke, and far less particulate pollution and carbon monoxide.

  1. Small-diameter fuel — sticks burn more efficiently than large pieces of wood, and extinguish quickly when cooking’s done
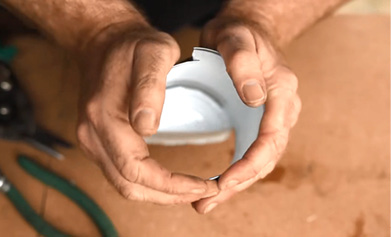
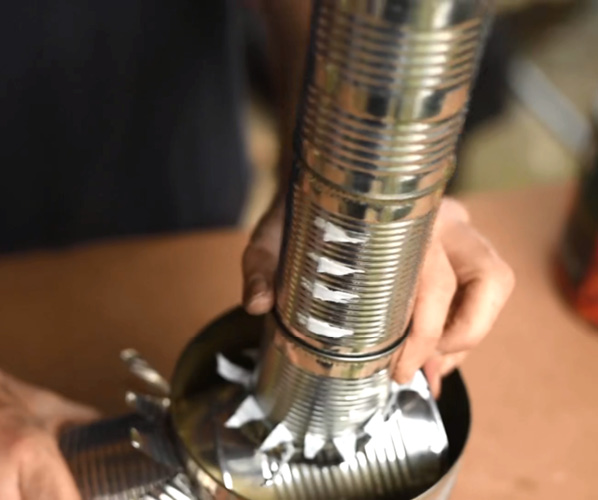
  2. Combustion chamber — elbow-shaped L-tube for horizontal fuel feed and vertical heat direction; aka burn tube
  3. Fuel shelf — admits small fuels only, allows airflow beneath
  4. Air gap — provides high air-to-fuel ratio for efficient combustion
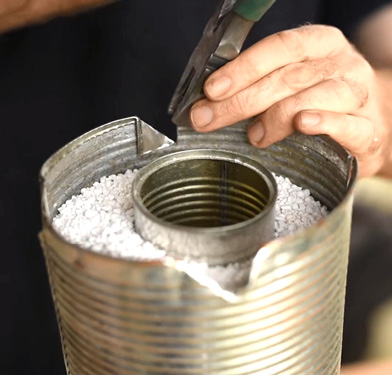
  5. Insulated chimney — increases air draft and directs heat to cookware; confines wood gases and smoke in high heat for near-total combustion.

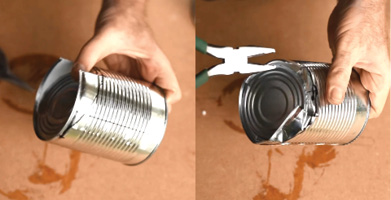
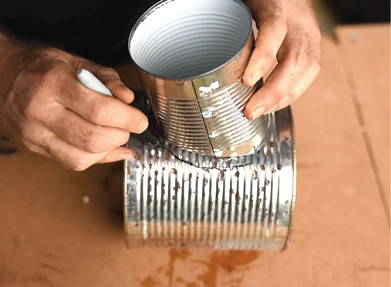
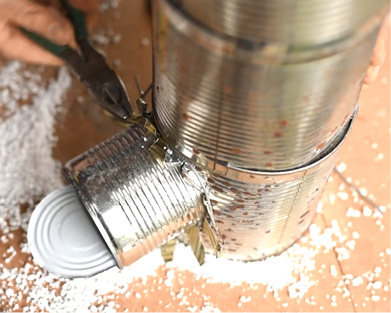
BUILD YOUR ROCKET STOVE

Before you begin, please watch my assembly video, and put on your work gloves.

YouTube player

FEEL THE BURN

It’s important the first time you light your rocket stove to do so outside, in a ventilated area, as that first fire will burn off all the plastics and other chemicals in the cans. After about 10–15 minutes of running at full temperature, that stuff should all be gone and the stove can be used in more enclosed spaces thereafter.

FEEDING FUEL

The best fuel for your rocket stove is dry, untreated wood, a couple of centimeters square and about 20cm–30cm long. This can be split kindling, or sticks and small branches.

Ideally you only want to have two or three pieces of wood in the stove at a time, as overfilling it will reduce the space for airflow. The ideal configuration is where the tube is about one-quarter full of hot coals (once it’s been running for some minutes to produce them) and one-quarter full of wood that’s fully ablaze, leaving half the space for air, as this will produce maximum flame, temperature, and efficiency .

Keep feeding the wood toward the back as it burns, adding a new piece when it’s fully burned away.

LIGHT IT UP

To light, place some paper or other tinder in the burn tube, followed by a few small sticks or splinters of kindling, followed by two or three larger pieces. It’s usually easiest to then light the tinder with a lighter or match through the air gap at the bottom.

The stove will produce smoke for the first couple of minutes, but this will reduce to almost zero as it comes up to peak temperature. If you see smoke after that, it usually means the fire is burning out and needs more fuel.

The stove should use about 80% less wood than an equivalent open fire, and produce greatly less smoke and emissions. The coals will burn completely to ash, and what little is left behind can be dispersed by blowing into the burn tube. I haven’t found cleaning to be much of an issue. 

Ask questions and post your build on the Facebook Group, and find more low-tech projects at opensourcelowtech.org.

Project Steps

SHAPE THE COMBUSTION CHAMBER

Take one of your medium sized cans and use a can opener to cut through the bottom, about three quarters of the way around the inside circumference.

Draw a curved line that starts and ends at each end of that cut, coming in at roughly a 30° angle, up the wall of the can. Then draw two vertical lines that divide your curved lines into rough thirds.

Pull the can bottom outward a little so it’s out of the way, and cut the two lines up to the level of the curve.

Push that center tab of metal you just cut into the can, and push the can bottom down onto that.

Use pliers to bend the two outer, triangular tabs down to lock everything in place.

CUT THE LOWER INSULATION JACKET

Take a large can, and place the 30° angled base of your medium can against it, centered about halfway up the wall. Draw a curve around the medium can onto the large one.

Draw a star of lines across the resulting oval to divide it into 12 sections.

Use the can opener or tinsnips to punch a hole in the center of the star, then use tinsnips to cut all the lines, being careful not to cut your hands on the metal. Bend all 12 sections out with pliers.

Check that the medium can will fit within this hole, sloping down/out at a 30° angle. Enlarge the hole if needed, but keep it tight; you don’t want more of a gap than necessary.

ATTACH THE CHIMNEY

Take a small can and remove the top and bottom with the can opener. Place the small can on top of the combustion chamber (medium can) at a 30° angle (on the intact side, away from the bent tabs), and draw around it. Again mark, cut, and bend out 12 slice sections to open up the hole.

Insert the small can into this hole so its base is just within the wall of the medium can, not protruding into it more than necessary. Place a loop of twisting wire around the outside of the triangle slices. Use pliers to twist the wire tight so that it holds the small can in place.

Bend down the tips of the triangles so they lock the wire in place.

MAKE THE FUEL/AIR FEED TUBE

Take the remaining medium can and, with the can opener, make a cut about two thirds of the way around the inside circumference of the can’s base, and then another smaller cut, leaving 2cm gaps of uncut metal in between.

Bend the resulting larger flap of metal outward to about 90° or so, to make a little shelf for your pieces of wood to rest on.
The bottom cut is an air gap, to let in air to feed the base of the fire. You can bend it inward slightly to open it.

Use the can opener to cut out and remove the top of the can if it’s not already. With the tinsnips, make a 1cm cut in the wall of the can opposite the shelf, and bend the wall inward a little so that the can will fit inside the other medium can (the combustion chamber).

ASSEMBLE THE STOVE

Place the combustion chamber into the large can so that the opening of the medium can protrudes slightly through the star cut in the large can.

Place the combustion chamber into the large can so that the opening of the medium can protrudes slightly through the star cut in the large can.

Twist the feed tube so that the shelf is horizontal, with the air gap slit at the bottom.

FINISH THE CHIMNEY

Remove the tops and bottoms from the two remaining small cans. Cut 1cm slices into one end of each can.

Connect these cans to each other in the same way as previous.

Then connect these two to the open top of the small can in the combustion chamber assembly.

FINISH THE OUTER JACKET

Remove the tops and bottoms from the remaining two large cans.

Make four 1cm cuts evenly spaced around one end of each. Bend two of the resulting tabs inward slightly, and the other two outward slightly.

Drop first one and then the other onto the top of the assembled large can, so that the inward tabs are inside of the can beneath, and the outward tabs are outside.

The three large cans are now stacked and connected to each other. The stack is strong in terms of supporting downward force from heavy pots set on top of the stove, but it’s not strongly locked together, so be careful when you pick the stove up that it doesn’t come apart. The insulation should keep the outside surface from becoming too hot, so you may want to use tape or rivets to attach the large cans, but if the connections are tight enough then this shouldn’t be necessary.

Twist a loop of wire around the star sections holding the protruding feed/burn tube so it’s held in place at about a 30° downward angle. This is so that the coals drain forward, don’t clog the back of the burn tube, and burn the full length of the wood, producing more flame and increasing the efficiency.

Fold the tips of the triangles back so they lock off the wire and are less of a hazard.

INSULATE YOUR ROCKET STOVE

Start filling the space between the small and large cans with perlite, or whatever you’re using as insulation. Keep everything aligned, with the medium cans on their 30° downward angle and the small cans centered in the large, while you use a short stick to push down and compress the insulation as you go.

CUT THE POT SUPPORTS/FLAME GAPS

Finally, make four cuts of about 3cm–5cm into the top edge of the outer jacket, and fold down triangles of metal on each side of all of them. This provides exit gaps for the flame, and reinforces the resulting tabs so that they can hold larger weights without folding.