Intro GIF 1

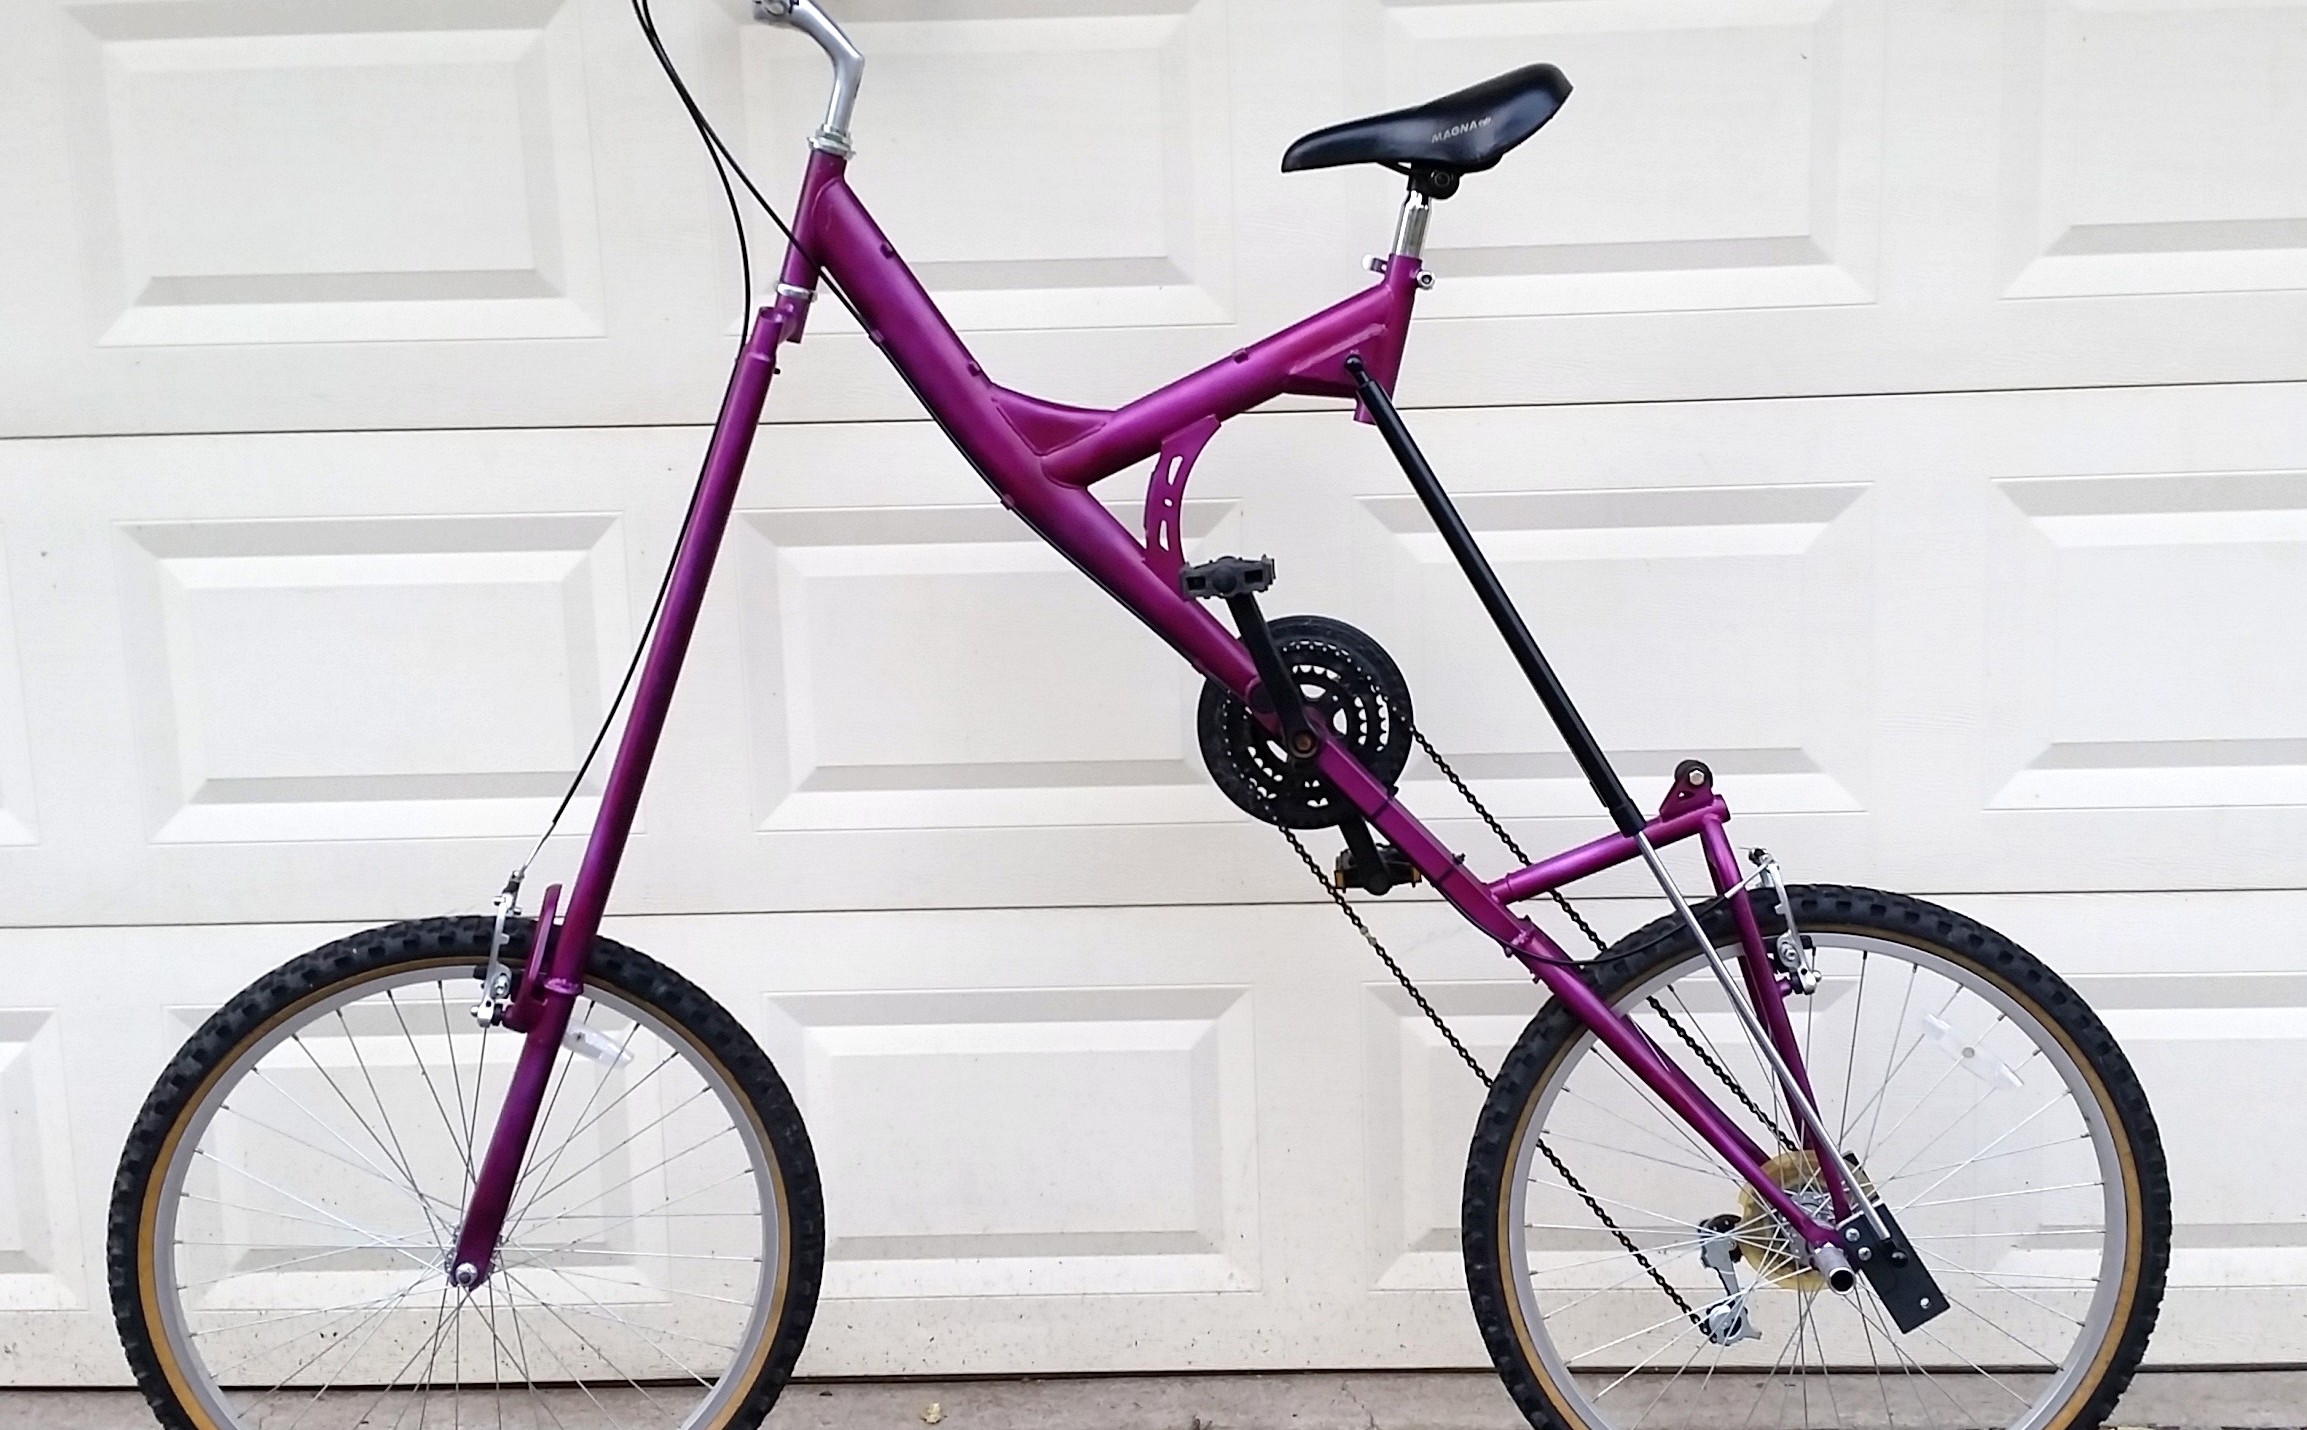
This bike transforms from a tall bike to a chopper (and back) while you ride it! It is made with a full suspension mountain bike and a set of gas shocks. The spring on the mountain bike is removed to allow the bike to pivot, the fork and rear triangle of the bike are extended. The gas shocks are extended when the bike in the tall position and compressed in the chopper position.

The following describes the general steps for building this type of bike. Specific materials and sizes used will vary depending on what materials you have access to, the specific bike used, and the rider’s size.

tall chopper bike

YouTube player

Project Steps

Remove components from the bike

The components of the bike were removed before cutting and welding.

The cranks were removed with a crank puller tool.

More common tools were used on the other parts of the bike (wire cutters, an adjustable wrench, allen/hex keys).

The shocks were removed from the fork as well.

Cut the bike

The bike was cut behind the bottom bracket, and a grinder was used to clean up the cuts before welding the extension piece.

Extend the rear triangle

A scrap piece of rectangular steel 10.5″ long was used to extend the rear triangle.

Extend the fork

Two pieces of 2′ long steel pipe were used to extend the fork.

Which gas shocks to use?

Distances between potential mounting points on the bike were measured to find possible extended and compressed lengths for gas shocks. The wheels and seat were reinstalled to make this process easier, and the cranks and pedals were reinstalled to make sure they would not hit the shocks in either position.

Gas shocks with 37″ extended length and 20″ compressed length were used.

What force gas shocks to use?

The gas shocks used on this bike each have a force of 90lbs. The rider weighs 120lbs, which is 66% of the total force of the shocks. This works well for riding slowly, but riding faster over small bumps and cracks in the road makes the bike slowly compress. Locking shocks or higher force shocks may help in this regard.

Mount gas shocks

The top end of the gas shocks are mounted in the center of the triangular part of the bike frame near the seat. The gas shocks came with metal socket end fittings and 5/16″ threaded ball studs. A 5/16″ coupling nut was welded to a piece of ¼” steel cut to fit into the triangle and welded onto the bike.

The bottom end of the gas shocks are mounted to a similar steel plate that is attached to the bikes rear rack mounting holes with screws.

Putting the bike back together: chain

The shifters were not reinstalled, making the bike single speed. The rear derailleur was used as a chain tensioner and a small piece of wire was used to lock it in position. Two new chains were combined to make a single large chain.

Putting the bike back together: brakes

New 78″ brake cables were used; the back cable used the existing cable standoffs and zip ties to hold it in place. The front brake cable used a single zip tie to hold it in place.

Finishing touches

The bike was stripped and repainted; a BMX bike peg was added to the left side as a step for getting on the bike.