Becky Stern is a Content Creator at Autodesk/Instructables, and part time faculty at New York’s School of Visual Arts Products of Design grad program. Making and sharing are her two biggest passions, and she's created hundreds of free online DIY tutorials and videos, mostly about technology and its intersection with crafts. Find her @bekathwia on YouTube/Twitter/Instagram.
That’s a nice little tutorial. Well targeted for electronics use. I have a dial caliper I use for machining since I like to do things by feel. Take a little off, see how much the needle moves kind of thing. I find when machining you get a feel for how much to move the tool by hand this way. This makes me want to get a good digital set now though for other uses.
Jamesmynamesays:
I agree, nice tutorial. I put my first pair of calipers (digital) on my Xmas list this year. This tutorial showed a few uses I hadn’t thought of offhand.
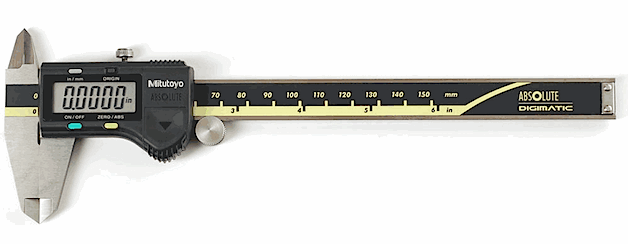
Could someone tell me how much depth they can measure with that end attachment? Does it run the length of the caliper?
japroachsays:
James, its the full length so you can measure 6in/15cm depth. Search for some pictures of the back to see how it sits in a channel.
Capnsays:
The “get a good tight grip” isn’t what your supposed to do. In any high tolerance, or machinist level work you do NOT get a good tight grip on your part. You however are supposed to have the part be able to move with only a slight drag on the caliper. This way you avoid any measurement error produced by the deflection of the part or caliper. For metal measurements, this is pretty low, however if you are working with any soft material, it can be up to 0.005″.
Also Mitutoyo are not the best calipers one can buy, they are a pretty good digital caliper, but best caliper it isn’t. The absolute best caliper is a vernier caliper made by Brown and Stone. They may not be digital but they are worth their weight in gold. All of my machinists use Brown and Stone and they swear by them, even after 20+ years of owning them.
jdmorsesays:
What a nice, straight-forward tutorial. As a tool & die maker I’ve been using these things for 30 some years and this has taught me a new trick! The pin-to-pin trick would work just fine on hole-to-hole (assuming equal size holes). The pair I currently use is identical to the ones pictured but I have owned Brown & Sharpe, Starret and others. I seem to keep coming back to Mititoyo. I believe it’s a matter of personal preference over what’s best, although there are many poor models/brands you could buy.
Becky Stern is a Content Creator at Autodesk/Instructables, and part time faculty at New York’s School of Visual Arts Products of Design grad program. Making and sharing are her two biggest passions, and she's created hundreds of free online DIY tutorials and videos, mostly about technology and its intersection with crafts. Find her @bekathwia on YouTube/Twitter/Instagram.
Our websites use cookies to improve your browsing experience. Some of these are essential for the basic functionalities of our websites. In addition, we use third-party cookies to help us analyze and understand usage. These will be stored in your browser only with your consent and you have the option to opt-out. Your choice here will be recorded for all Make.co Websites.
Allow Non-Necessary Cookies
Escape to an island of imagination + innovation as Maker Faire Bay Area returns for its 15th iteration!
Buy Tickets today! SAVE 15% and lock-in your preferred date(s).


That’s a nice little tutorial. Well targeted for electronics use. I have a dial caliper I use for machining since I like to do things by feel. Take a little off, see how much the needle moves kind of thing. I find when machining you get a feel for how much to move the tool by hand this way. This makes me want to get a good digital set now though for other uses.
I agree, nice tutorial. I put my first pair of calipers (digital) on my Xmas list this year. This tutorial showed a few uses I hadn’t thought of offhand.
Could someone tell me how much depth they can measure with that end attachment? Does it run the length of the caliper?
James, its the full length so you can measure 6in/15cm depth. Search for some pictures of the back to see how it sits in a channel.
The “get a good tight grip” isn’t what your supposed to do. In any high tolerance, or machinist level work you do NOT get a good tight grip on your part. You however are supposed to have the part be able to move with only a slight drag on the caliper. This way you avoid any measurement error produced by the deflection of the part or caliper. For metal measurements, this is pretty low, however if you are working with any soft material, it can be up to 0.005″.
Also Mitutoyo are not the best calipers one can buy, they are a pretty good digital caliper, but best caliper it isn’t. The absolute best caliper is a vernier caliper made by Brown and Stone. They may not be digital but they are worth their weight in gold. All of my machinists use Brown and Stone and they swear by them, even after 20+ years of owning them.
What a nice, straight-forward tutorial. As a tool & die maker I’ve been using these things for 30 some years and this has taught me a new trick! The pin-to-pin trick would work just fine on hole-to-hole (assuming equal size holes). The pair I currently use is identical to the ones pictured but I have owned Brown & Sharpe, Starret and others. I seem to keep coming back to Mititoyo. I believe it’s a matter of personal preference over what’s best, although there are many poor models/brands you could buy.