


I love the moon. Like most folks, I take it for granted most of the time, but occasionally I am reminded that it is a giant freaking rock that is orbiting us about 240,000 miles away. I’m not sure why, but I find it fascinating.
I wanted to bring a bit of the beauty of the moon into my home, but like usual, I had to make it into some kind of big impressive item. My first thoughts jumped right to the giant CNC router I have access to, I also considered 3d printing this in multiple parts and assembling it into a massive structure.
After some consideration, I ultimately decided I was going to challenge myself to do this low-tech. I didn’t want to use tools that many people don’t have within their reach. In the end, you could pull off this whole thing with only a hand saw, a staple gun, and a pair of scissors.
The Idea
I wanted a giant moon. High resolution and back lit, and I didn’t want it to take up a bunch of room, so it had to be pretty flat. I’ve got really high ceilings in my living room, so I knew I could go huge without it feeling weird and claustrophobic.
The Print
I hunted for high resolution images of the moon, and found plenty. Then I moved on to getting a custom print. After a few calls to sign shops it turned out that I was going to be paying over $200 for a 6 foot wide, high resolution print of the moon on plastic I could back light. That just seemed wrong to me, there had to be a better way.
I considered projecting an image of the moon onto a vinyl shower curtain, painting the craters, then stretching that over a frame. During this brainstorming session, it hit me… I wonder if there are already shower curtains out there with high resolution images of the moon on them? Sort of.

Here are the 2 shower curtains I found. The big one was roughly $30 the smaller was $40 I found this one for $50, but didn’t buy it. The resolution isn’t as high as I’d like, but from a few feet away, you’d never know. The larger moon on the left is somewhat elongated and overlaps with the grommets at the top. Despite that, I decided to use the larger just for the impressive size. The smaller one may get finished and placed into a classroom in the near future.
I also purchased some cheap frosted vinyl shower curtains to act as diffusers.
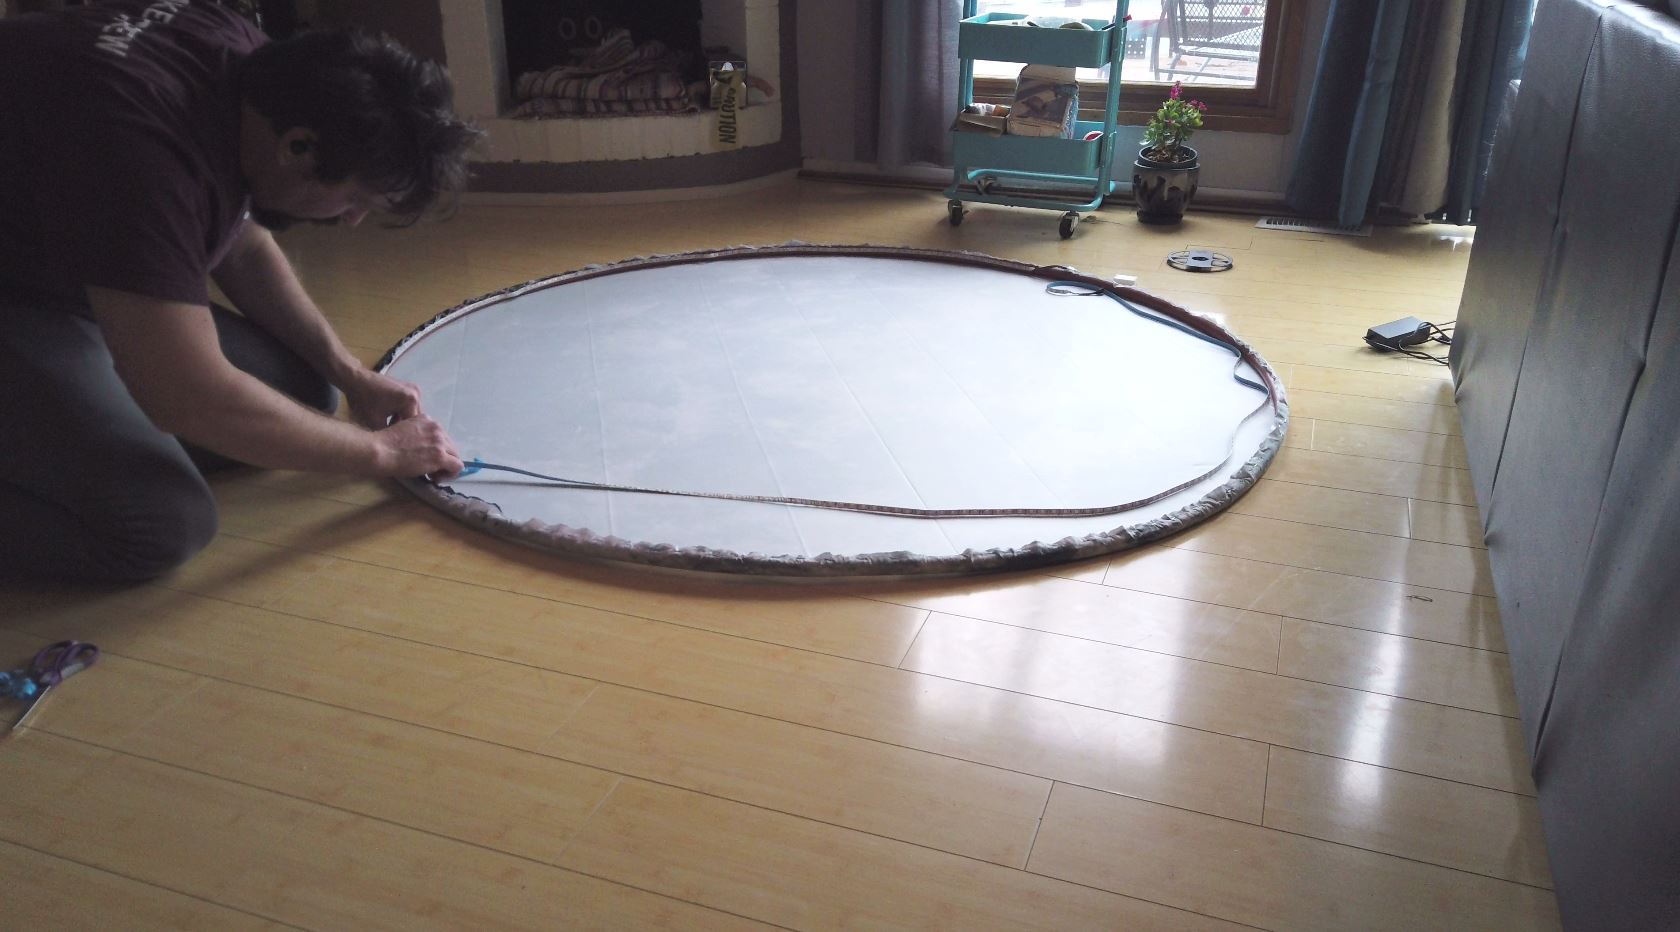
The Hoop

For the frame of this whole thing, I wanted to use something that you could construct with little or no tools. I remembered that people make hula hoops out of PEX tubing all the time, so I went that route. You can saw through this stuff pretty easily. I used a pull-saw for wood but you could probably get through it with a steak knife if you were persistent enough.

Another great thing about PEX is that it is soft enough to staple into. I simply stretched the shower curtains over the frame and stapled it in place. Well, if you watch the video I first explored a different route that turned out to be a complete waste of time and ugly as well, but there’s no need to rehash that here. Just staple it.
After you’ve stapled it in place, cut off the excess shower curtain to clean it up.
The LEDs

I used an RGB LED strip. I probably wouldn’t use this strip if I did it again. I chose it because it was cheap, but the white is super blue. I probably would look for a more true white strip and skip RGB all together.
Applying the LED strip was easy enough. It has an adhesive backing, and sticks well to the PEX tubing.
Mounting
Originally I wanted to just hang it all from a single hook. Unfortunately, due to uneven stresses on the somewhat flexible frame, the whole thing was slightly Pringle shaped. This really wasn’t a huge problem though. They sell these clips for PEX that you can simply press the pipe into and it grips it pretty well.

I actually cut some of the tip off of the clip to make the grip a bit less extreme. Once I had a ring of these screwed into my wall, all that was left was to press the moon into place!

You can see the clips as well as how incredibly thin this thing is here.
Going Further
There are so many ways to improve this that popped into my mind as I was building it.
1. Improve the light color
This is easy enough to fix. Just order better LEDs.
2. Improve the existing light diffusion
This one has me a bit stumped. To get good diffusion and light up the entire moon, I would have to pull it out much further from the wall.

There you can see me messing around with additional diffuser layers and more LEDs. If I put some distance into the equation, it really glows nicely but I don’t want it that far from the wall! How could I diffuse the existing LEDs better to the center?
3. Add more light
Similar to above, how could I better diffuse lights in the center without making it fatter. I suspect I’d get hot spots even with very very aggressive diffusion with the current thin design. A different light may be needed.
4. Add a microcontroller to make the lights do something smart (like display moon phases)
you could totally plop an RTC onto an Arduino and light up a few light strips with various moon phases. That was initially part of the plan. While it does sound neat to be able to do that, I found myself wondering why in the world you’d ever light up a partial moon phase when you could have a full moon?
ADVERTISEMENT

