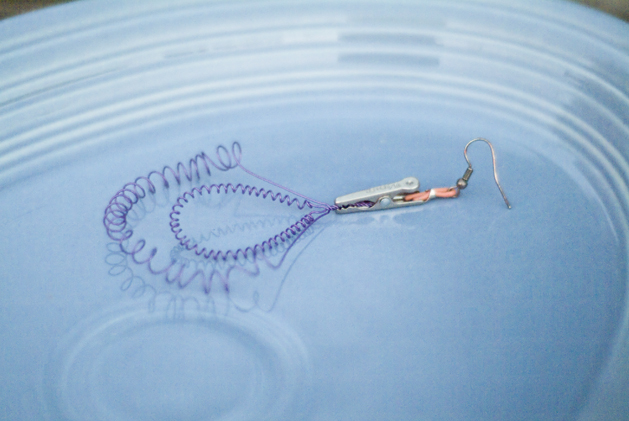
I love to go to the electronics store. The one in my neighborhood is called HSC, and it’s a warehouse of random parts and pieces. They have entire aisles dedicated just to switches, another just for attachments, and an entire room of wire. I have been known to wander the store for an hour, just looking at all the wire. The textures and colors and shapes of these components are so inspiring, that I find myself wanting to make jewelry as much as I’m wanting to make electronics!
This project is so simple. It doesn’t require any complicated steps or parts. I just let the wire and the alligator clips inspire me into making these fun geek chic earrings. And, if you wanted to, you could attach just about anything to the alligator clips, making them very versatile additions to any jewelry collection.
Materials:
Wires, 1 thin gauge, 1 thick gauge, and 1 in between
2 Alligator clips
French Hook Earrings
Wire Cutting Pliers
Step 1: Cut 1/2′ of the mid gauge wire. Bend it in half, and slip it through the loop on the french hook. Then, use the pliers to attach the alligator clip to the folded wire. Just press the tabs on the alligator clip down around to secure it. Now you have the base of the earring.
Step 2: Create spirals using the thinnest wire. To make them, just wrap the very thinnest gauge wire around the thickest gauge wire. Make tight and close wraps, as if you were coiling up a spring. Then, remove the large wire, leaving the spiral. Make one using the thick gauge wire as a base, and one using the medium gauge wire as a base. My large spiral is about 3′ long, and my small spiral is about 2′ long.
Step 3: Make a large tear drop with the large spiral, and a smaller teardrop with the small spiral. Nestle the small one inside of the large one. Secure their ends by tightly twisting them all neatly together with the pliers.
Step 4: Clamp the alligator clip onto the end of the wires. Then, make a second earring the same as the first by repeating Steps 1 through 4. Voila!
ADVERTISEMENT


