
I have a tiny little home in the woods. It’s filled with entirely hand-me-down furniture and thrift store finds. I have a “green” lifestyle, but mostly because it’s a modest lifestyle. I believe my crafty attitude has been my greatest asset in styling my house with beautiful and affordable accessories. And in turn, sewing is perhaps the most crucial and versatile skill for bringing custom style and comfort to your home.

With simple sewing, anyone can quickly transform the most plain wooden seating into comfortable, custom, organic pieces of furniture. By sewing projects from scratch, you, as the designer, have complete control over the quality of materials. I made these cushions with amazing organic home decor fabric from Amenity. They sent me their to-die-for organic canvas, and then I picked up bamboo fiber stuffing and 100% cotton thread. The project is easy, pretty, and exactly the kind of thing that I want in my house!

Special Discount
As a special bonus for CRAFT readers, Amenity is offering a 40% discount on all fabric purchases until May 31, 2010! The fabric I used is their yummy hemp cotton blend, perfect for upholstery projects of all kinds. To redeem your discount, just use the code “craft” at the checkout. If you pick up some fabric, be sure to share photos of your creations in the CRAFT Flickr Pool and on Facebook!
Materials:
Chair
1 yard of fabric
1 yard of ribbon
Sewing Machine
Cotton thread
Fiber Stuffing
Large sheet of paper
Pen
Pins
*I was able to make cushions for 2 of my chairs with just 1 yard of material. Your size may vary.
Prep the Pattern Pieces
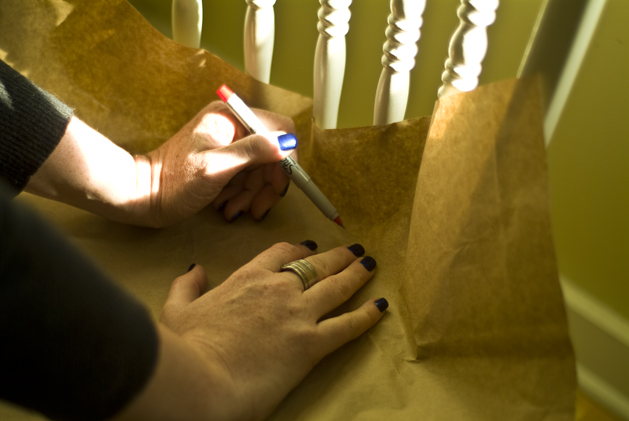
Step 1: Lay the paper onto the seat of the chair. Press it down and trace around the perimeter of the seat shape with the pen.
Step 2: Cut out the paper pattern, and then fold it down the center. Trim the pattern so that it is centered and symmetrical.
Step 3: Lay your fabric out on the table and pin the pattern to it. Cut out 2 pieces, one for the front, and one for the back.
Sew the Cushion
Step 4: Pin the two pattern pieces together, right sides facing in. Stitch them together using the straight stitch, but don’t sew them all the way closed. Leave the cushion open at the back where it will tie to the chair.
Step 5: Turn the cushion right side out through the opening that you left. Then, fill it with stuffing. Be generous with the stuffing, but resist the urge to over fill it!
Step 6: Cut two lengths of ribbon, 1′ each. Set the cushion on the chair, and determine where the ties will need to be attached. Fold the ribbon in half, and pin it to the inside of the bottom of the cushion.
Step 7: Tack the ribbons into place with the sewing machine.
Step 8: Close the cushion by folding the edges in on themselves, and pinning the folded seams together. Make sure the ribbons are fed through the folded opening, and then sew it shut.

Step 9: Tie it to the chair, and voila!
ADVERTISEMENT


