
You walk into a friend’s living room. They pass their hand over the side of their unassuming, glass-topped coffee table. The button they press brings the embedded LCD screen to life, with 10,000 classic arcade games at the flick of a joystick. Your friend pulls out both of the drawers facing the couch — inside are controls for Player 1 and Player 2. Pretty neat, right?

I always love a good multifunctional piece, especially those that have secretly embedded features. So, when Redditor Russell O’Neill shared the video below of this spectacular DIY coffee tabletop arcade, I had to find out more about his project.
[youtube https://youtu.be/pyaUb9LwLjw]“I spent some time thinking about how I could get away with having a gaming system in the house where it could be used and not sit somewhere collecting dust for being too much of an eyesore,” says O’Neill. He fondly remembers having played on tabletop arcade games, and so he set out to build a similar but more grown-up version.
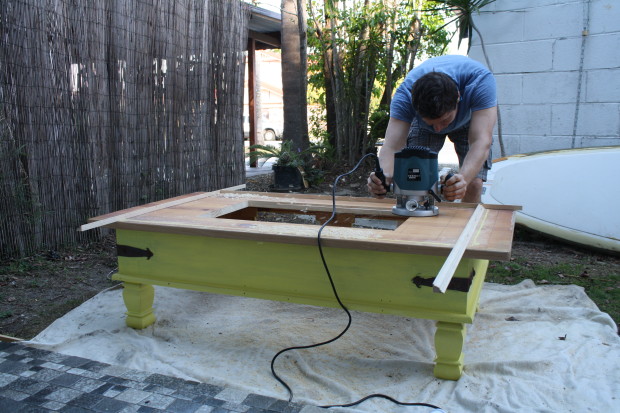
O’Neill started with a fairly basic coffee table that he picked up for a few bucks. Because of the drawers, the table has about one foot of depth to house the electronics. This is probably one of the most important considerations when choosing (or building) a table if you decide to make your own tabletop arcade.
Even with the extra clearance offered by the drawers, O’Neill’s greatest challenge was fitting everything together. The controls housed within the drawers themselves required many “prototypes and scratchy drawings,” as he wanted the drawers to open and close smoothly to hide the controls while leaving them easily accessible. Mounting the TV screen proved to be a similar challenge — O’Neill had to dismantle a TV and left only the necessary elements attached to the screen. With no background in electronics, he figured it out step-by-step by reverse engineering the circuitry. He summarizes the process as follows:
“I had to remove the circuit board and shift it around to make way for the drawer/controller to tuck away. That meant extending certain wires and even removing one of the circuit boards completely! I also had figure out from the circuit board what was the on/off button, volume, and source. I then had to solder new wires and buttons to bypass come circuitry to make a new control switch.”
For this particular build, he says, his computer specs were:
Intel Core Duo E7200 2.53GHz
2GB RAM (667GHz)
250GB IDE Hard Drive
Radeon HD 4850 1GB VRAM
O’Neill didn’t have much experience with software, either. He knew that he needed a central interface to control individual game consoles, and the emulators to run them, so he simply searched the internet for the answers to his questions.
When he set out, O’Neill thought it would take a day or two to get the software functioning. It took closer to six weeks. Months later, he says, “I’m still configuring small elements and finding bugs. It took an extra week to figure out how to configure 15 game consoles to use one set of controls without the need for a keyboard or mouse.”
Perhaps the most impressive aspect of this project is O’Neill’s sheer determination and never-ending resourcefulness. He seems to own very few tools, and yet produced such a sleek and polished result.
I didn’t have a ruler for the project, rather then going out to buy one, I just used a straight and flat piece of wood and marked lines with a pencil. I didn’t have a set square, so I folded a heavy piece of paper on an angel to form a right angle. I don’t have a workshop! This whole thing was built inside of my apartment and on my front step! I recommend having awesome neighbours and a very supportive missus… I’m still cleaning sawdust out of the carpet.
[via Reddit]
ADVERTISEMENT


