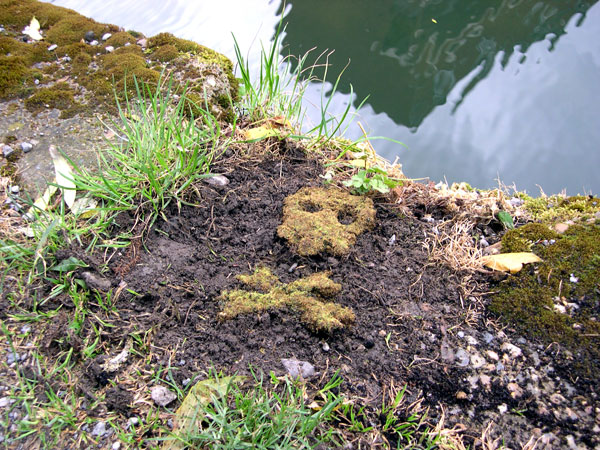
Last week, I posted about a 3D painting done on a wall, made to look like the letters were growing. Naturally, it reminded me of the Moss Graffiti tutorial by Helen Nodding that we ran in CRAFT Volume 04. With rainy season just around the corner, here’s the full tutorial for you to check out and start making your own moss milkshake to create with.
Moss Graffiti
Try this alternative to spray paint, and leave your mark in the way of gardeners past.
By Helen Nodding
The possibility of growing moss graffiti occurred to me during one of those dull days at work when your thoughts wander. A quick internet search showed me that I wasn’t the first person to ask the question “How does moss grow?” In fact, many genius gardeners had even come up with a recipe for a moss milkshake! Next I wondered if you could use this recipe to grow your own designs and create a kind of moss graffiti, and it would appear that you can!
MATERIALS
Several clumps of garden moss
1 can of beer, or pot of natural yogurt, or 12oz buttermilk See which works best for your location.
½tsp sugar
Blender
Plastic container with a lid
Paintbrush and spray mister
NOTE: For indoor growing, you’ll also need compost and a seed tray.
DIRECTIONS
Step 1: Gather moss.
First gather together several clumps of moss. You can find moss growing between the cracks in paving stones, near leaky drains, on trees … basically, moss loves damp and shady places. Mosses do not have roots but use rhizoids to attach themselves to surfaces, meaning that you can easily collect moss by hand or with a spatula.
Clean off as much of the mud as possible by soaking it in water.
Step 2: Make the moss milkshake.
Put the moss in a blender and add beer (or yogurt or buttermilk) and sugar. Blend just long enough to create a smooth, creamy consistency, like a thick milkshake. Pour the mixture into a plastic container.
Step 3: Create your design.
Find a suitable location onto which you can apply your moss milkshake (a good indicator is somewhere that moss is already growing). Paint on your chosen design (either freehand or using a stencil).
Step 4: Tend your graffiti.
If possible, try to water your masterpiece daily with a spray mister. Soon the bits of blended moss should begin to recuperate, maintaining your design before eventually colonizing the whole area.
Learn about mosses at craftzine.com/go/moss.
The Moss Graffiti recipe was previously published in Interlude Magazine, Issue 2, and Craftivity, edited by Tsia Carson, Harper Collins, 2006.
About the Author:
Helen Nodding is an artist who lives and works in London. As well as her own work (storiesfromspace.co.uk), she often collaborates with the London-based group Spacehijackers, who explore and critique the use of public space.
ADVERTISEMENT


