By Jessica Wilson
I’m a big fan of needlebooks. Always delighted to receive a handmade one in the post, I fill it with needles, pins, and safety pins, use it for a week, then tuck it somewhere “safe.” Of course I rarely remember where these safe stashes are, but do I plan better and place it in the metal drawer designated for sewing accoutrements? No. You’d think I would have learned by now.
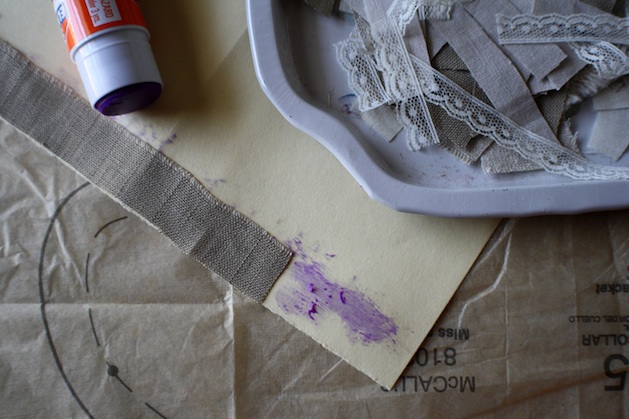
Not only am I a big fan of receiving needlebooks, I am quite fond of making them as well. I have used matchbooks, matchboxes, felt scraps, and even recycled a coffee sleeve. It’s been awhile since I’ve rocked out a needlebook, so here is a new style for you, using a manila folder as its base with a little help from a glue stick and a date with your sewing machine.
Materials
Fabric and lace scraps
Fabric scissors
4″ x 8″ manila folder or cardstock
Glue stick
Needle and thread
Sewing machine
4″ x 8″ piece of felt
Pins
Needles
Button
Embroidery thread
Directions
Step 1: Set up some play time with some of your favorite fabrics to decide on a color scheme for your needlebook. Once you have made a decision, snip up your scraps into smaller bits and pieces, about 1/4″ wide and up to 5″ long.
Step 2: Grab your piece of manila folder or cardstock and fold it in half (bringing the top and bottom edges together) to make a crease. Unfold it and place it in front of you with the creased side up. Slather the bottom edge with glue. I prefer to use a Scotch Craft Stick, but mine is still in a box somewhere, so I made do with this day-glo purple stick. Before the glue stick can dry, puzzle-piece a selection of scraps along the bottom, from one side to the other. The glue stick is not for the finished project but just a temporary caregiver for all those itty-bitty scraps. You can do this on fabric as well, but I find the cardstock adds a bit of weight and security to the finished project.
Step 3: Continue gluing and scrapping until the whole piece is covered. For each subsequent layer, make sure there is a little bit of overlap to give your cover a bit of texture. Torn pieces of fabric are fun and add happy little frays into the mix. I let my pieces hang over all the edges for that bit of extra coverage, just in case.
Step 4: Once covered, flip your project over and trim with a pair of fabric scissors. Bring to your machine and use a small straight stitch all the way around the edge, anchoring your outside scraps to the cardstock. I keep as close to the edge as I can by lining up the innermost edge of my sewing machine foot (on the right) to the edge of my cover. Don’t forget to backstitch.
Step 5: Now it is time for a little quilty action. Plop back under your sewing machine foot and stitch a series of lines down the entire cover from top to bottom. This will make sure all your scrappy bits get anchored in some way and finish the piece. Like a little patchwork quilt! Backstitch on each run here as well. I used the width of my foot as a guide for the spacing here. Remove from the machine and trim all those crazy threads!
Step 6: If you like, add a few flat embellishments by hand or machine. I used a bit of burlap for more texture.
Note: When cutting burlap, don’t use your good scissors; it will muck them up!
Step 7: Lay your cover, pretty-side-up, atop your length of felt. Don’t trim your felt to size just yet. Fold the cover closed along the crease, catching the felt as well, and open. You should have a visible crease along the felt piece. Bring to your machine and stitch a couple of inches along the crease, attaching the felt to the cover. Backstitch and trim.
Step 8: Now you can trim your felt to the edges of the soon-to-be needle book. Return to your machine and stitch all the way around the perimeter using a short zig-zag stitch. Backstitch and trim.
Step 9: Hand-stitch a button to the front of your needlebook. This will be one part of your closure.
Step 10: To create your tie, snip a length of embroidery thread about 10″. Knot a loop at one and add a knot near the other end. Estimate where you will need to anchor the back knot by looping your loop over the button and pulling the tail to the back cover. Adjust for a little slack and hold the tail in place while removing the loop from the button. Pop it into your machine and do a bit of zig-zag magic, capturing the length of the tail and anchoring it in place.
Note: This may go without saying, but make sure you do this with your needlebook open, otherwise you will have stitched the whole thing closed. … Not that I have ever done this, mind you, I’m just saying.
Step 11: Fill with pins and needles. You’re now ready to get your craft on! I made a few in an assortment of sizes, depending on my cardstock scraps. A little scrap pile can go a long way with one of these itty-bitty pretties.
About the Author:
Jessica Wilson is most happily known as “jek in the box” and spends most of her time crafting it up and taking pictures. She can often be found standing on benches over on Flickr and creating all sorts of kiddie crafts on her blog scrumdilly-do! She lives a life of scrumdillydilly and loves to share.
ADVERTISEMENT


