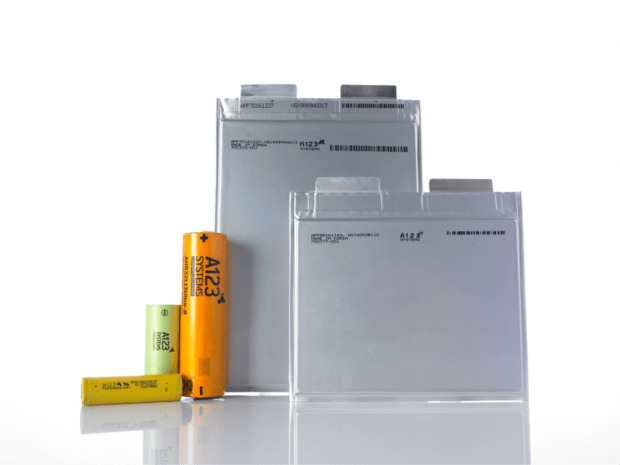
I’ve been using lithium batteries to power my custom projects for years. Since options are fairly limited for off-the-shelf lithium battery packs, I’ve had to learn to build my own. Unfortunately, that required investing in a lot of battery building tools, so I recently designed a kit that lets makers build their own lithium battery packs with just a soldering iron. It’s live right now on Kickstarter!
In this Skill Builder, I’d like to share some information on choosing the right lithium battery for your project and how to assemble your own lithium battery safely, whether completely by yourself or if using my battery building kits.
Choosing A Lithium Chemistry
There are three main types of lithium batteries available for most projects: lithium ion (li-ion), lithium iron phosphate (LiFePO4), and lithium polymer batteries (li-po).
Li-ions are the most common. There are a few slightly different varieties, but they all share similar properties: high energy density, fairly safe when not abused, and reasonably inexpensive. Almost all electric vehicle makers use li-ion batteries. Li-ion is likely the best type to use on most of your projects, unless the advantages of the other two types are required.
LiFePO4 batteries are less energy dense, making them bigger and heavier than li-ion. Most LiFePO4 varieties also have lower discharge ratings, making them less powerful. LiFePO4 are also more expensive than li-ion, but they are the safest lithium variety and have extremely long cycle life.
Li-po batteries are the kind used in R/C drones. They have the highest power level, but they can also be extremely dangerous if not charged and discharged carefully. These are needed for extremely high power projects but extra care must be taken to ensure safe conditions.
Of the three different types, li-ion batteries have the best balance of performance, cost, and safety, which is why I designed my battery-building kits around high quality li-ion battery cells.
Choosing The Proper Battery Specs For Your Project
In order to choose the right battery for your project, you’ll need to know three main specifications: the voltage, current, and energy capacity requirements of your project.
By adding more battery cells in series you can increase the voltage to meet your needs, such as 12V or 24V for most consumer products like 3D printers and chargers, to 36V or 48V for things like electric bicycles or home energy storage systems.
You can add cells in parallel to increase the current capacity of your battery. For example, if one battery cell can provide 10A then three cells in parallel will provide 30A.
Lastly, adding cells in parallel also increases the total energy capacity of the battery. For example, if your project requires a 20 amp-hour (AH) battery, you can put six cells of 3.4AH each in parallel. Calculating run-time is easy once you know your current draw. If your project uses 5 amps, that 20AH battery will run for 4 hours (20AH/5A = 4 hours).
Making A Custom Lithium Battery
If you can find the perfect sized lithium battery for your project from an off-the-shelf supplier, that’s great! Chances are though that the few options out there don’t quite fit your project’s needs. That’s where battery building comes in.
Just as I described above, battery building is all about combining battery cells, either in parallel or in series, to achieve the proper battery specifications. A Battery Management System (BMS) is included to monitor the battery cells and keeps them safe and healthy, the battery is wrapped in heat shrink tubing and finally installed in your project.
To combine the cells you used to have to spot-weld them together using nickel strips. While some people solder the cells directly, this is both damaging to the cells and potentially dangerous.
Since most people don’t have (and don’t want to buy) an expensive spot welder, I created my battery building kits with this in mind. My kits have modules of battery cells that are already spot welded in parallel. You simply have to solder the modules together in series to reach whatever voltage you need. Because you solder to the nickel strip on the cells and not the cells themselves, you don’t risk damaging the batteries. The kits include a BMS to protect your battery and keep it safe, as well as all of the wires, connectors and heat shrink wrapping that you need to finish your battery.
Lithium Battery Safety
High quality lithium battery cells are inherently safe by design. The bad rep that lithium batteries get comes from the few rare cases of poor quality knock-off batteries catching fire due to flawed design.
Whether you want to go the completely DIY route to building your own battery or you want to start with one of my kits, there are still a few safety factors to keep in mind when you work with any batteries. The biggest concern is to avoid short-circuiting the battery, or allowing the positive and negative ends of batteries to touch. This can cause the battery to overheat if it occurs for an extended period of time. To avoid this, remember to remove any scraps of metal from your work surface and to take off any jewelry before handling battery cells. I like to use plastic or wooden tools when possible to avoid dropping something metal on top of the exposed contacts of a battery I’m working on.
As long as you use high quality lithium battery cells along with a battery management system and don’t accidentally short circuit your cells while you’re working on them, your battery building will be a safe and rewarding experience. For a complete how-to on battery building, please see a full article I wrote here, and if you’re interested in a kit to get you started, you can check out my Kickstarter here along with the complete instructions for assembling my kits here.
ADVERTISEMENT


