I’ve been working on a special project for Make: Books that has had me knee deep in the dusty stacks of the Make: archives. I’m going through the entire ten years of content looking for awesome and indispensable shop tips that we’ve published along the way.
I’ve always had a special fondness for shop and tool tips. I love how eye-opening and darn-near life changing a good tip can be, especially when it generates a real “ah-ha” moment, a solution so simple and brilliantly kludgey that you have to smack your forehead with a “Now, why didn’t I think of that?” Here are six of the tips I scooped up this week, from within the Make: corpus and beyond.
If you have a wavy wall that you want to perfectly fit a board to, use a washer to roll a pencil along the wall (and the board) to get a precise cut (or sanding) line. [From Popular Woodworking]

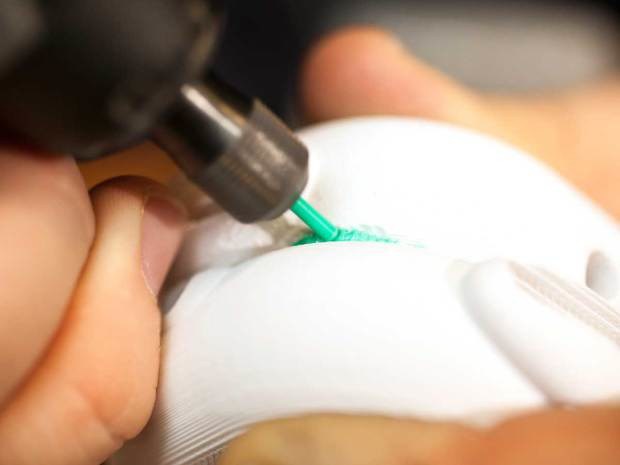
Need to bond two plastic pieces together? Consider friction welding. Simply chuck a short length of plastic rod into a rotary tool. Apply the spinning plastic tip to your join and the friction will melt the plastic, forming a pretty serviceable bond.
To prevent dust and small particles from escaping into the room when you’re sanding fine items, try building a simple dust containment box. Basically you need a cardboard box, some old rubber gloves, a few layers of saran wrap, and tape. [Via Pinterest]
A great way to add more customizable storage for “First Order Retrievability” is by using cheap magnetic knife racks. You can use them to store drivers, drill bits, metal rulers and squares, and other light hand tools. [Via Pinterest]
Create an easy jig for drilling perfectly straight holes by attaching a small piece of wood to your hand drill (either on the top or one side) and place that against a flat surface perpendicular to where you want to sink your hole. When attaching the wood, make sure it’s perfectly parallel with the bit. [Via Jimmy DiResta]
So, what are some of your best, most indispensable shop tips? Please share them in the comments.
ADVERTISEMENT


