It is a profoundly human compulsion to change our environment to suit ourselves, and the quarter-trillion-dollar US home décor industry presents a playful (and profitable) example: We bedeck our living spaces to express ourselves and illustrate our individuality. Colorful light displays decorate busy event spaces like concerts and sports arenas, but they can also function as enchanting home ornaments, like my LED Rainbow Weather Station (Make: Volume 69), and Inner Glow Edge-Lit Heart (Volume 71).

ILLUMINATING INTERIOR DESIGN

Subscribe to Make: for this and more projects and articles

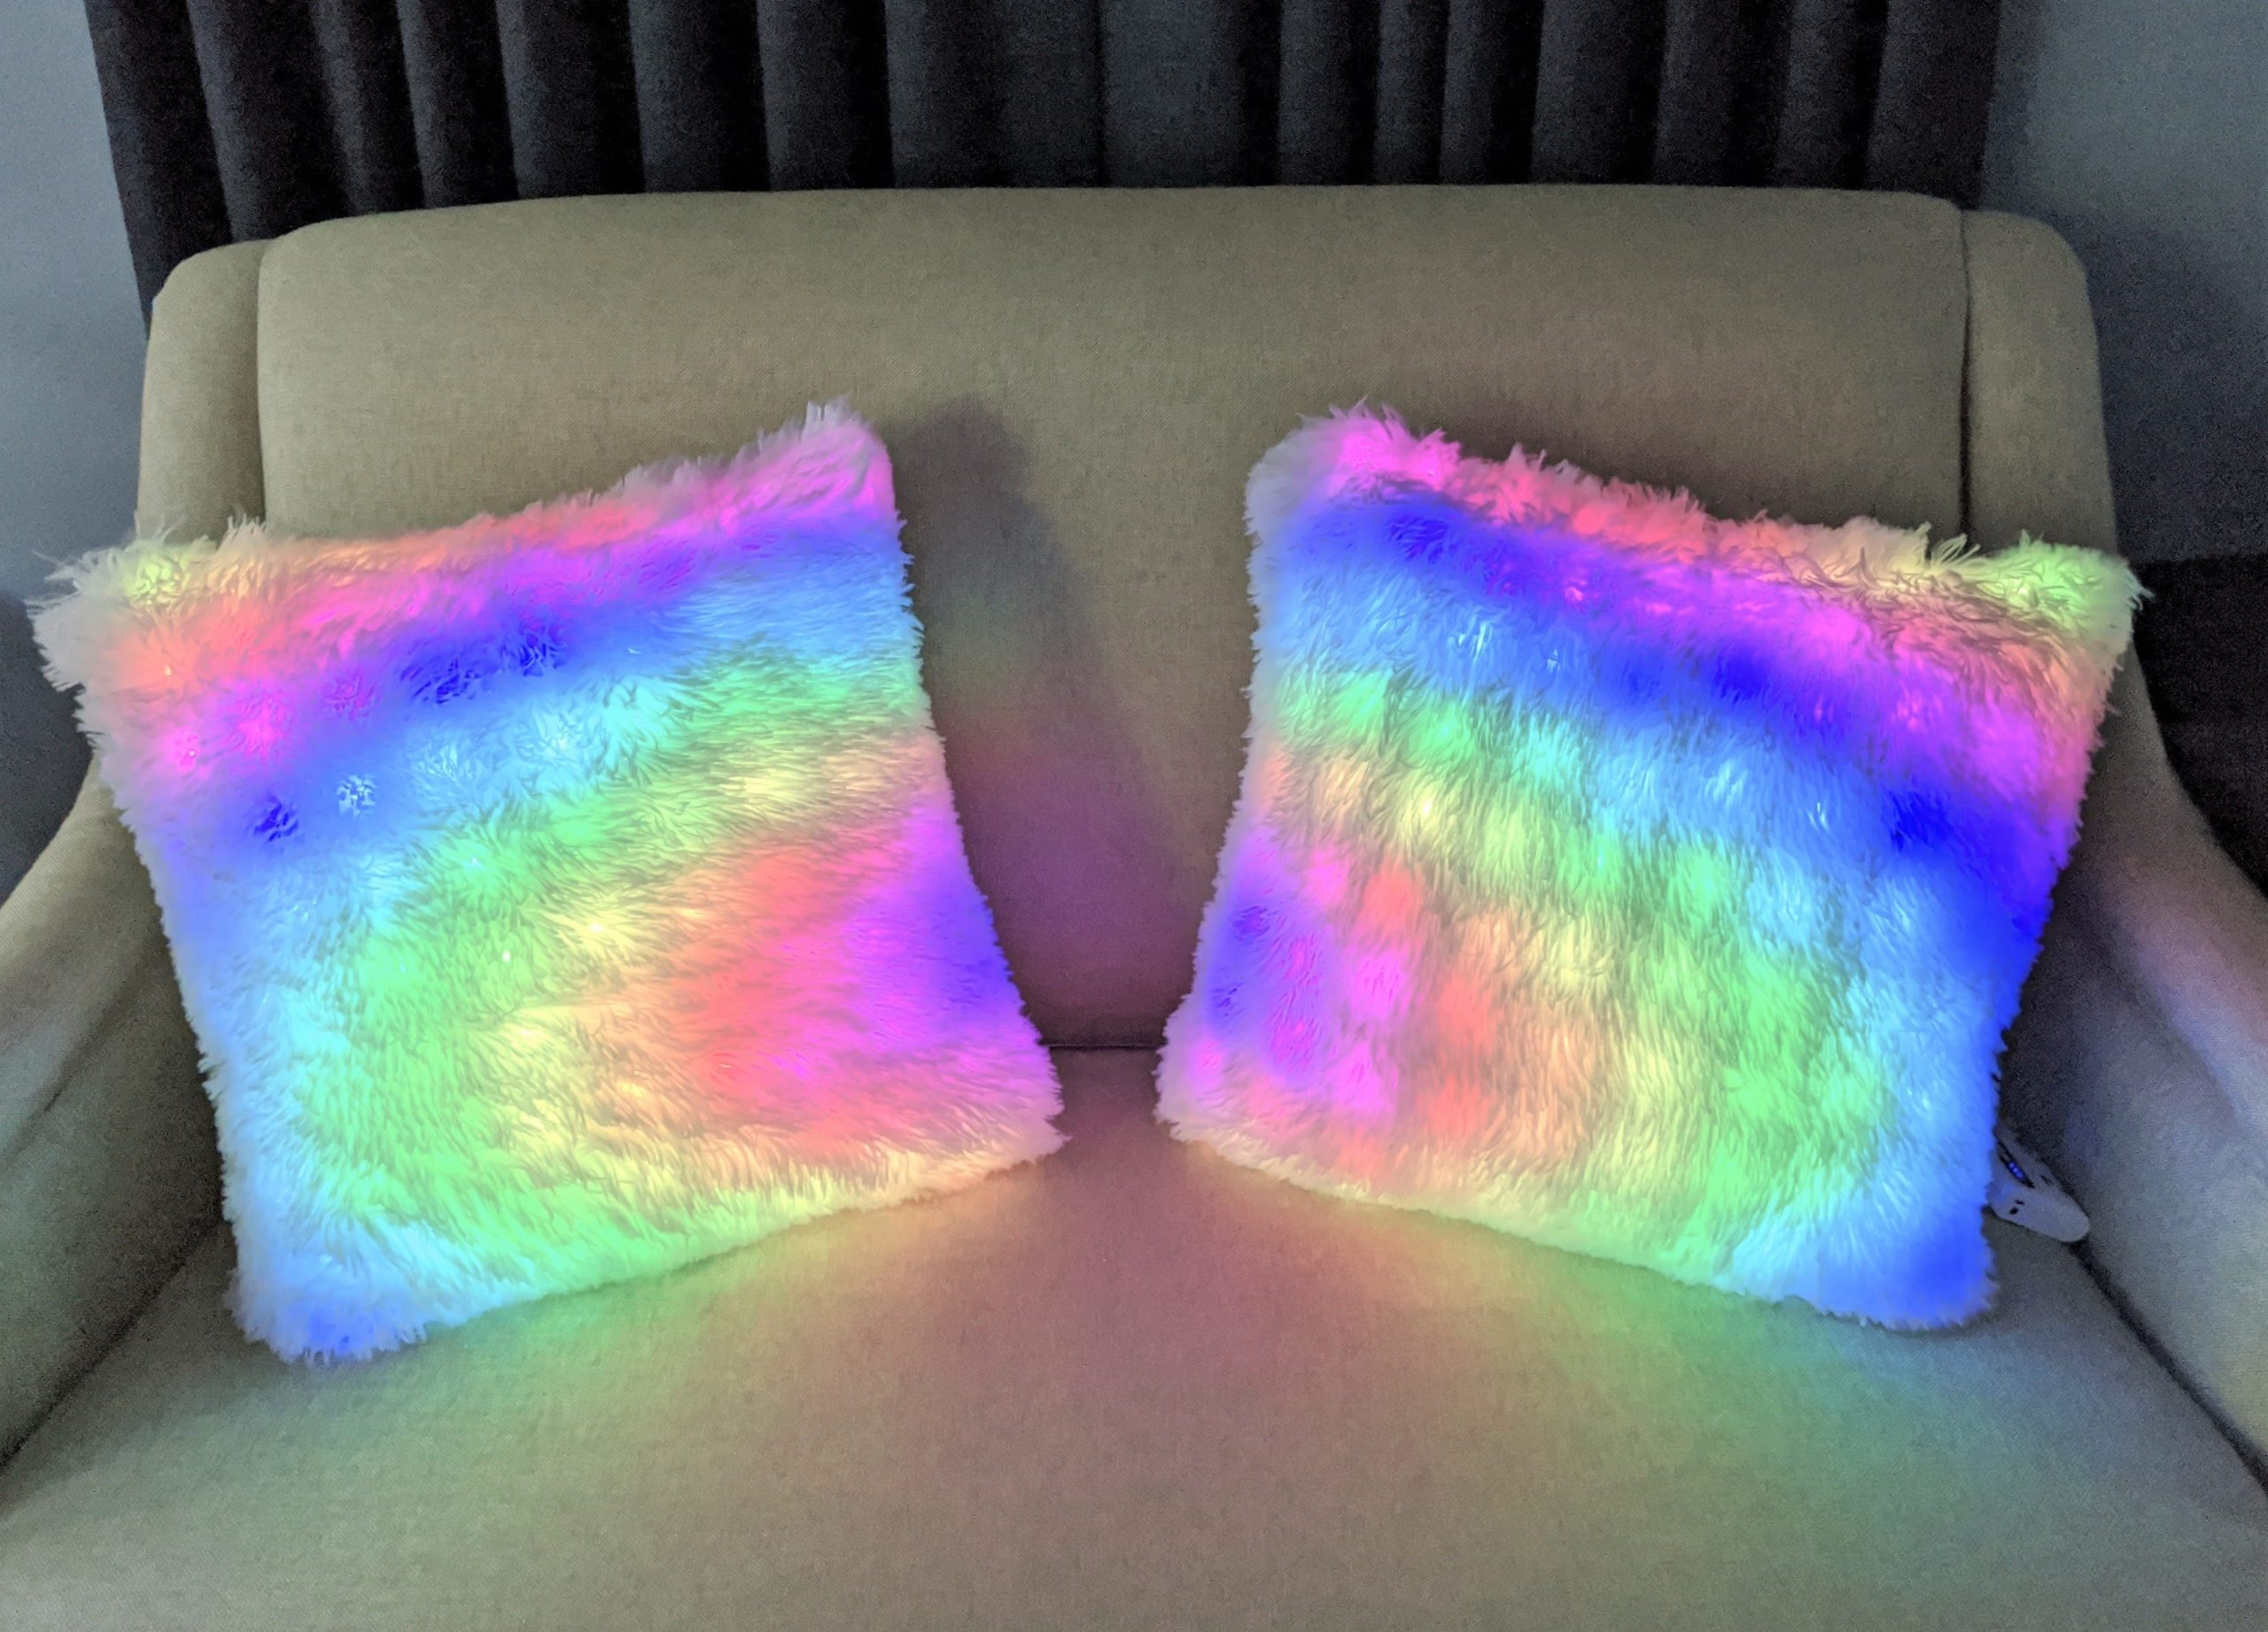
This LED matrix pillow project is not only pretty but practical as well. The electronics attach to a removable DIY pillowcase, so the outer decorative cover and stuffed pillow insert both may be removed for cleaning. You can change display colors and patterns, controlled by the codable Pixelblaze controller board, for both visual embellishment and entertainment.

There is something unexpectedly delightful about embedding electronics in soft, cuddly objects, and these sparkly pillows emphatically spark joy inside my home.

SPARKLY JOY

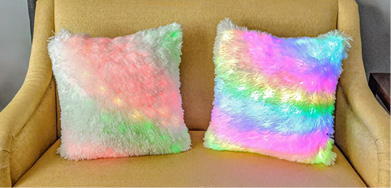
These pillows are a DIY project to display proudly. They morph from innocuous home accessories to something far more beautiful and interesting with the flick of a power switch. It’s hard for still photos to convey the dynamic beauty of constantly changing LED animations, but these pictures are a small example of what is possible.

They’re also extremely touchable and will stand up to a fair amount of abuse, because the weatherproof outdoor LED strings flex easily. I’ll stop short of recommending them for a pillow fight, but they will easily survive the use that normal throw pillows get (as long as nobody yanks hard on the wiring). And the covers unzip and can be removed for washing, so kids can absolutely touch them, hug them and enjoy them.

What will the next generation of Make: look like? We’re inviting you to shape the future by investing in Make:. By becoming an investor, you help decide what’s next. The future of Make: is in your hands. Learn More.

Project Steps

1. CUT FABRIC AND MARK A GRID

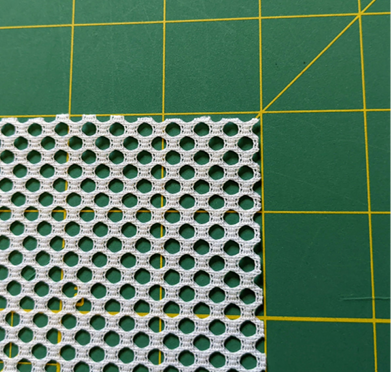
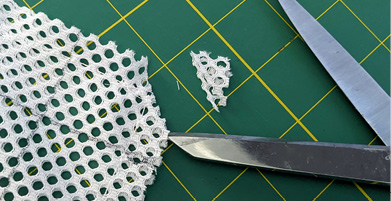
Cut six rectangles from the mesh fabric: two 21″×21″ and four 13″×21″. Try to cut the edges parallel to the rows and columns of holes in the mesh, to make aligning the matrix easier      (Figure A).

This image has an empty alt attribute; its file name is A_Cut_Mesh_Fabric.png
Figure A

Take one of the 21″ square mesh pieces and fold it in half. Make a small dot with the Sharpie at one end of the midline (Figure B). Unfold the square and lay it on a flat surface with scratch paper underneath. Now use the Sharpie to draw two vertical marks that are 2.5cm on either side of the midline. Continue to draw additional vertical marks at 5cm intervals on both sides side until there are exactly 10 symmetrically spaced marks at 5cm intervals (Figure C).

Figure B

Figure C

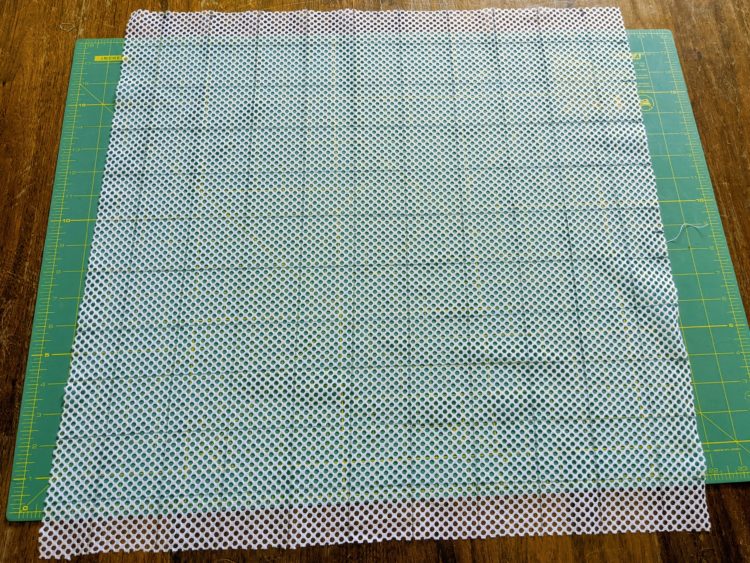
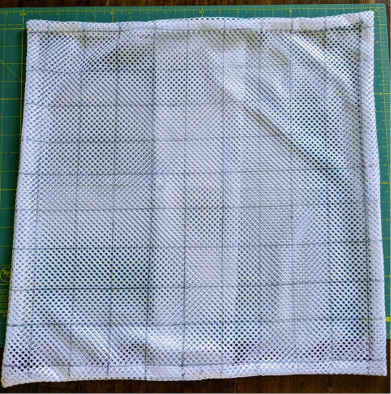
Next, using a ruler as a straightedge that is aligned with the mesh holes, draw lines to extend the marks to the opposite side of the mesh square. Then turn the mesh fabric square 90 degrees, and follow the same procedure to draw identical lines running perpendicular to the first set. When finished, you will have drawn a regular 9×9 grid of 5cm squares that is centered in the mesh rectangle (Figure D). Repeat this process with the second 21″ mesh fabric square.

Figure D

2. SEW THE PILLOWCASES

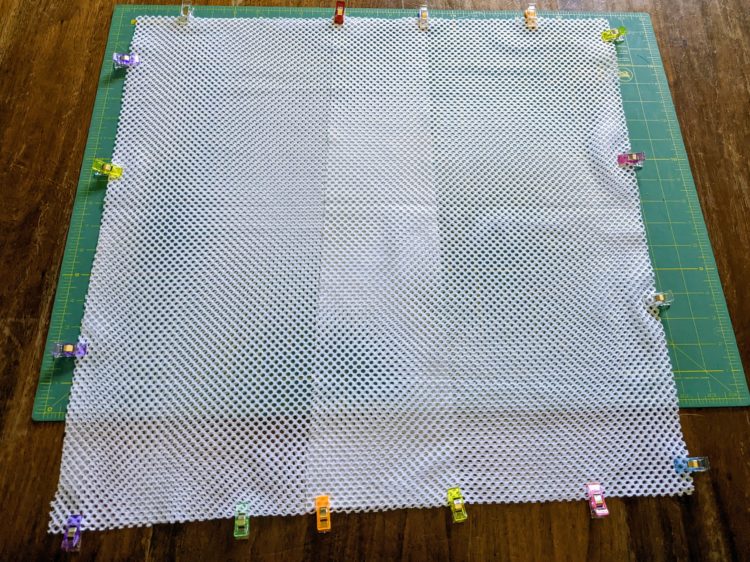
Lay one 21″ mesh square on a flat surface with the marked side up. Place two of the 13″×21″ rectangular pieces over it so that the long rectangle edges align with opposite sides of the square. The rectangles will overlap each other by 2½” in the middle. Use the sewing clips or binder clips to secure the edges all three fabric pieces around the perimeter (Figure E).

Figure E

Use your sewing machine or a needle and thread to sew a seam with a ½” allowance around the entire perimeter of the sandwiched fabric pieces. If you’re using a sewing machine, reinforce the seams by back-stitching near the corners and the places where the rectangular layers overlap. If you sew the layers by hand, use small, tight stitches to secure the fabric well and knot the thread ends tightly.

Figure F

Once the mesh pillowcase is sewn together, use sharp scissors to trim the four corners at a diagonal, just outside the seam (Figure F). Invert the mesh case through the center opening (Figure G), pushing the corners out from the inside with your fingers. Insert a pillow insert into the mesh case, plumping and tugging the pillow corners to fill the case without slack.

Figure G


3. MAKE THE LED MATRIX

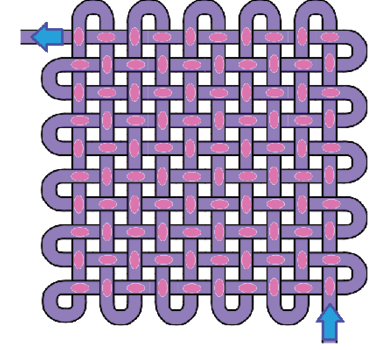
The grid design drawn on the cases has a 5cm spacing but adjacent LEDs on the strings are 10cm apart. We’ll reconcile this difference by weaving the LED string into a pattern of two perpendicular zig-zag grids that overlap perfectly to place one LED at each grid intersection.

Figure H

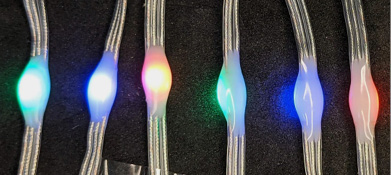
Each of the resin-encased LEDs has a distinct front and back side (Figure H). The back is a bit flatter and noticeably dimmer than the front. Be careful to place the LEDs front side upward when securing the string in the next steps.

Figure I

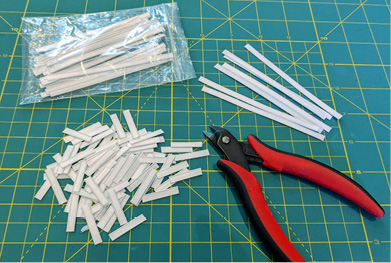
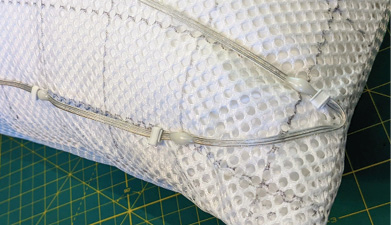
To attach the matrix to your mesh pillowcase, you’ll use the double-wire twist ties. Do not use standard twist ties, as they will twist around and poke through the pillowcase. Using wire cutters or flush cutters, cut about 50 of the 10cm ties into approximately equal fourths about 2.5cm long (Figure I). Then, take the input end of the LED string and lay it along one of the border grid lines, aligning the LEDs with the intersections.

Figure J

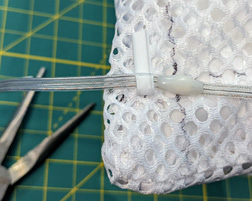
You’ll secure the LED string to the mesh case at regular intervals by wrapping it in a cut twist tie near one side of each LED. Don’t secure both sides of the LEDs because there must be enough slack to run part of the string underneath itself. Slide a cut twist tie through two adjacent holes which border the Sharpie line so that the tie is perpendicular to the string (Figure J). The tie is slightly wider than the holes, so you may have to pull the mesh taut and wiggle it a bit to slip it through.

Figure K

Figure L


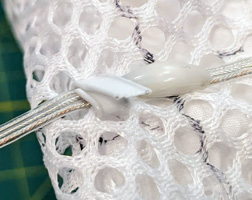
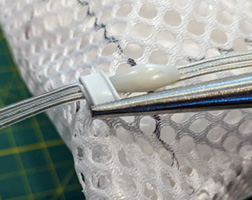
Using pliers, sharply fold about one-quarter of the tie over the LED string (Figure K), then fold the opposite side of the tie extending from underneath the LED string to cover the first folded section (Figure L). With the pliers, bend and crease the remaining overhanging twist tie section back underneath the string and tie, pressing it firmly to grip the wires inside. Tuck the final short segment into the mesh under the string (Figure M on the previous page).

Figure M

Figure N

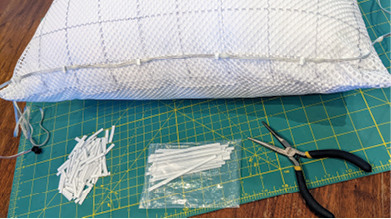
Proceed this way down the entire first row, placing one twist tie just before each LED (Figure N). At the end of the row, bend the string into a U-shaped turn and place the next LED in the closest adjacent row so that it is offset by one column from the previous LED (Figure O). Proceed to fill all the rows using this technique until half the LED string is attached to the case in a zig-zag pattern with one folded twist tie near each LED. The LEDs should sit at alternate grid intersections, so that the LEDs in each row are offset by one from their neighbors (Figure P). Double check that all LEDs have front sides oriented upward, away from the pillow.

Figure O

Figure P

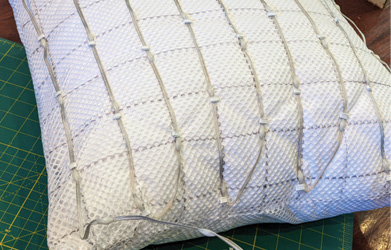
The next step is to weave the second half of the string in and out of the attached rows. Start by turning the pillow 90 degrees, then lay the next loose portion of the string across the closest perimeter row. Fasten the next LED at the intersection nearest the pillow corner as shown in Figure Q.

Figure Q

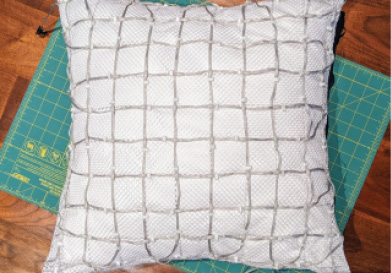
Continue connecting the LED string along the rows like before, but slide the loose portion of LED string under each of the LEDs in perpendicular columns (Figure R) When you are finished, the LED string input/output connectors should extend from opposite pillow corners and the string will be woven into a pattern that looks like Figure S. You may wish to attach additional ties to affix any parts of the string that seem loose.

Figure R

Figure S

After the first LED matrix is secured to the mesh pillowcase, repeat the process with the second pillow and LED string. This step may take several hours but can easily be done while listening to a podcast or watching a TV show for distraction.

4. SET UP PIXELBLAZE AND POWER

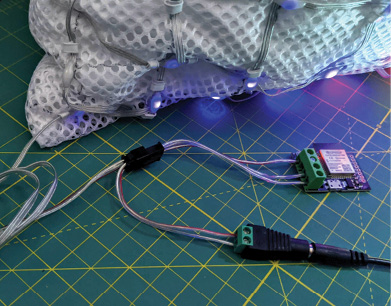
The next step is connecting the Pixelblaze controller and power supply to one LED matrix. Both the Pixelblaze and LED string operate at 5V and can be powered with the same source. Be sure that you do not run the power for the LED string through the Pixelblaze USB micro-B connector, as it is not designed to carry that much current.

The specific wiring layout will depend on whether your LED string connector has extra power wires broken out. If so, it is straightforward to attach those extra power wires to the barrel-jack screw terminal connector as shown in Figure T, then connect an extra 3-pin JST-SM cable to the LED string input, and connect that cable’s Power, Data, and Ground wires to the corresponding screw terminals on the Pixelblaze.

Figure T

If your connectors don’t have extra power wires broken out, you’ll need to splice hookup wire to the JST connector’s 5V and GND wires and attach those hookup wires to the DC jack’s screw terminals to supply power.

Once the Pixelblaze and the power adapter have been connected to the input end of one matrix, use a JST-SM extension cable to connect the first pillow’s matrix output to the second pillow’s input. If you want to move the pillows further apart, you can insert a second (or third) extension cable between the pillows. With wiring completed, plug in the power source into a wall jack to turn it all on.

When powered, a new Pixelblaze board will automatically boot into access point mode with its own unsecured Wi-Fi network starting with the prefix Pixelblaze. Connect a Wi-Fi-enabled device to the access point network, then visit http://192.168.4.1 in the device’s browser to configure the Pixelblaze WiFi settings with your local network name and password. Be sure to select the “Enable discovery service” checkbox.

Once configured, the Pixelblaze will reboot and connect to your network. To find it, visit the Cloud Discovery Service, which displays all Pixelblaze boards on your network (Figure U).

Figure U

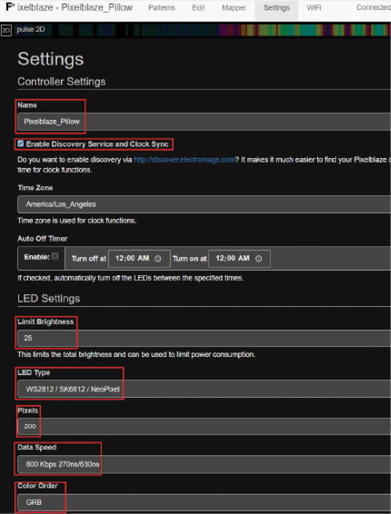
Selecting the board will open the Pixelblaze web app in your browser, where you can configure the LED setup and display patterns. First, select the Settings tab to configure your LED string characteristics (Figure V). Assign your board a descriptive name. Set the LED Type to WS2812 and the Data Speed to 800 Kbps. If you are not sure of the Color Order, select GRB — if the colors in some patterns look wrong, you may have to experiment with this setting to find the correct option. Set the number of pixels to 200, for the two LED matrices. It’s a good idea to limit LED brightness in the settings to reduce power consumption and heat output. Specifying a maximum 25% power is usually more than adequate to generate a bright display.

Figure V

5. MAP THE LEDS

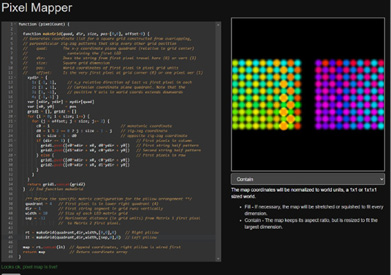
The Pixelblaze app stores LED configurations independently from the animation code, so the same pattern runs without modification on different layouts. To map the pattern to a specific pixel arrangement, you need to give the app the relative position of all the LEDs. We specify LED positions in the Mapper tab. Any coordinates entered there will be automatically scaled by the app to a range of [0,1] for standardized use in code for different LED patterns.

The text box in the Mapper tab will accept a formatted list of Cartesian coordinates, but it can also generate pixel locations from a JavaScript program (Figure W). Download the code file PixelPillowMapperCode.txt, then paste its contents into the Mapper text box. This code specifies pixel locations for the two pillows using variable parameters to define their orientations and separation. Be sure to click the Save button to retain the new mapping. You will know the map is correct when an affirmative message in green text appears below the mapper box and the screen image showing the positions of each LED resembles the physical layout of the pillows’ LED matrices.

Figure W

You may want to experiment with the Mapper tab’s Fill and Contain options, which stretch the pattern to eliminate empty space at the periphery or keep empty space to maintain the pattern’s aspect ratio, respectively. These options affect the appearance of different patterns in different ways, so the choice is strictly aesthetic.

6. ATTACH DIFFUSER AND COVER

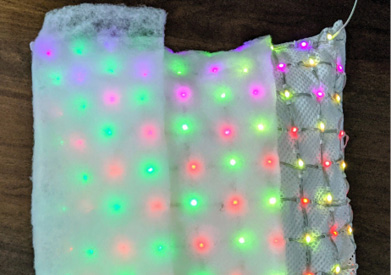
The final assembly step conceals the electronics by placing the pillows inside the decorative covers. A 20″×٢٠” square of quilt batting over the LEDs helps to diffuse emitted light and prevents twist tie wires from poking out. Figure X shows the difference in appearance of LED light shining through (from right to left) no diffusing material, a single layer of batting, and a double layer of batting.

Figure X

Place one 20″ square of batting over each matrix, then insert the pillow and batting together into the decorative cover. Plump the pillow and tug the corners to ensure they fill the cover evenly. Smooth out the batting if it has bunched up inside the cover. Then zip the pillow covers almost completely closed, leaving just enough of a gap for the wiring to emerge.

Tip: The fuzzy white shag fabric is an amazingly good light diffuser as well, so not only is it a fun texture, it’s a functional element.

Arrange your pixel pillows on a sofa or bed, tucking the wiring out of the way to hide it. If you change the pillow orientation and position, be sure to update the Pixelblaze Mapper.

7. PICK YOUR PATTERNS

This last step is by far most fun to execute. The Pixelblaze controller comes with several dozen animation patterns pre-installed. Switching between them is as simple as clicking the pattern name in the app’s Patterns tab. The pillow display will update immediately.

You can view and modify the pattern code in the app’s code editor. Select the Edit button next to a specific pattern in the Patterns tab to bring its code into the editor window. You can also access the pattern editor directly via the Edit tab and create new patterns there or upload them from pattern files in the .epe format.

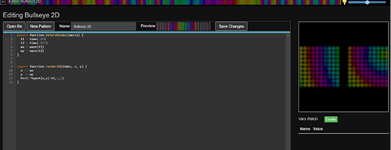
Only a few lines of code are required to create your own original pattern, like this Bullseye pattern that sets the pixel colors based on their distance from an oscillating central point. The oscillations around the center are created easily in the code with the Pixelblaze editor (Figure Y).

Figure Y

When making or modifying patterns you can verify that your color settings and pixel map are correct by comparing the editor pattern preview window to the actual display (Figure Z). If you’re not comfortable with jumping in to coding your own patterns, making small changes to existing code and watching the real-time display response is a great way to learn.

Figure Z

The Pixelblaze pattern editor has far too many powerful and useful features to describe here, but you can explore them in greater depth at here. There’s an open source library of Pixelblaze patterns from various contributors here; those with a “2D” designation in their name will generally look the best on the pillow display. And programmer “Zranger1” has created a wonderful collection of intricate 2D patterns in his Pixelblaze repository  that are worth trying out.

NEXT STEPS

If you’ve enjoyed making your own set of LED matrix pillows, and would like to take this project even further, here are a few ideas:

• Use the Pixelblaze app’s Playlist feature to collect your favorite patterns in an auto-play display

• Add a Pixelblaze sensor board for sound or motion reactivity in your animations

• Create and connect additional pillows to connect in series for an even larger decorative display

• Sew a matching LED throw blanket

• Switch to battery power. I ran the pillows continuously at 25% brightness and the power draw stayed below 2 amps the entire time, so any portable phone charger capable of putting out 2A (many of the larger capacity ones can do that) will work fine for portability.

I’ve had more fun than usual creating and tinkering with this LED build and I hope others will enjoy its accessible construction and versatile display. It is home décor that is literally brilliant.