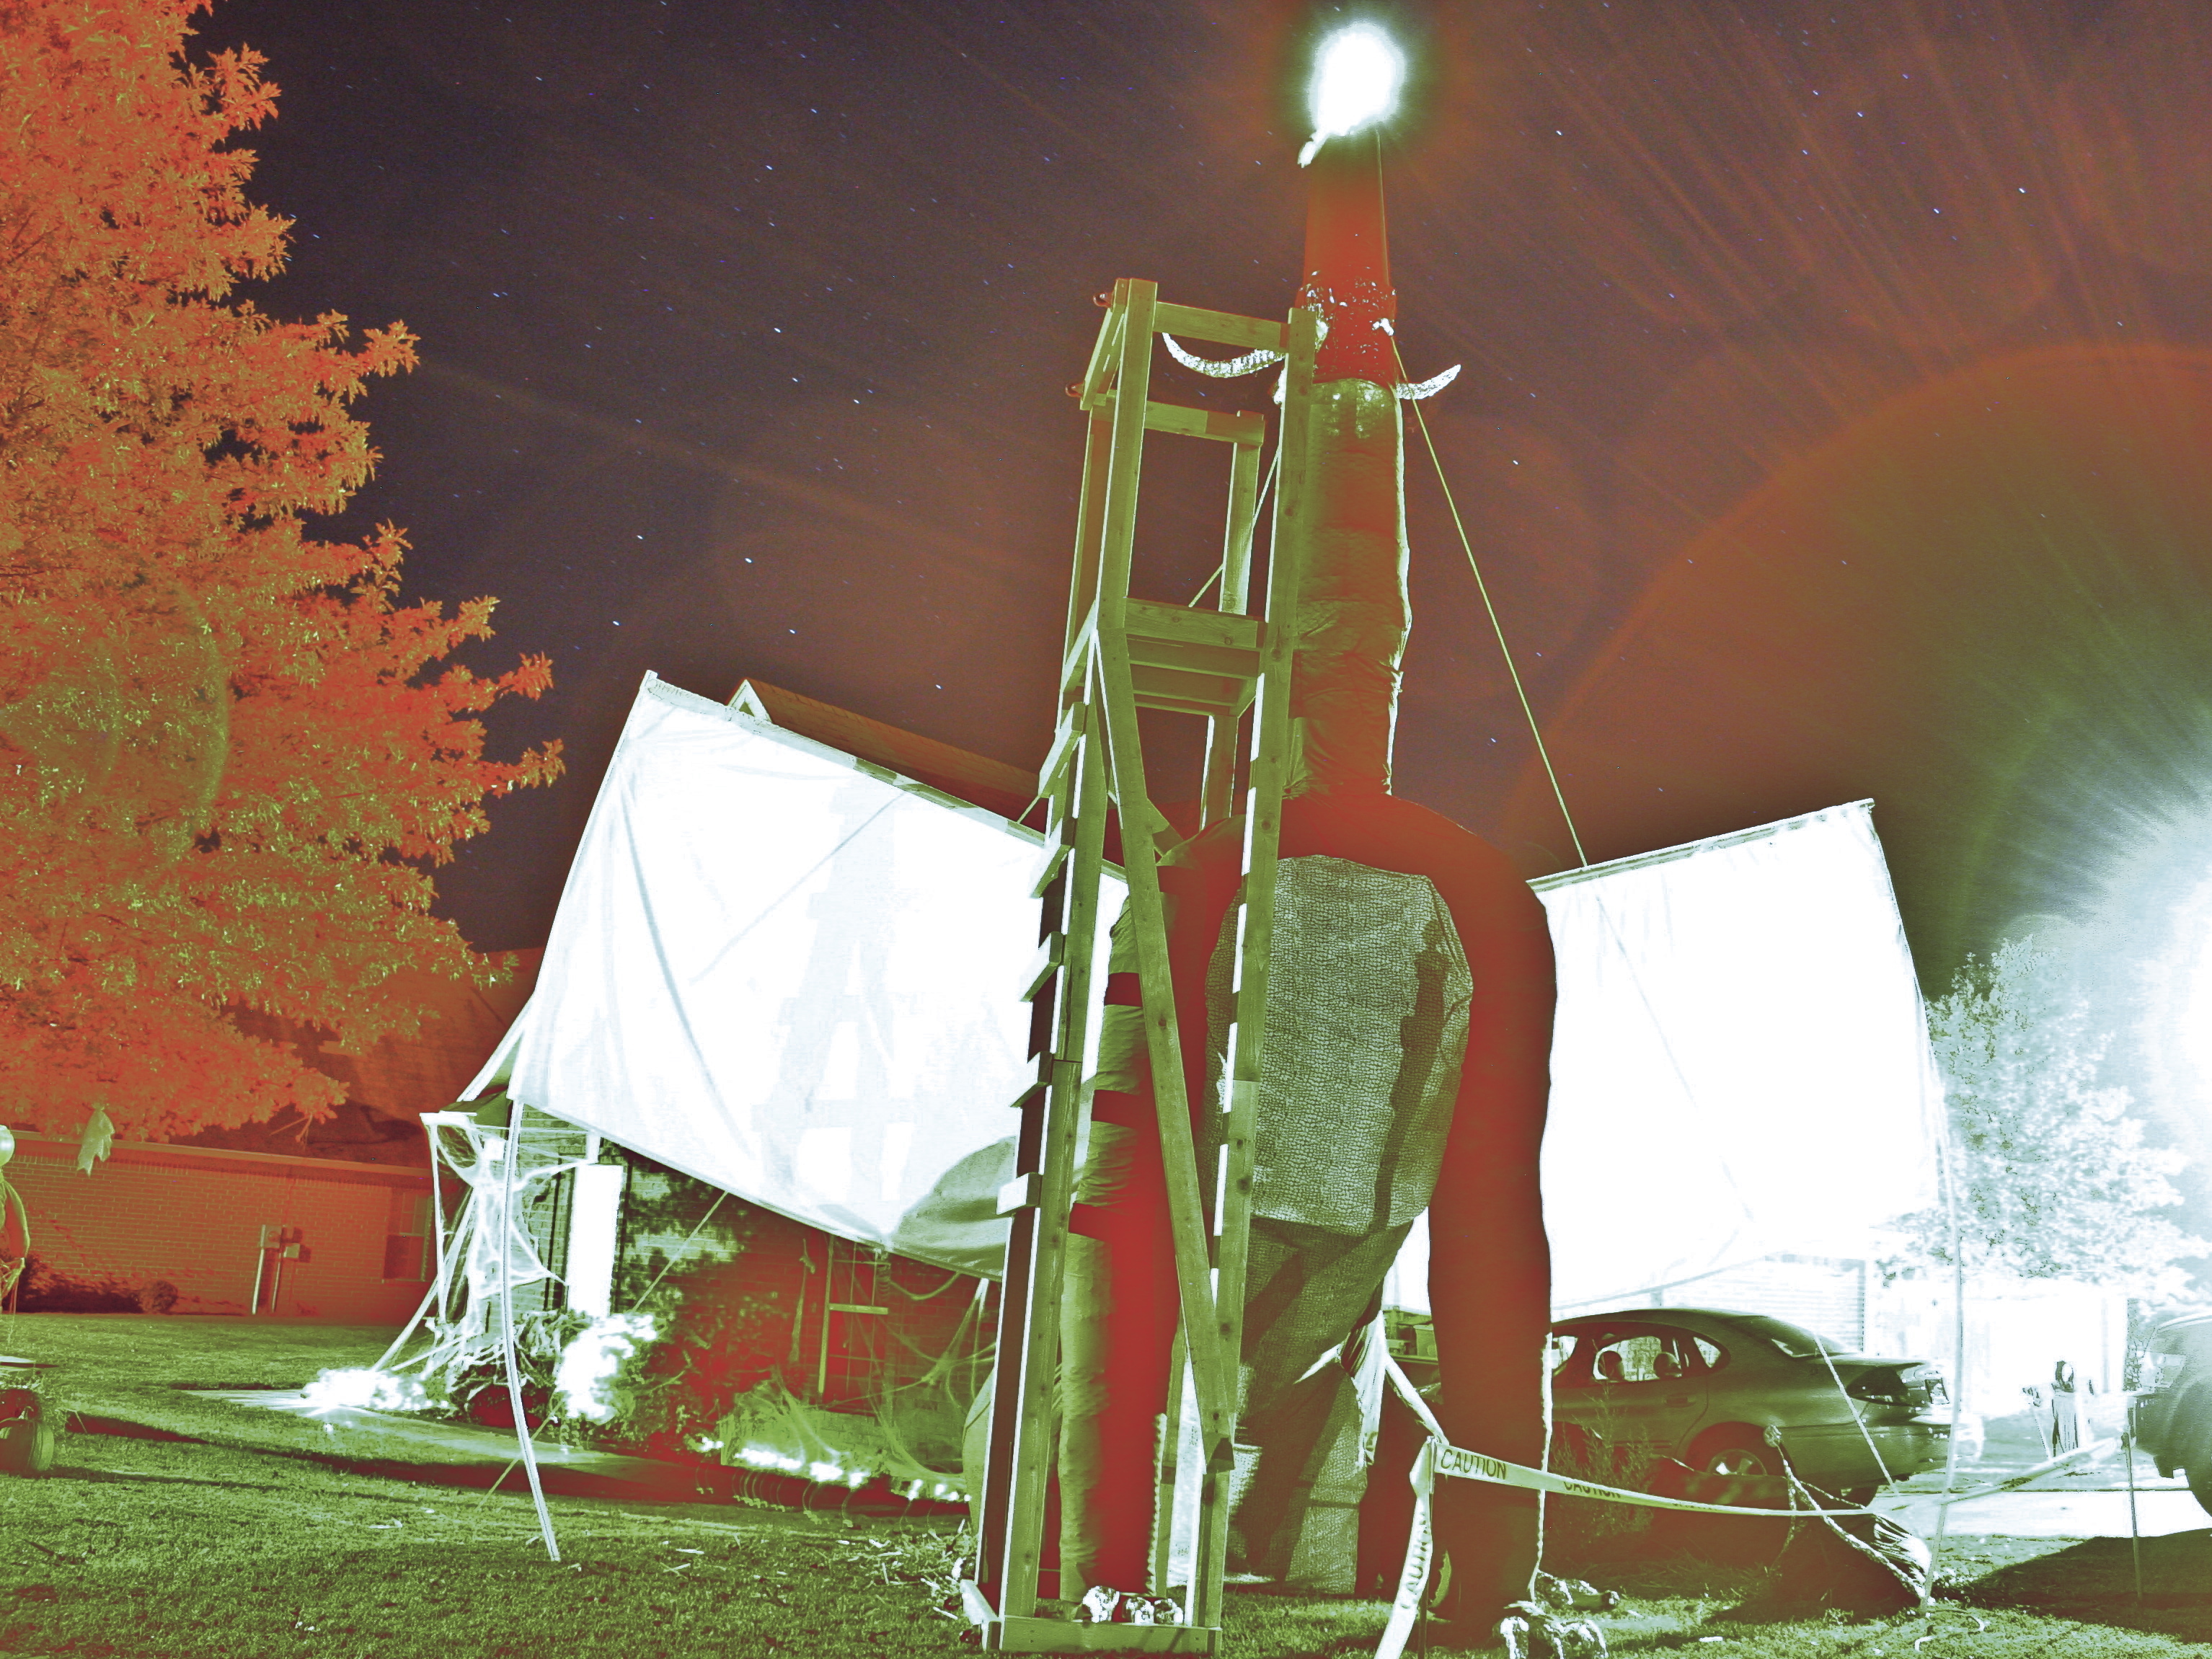
Have you ever wanted to have a gigantic lawn prop for Halloween? Perhaps something that the neighbors wonder about as it’s coming up, and is so challenging, you wonder if you’ll be able to finish it? This is the project for you. Unfortunately, I did not write this and track everything carefully as I went, as I was not expecting to enter this contest, but the techniques are really what’s important here, not precise details.

The basic approach we took is to make a very simple skeleton out of 2×4’s, and then use electric fencing and chicken wire to create a wire frame to wrap fabric around. I constructed the head from a 5-gallon bucket, a lawn torch, some air-conditioning duct work, and 14-gauge steel plate welded into the shape of a snout.

As far as budget goes, I lost count. The materials list looks something like this:

2×4’s: 6-8 ft

Red Cotton: 40 yards +-

Scaly Cotton: 5 yards +-

Electric Fence Wire: 80-100 ft

Chicken Wire: 24″x??? (‘way more than I expected, and I lost count of the rolls purchased.)

14-Gauge Steel plate: 1 8×14″ sheet (if I recall).

1 5-gallon bucket

1 roll aluminum foil

1 10″-diameter, 2-part AC duct

What will the next generation of Make: look like? We’re inviting you to shape the future by investing in Make:. By becoming an investor, you help decide what’s next. The future of Make: is in your hands. Learn More.

Project Steps

At this stage, the design was very experimental. We decided to try mounting a propane lawn torch to a 5-gallon bucket using some U-Bolts as shown, and to remove the bottom of the bucket so the torch could stick through. We did a test burn to verify that the heat from the torch would not melt or burn the bucket.

Having successfully verified that our bucket would not ignite due to the presence of the lawn torch, we figured it was safe to move ahead and begin building a frame. We started by assembling 2 full-length 2×4 studs to a 2×4 beam, and cutting a couple of angles to keep them reasonably square. This became the shoulders and the front legs.

Next we made a “T” assembly, which would become the neck. This meant that the head would be mounted pointing straight up, which was our intent. My thinking on that was that since hot air rises, the exhaust from the fire would leave the dragon and flow into the surrounding air, thereby avoiding catching the rest of the dragon on fire.

We left the neck assembly on the side and added a spine. This consisted of two 2×4’s, and a short bit to act as a connector to the shoulder/leg assembly. We did not frame hind legs, because my intent was to make a sitting dragon. The hind legs were to be big circles on either side of the body. More on that later.

Obviously, the 2×4 framing looks absolutely nothing like a dragon. We originally thought we would use 5-gallon buckets wrapped around the legs to give them some bulk. It turned out there was a much easier approach: tomato cages. We picked up four of them at a Lowe’s or Home Depot, and mounted them on the frame. We were careful not to mount them perfectly up and down; this gave the illusion that the legs were bent at the elbows. We used the same technique to give the neck some curvature.

At this point we also began experimenting with using chicken wire, sometimes also referred to as poultry netting, to model the body. Basically, we rolled it to the general shape and folded it as necessary to get the exact shape we wanted to have.

The first real failure occurred at this point: We tried using self-adhesive fiberglass drywall tape and plaster of Paris as skin. It turned out not to work very well, and would have been ridiculously expensive if we had gone that route. It was a free failure, though, because we had both materials lying around from previous projects.

The next step was to begin building the wire frame. This step involved my first big failure, or at least waste of time – more on that in a minute. First, I’ll explain how I would do this if I knew then what I know now.

Using a fairly heavy-gauge steel wire, create “broad strokes,” like ribs, and lines that flow from the shoulders to the legs. Connect them to each other using a lighter-gauge wire as lashing to tie pieces together. This is how I eventually settled on making wire-to-wire connections. For wire-to-wood connections, I used a wiring tacker similar to this: Amazon

Now for the bit about the mistake. I thought that it would be a good idea to weld the heavy-gauge wire together. While this did work (when I didn’t burn all the way through the wire), it turned out to be a lot faster just to lash the wires. That was a costly error, as I did not own a welder before this project. However, I don’t regret it because I did learn how to weld and I welded the snout together (more on that in a few steps). A friend suggested that I record the welding on video, and I did: Welding 1

At this point, we started checking how the skin looked on the body. We simply draped red cotton fabric (over the course of this project, we bought out the whole supply at Jo-Ann’s fabric and Walmart) over the body to begin to get an idea of how the finished product would look. Something about this stage screamed “elephant” to me; but then, the neck wasn’t installed as it wouldn’t fit inside my garage.

I also started planning out how I would make the snout. The blue bucket with AC duct alone did not look like a dragon’s head. It really needed a mouth with teeth.

I drew some parts for the snout on a piece of sheet metal and began cutting them out with a Dremel tool. It would have been nice to have had a shear to cut these. With only a Dremel tool, and with this many cuts in fairly thick sheet metal, the cutting took a long time.

Next, I bent all four pieces of the snout and welded them together. I love those teeth!

The dragon had now grown to the point where further development would not fit in the garage, so he had to come out into the yard. We next added some skin and the frame for the wings. To fasten the skin, we simply used safety pins to clip the fabric directly to the chicken wire. For the frames of the wings we used PVC plumbing pipe with elbow connectors. To keep the wingtips in place, we put concrete form stakes similar to this into the ground and slid the PVC pipe directly over them.

I cut off the overlaps from the welding and mounted the snout to the rest of the head using sheet-metal screws. My wife made and added horns, using chicken wire to produce the shape and aluminum foil to give them a shiny finish.

Next, it was time to paint. I bought some engine enamel, rated to 500 degrees Fahrenheit, and primed and painted the head. I then taped off a triangle on either side for the eyes.

Around this time, I made another video showing our progress. Check it out here.

At this point, we needed to raise the head into place. The approach we took was to mount a piano hinge at the shoulders and connect the head there. We then pushed the head up using a 2×4.

That turned out to be the next big, and nearly very painful mistake. It would have been wiser to use a crane. Too bad I didn’t have access to one on my budget.

The mistake was that at a certain angle the 2×4 I was using to push the head up lost its grip and slipped right off the end of the neck/head assembly. That was a problem, because I was underneath it. Fortunately, I was able to catch it rather than just get hammered on the head by it. It was pretty scary.

We were recording at that point, so you can see that here. Unfortunately, the camera’s batteries died shortly after that, and the sun went down, so you don’t get to see the successful attempt. What we did differently was, rather than pushing directly on the head, we pushed on the neck. The fabric provided much more traction than the slick metal, and we were able to push the head up.

At this point we had to buy more red fabric. Jo-Ann’s was out, so we went to Walmart. They were almost out, and we were starting to worry that we would not be able to find enough fabric to finish the dragon, but then we noticed that they had a green-on-white fabric which looked an awful lot like a pattern of reptile scales. So we decided that our dragon was not 100% red. Instead, he would have a lighter set of scales on his chest and belly. So we cut the red fabric from his chest and belly and used it on his tail.

For the wing panels we used bed sheets. The wind in our neighborhood tends to be pretty strong, so we decided not to get enough fabric to enable the wings to reach all the way to the ground or connect to the vertical frame pieces. The wings were close enough to acting like sails to make our dragon nearly go airborne as it was!

One thing that we discovered in this process was that our cat loves dragons. Or at least, he loves models of dragons that he can use as his own personal jungle-gym.

Once we finished applying the skin, it was time for the finishing touches. We used hay to make it seem as though the dragon was nesting and we created three eggs by wrapping some balloons in plaster. One of the eggs cracked, so we made a mini dragon’s tail and claw to simulate a baby dragon clawing its way out of the egg.

We asked one of our neighbors if we could install a sign in her yard indicating to trick-or-treaters, or just passersby, that there were dragons ahead and they should be careful. On the side facing the sidewalk we scrawled “THAR BE DRAGONS,” and on the side facing the street we simply wrote “DRAGON”. The sign was cut in the shape of an arrow so people would know which way the danger was.

We made a scaffold so I could climb up and light the torch. I could not get high enough to use the flint lighting tool, so lighting the torch meant using a tiki torch on a pole. I slid the lit tiki torch through the access panel that you can see in the video from step 8 and turned on the propane. This was fairly scary because I was up on a 10-foot scaffold, lighting a propane torch in a manner that is explicitly called out as a “bad idea” by its accompanying instructions. It would have been better to have figured out a remote lighting mechanism.

After lighting the dragon, I took a walk with the video camera from the sign up to the dragon. Enjoy.

Also, I’ve put up an album over at Picasa. Enjoy.

On Halloween night the dragon was a huge hit, as you might expect. The crowd around the house easily numbered in the hundreds at some points during the evening.