This project appeared in Make: Vol 87. Subscribe for more great projects.

Several hundred million electric toothbrushes are manufactured, and sadly discarded, each year yet most people don’t realize that toothbrush parts are salvageable and they don’t have to wind up in a landfill or the ocean.

Using the magnets and motors inside discarded electric toothbrushes — and also inside motorized personal fans, pencil sharpeners, fabric shavers, facial brushes, and toy cars — I’ll show you how to repurpose them to make 10 practical projects. Here in Part 1 we’ll build five using motors, and in Part 2 we’ll build five using magnets!

What will the next generation of Make: look like? We’re inviting you to shape the future by investing in Make:. By becoming an investor, you help decide what’s next. The future of Make: is in your hands. Learn More.

Project Steps

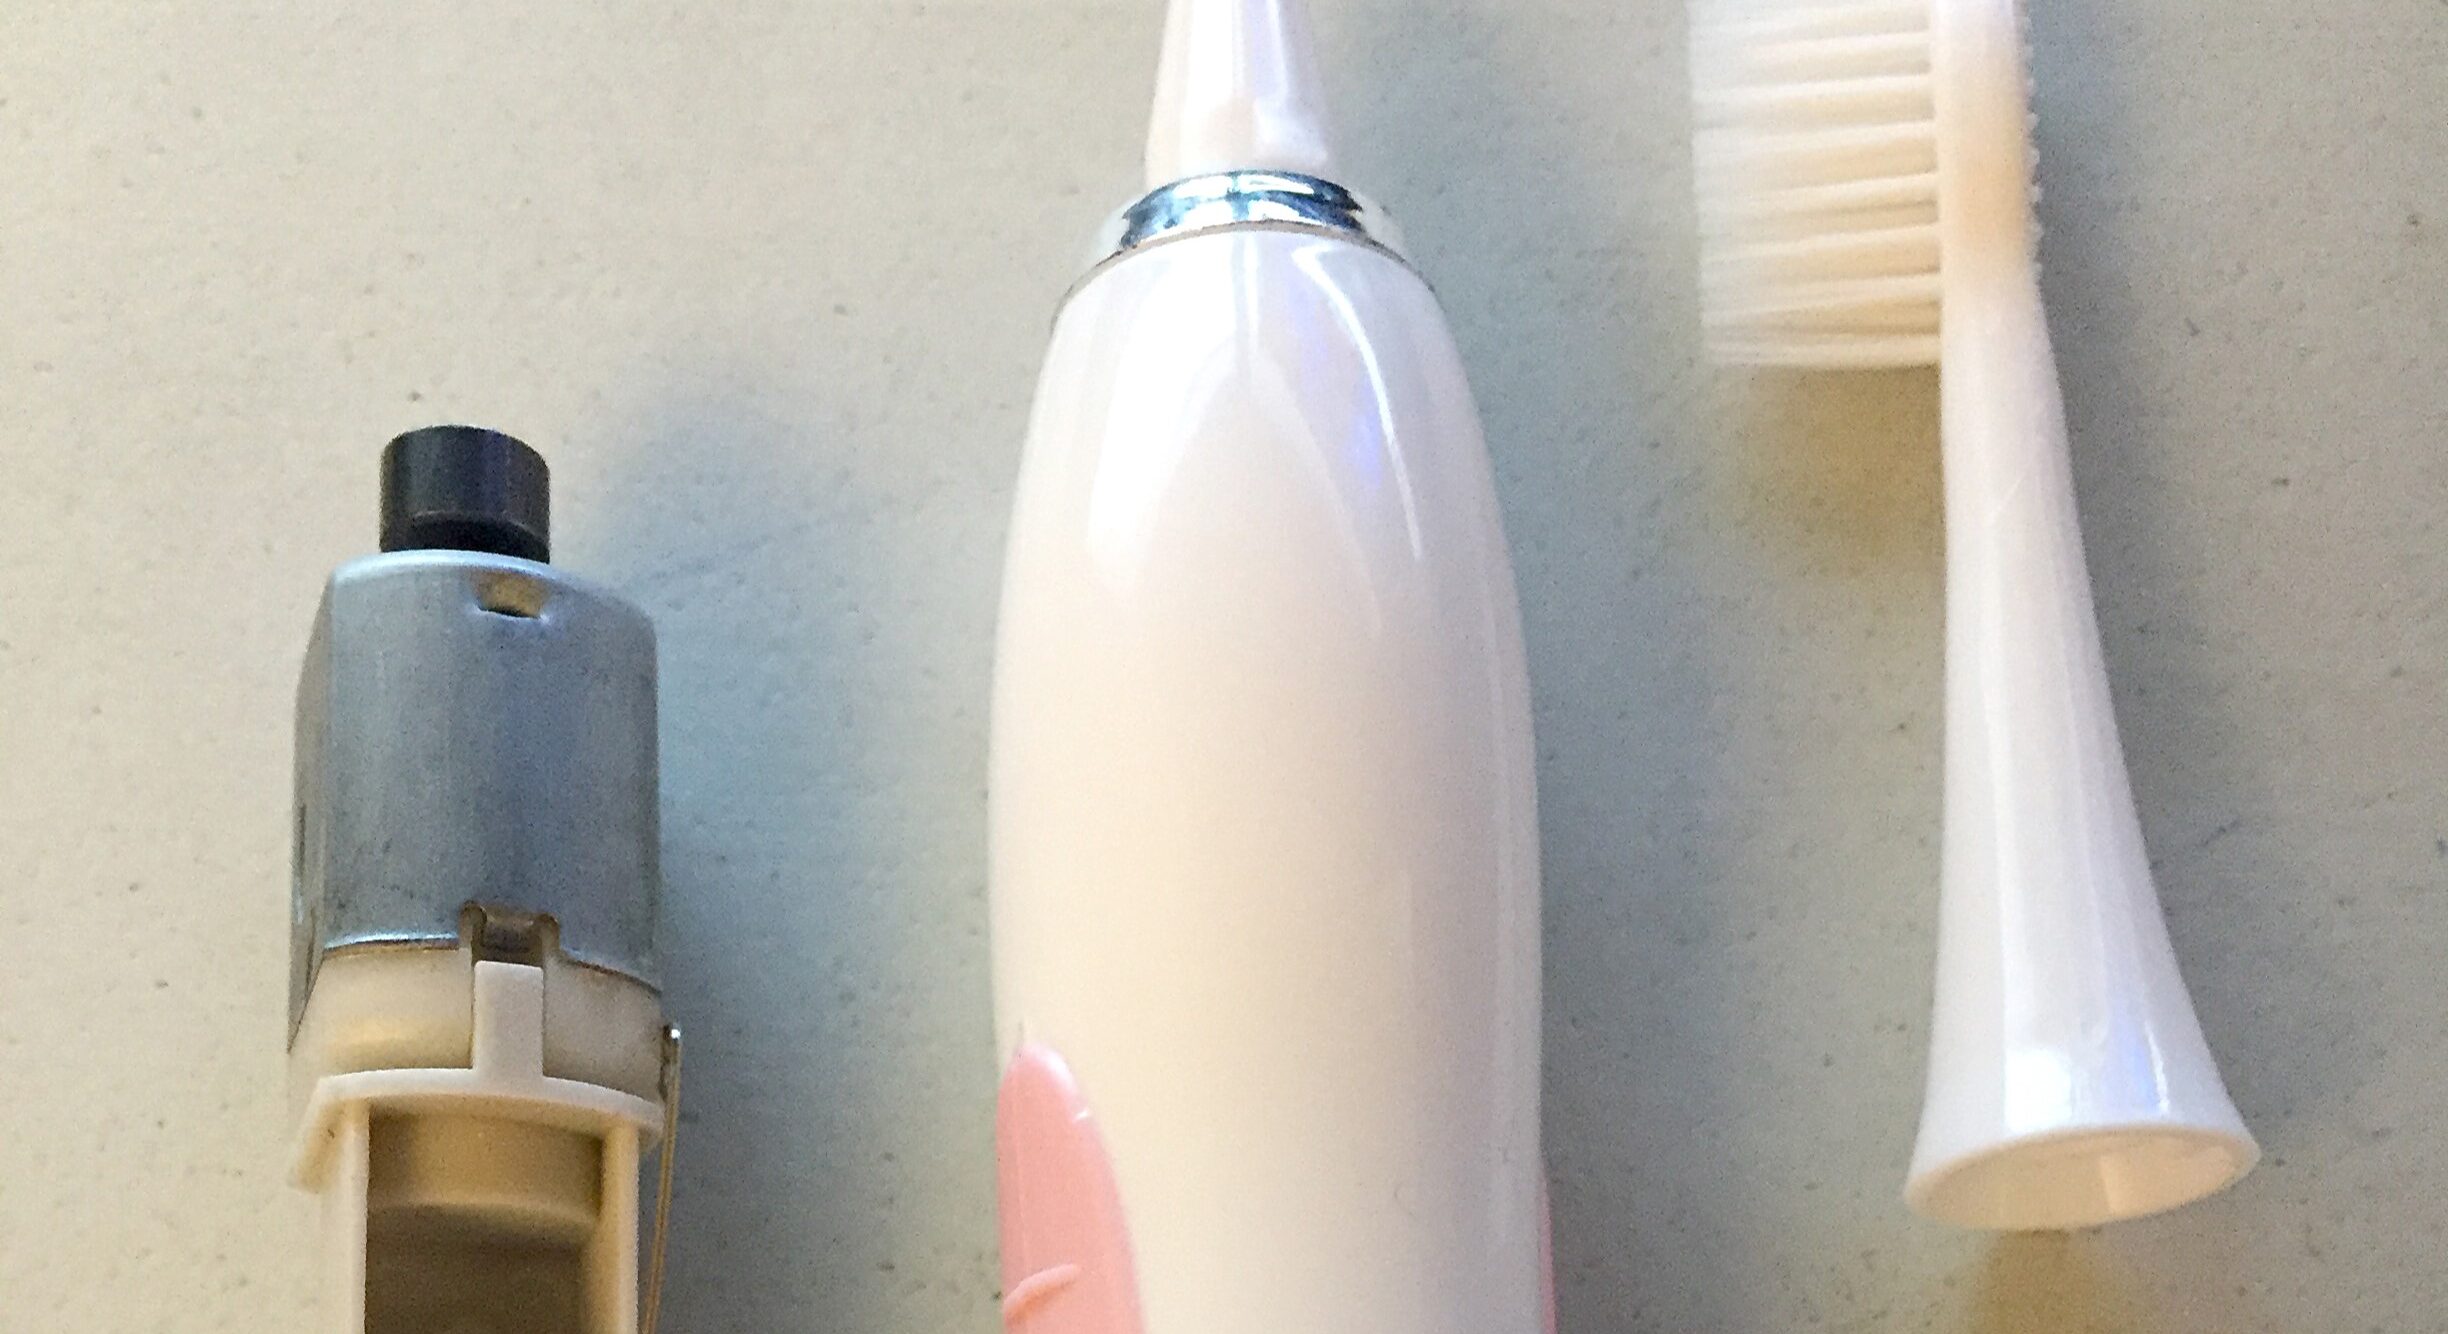
Toothbrush Disassembly

These instructions are for the inexpensive electric toothbrush models that use a replaceable AA batteries. Similar methods can be used for other varieties.

  1. Remove the toothbrush end cap and battery.
  2. Twist the case apart.
  3. Pull the motor out.

Motor Parts

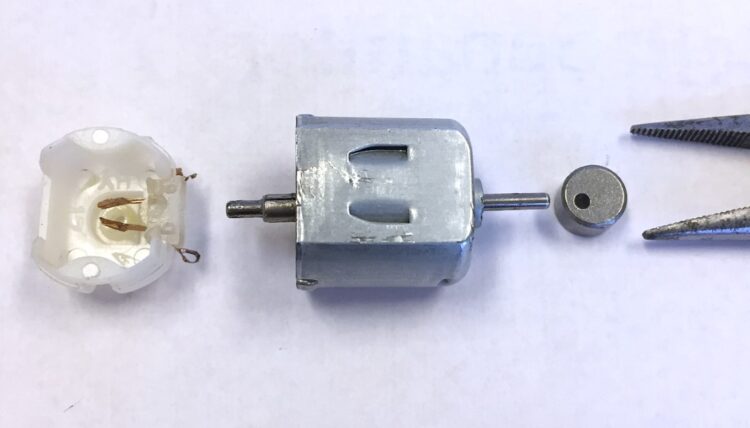
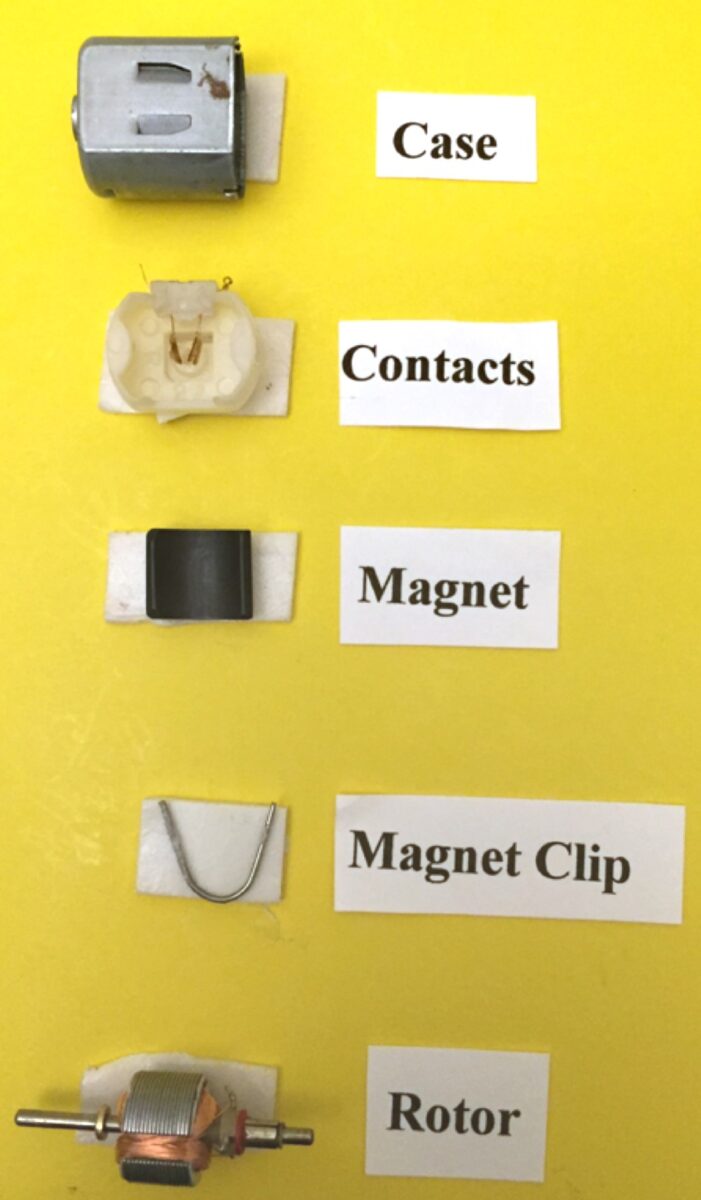
The motors in inexpensive electric toothbrushes (and many toys and consumer devices) are permanent magnet Micro 150 or 130 models. They typically include a small weight on the end of the motor shaft so that it wobbles while it spins to vibrate the toothbrush. You can pry the weight off the shaft with a pair of pliers.


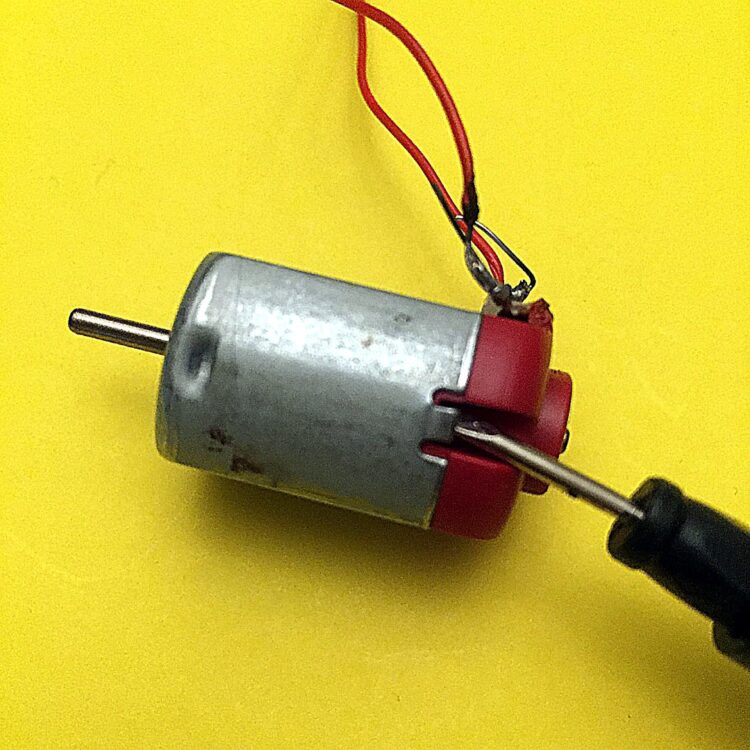
To open the motor case, pry the 2 side tabs upward with a small screwdriver.

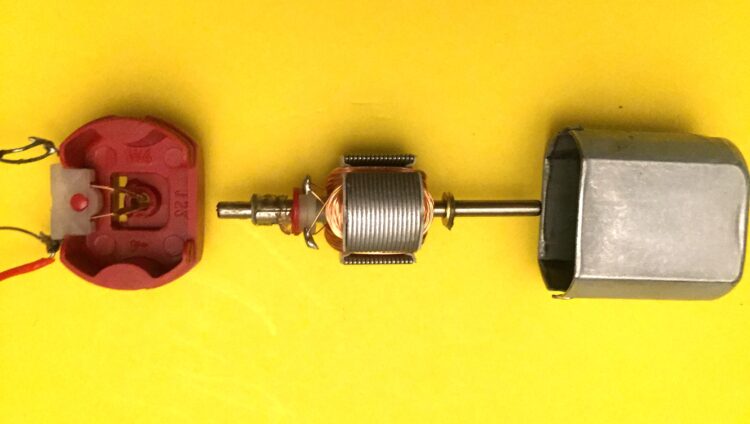
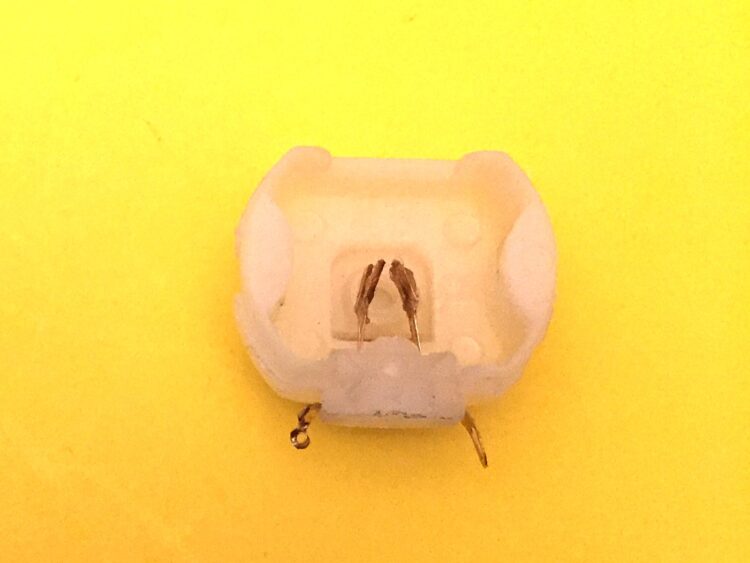
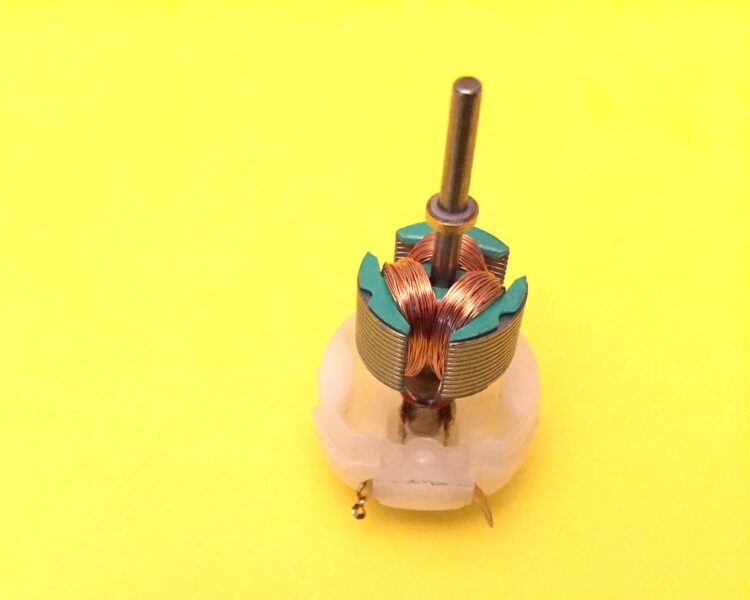
Next, remove the end cap, which holds the motor contacts. Then wiggle and slide the rotor out of the case.

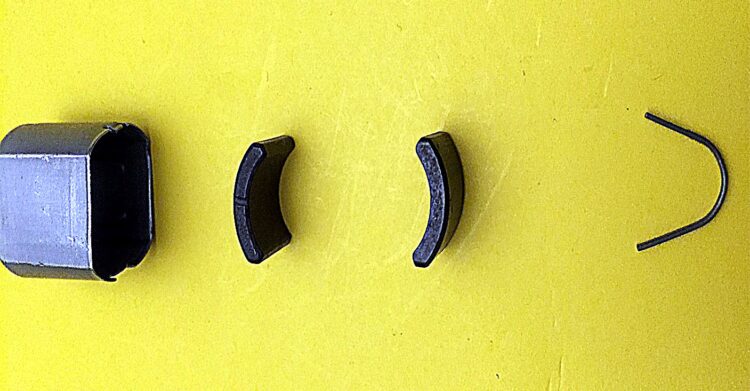
The two curved magnets in the case are held in place by a V-shaped metal clip which you can pry out with pliers and a small flat blade screwdriver.

How It Works

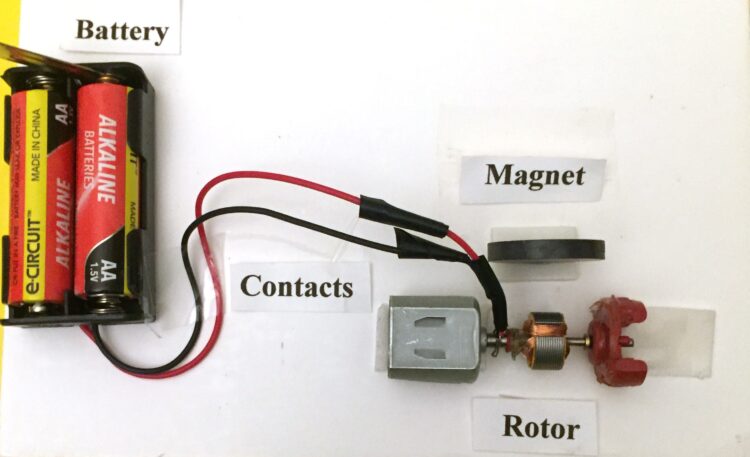
Notice the motor parts labeled below. The two magnets inside the case (the stator) surround the rotor (also called the armature), which is a set of spinning electromagnets.

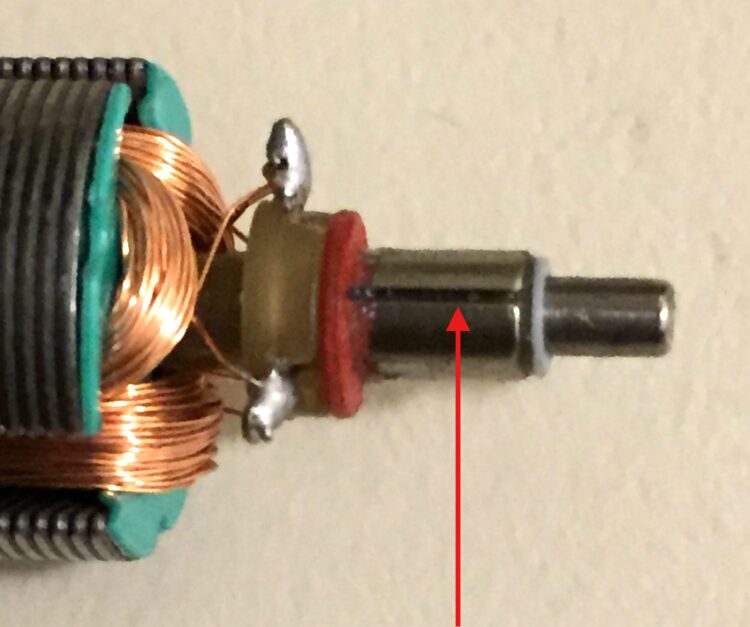
The rotor’s armature wire coils receive power from the commutator — a ring with gaps in it — on the end of the rotor. The commutator ring receives electrical power from the end cap’s contacts, which connect to the battery.

The commutator switches the polarity of the electromagnet armature coils so they alternately attract and repel the permanent magnets to keep the rotor spinning. To learn more, you can watch Jared Owen’s animated electric motor tutorial.

Easy Motor Repairs

Small motors usually fail because the wire coils are faulty, or the rotor does not spin freely, or the electrical contacts on the end cap do not properly contact the commutator ring.
If you have an inoperative motor:

  1. Test the motor with a known-good power source.
  2. Ensure that the rotor can spin freely.
  3. Bend the contacts so they touch the commutator ring when in place and test it again.
Motor contacts bent so they touch the commutator ring
Testing the motor again

NOTE: Check the motor’s suggested voltage rating for use with your projects. Generally, the common Micro 150 motors can run fine with 3 to 6 volts. If you want to use a higher voltage power source the motor will run faster but the batteries will also drain faster. You can place a resistor in series with the battery to reduce voltage for longer power usage.

1. Personal Mini Fan

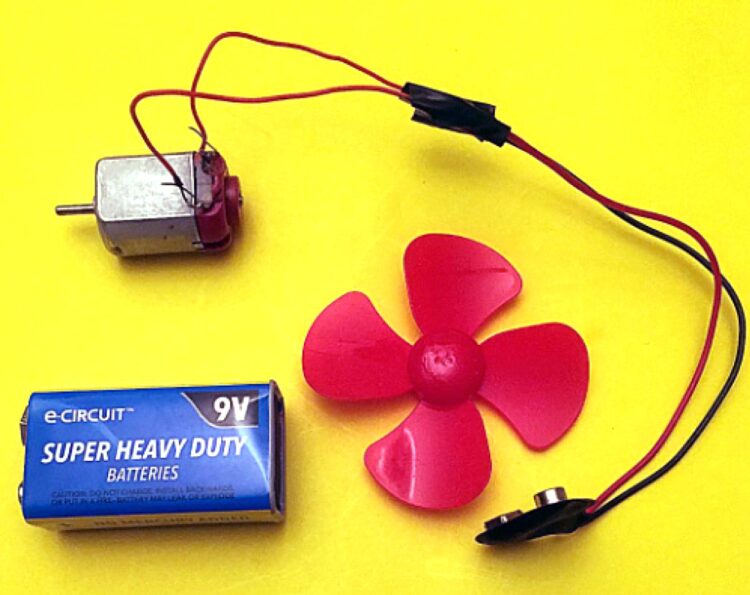
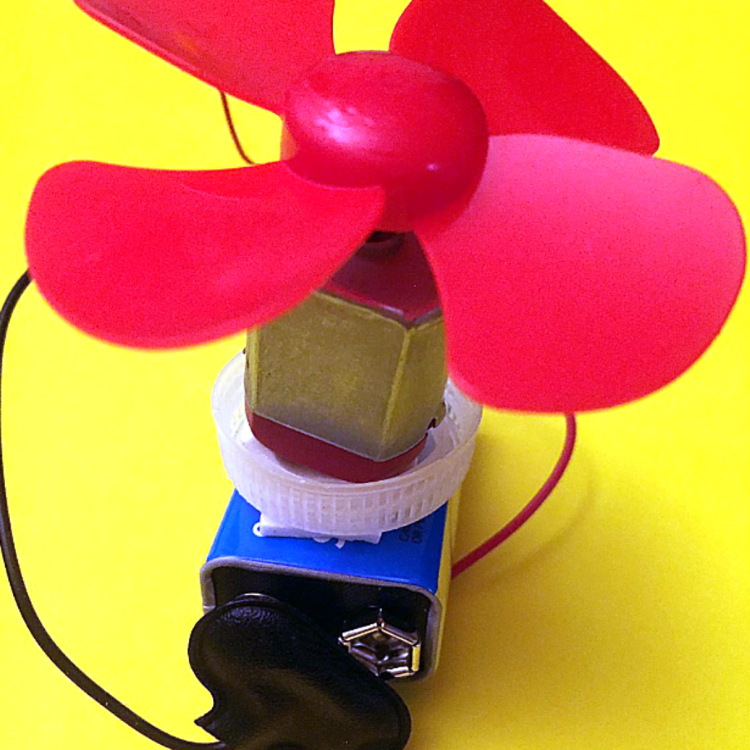
By attaching a propeller from an old toy, or cutting one out of a chip can lid or soda bottle plastic, you can easily construct a toy fan with a battery clip and battery, propeller, and adhesive foam tape as shown.

Connect the motor wires to the battery clip wires, and insulate the connections with electrical tape.

2. Bubble Blower

Position a wire loop dipped in bubble maker fluid in front of the propeller to turn your personal fan into a motorized bubble blower!

3. Sneaky Speaker

A motor has wire coils and magnets inside, and so does an audio speaker. You can improvise and use a motor as a makeshift speaker in a pinch!

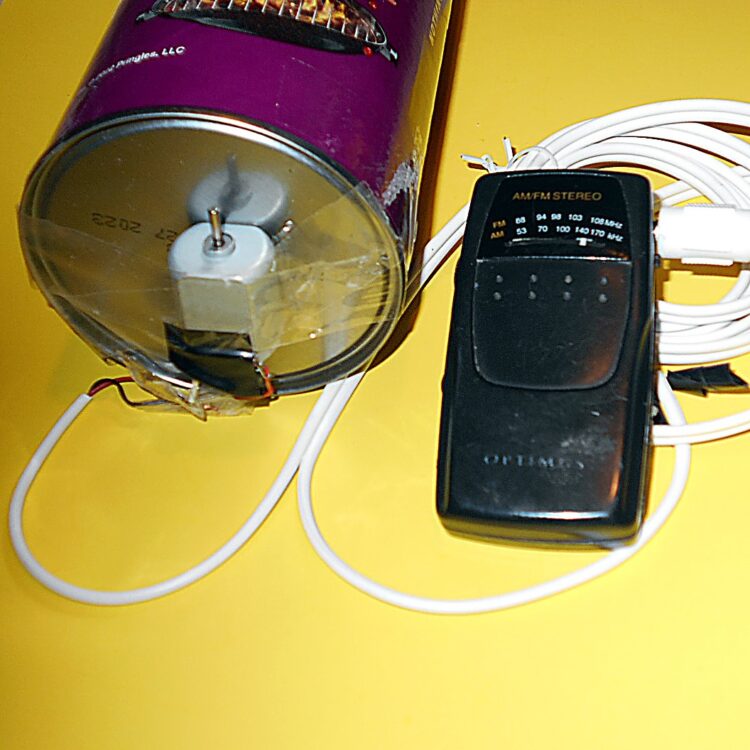
Cut one end of a 1/8″ audio cable and attach its wires to the motor’s wires.

Tape the motor securely to the bottom of a chip can. Then connect the audio cable plug to a sound source, like a radio. Turn the radio volume up high and you will be able to hear the radio audio from the can.

How it works: The sound signal is causing the motor wires to become an electromagnet which is attracted to the permanent magnets. This vibrates the motor case and produces sound just like a speaker does!

4. Mini Vacuum Cleaner

Here’s a novel project that will amaze your friends — convert your toothbrush into a mini vacuum cleaner!

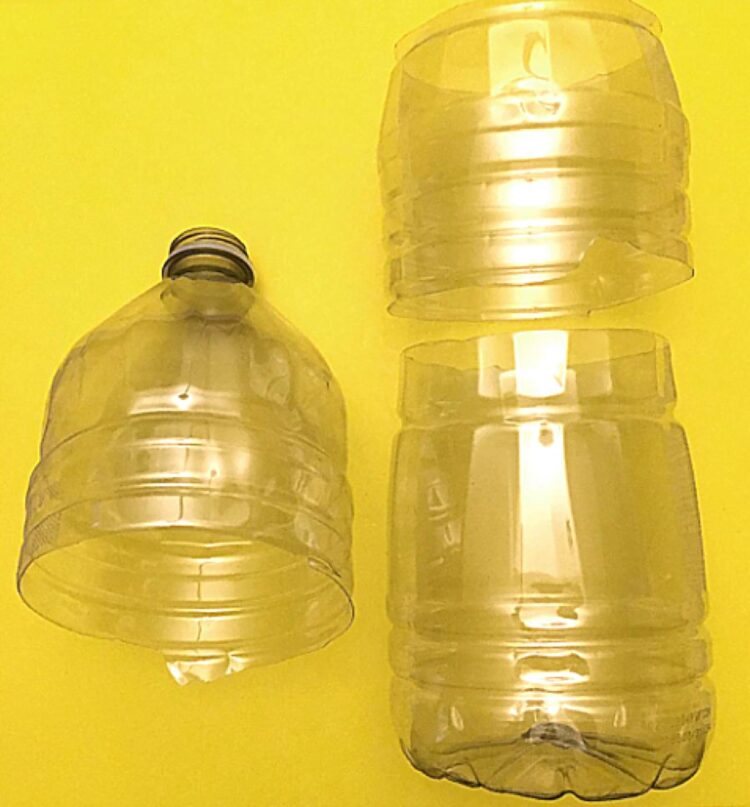
Obtain a soda or water bottle that narrows in the middle. Cut off the top and bottom sections of the bottle, removing about 3″ of the center section, so that the top fits tightly over the bottom.

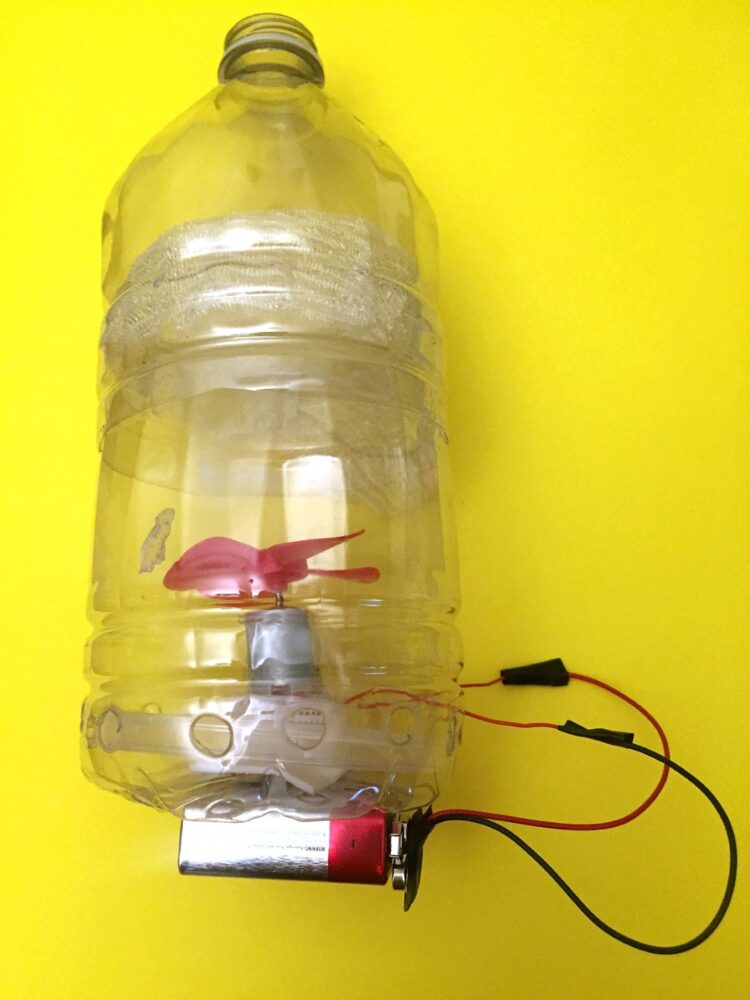
Poke holes around the base of the bottle. Then stick a piece of adhesive foam tape at the bottom inside. Stick the bottle cap and motor to a chip can’s plastic lid.

Place this motor assembly in the base of the bottle and lead the wires out the holes. Mount the battery outside the bottle with foam tape. Connect the motor and battery wires and insulate with electrical tape.

Place some screen material on the top of the base to prevent the debris from getting into the bottom of the bottle.

Press the top section of the bottle snugly over the base.

Turn on the battery power supply and your toothbrush motor can now vacuum dust, small particles, pieces of paper, and more.

5. Bonus Science Project

Demonstrate how a motor works while it’s mounted outside its case! Remove the end cap and rotor from a motor. Mount the case and end cap backwards with the rotor between them on a piece of cardboard. Ensure the rotor can spin freely.

Mount a strong magnet or two close to the rotor (or optionally, tape a strong motor underneath the rotor on the back of the cardboard). Press the battery wires on the rotor’s commutator ring and the motor will spin.

Conclusion

GOING FURTHER

Small motors can provide many more possibilities for science and craft projects. Here are a few suggestions:

  • Toothbrush motors can be used in innumerable science projects like a vibrobot toy, mini drill or sander, water pump, or electrical generator.
  • Substitute salvaged toothbrush motors into inoperative devices and toys to prevent unnecessary discards.
  • Copper wire in rotor armatures can be unwound and used for electrical circuits. Note that armature wire, aka magnet wire, has an enamel coating which must be gently sanded off at the ends to make electrical contact.
  • Motor cases can hold small electronic parts, screws, etc.

Up Next: Magnets

If you have a broken motor, you can salvage the magnets inside to make practical projects. I’ll show you how in the next issue of Make:!

Photos by Cy Tymony and Bill Melzer. This project appeared in Make: Volume 87. Subscribe for access to more projects.