

This tutorial shows how to connect a button to the TurtleBot power and gyro board.
Projects from Make: Magazine
Add a Demo Button to Your TurtleBot
This tutorial will show you how to add a button to your TurtleBot.
This tutorial will show you how to add a button to your TurtleBot.
This tutorial shows how to connect a button to the TurtleBot power and gyro board.
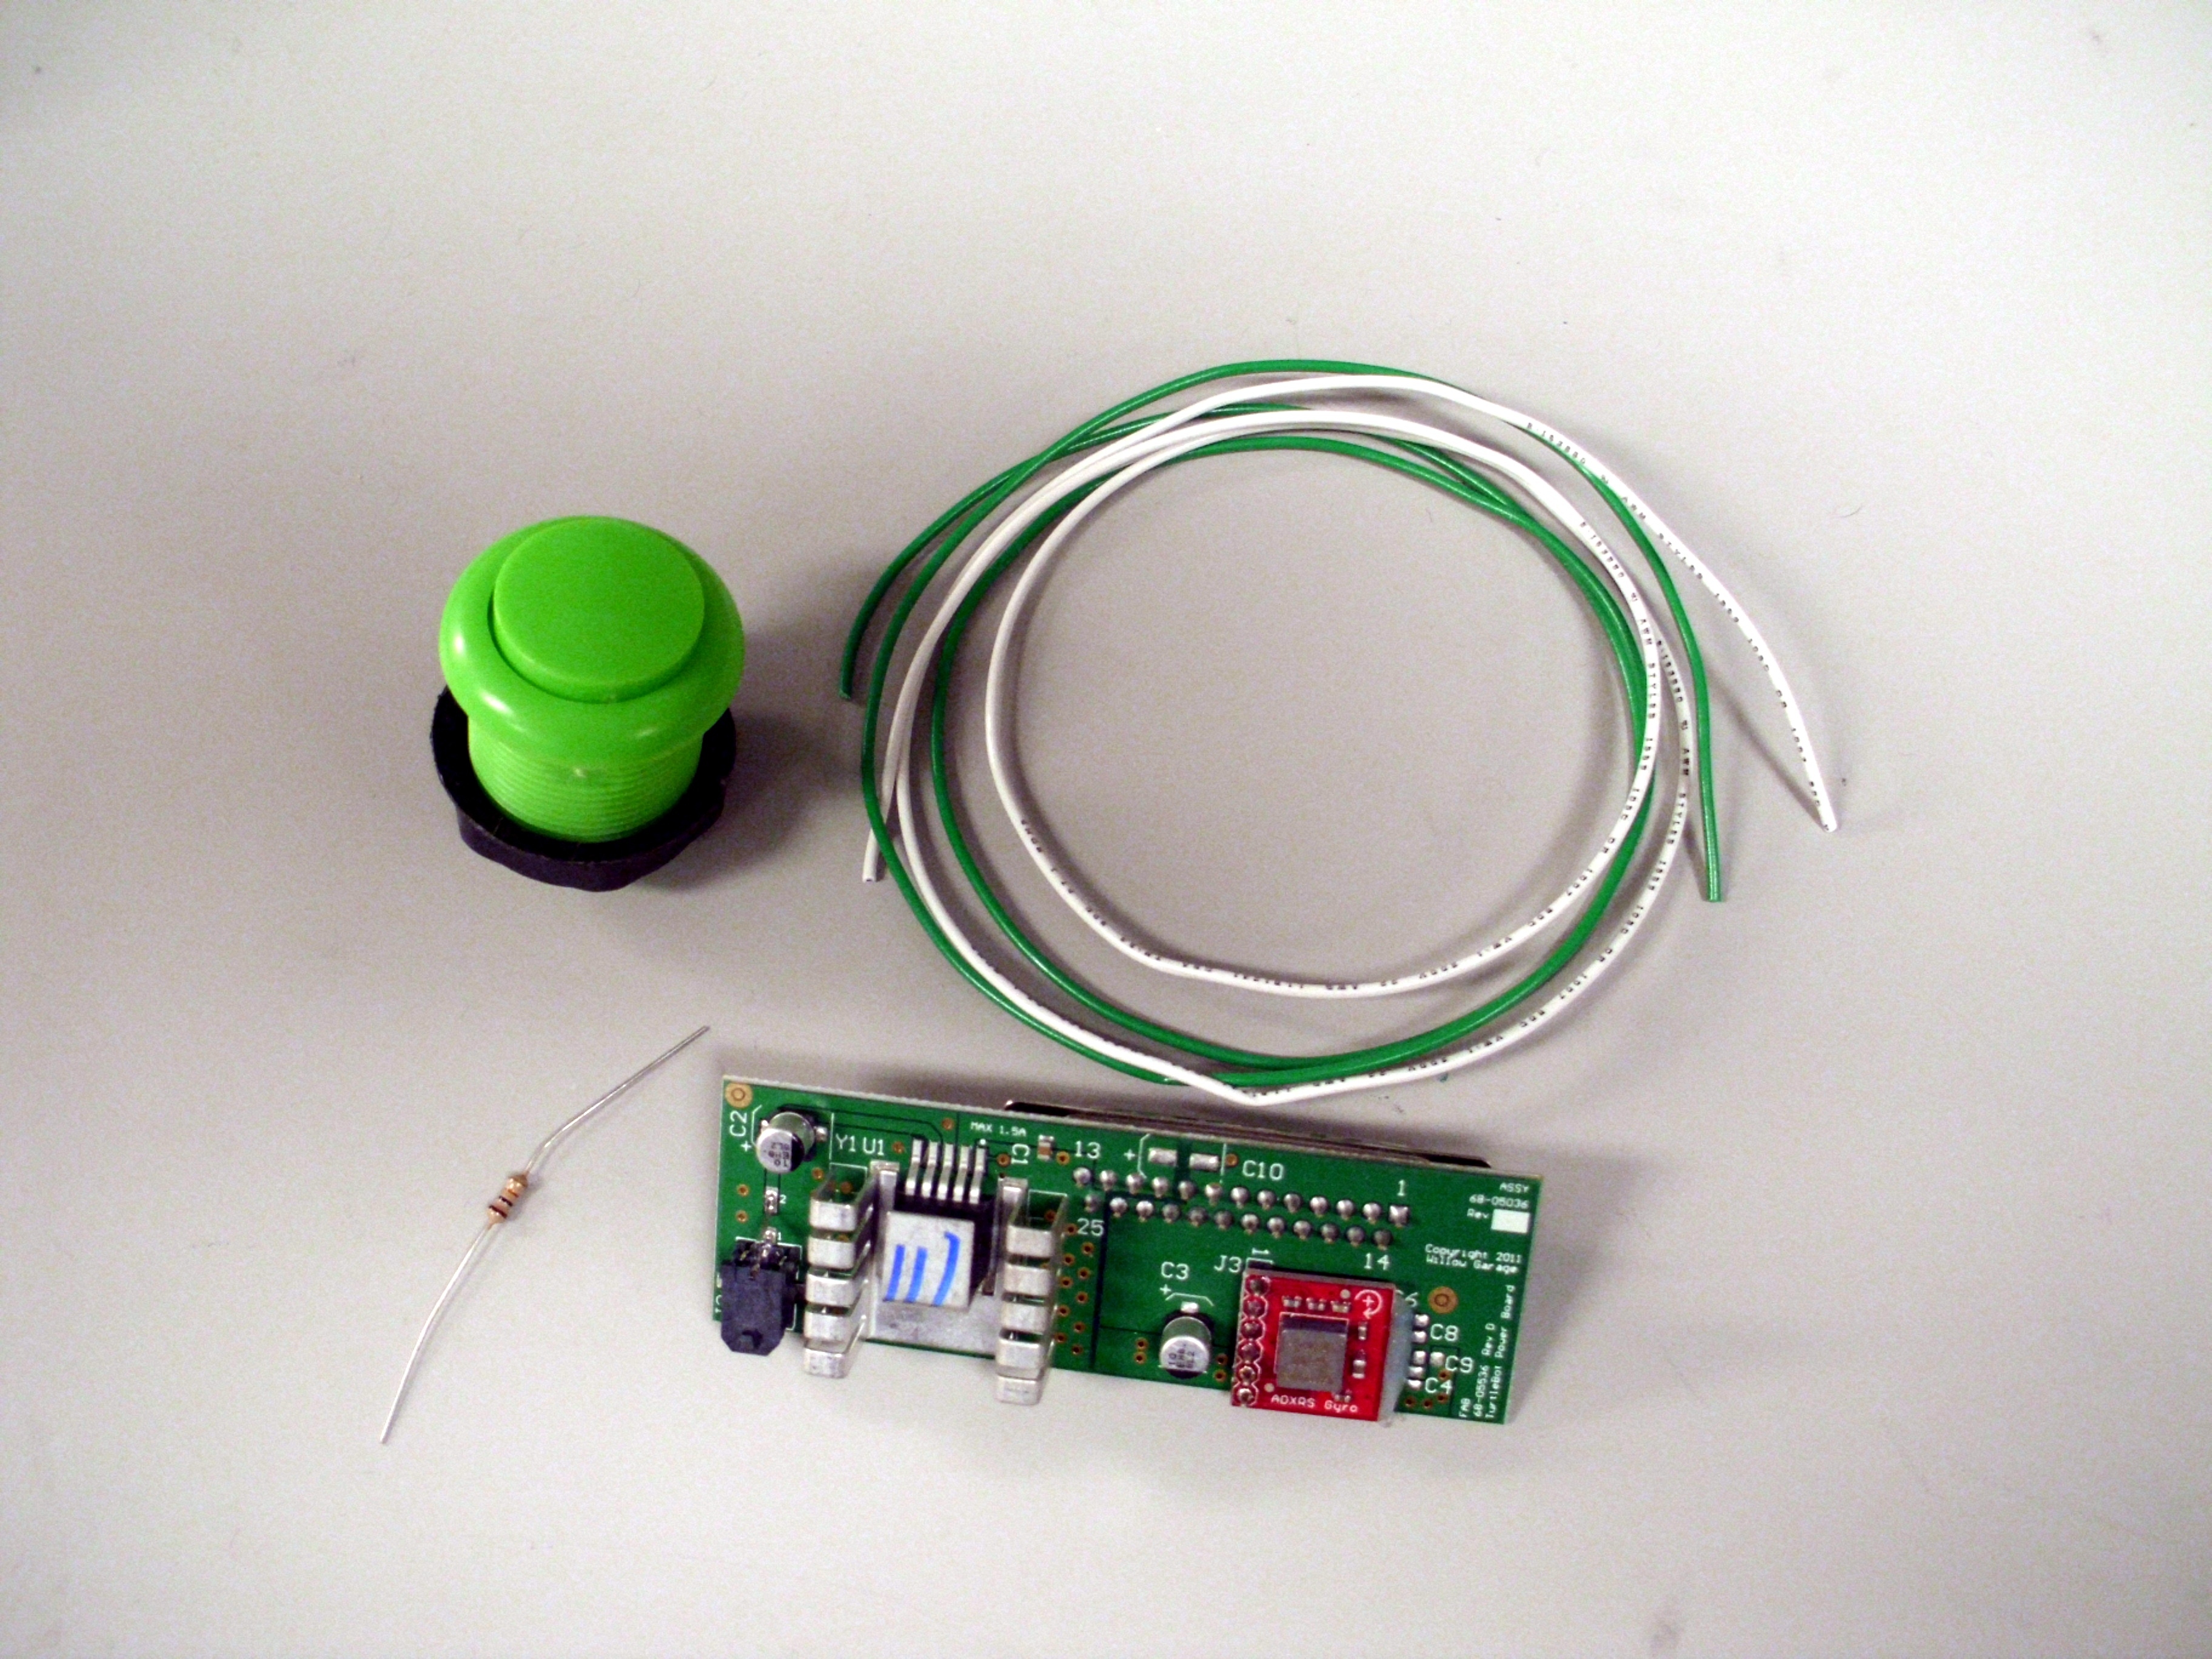
You will need:
Giant button
10K Resistor
Wires
TurtleBot Power Board
A TurtleBot might be of use as well
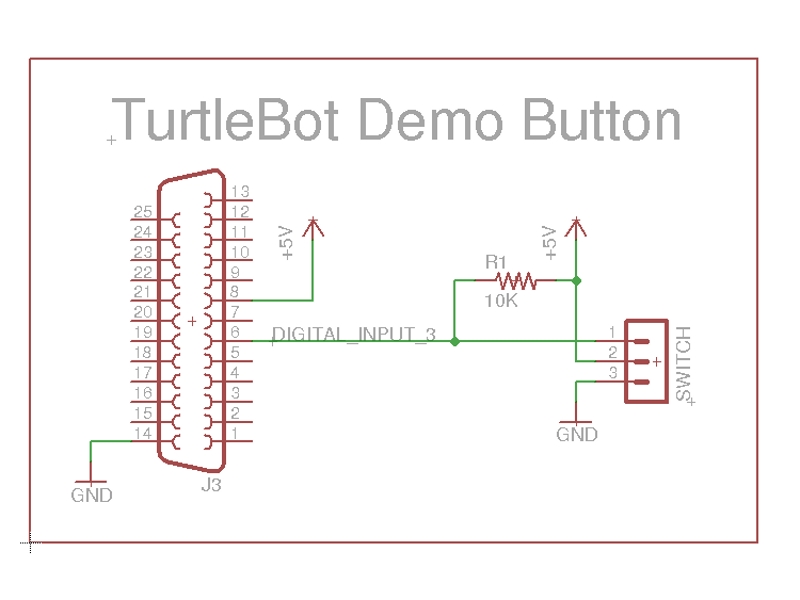
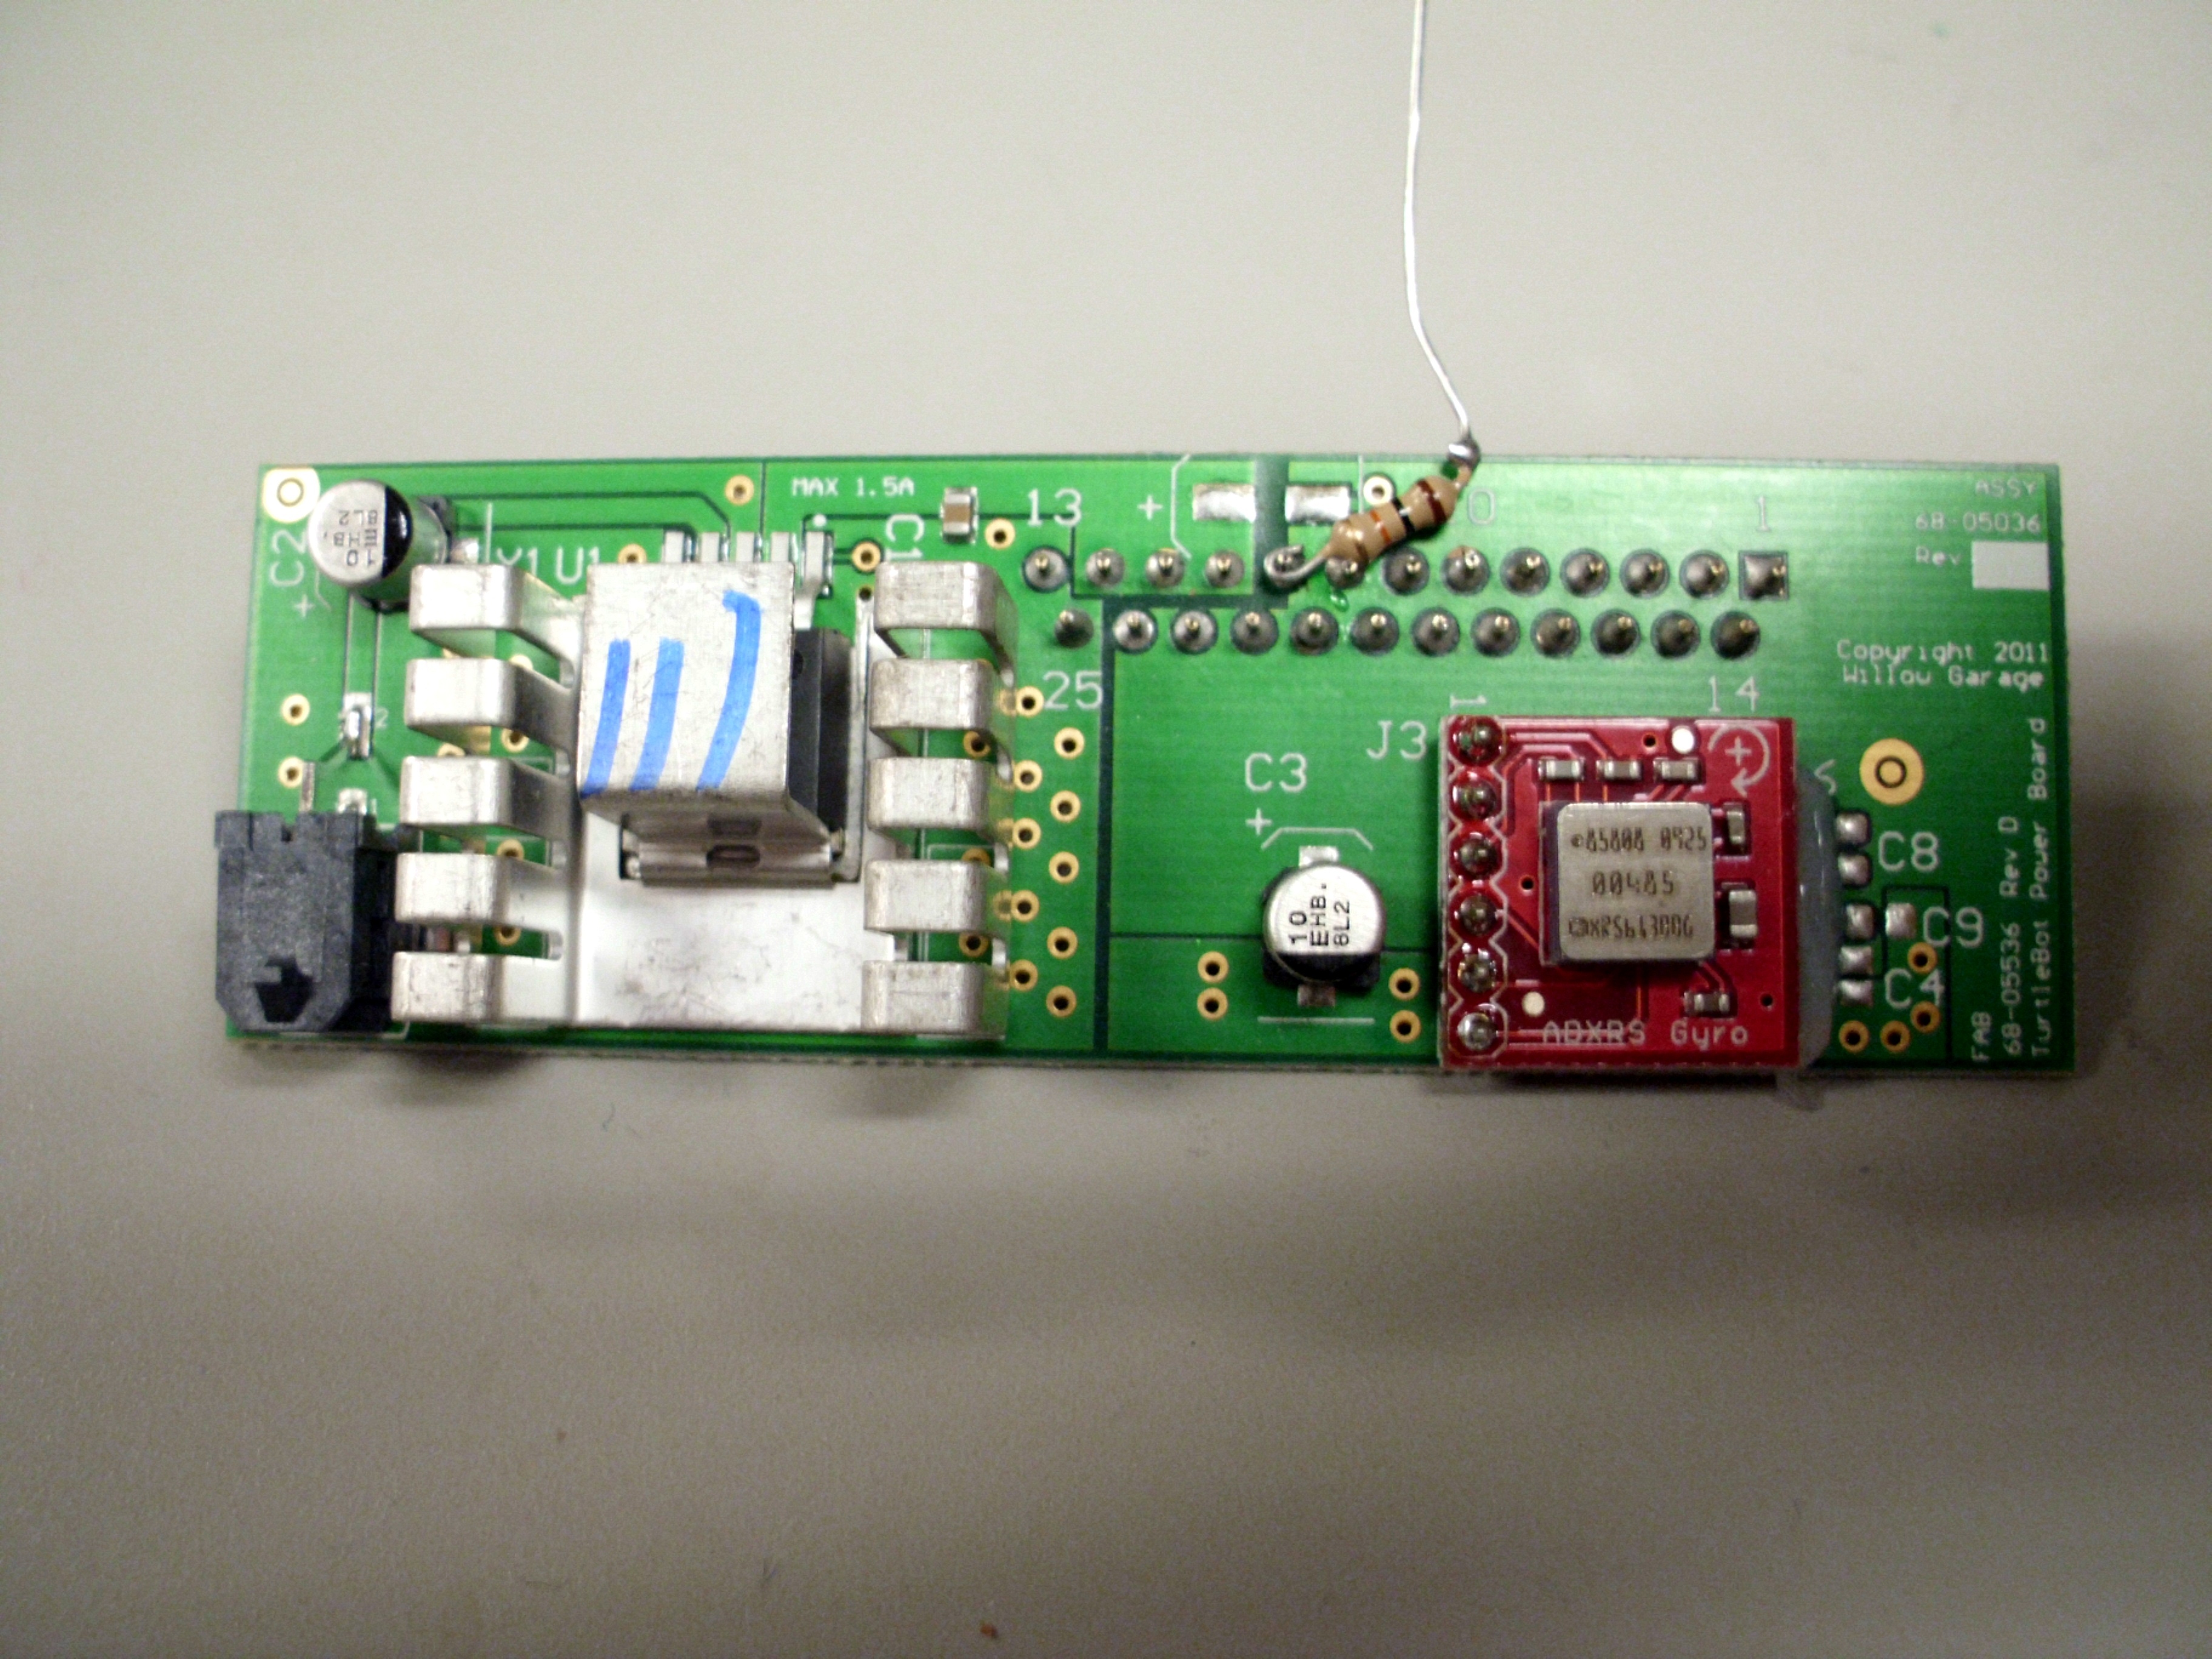
Solder one end of the 10K resistor to Pin 8 (5V) on the DB-25 connector of the TurtleBot power board.
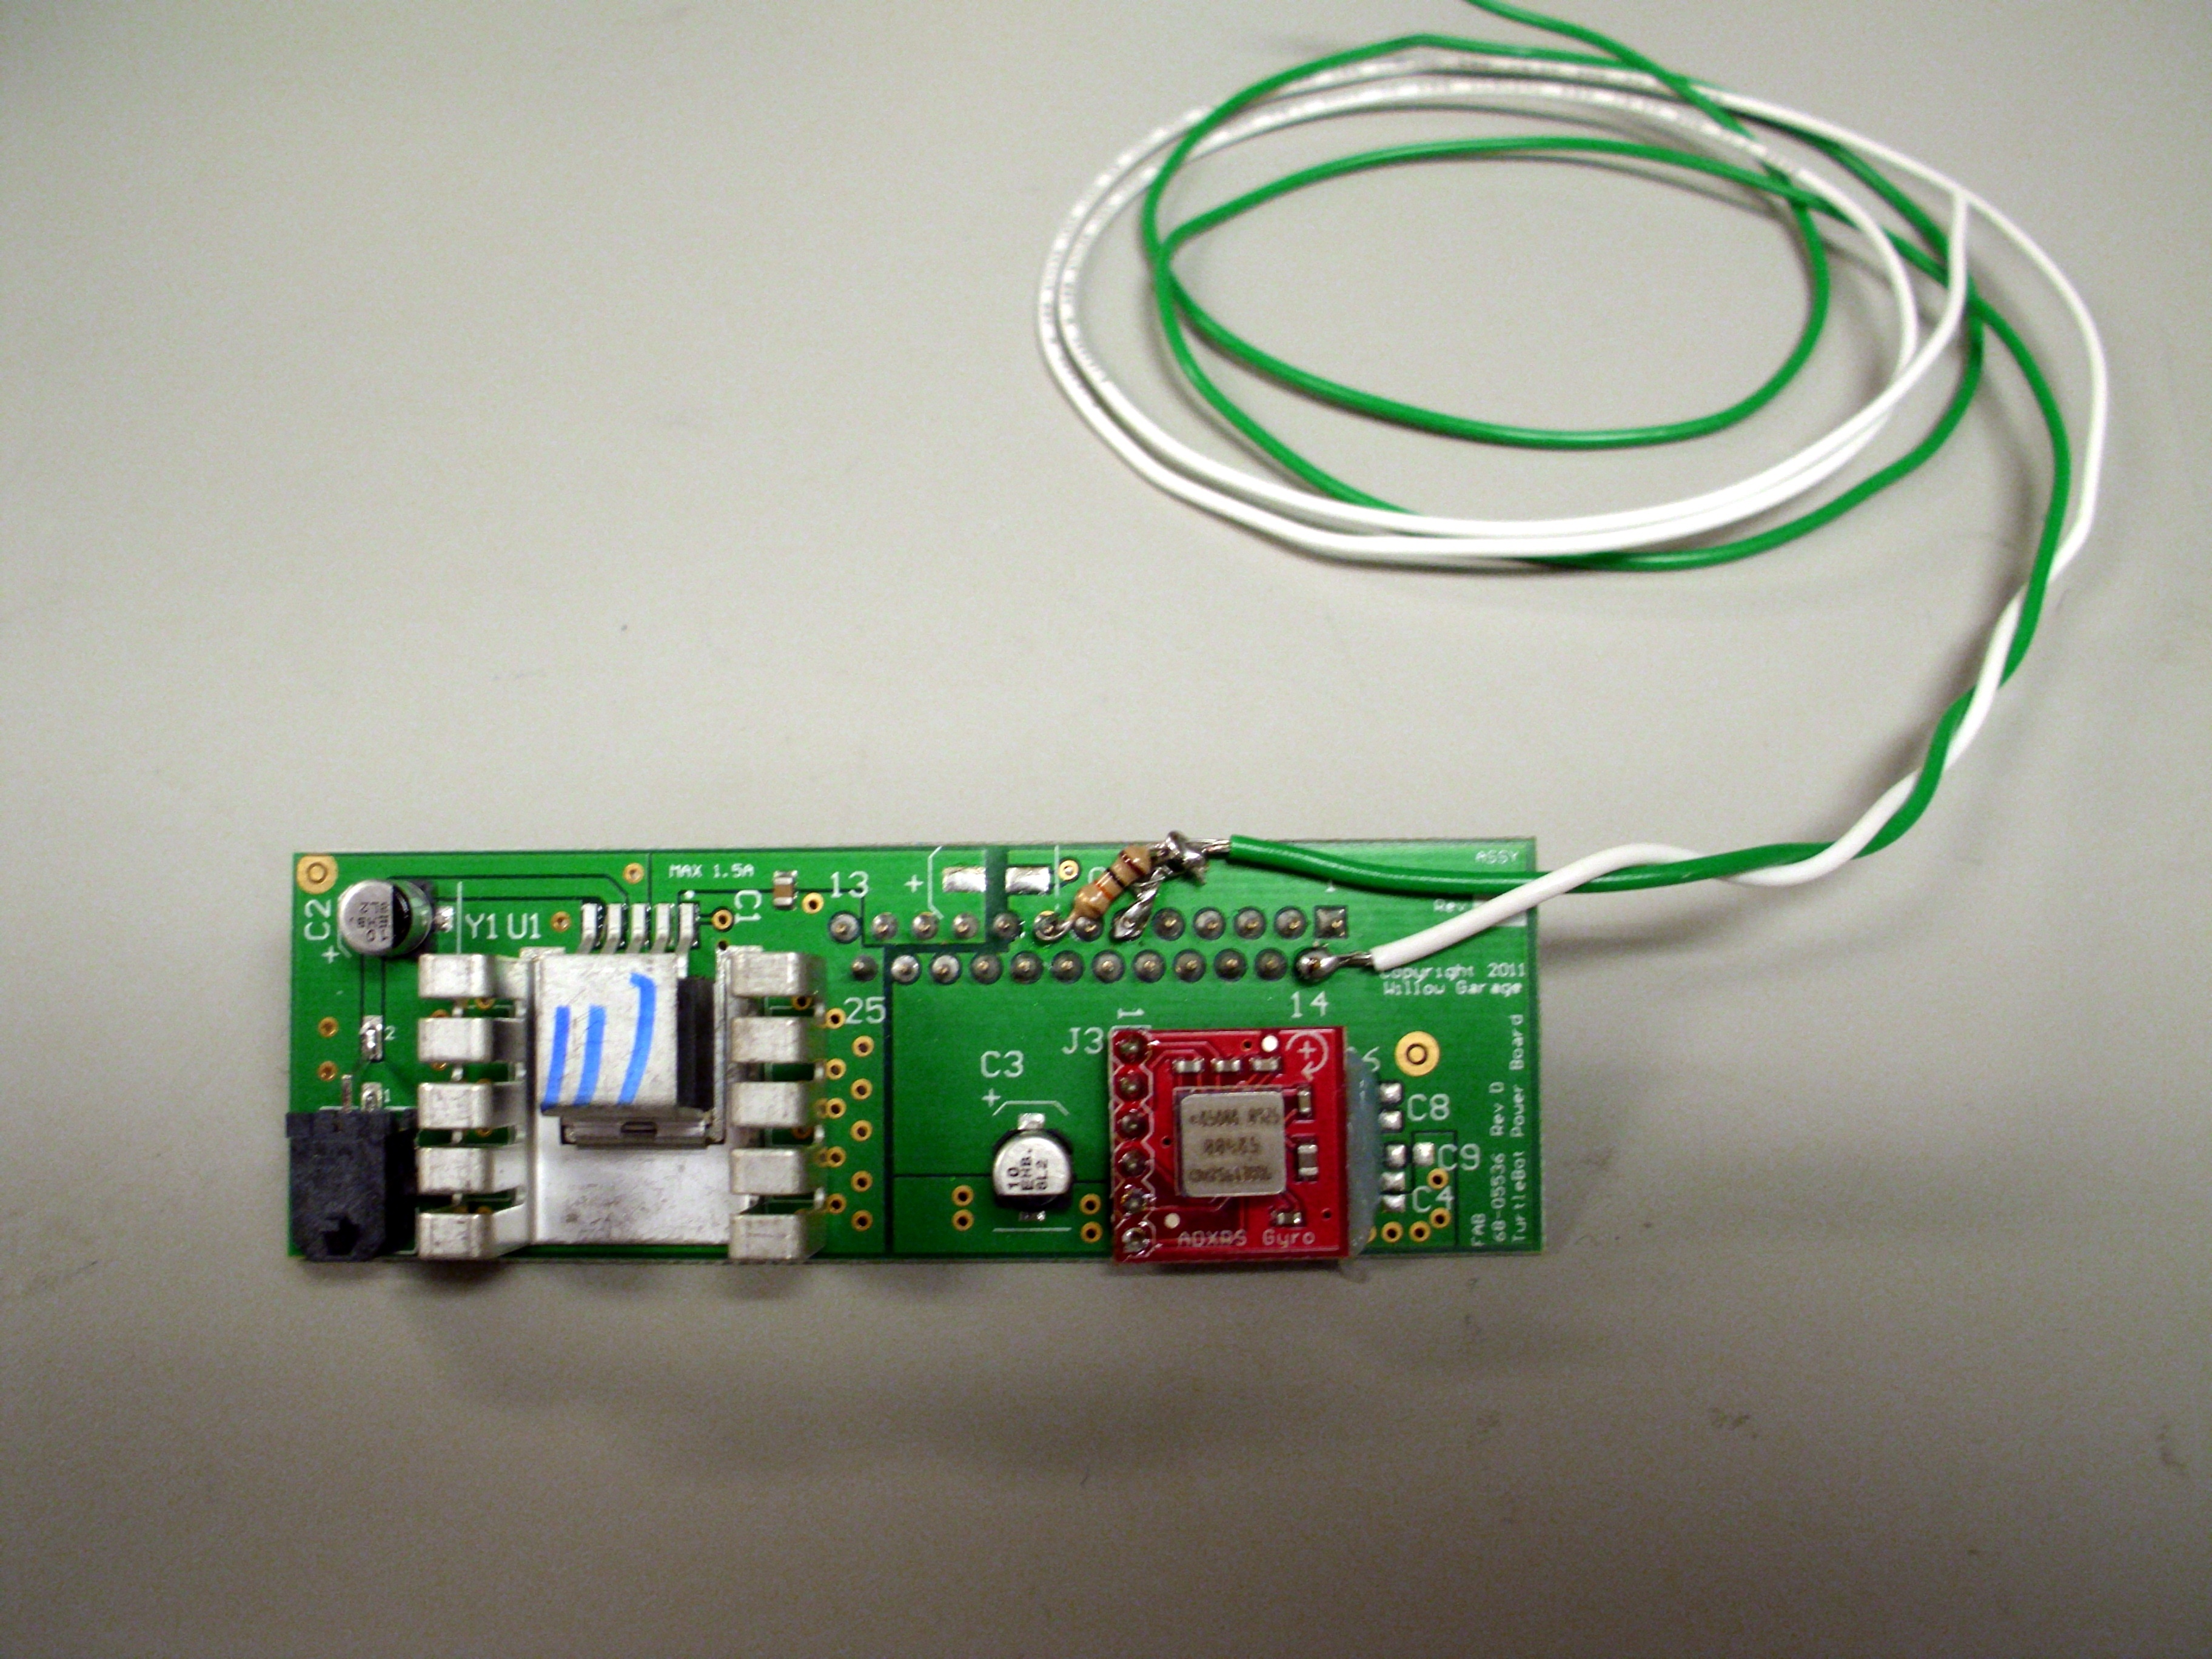
Solder one of the wires onto Pin 14 (Ground) of the DB-25 connector on TurtleBot Power Board. (white wire in picture)
Solder the other wire onto Pin 6 (Digital Input 3) of the DB-25 connector on TurtleBot Power Board. (green wire in picture).
Connect the other end of the 10K resistor to the wire attached to Pin 6. (green wire in picture)
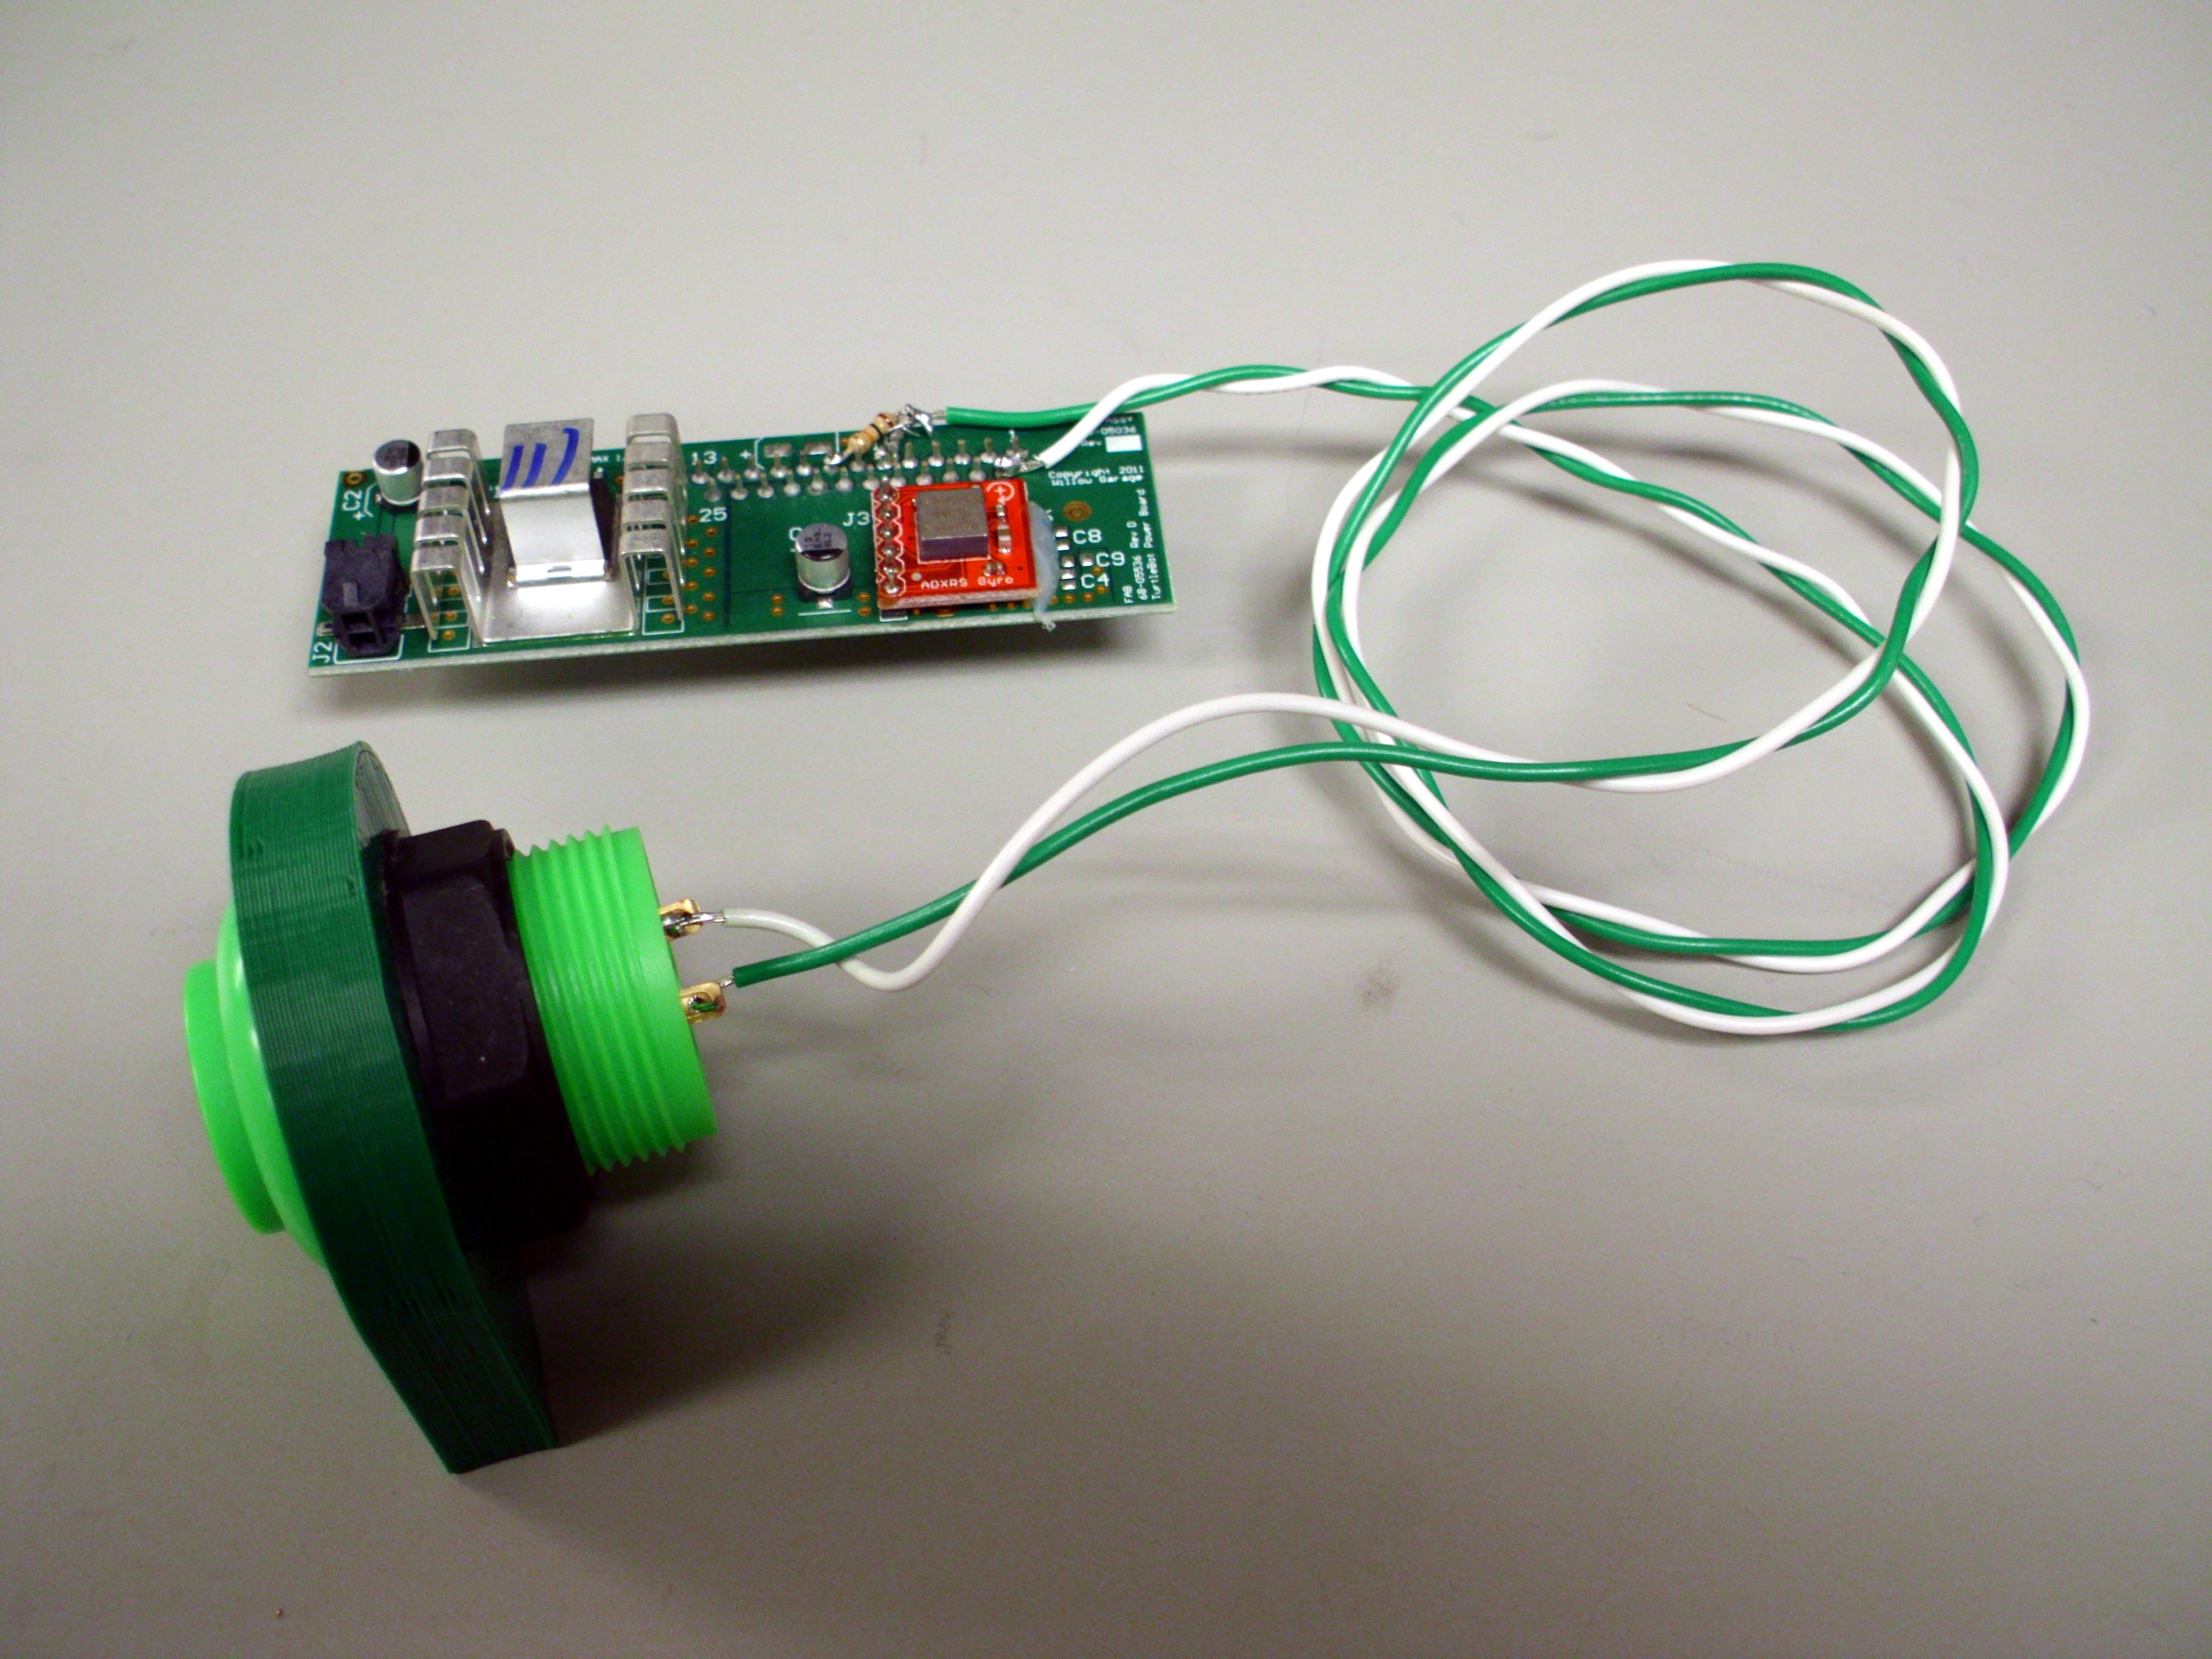
Solder the two wires onto the switch.
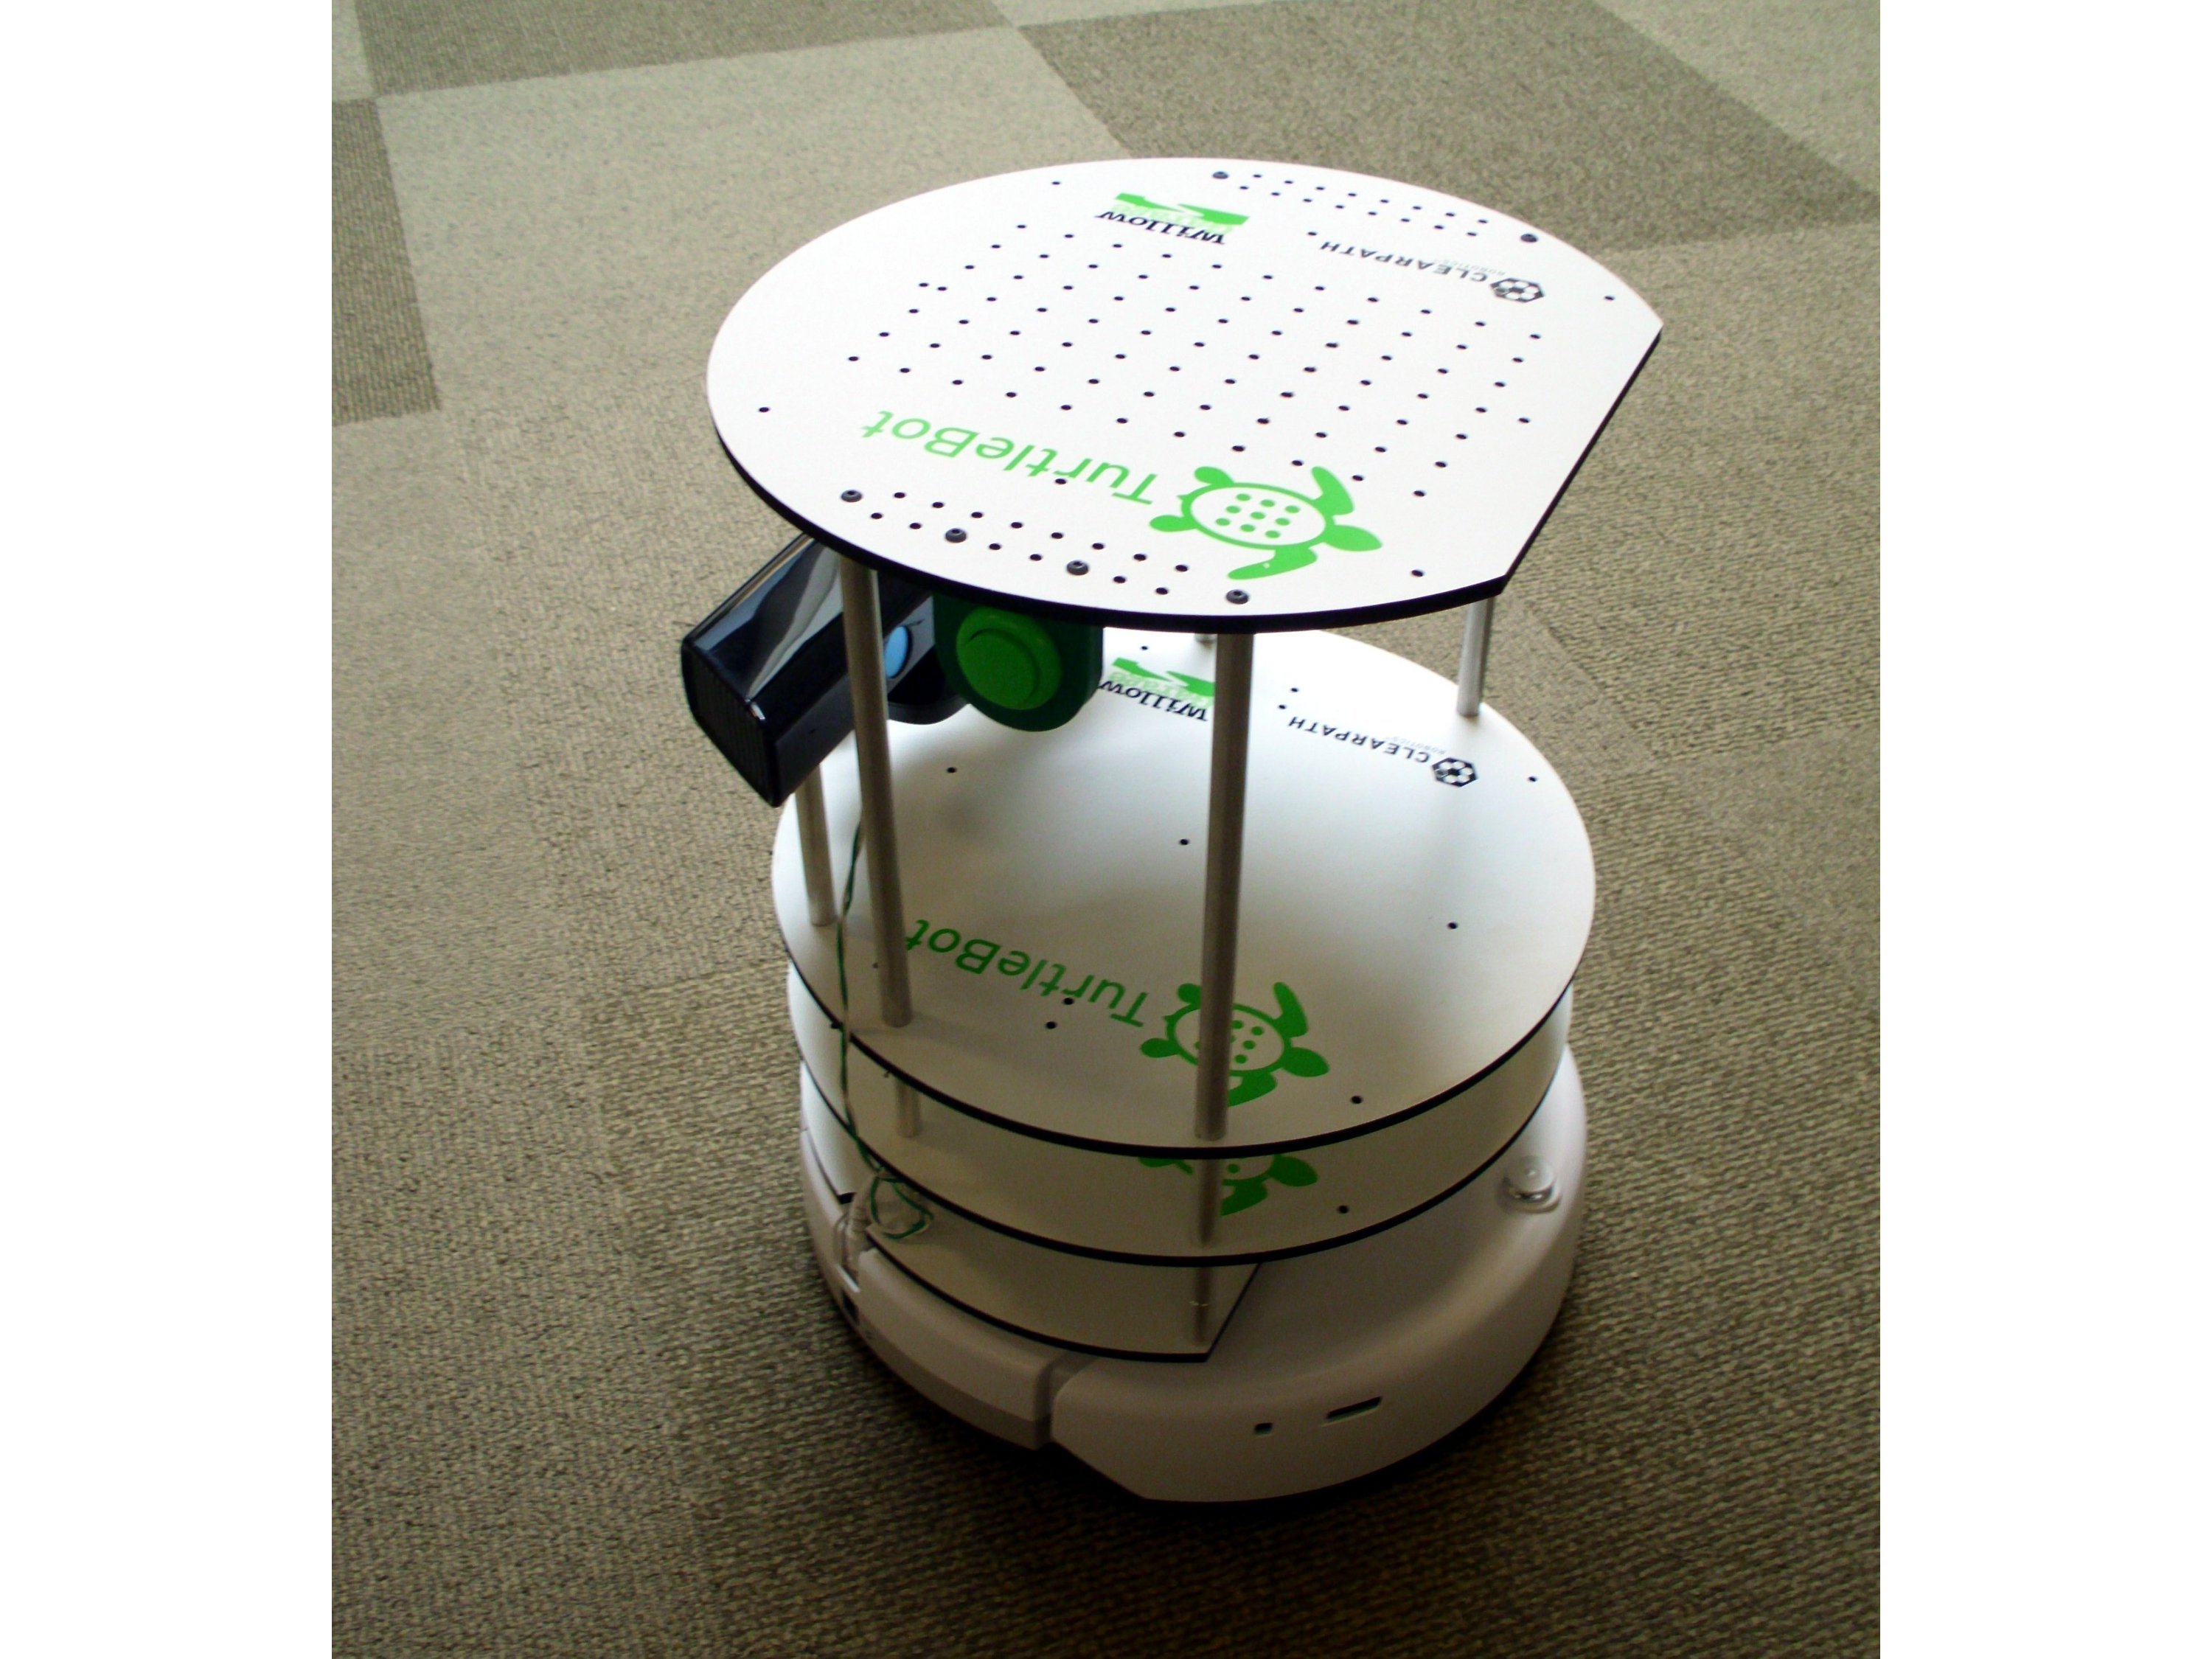
Attach the button to your robot.
Try out this script on your ROS-configured TurtleBot laptop. This script makes the robot drive forward, pressing the button toggles motion on or off.


