Many inventions/hack
Projects from Make: Magazine
Arduino Mail Notifier
Using cheap 315MHz wireless radios, I will show you how to create a wireless snail mail notifier.

Using cheap 315MHz wireless radios, I will show you how to create a wireless snail mail notifier.


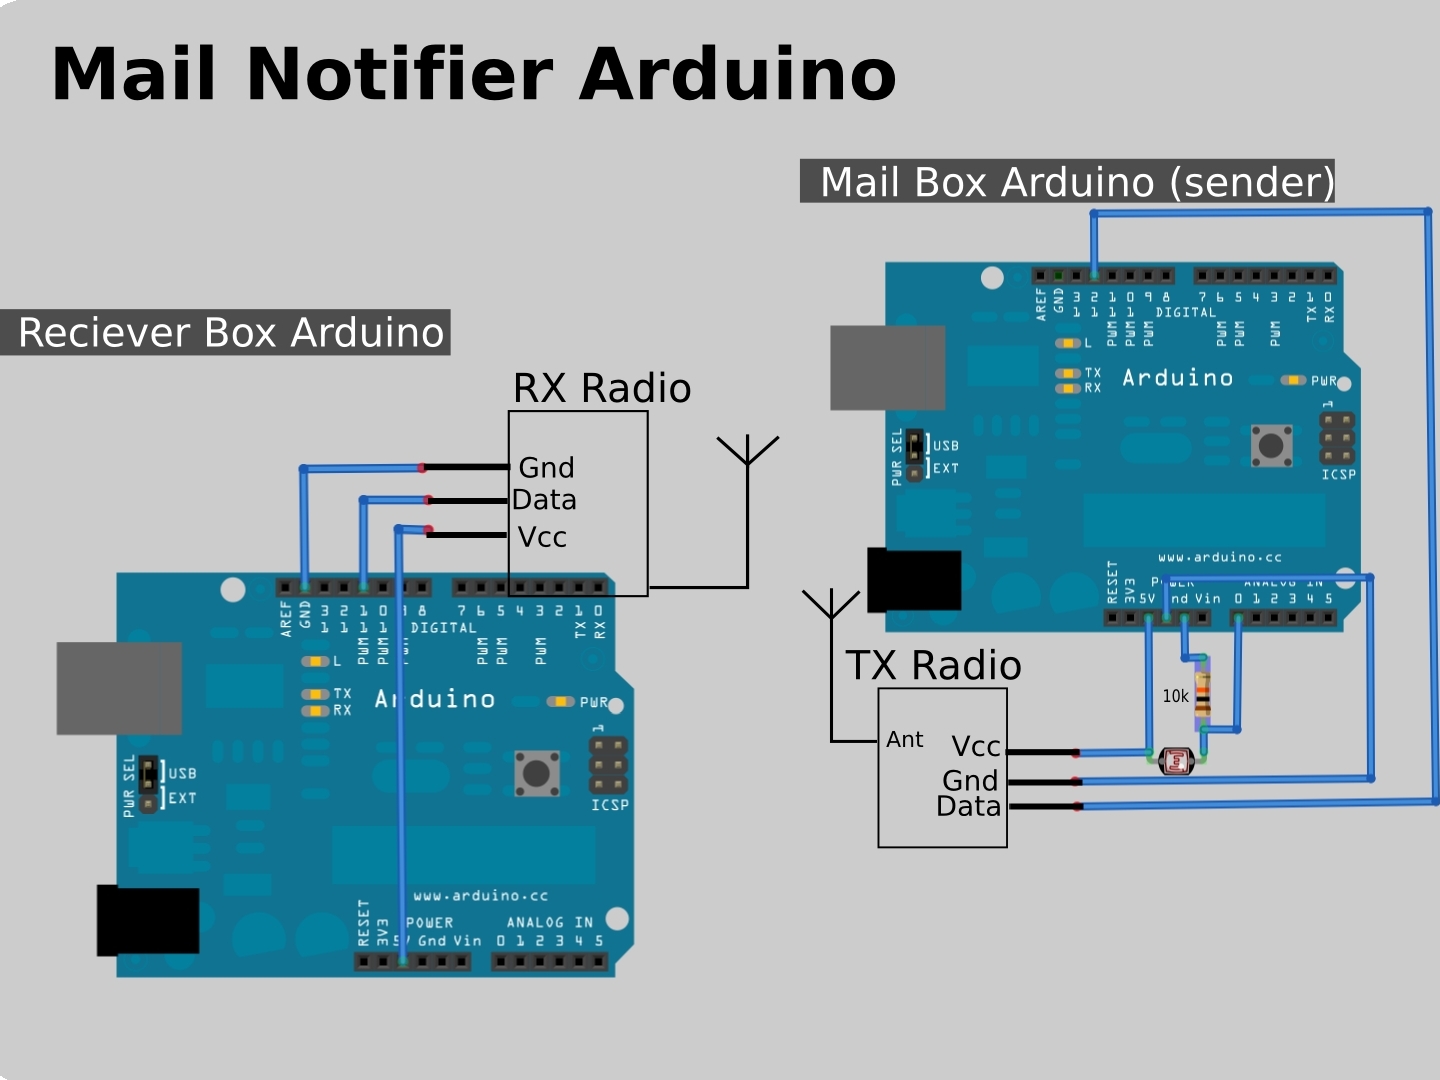
Wire up the two Arduino boards as shown in this diagram
On the receiver there are multiple places for GND and VCC. Connect all of the GND’s together and the VCC’s together.

Build your antennas (2x)
Cut roughly 12″ of breadboarding wire.
Strip 1/4″ off of one side of each wire.
Tightly wrap one wire around a pen.
Remove both wires and insert them into the Ant port on each radio.
Copy and pase the code from the URLs below into two different Arduino Sketches. Be sure to load the Receiver code on to the Receiver Arduino ciruit and vice versa.
Receiver Code: https://github.com/ril3y/Make-Projects/r…
Sender Code: https://github.com/ril3y/Make-Projects/r…

Tweak the Sender Settings.
The sender sketch works as follows. It continues to check to see if the LDR reading (light sensor) is above the THRESHOLD value. See the image attached. I placed a red square box around the THRESHOLD var. Since each mailbox’s ambient light will vary from place to place I created this THRESHOLD variable.
Inside the Sender sketch is a DEBUG variable. If you set this value to equal 1. then ALL light readings will be sent to the receiver. This is a good way to see what your mail box registers while the lid is closed.
Record your closed lid value and your open lid value. For example: If your open lid was 300 and your closed lid was 600 then setting your THRESHOLD value to 350 might be a good value to try.

Test it all out.
Now that your Sender sketch is all tweaked for your mailbox lets see how it works.
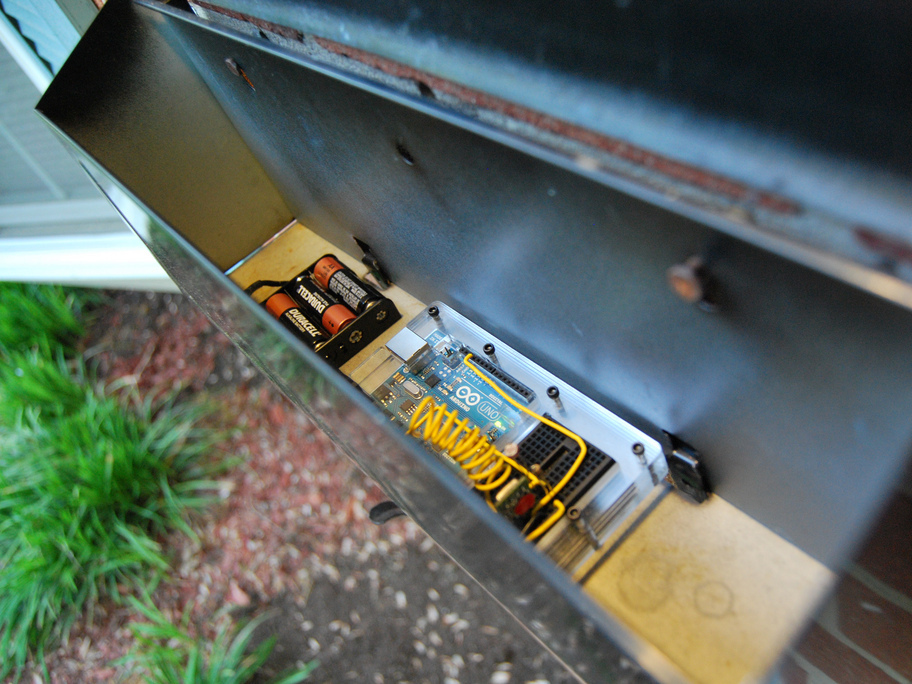
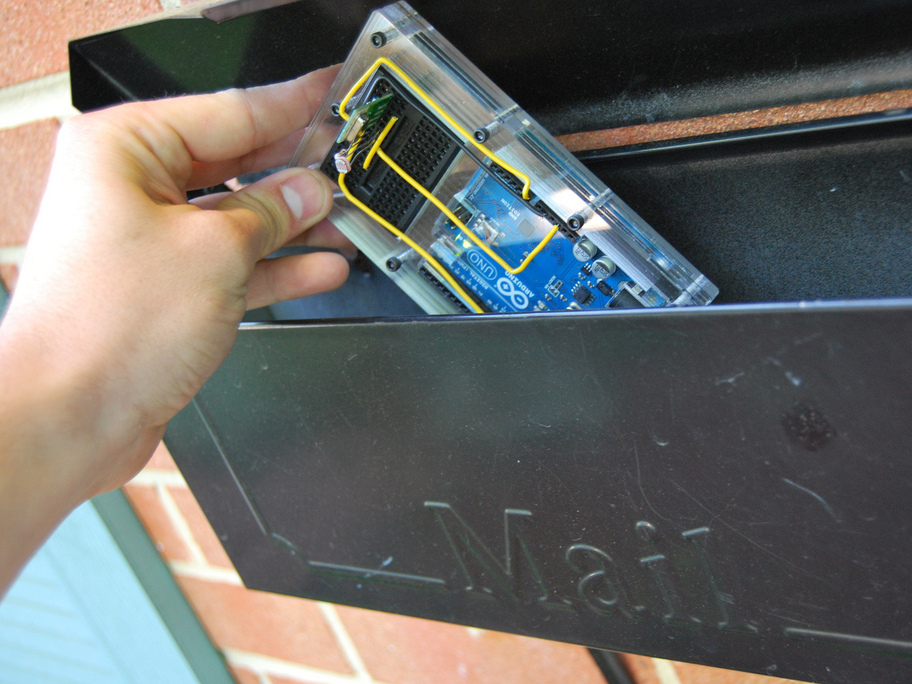
Place your Sender in the mailbox.
Hookup your receiver to your computer.
Open your serial terminal window. (See image).
Now have someone go open your mail box.
If all went well you should have message that says “Got: Your Mail”. It should also be noted that in the Sender sketch there is a “TIMEOUT” var. This is the number of milliseconds that will occur before your Arduino starts looking for mail again. This way you do not have to manually reset your mail checker.
This project was designed to get you used to working with cheap and simple RF modules while providing a cool, practical application. There is much room for improvement here. For instance, if this were a long-term project, much code optimization would need to be done to have the processor "sleep." Also, for alerting purposes, perhaps an LED or some audible alert could be added.
In O'Reilly's "Arduino Cookbook," in recipe 14.1 Sending Messages Using Low-Cost Wireless Modules, there is much more information about using these RF modules.
You can get the book here at the Maker Shed.
For another mailbox alert system, check out Matt Richardson's Snail Mail Push Alerts project.
And for lots more Arduino, take a gander at the Make: Arduino page.