When our house was built, I put a server room next to my office. Unfortunately, it had only a small bathroom-style fan with a 4″ duct leading outside, and during the summer I had to leave the door open, which made my office hot and loud.

So I installed a larger fan, along with an 8″ duct that dumps the waste heat into our basement during winter and outside during the summer.

The new fan works well, but also draws a lot of power — almost 300 watts. To reduce energy usage, I installed a manual speed control, but this made the temperature vary too much.

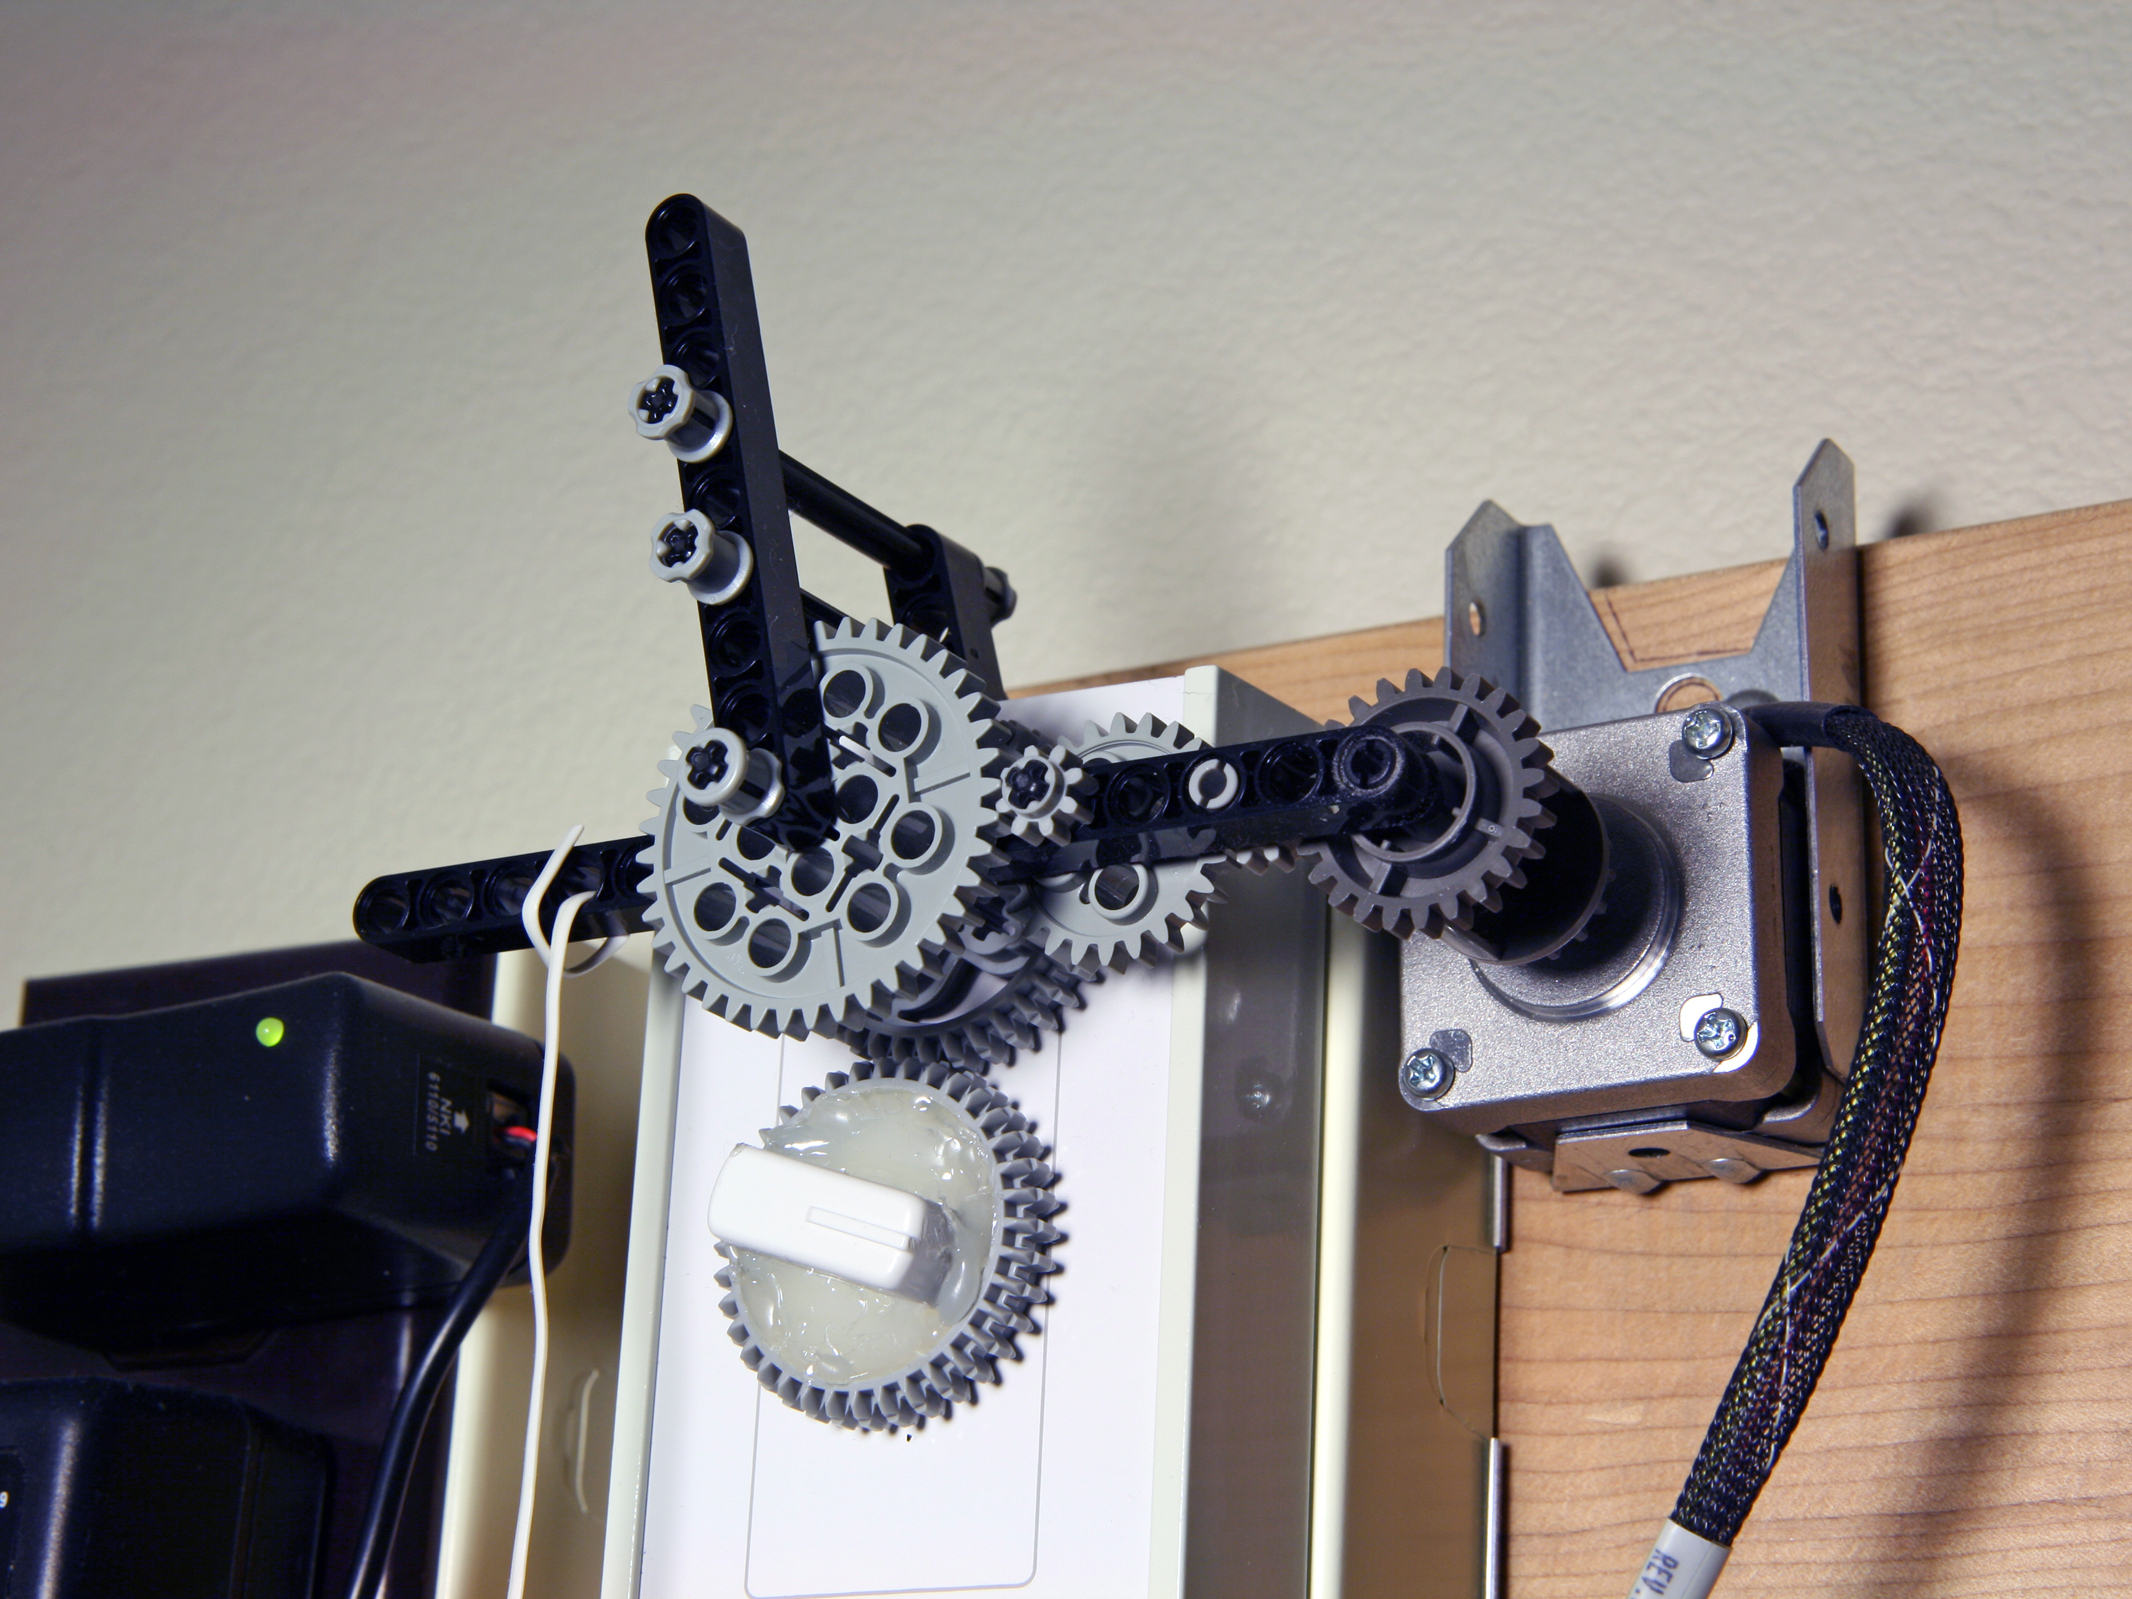
Finally, I built a control system that automatically adjusts the fan speed to maintain a constant temperature in the room. I was already using a serial-port temperature sensor connected to a computer to monitor and plot the server room temperature, so I closed the control loop using a MAKE Controller, a stepper motor, and some Lego Technic gears to turn the manual speed control knob.

I considered getting a different temperature sensor that would connect to the MAKE Controller directly. This would allow the system to stand alone without the computer. But in the end I chose to extend my existing setup and simply use the controller as an interface to the motor.

What will the next generation of Make: look like? We’re inviting you to shape the future by investing in Make:. By becoming an investor, you help decide what’s next. The future of Make: is in your hands. Learn More.

Project Steps

Assemble the parts.

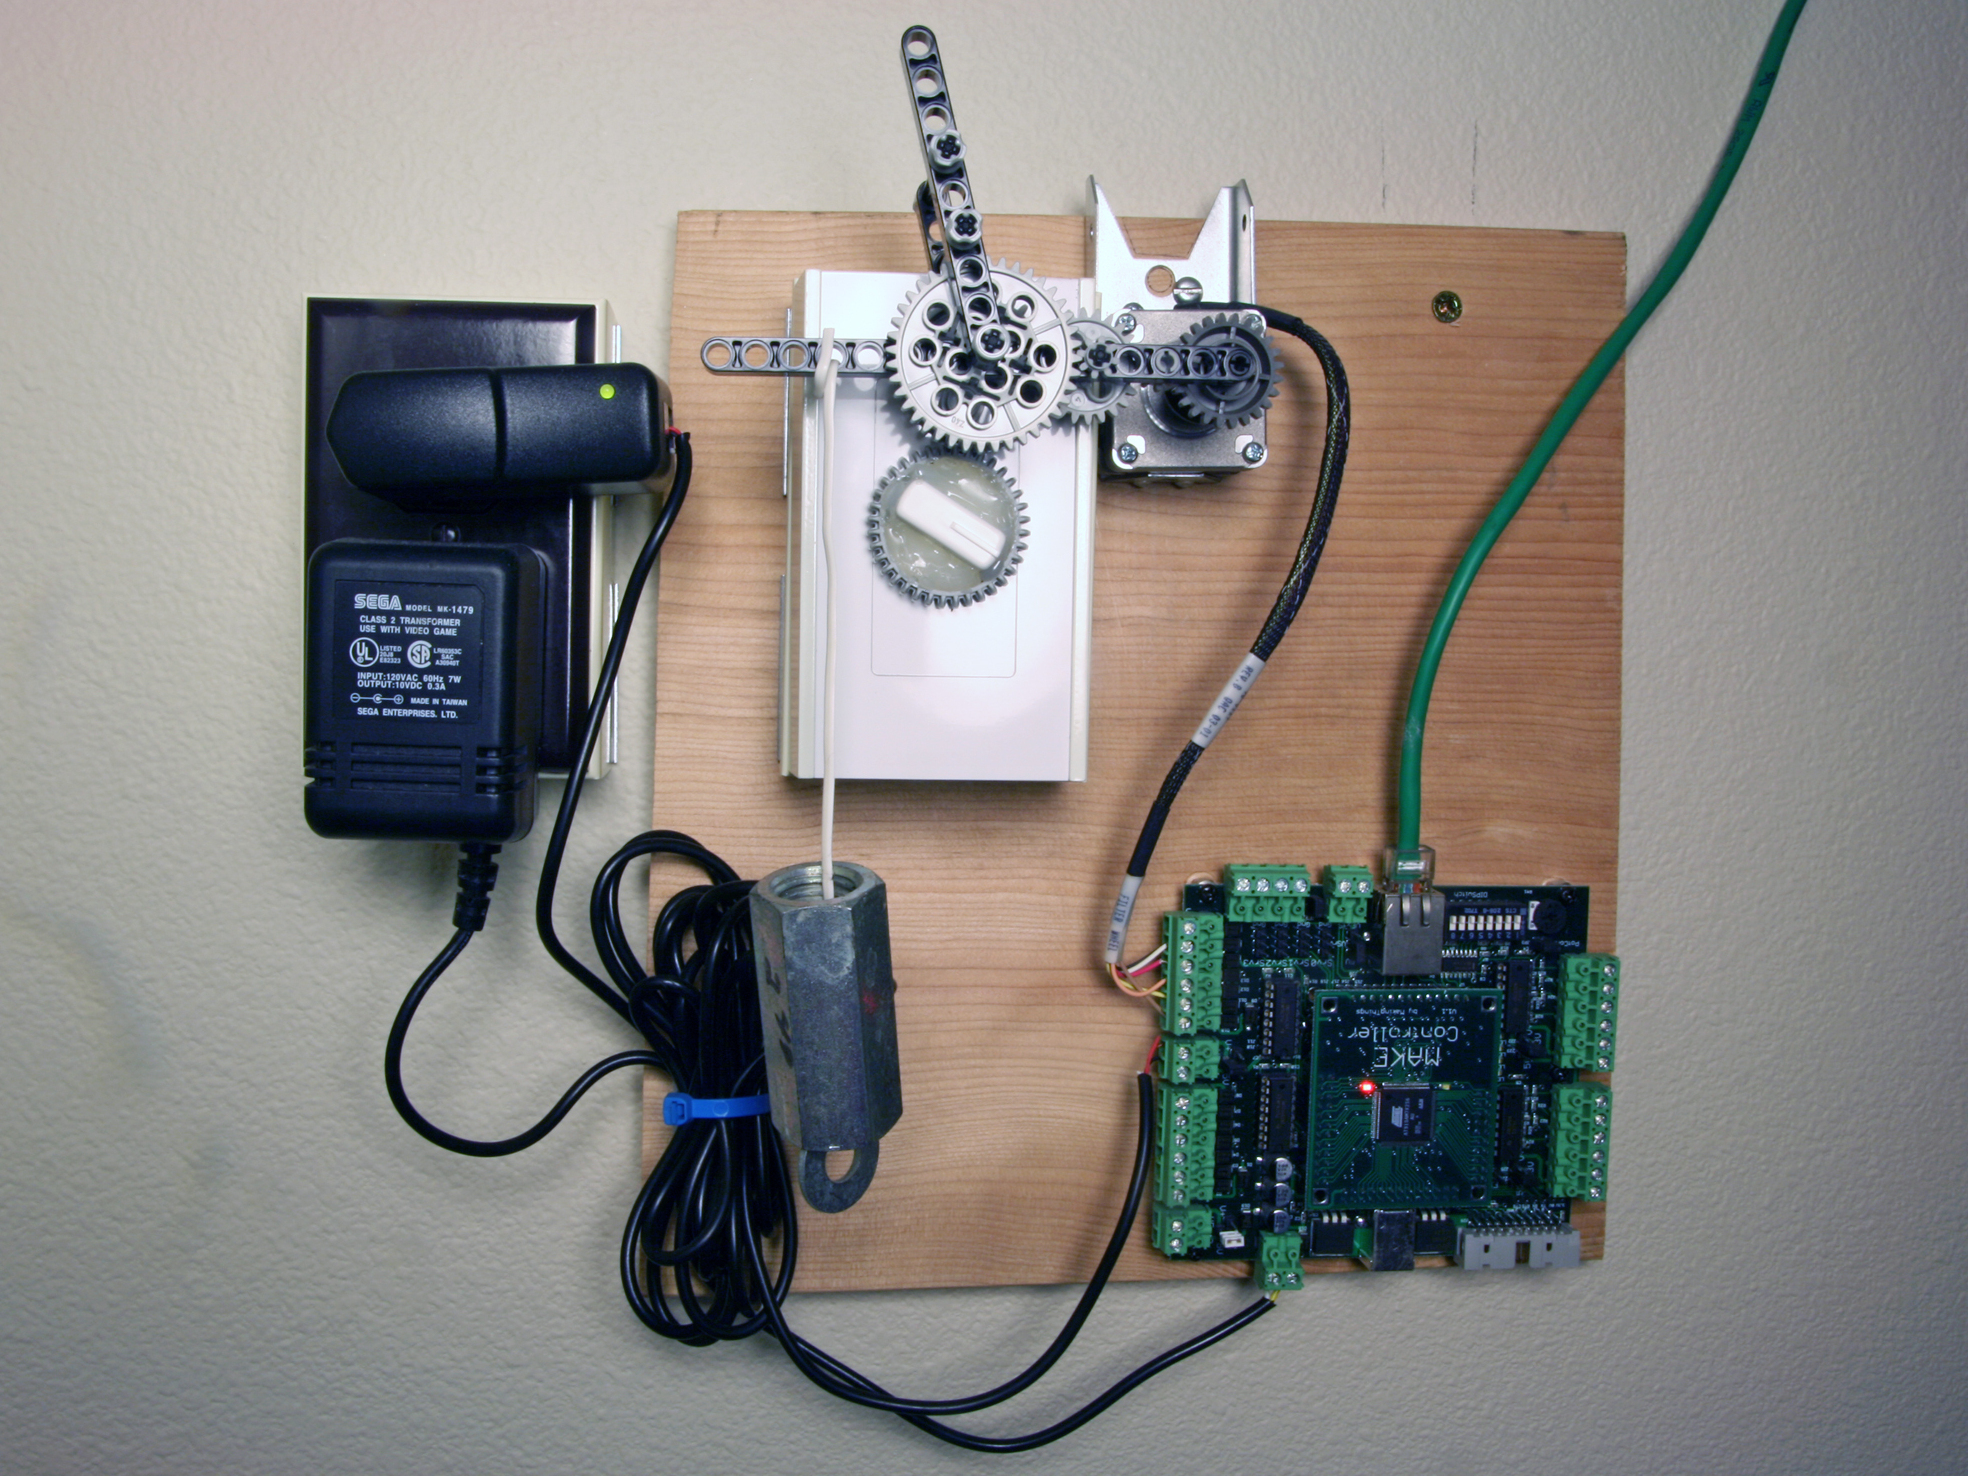
I mounted all the hardware onto a scrap of board. I screwed an outlet box onto one corner for the 2 power supplies, and drilled the wood to let the 115V AC wiring enter through the back.

I mounted the MAKE Controller in another corner using some hex screw standoffs, and I secured the stepper motor in a bracket sized to hold 2×4 studs.

Next came the connections. From the controller’s Application Board, Main Power connects to DC (I used a 10V DC, 0.3A wall wart), and an Ethernet cable connects to the PC. The motor has 5 wires; 4 connect to Digital Outs Bank 1 on the Application Board and 1 connects to ground. I figured out which went where by trial and error.

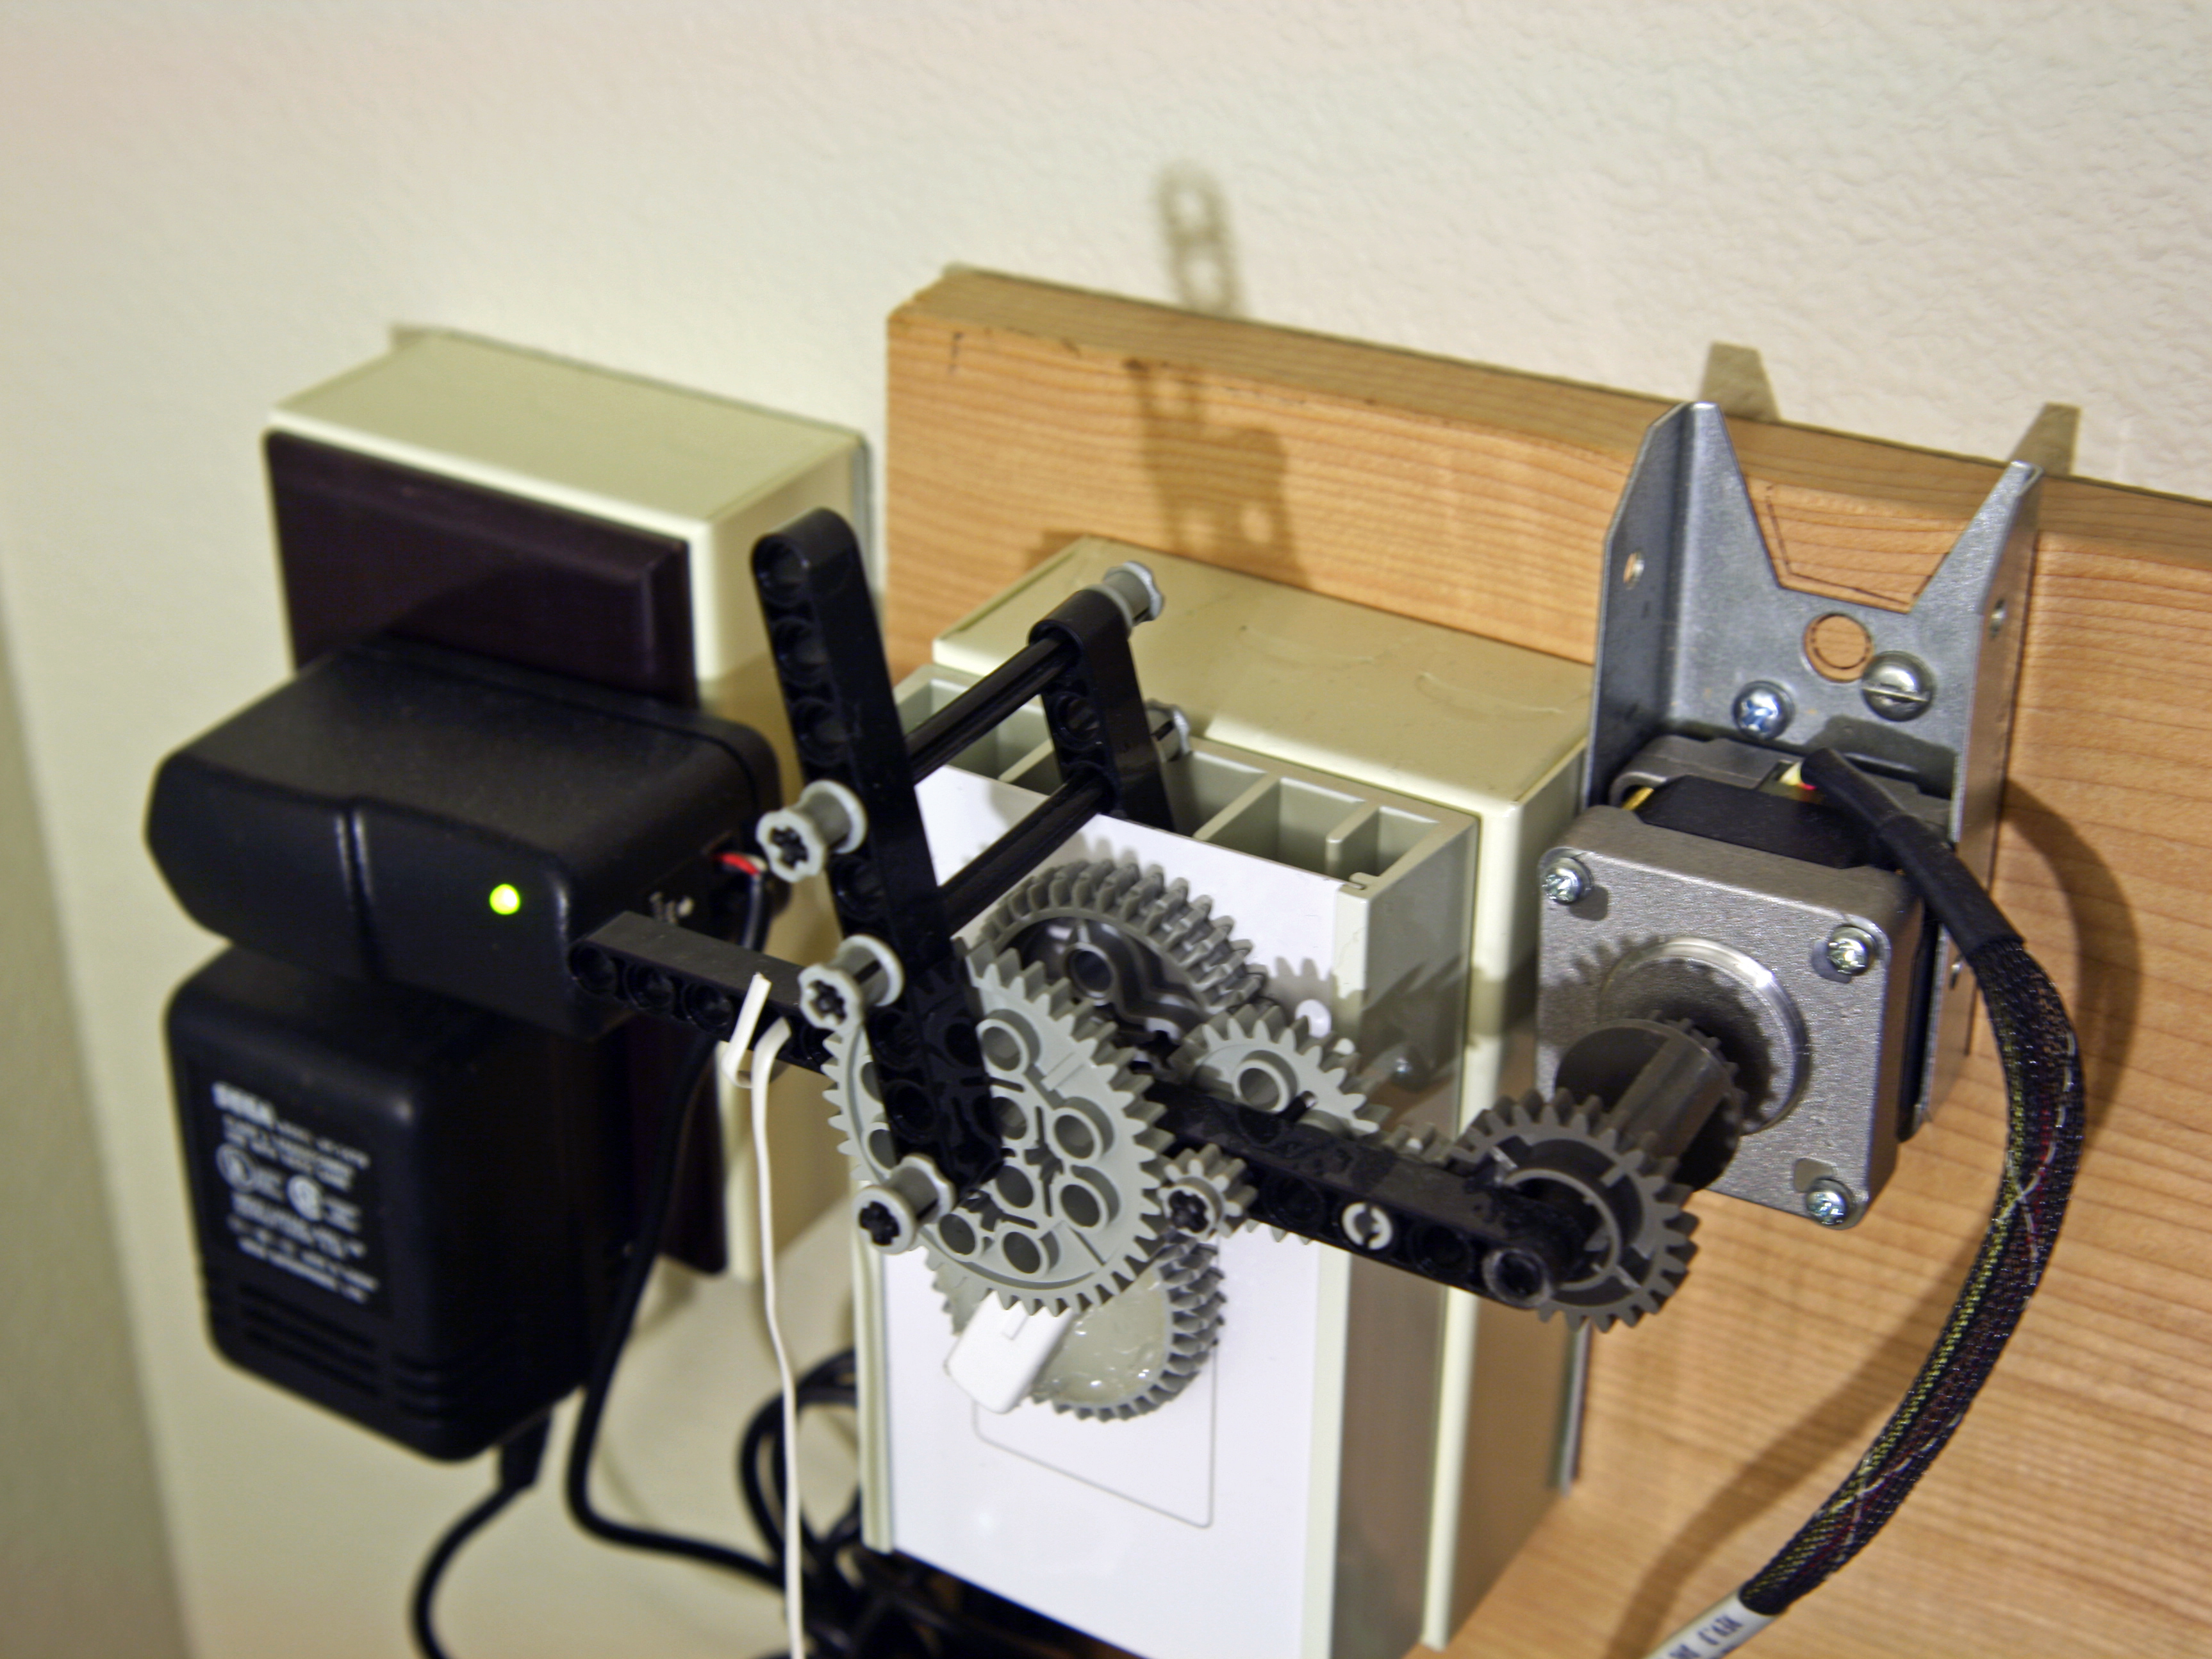
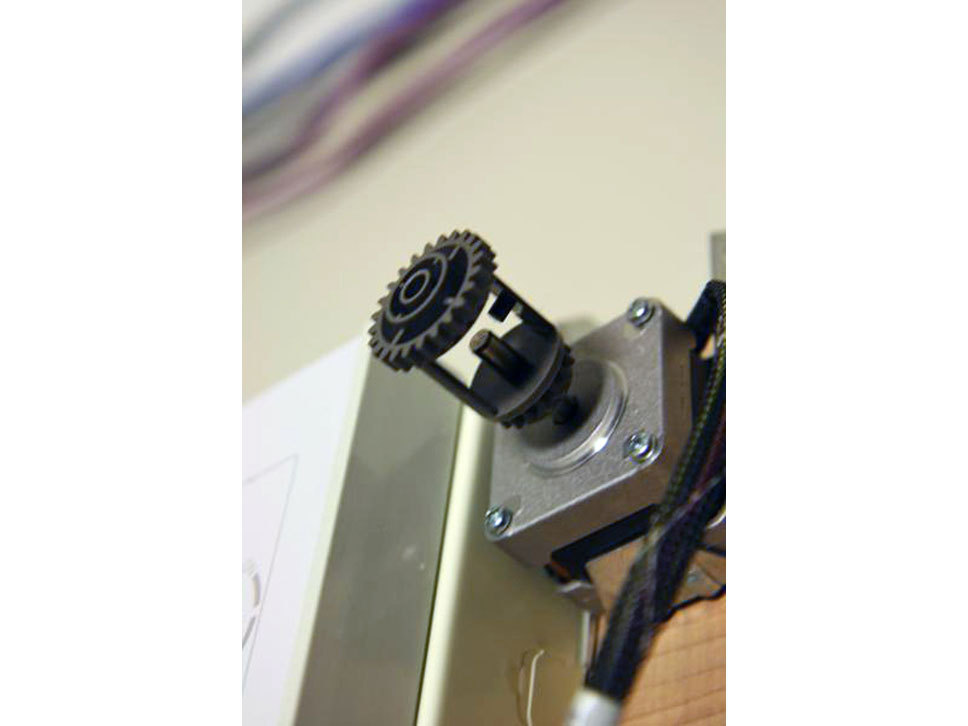
The best part of the project was figuring out how to connect the stepper motor to the fan speed control.

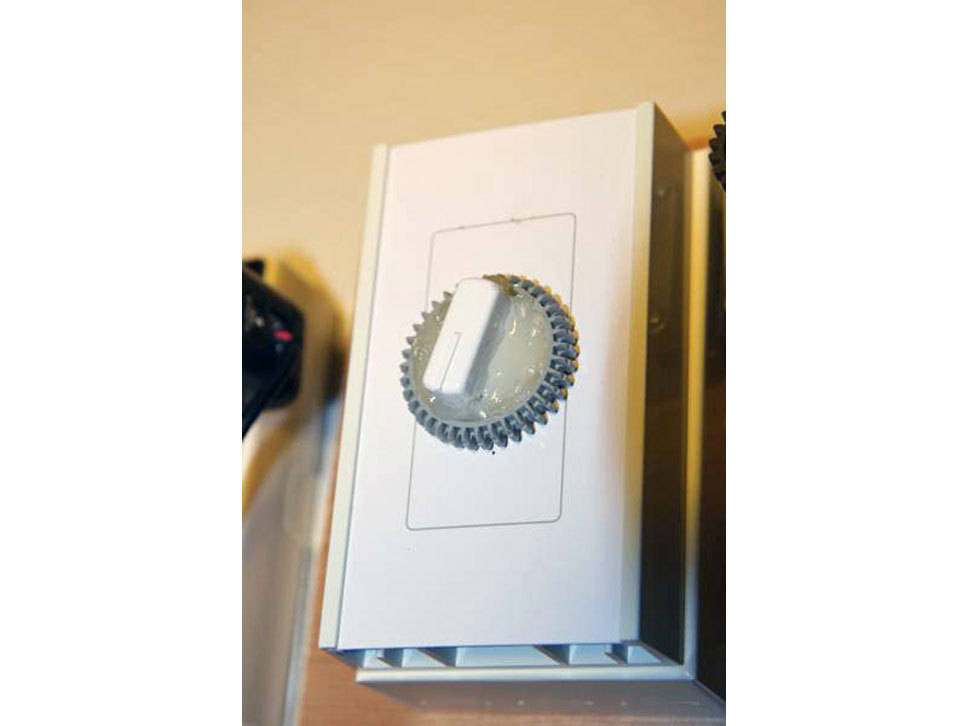
One of the Lego gears fit over the stepper motor’s shaft, but the speed control’s knob shaft was recessed below a plate and harder to access. So I left its knob on, cut a hole in a Lego gear, and hot-glued the knob inside.

Lego gears span the distance between the motor and the knob, all attached to a long beam with short axle pins. I’d like to say I designed the system of gears using algebra, but it was just trial and error. Additional beams and axles comprise a frame that wraps behind the speed control so the gears don’t slide front-to-back. A small hanging weight keeps the last gear on the beam pressed down against the knob gear.

One problem was handling the situation when the stepper motor tries to turn the knob beyond its range. I wanted to keep the software stateless, so that it wouldn’t have to care when the knob reached its maximum or minimum position. This was particularly important with my speed control, since turning it just past the maximum shuts the fan off.

After some experimentation, I found the solution: I used a separate, weaker power supply (an old cellphone charger) for the stepper motor, which was strong enough to turn the knob through its On range, but not strong enough to click it over to Off. This works wonderfully and was simple to do on the MAKE Controller. I just connected the power supply to External Power 1 and set the jumper to VExt.

Install the software.

I wrote the fan speed control code in Perl using the OpenSoundControl (OSC) module, which lets Perl talk to the MAKE Controller over either Ethernet or USB. If your computer runs BSD, Linux, or Mac OS X, you probably have Perl installed. Download the OSC module from http://opensoundcontrol.org. You can download my project code at http://cdn.makezine.com/make/21/fanspeed….

I configured OSC to use Ethernet rather than USB because it doesn’t require any special drivers. The MAKE Controller gets an IP address for the computer via DHCP and listens for OSC commands to move the motor on port 10000.

The stepper motor is controlled by 4 digital output pins that correspond to the motor’s 4 coils. To nudge the motor a step in either direction, the controller changes the outputs to energize different coils.

For continuous motion, the code needs a delay between steps to give the motor shaft time to find its new position. Welcome to the world of stepper motors, which behave very differently from servos.

Obviously if the temperature is high the fan speed should be increased, and vice versa. But for programmed control, the question is how frequently should adjustments be made, and by what amount?

I found that it works well to step the motor some number of ticks based on the logarithm of the difference between the measured and desired temperature. If the two are close, then no adjustment is made, 95% of the time. For the few other times, the system turns down the fan speed by one tick, so that it finds the minimum speed necessary to maintain the target temperature.

To run the program, fanspeed.pl, you need your controller’s IP address. You can find this using the mchelper app, downloadable from the controller’s maker, Making Things (http://makingthings.com). Then run the Perl script in a terminal window, like this:

$ perl fanspeed.pl [desired-temperature] – [ip-address]

where desired-temperature is in degrees Fahrenheit and ip-address is the address of the MAKE Controller.

Running the script to keep the temperature at 80ºF, for example, would look like like this:

$ perl fanspeed.pl 80 – 10.0.0.9

The program will then periodically log the temperature and stepper commands in the terminal window.

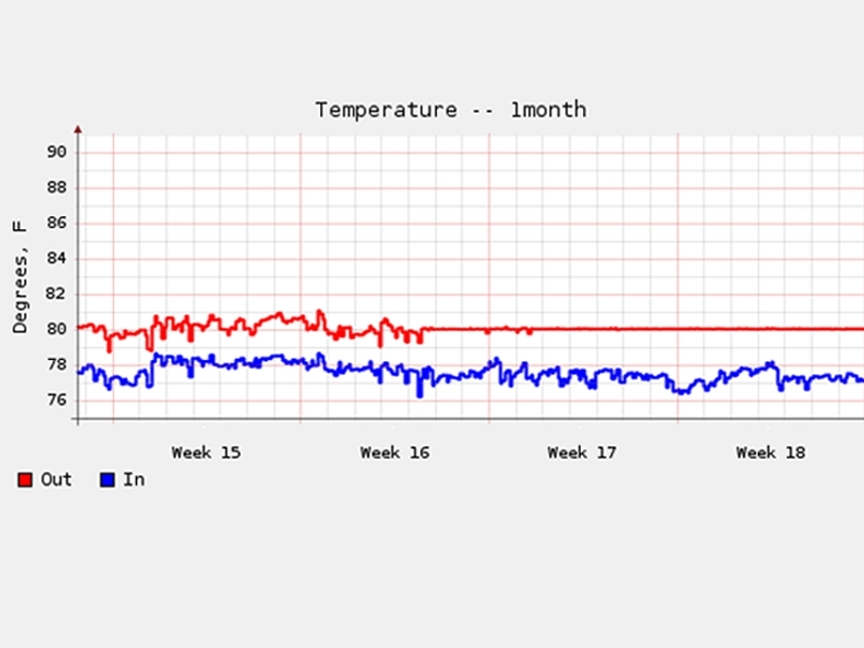
I use the open source data logging and graphing system RRDtool (http://oss.oetiker.ch/rrdtool) to track air temperatures inside and outside my server room. The photo shows the month I placed the speed controller into service. Note how the red line — air coming out of the room — went nice and flat.

Conclusion

I had a lot of fun with this project. It taught me about microcontrollers and stepper motors, and even gave me an excuse to play with Lego. This was my first project using the MAKE Controller, which I was eager to try, and I’m already looking forward to my next “MAKE Controlled” project. Meanwhile, the fan control system has been very reliable during its 20-plus months of service.

This project first appeared in MAKE Volume 21, page 139.