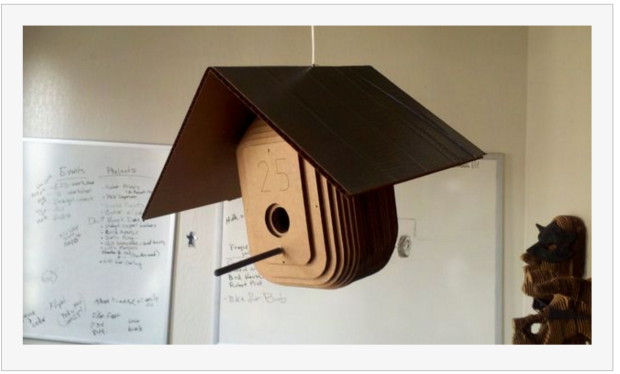
Here is quick project for making a cardboard birdhouse. You can find the software I used at 123Dapp. The bird house files I used include the roof.
Step 1: Creating the CAD file with 123D Design
This short video takes you through the 123D Design work I did to design the birdhouse.
Step 2: Build It!
After you get your plans from 123D make, you can cut them out yourself from cardboard or, if you have access to a laser cutter, that would work as well. The other option, of course, would be to order from a laser service like Ponoko.
Once the pieces are cut, glue them up using just about any glue. I like a thin layer of Elmer’s Glue-All or just plain wood glue.
Here is what you will need to finish the birdhouse:
• Duct tape or some other more waterproof easy-to-apply sticky thing. I think I might actually do my next one using roofing shingles.
• Cardboard for the roof. Anything that you can bend in the middle or make a butt joint out of would be great.
• The perch can be literally anything that you think a bird might want to stand on.
Step 3: Waterproof the Roof
Score the roofing sheet down the middle and then fold in half. After that, lay it flat and apply duct tape or other weather-resistant material to the surface. I added a separate piece down the middle so that it would reinforce the joint.
Now hot glue the roof to the house. Go ahead and hot glue the perch to the house, too.
If you want to add some reinforcement to the perch, you could drill an extra hole in the cardboard and then use a down rod and some glue to secure it.
Step 4: Hang in There
For the wire, I just pushed some knotted wire up through the crest of the roof and then added a little glue to assist in sealing up the hole. You can also mount this on a post or whatever else your mind could imagine.
Have fun — and don’t eat the birds.
This project first appeared on Instructables and is referenced in Jesse’s new book, 3D CAD for Autodesk 123D, just released and available from O’Reilly and Amazon!


