Homemade Modern Flip Desk
Image courtesy of Running Press.

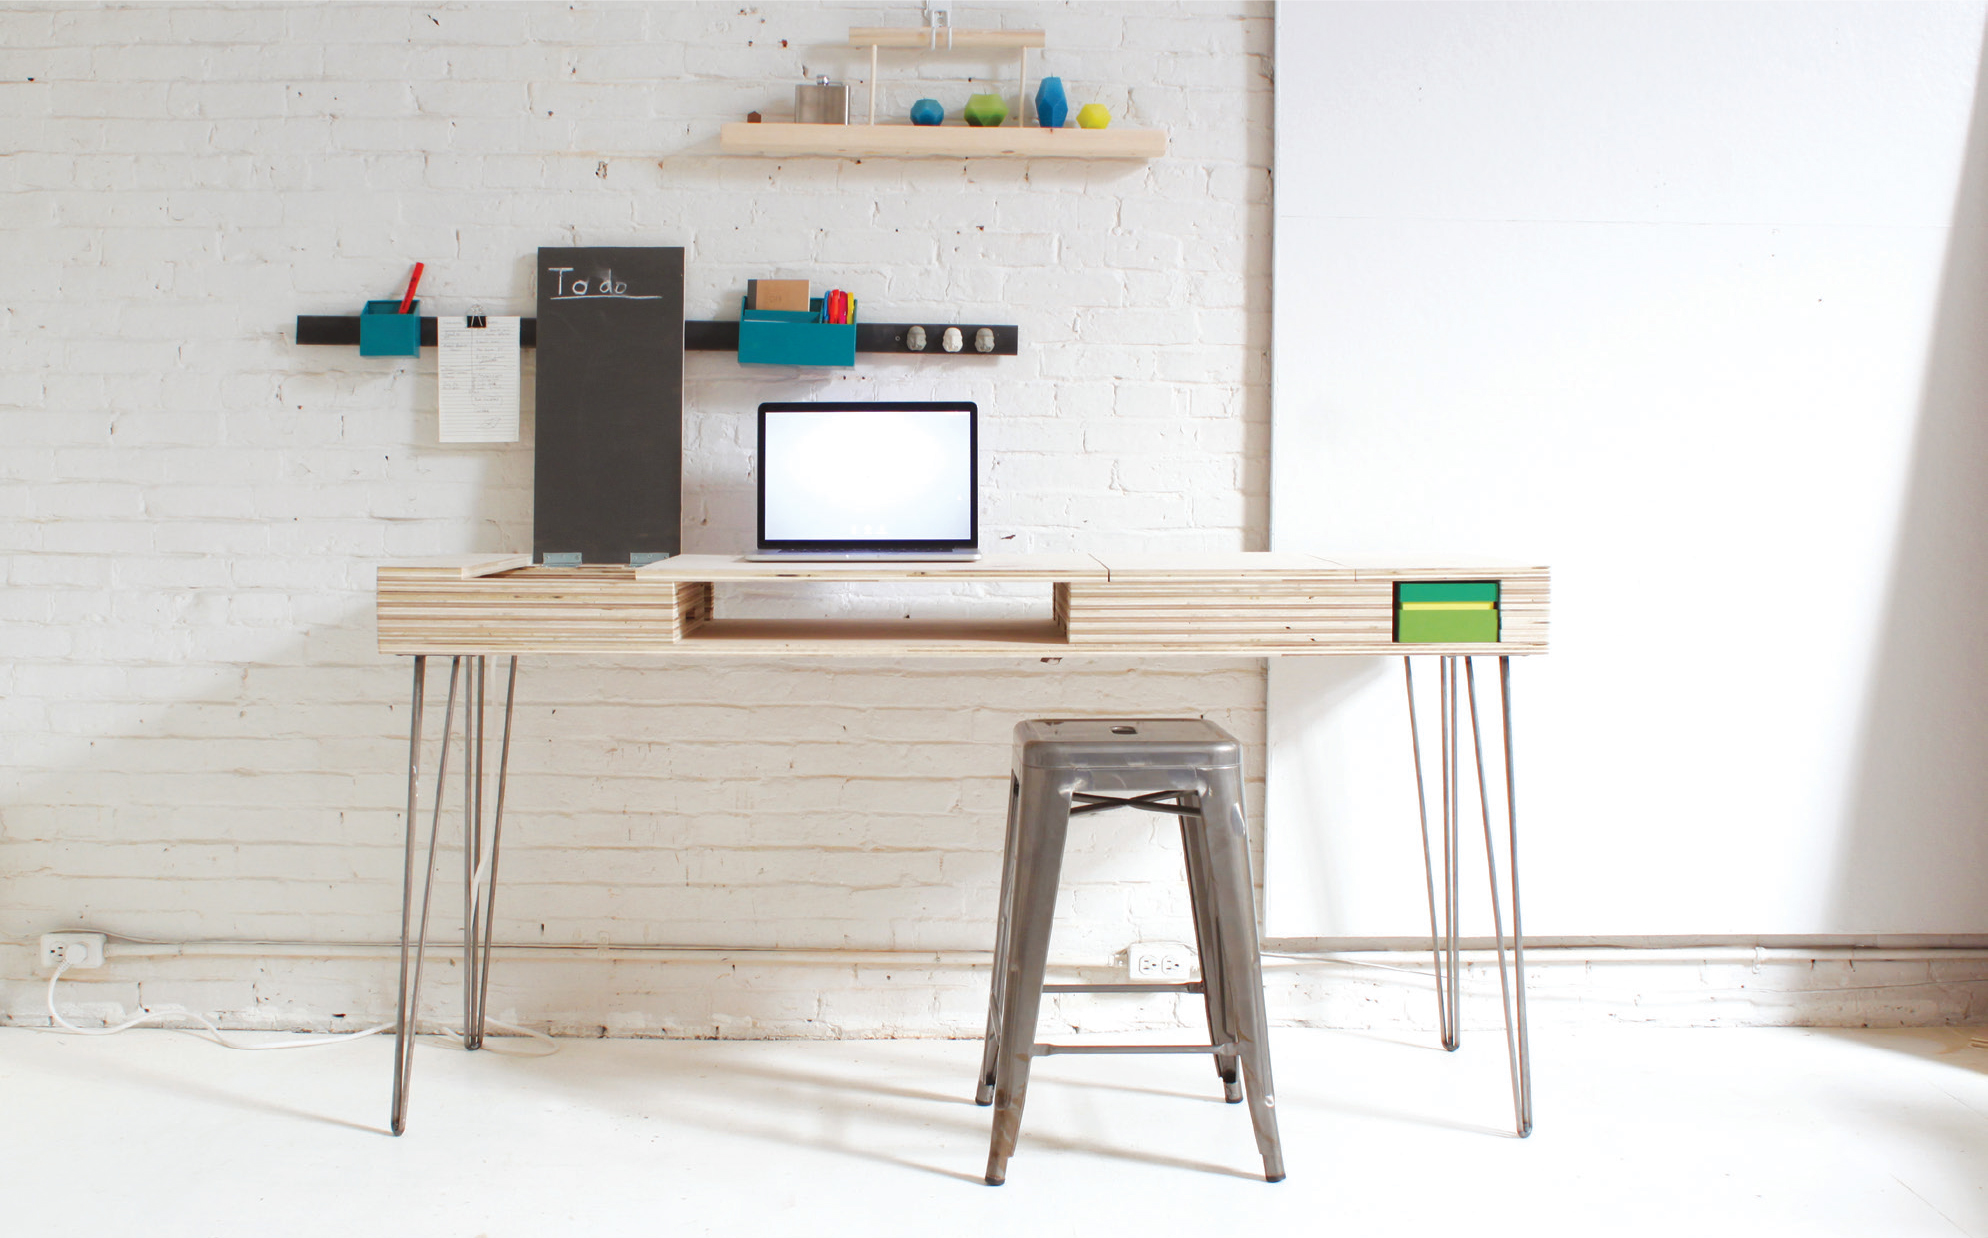
With the flip desk, I set out to create a small, simple desk designed for multi-tasking. It’s tailor-made for the small apartment or office where space and storage are at a premium. More than just a workstation, the desk can double as a craft table, a dinner table for one, a make-up station or vanity, or a place to store mail. Use it as a workspace during the day and tuck everything out of sight in the evening.

Editors’ note: This project is reprinted from the book HomeMade Modern by Ben Uyeda. We thought it was a cool project and the publisher was generous enough to let us share it here. The book is available on Running Press, a member of the Perseus Books Group, © 2015.

YouTube player

Project Steps

1: Cut the plywood sheet

Follow the diagram to measure, mark, and cut the plywood sheet; note some cuts are best made by your local home improvement store. Be sure to clamp the plywood to your worktable prior to cutting, and use the plywood blade to reduce the amount of tear out for each cut. Set the top and bottom pieces aside.

2: Cut the plywood strips

Measure, mark, and cut the 6″×5’6″ piece into two 3″×5’6″ pieces using the ruler, pencil, and circular saw. From the 2’6″×4′ piece of plywood, measure, mark, and cut twenty-four 2″ strips using the ruler, pencil, and circular saw.


HMM flip desk diagram
Image courtesy of Running Press.

3: Cut the strips to length

Measure and mark the strips (cut in step 2) to size using the ruler and pencil. These strips will be stacked five high to create the compartments in the desk. Cut the pieces for the front side of the desk first because you’ll have just enough plywood to make the desk. (Some small, stacked pieces used on the interior walls will have gaps.) Using the circular saw, cut five pieces 1″ to 9″ long from the 3″ strips. From the 2″ strips, cut the 1’5″–long pieces and the 1’6″–long pieces.

4: Screw the strips to the bottom

Lay the bottom piece of the desk right side up on your work surface. Follow the diagram to stack and screw the plywood strips together, one at a time, using the cordless drill and 1¼” screws. You’ll need to vary the locations of the screws to avoid bumping into the screws on the lower layers of plywood. Set this aside.


HMM flip desk diagram 2
Image courtesy of Running Press.

5: Mark and cut the desktop

Lay the top piece of the desk horizontally and right side up on your work surface. Working from left to right, follow the diagram to measure and mark four vertical lines at 6″, 15″, 41″, and 55″ using the ruler and pencil. Clamp the wood to your worktable and use the circular saw to cut along these lines, making sure to keep them in their original order. You should have five pieces: one 6″ wide, one 9″ wide, one 2’2″ wide, one 1’2″ wide, and one 11″ wide. Cutting the desktop like this will allow different sections to flip up when hinges are added.

Cutting desktop sections
Image courtesy of Running Press.

6: Screw the hinges to the desktop sections

Attach two hinges to the undersides of both the 9″-wide section and the 1’2″-wide section using the cordless drill and the screws that come packaged with the hinges.

7: Mark the hinge locations

Lay the bottom piece of the desk that you set aside in step 4 right side up on your work surface. Position the five desktop sections in order and on top. For the two sections with hinges, mark the outline of the hinges on the top layer of stacked plywood at the back of the desk using the pencil. Remove all the sections and set them aside.

Cutting and attaching hinges
Image courtesy of Running Press.

8: Cut recesses for the hinges

To make the recessed areas, use the circular saw with the blade set at –⅛” deep to cut a series of grooves, no wider than the hinge, in the top layer of stacked plywood at the back of the desk. This will allow the hinges to sit flush. Then use the hammer and chisel to remove the leftover wood.

9: Screw the hinged desktop sections into place

Place the two hinged sections back into position on the desk. Screw the remaining halves of the hinges to the desk to affix them. You may not get it perfect the first time, so use two screws at first and test how well it opens and closes to make sure it’s properly aligned.

HMM flip desk diagram 3
Image courtesy of Running Press.

10: Screw on the remaining desktop sections

Position the remaining desktop sections and secure them in place using the cordless drill and the 1¼” stainless steel screws. (They’re more expensive than the average deck screw but look much nicer.) You might want to mark the screw locations first to make sure you have uniform placement.

11: Sanding

Lightly sand the top using the orbital sander and 220-grit sandpaper. Sand the sides of the desk using the orbital sander and 100-grit sandpaper followed by the 220-grit sandpaper. Remove the dust using the clean rag.

12: Screw on the legs

Gently flip the desk over and attach the hairpin legs using the cordless drill and ¾” screws. (These shorter screws are used to ensure that they go through only one layer of plywood.)

Finished Flip Desk
Image courtesy of Running Press.

13: Get organized

You can make interior partitions out of leftover 2×3 scraps and paint stirring sticks, or you can choose to leave the cabinets open. To make the partitions, clamp together two 2×3s and cut grooves into them using the circular saw. The paint sticks fit into the grooves. You can also drill some holes in the 2×3s for some handy cylindrical compartments.

14: Finish

Paint the inside of one flip-up desktop section with chalkboard paint and attach a mirror with double-stick tape to the other.

What can go wrong?

Your cuts are crooked.

If your cuts are crooked or not at perfect right angles, your desk will have a more dramatic texture. You can adjust the roughness with some sanding once the desk is assembled, but the rough, layered texture is the reason many people like this project!

There are gaps in between the plywood layers.

Gaps can occur when the screw pushes up the top layer of wood when securing it. To prevent this, firmly hold the plywood down against the layer below while screwing.

Image courtesy of Running Press.

Alternatives

I envisioned this desk as a combination home office and vanity, but it can easily work for a variety of different uses. To make it more home office ready, drill a hole through the desktop to run laptop power cables.

What if you don’t want it anymore?

The nice thing about screwing the layers together instead of gluing them is that you can always unscrew and rearrange them to create different sized compartments and shelves. And if you are sick of the look, you can use the plywood pieces to make handy little storage boxes.


Conclusion

Based on the popular website of the same name, HomeMade Modern by Ben Uyeda, includes attractive, budget-friendly projects to furnish your home and outdoor space. HomeMade Modern has a young, edgy feel and is all about projects that are substantial and aspirational, like a catalog of cool stuff that you can afford and actually want to make. HomeMade Modern is on sale now wherever books are sold. Please visit Ben at HomeMade-Modern.com.