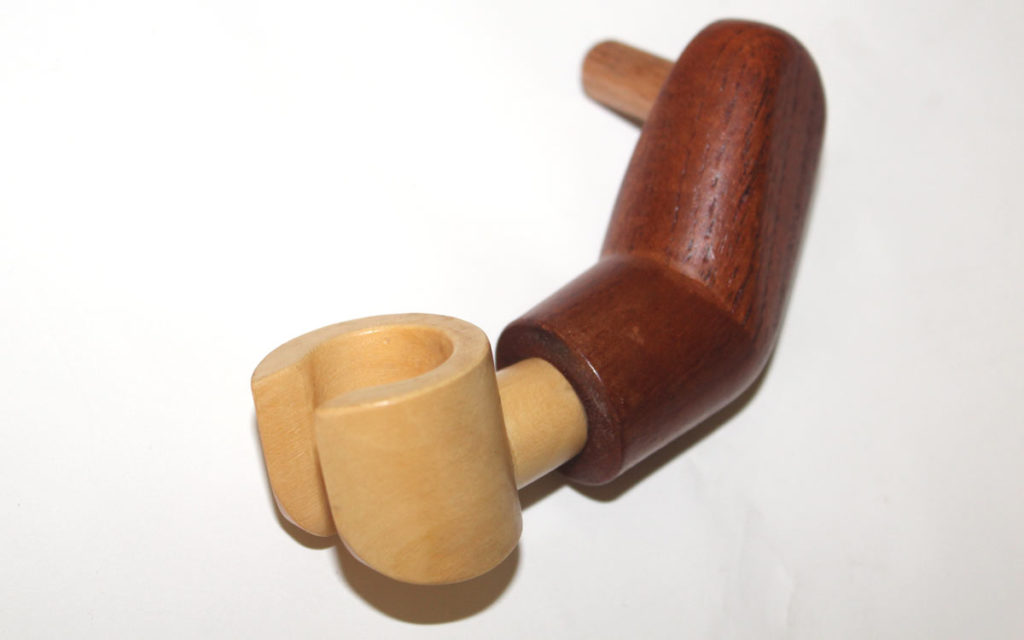
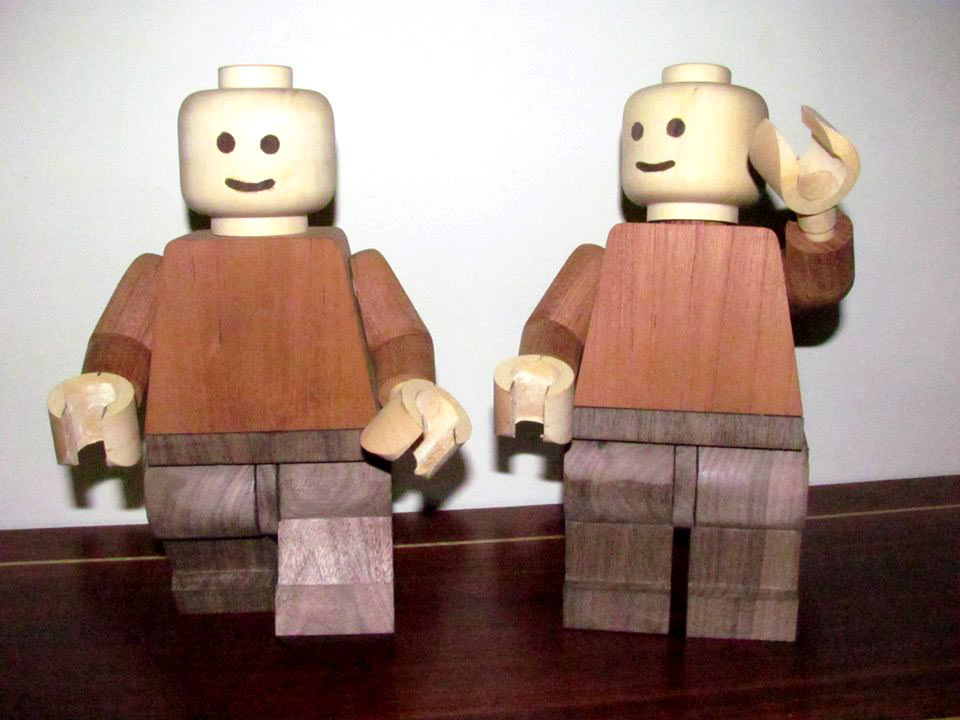
These are some giant Lego men that I have made. I built them as a challenge — I like doing a project like this every year to push myself and learn from the design process. These have all the movements, clips, and operations that a standard Lego minifig has. They are to scale (1:6.25), and I built them using Huon pine, Australian red cedar, and American walnut. Here’s how to do it.

You’ll need a selection of wood that fits the scaled version of your minifig.

Design and Timber Selection

Before you start building one for yourself, design and timber selection is very important.

Figure A
Figure B

I copied the designs directly from the web (Figures A and B) and measured actual Lego pieces. It’s pretty simple to get the measurements, but there are a few subtle design features that I never realized until I studied these:

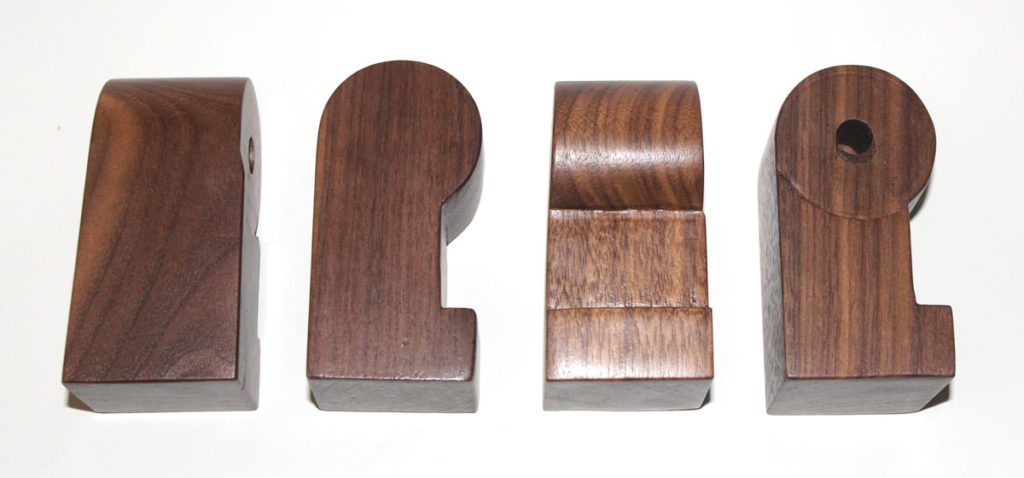
  • The legs taper outward. Not much, but the distance at the bottom of the feet is equal to the bottom of the body. The top of the legs sit a few millimeters underneath.
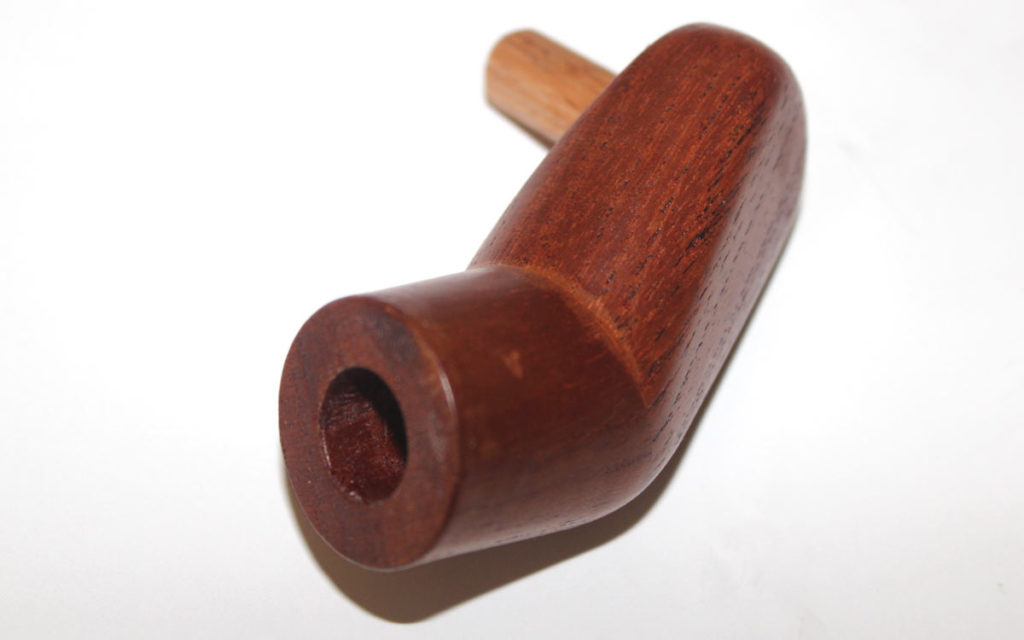
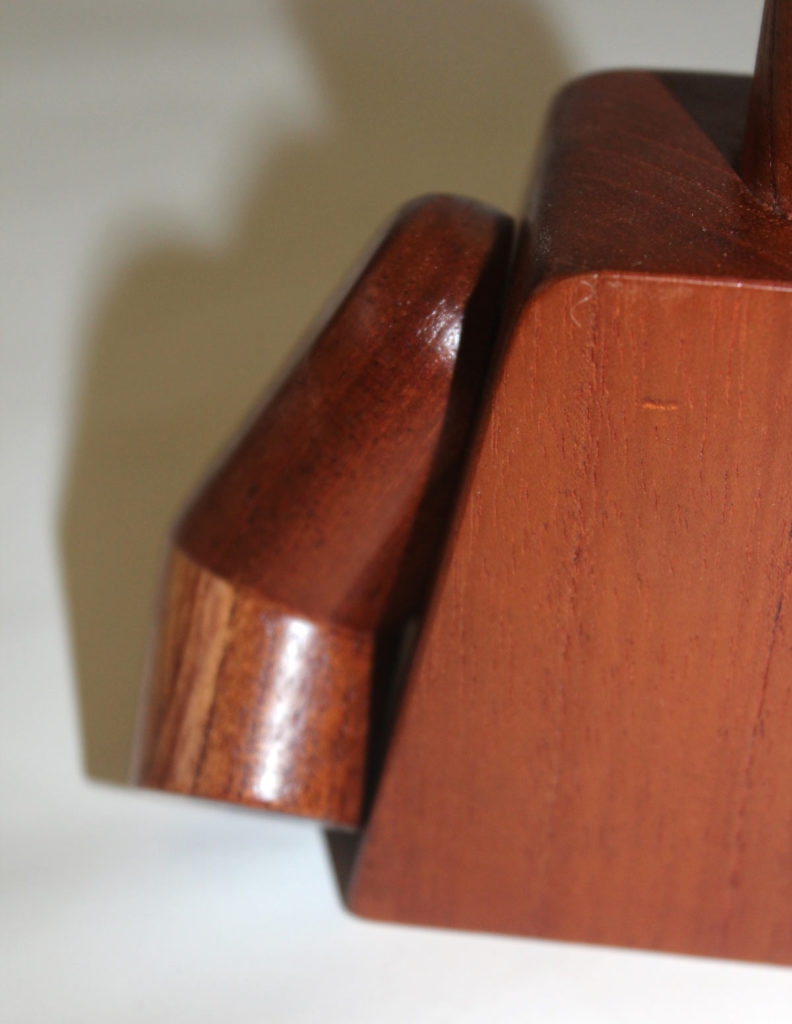
  • The leg mechanism is not flush at the front
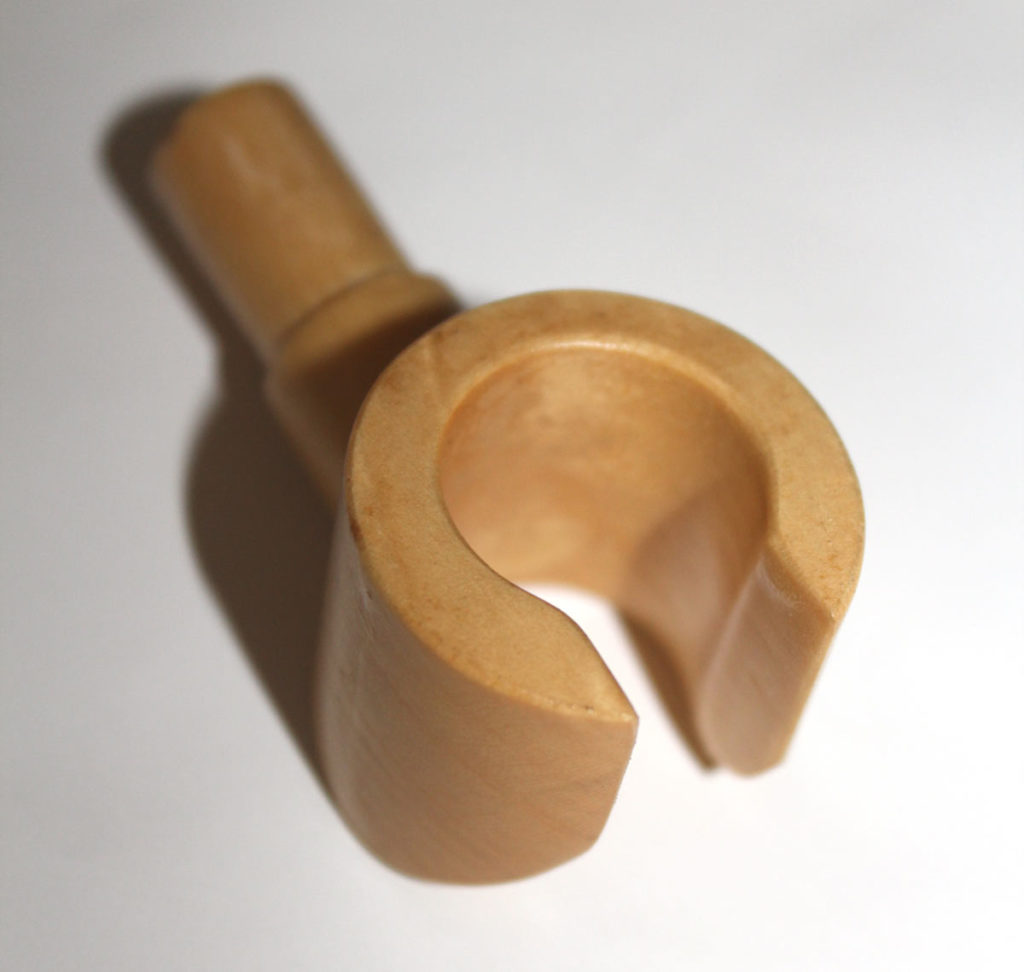
    or back
  • There is a flat spot on the arms
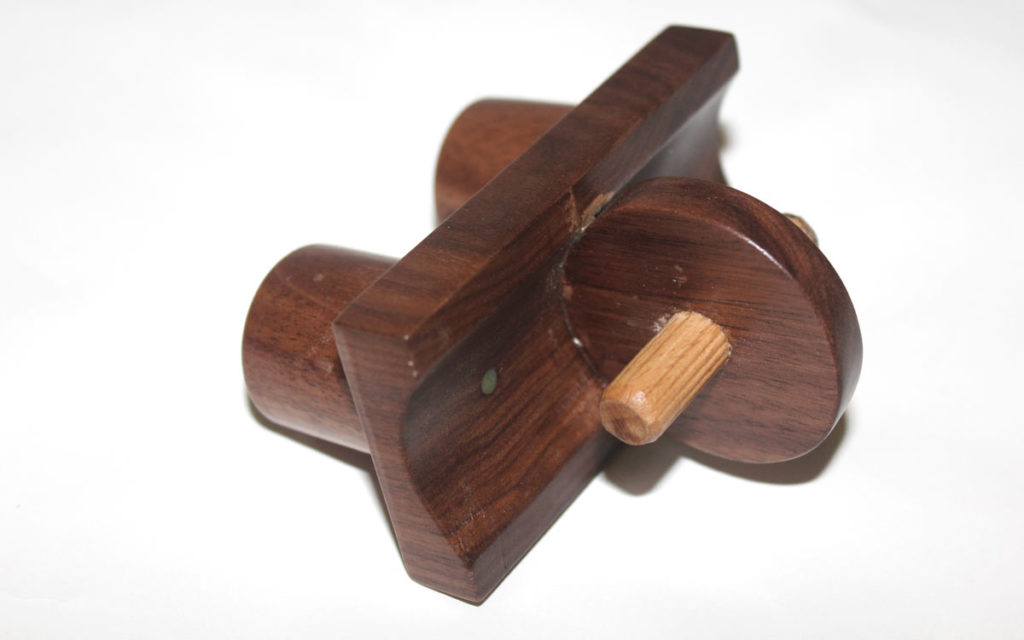
  • There is a cutout on the legs that houses the middle disk.

These are all really important, and make a big difference. I even tried slightly changing the sizings on the face and it looked so wrong. They are well designed.

Choosing your scale is also important. I chose 1:6.25 because that gave me the biggest size with the timber I had. The body thickness is 50mm (standard timber sizing). By luck, at this scale the hand also holds a real Lego man perfectly.

Figure C

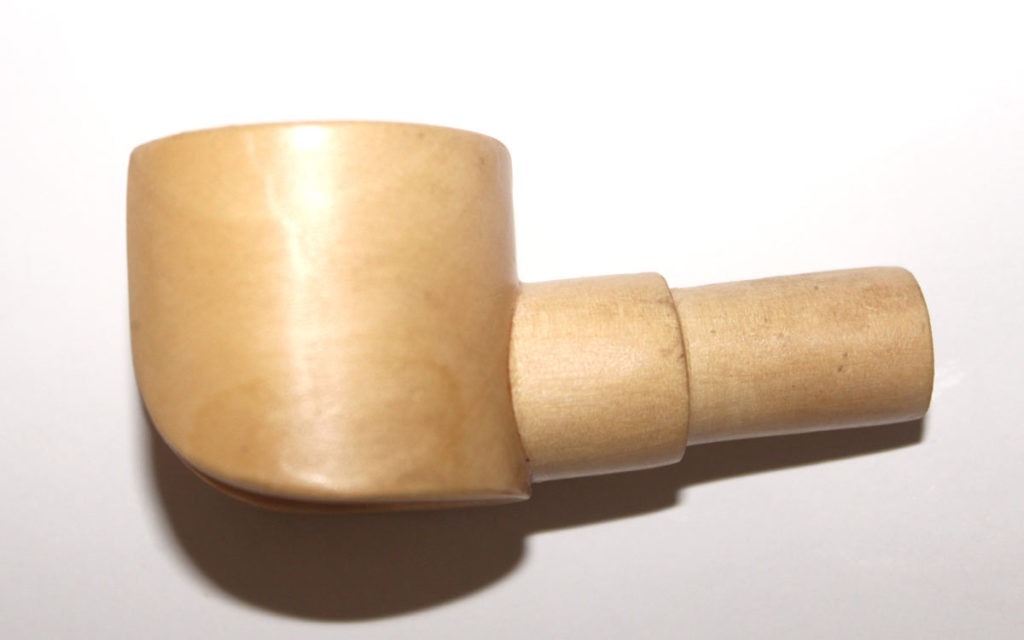
Timber selection: The main thing is timber density. With dowel joints that are tight but not too tight, soft timbers are best. Color is only really important for the head. Try to get a yellow timber. The other colors are not as important but something contrasting is good (Figure C).

Project Steps

Turning the Head

The head is simple turning on the lathe. Get your diameters and markings right with the calipers. Use the parting tool to get accurate sizings. Roll the radius with a skew or a gouge. After that’s done, drill a 30mm hole in the bottom for the connection to the body.

The Face

I made my facial features with a walnut veneer. The eyes were easy, punching them out with a plug cutter. The mouth was harder, having to cut that out by hand with a Stanley knife. It’s important to sand the edges. I carefully glued on the pieces with PVA glue, using clear Sellotape (aka Scotch tape) to hold them on. You’d normally use masking tape but this allowed me to ensure the position was exact.

The Body

The body is another simple part. The shape is easy to get from the designs. I used a bandsaw to cut it out and then sanded it up. The arm holes are central in width and not too far from the top. Drill the two 30mm holes on the bottom to clip in. The dowel at the top has to be made. This has a 30mm diameter that matches the hole in the head, but it’s 29mm at the top. This taper allows the head to slip on with ease. Also drill a 30mm hole in the body to fit this dowel.

The Arms

The arm is two parts but comes from one turning. A cylinder is turned with a taper with a round on top. Partway down the arm, cut it at an angle of 67.5° with a thin blade. Rotate it 180° and reglue. This should create a finished angle of 135°. Drill holes for the hands and for the dowel to connect to the body.

The Hands

There are two parts to the hand. The wrist dowel is turned with two diameters, one that fits into the arm and the other a little larger to fit into the hand (Figures I and J). The hand itself is first turned to the correct diameter. Drill a hole in the side that fits the wrist dowel and glue it in. When dry, you can drill out the middle of the hand. Make two cuts in the front of the hand with your chosen saw. Radius the bottom of the hand using a sander.

The Legs

The easiest way to get the legs consistent is to make a template. The round at the top has to be spot-on, as this moves in the leg mechanism. Cut out the shape on the bandsaw and sand to shape. Drill out the centers for the dowel using a hole saw to create the small recess, then increase the hole with the 10mm bit for the dowel. Chisel the rest of the recess flat.

The legs may need adjusting when you make up the mechanism. Sand the taper later, after making the mechanism, so you can make it exact.

Leg Mechanism

This is the really hard part. First, cut the center block. This can be left a bit oversized, but make sure it’s the correct thickness. Next, turn the two body dowels to the same diameter as the one for the head. These are glued into a recess. It’s a tight fit so they hold well. Drill two holes at the top for this. These have to be exact. The joint will be really tight and hard to separate but it needs to be tight enough to hold well. Glue these in. I used epoxy to be sure. 

Next, shape the curve on the underside of the block. To do this I made a sander of the correct diameter by turning pine on the lathe into a cylinder slightly smaller than required diameter, and then gluing abrasive paper to it. 

I shaped the disc on the bandsaw and sander. The disc has a tenon on it: drill a hole in the center and glue a dowel halfway though. Then drill and chisel a mortise into the center of the block and glue the disc in. This part is so hard because it has to be exact to get the legs to work well.

Sanding, Fitting All the Parts, and Finishing

Sanding, sanding, and more sanding. It has to be done. Some bits can be done with a sander but there are also parts that need to be done by hand. Anything that is too tight, sand. Make sure it all moves. It does have to be a bit loose because the lacquer will tighten it up.

For the finish I chose lacquer, for a well-wearing finish that will protect the timber. I sprayed on the lacquer, and I used beeswax on some of the joints to help with movement.

Enjoy!

Once finished, you can play with these! They are a lot of fun and bring back childhood memories.