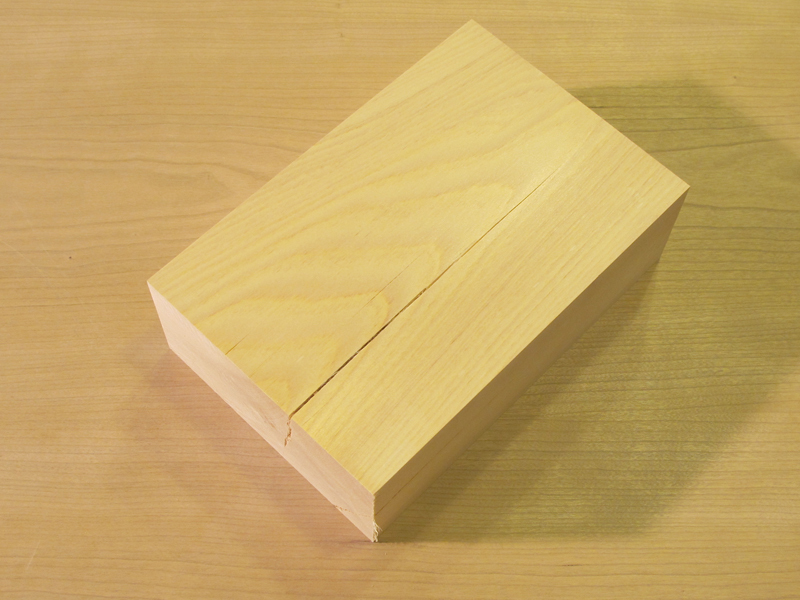
When working with wider, thicker slabs of wood, it is not uncommon to have checking (cracks) in the surface, particularly at the ends. While there are a couple of ways of dealing with this, such as filling the gaps with wood or putties or epoxy, I prefer to leave it as it is, treating it as a feature instead of a flaw and stabilizing the check with a butterfly spline.

Project Steps

Spline

You need 1 spline for every 3-5 inches of checking.

Cut a couple out of paper and lay them on the piece to find the right size.

You can make it as small as 1/2″ x 1″ up to 1 1/2″ x 3″. Keep it on the thin side, between 1/4″ – 1/2″.

Spline (continued)

Using a piece of cherry measuring 1″ wide 2″ long and 3/8″ thick here.

Make sure the grain runs the length of the long dimension. Use an adjustable square to mark the center of its length, and then 1/4″ in from each side.

Use an angle gauge to draw lines from the outer corners to the center marks.

Cutting Spline

Make a cut along the center line to where the angled lines meet. This is a relief cut that will make it easier to chisel out the waste. Keep chisel flat.

Take a few small shavings down one slope, then rotate and take a few from the other side.

Continue taking shavings from each side until both are down to the line. Now flip and repeat.

Sizing The Spline

Determine its position along the check. For greatest strength, try to align the centerline of the spline with the line of the check.

When ready, carefully trace the spline once. If you are working on dark wood, cover the area with a wide strip of masking tape and mark on it. Put an ‘X’ on one end and a corresponding mark on the board to keep track of the spline’s orientation.

Use a router to create a quick flat-bottomed hole.

Set the router bit about 1/32 below the thickness of the spline so it can stand out and be flushed later.

Rout the mortise staying about 1/16″ in from the pencil lines.

Chiseling

Carefully chisel the lines at the ends and along one side. Do not chisel the lines away. Put the spline in the mortise and check the fit along the chiseled edges. Correct any gaps now.

Fitting

Use a marking knife to scribe lines along the unchiseled side. Only make one pass with the knife. You should be able to see why you chisel out one side at a time. The lines you scribed are usually inside of the pencil lines. Only push the spline in a little way. If you push it too deep you might not be able to get it out.

Bevel

If it fits, carefully pull it out. Using a knife or chisel, chamfer (bevel) the inside edges of the spline to help it slide in straighter, keep from damaging the edges of the mortise, and leave a little clearance in the corners for glue squeeze-out.

Gluing

Using a small brush, apply a thin layer of glue to all of the surfaces of the mortise and to the bottom of the spline.

Put the spline in the mortise and using a scrap to protect the surfaces, tap it in with a hammer.

Fitting and Flushing

The spline should be just proud of the surface and tight around the edges.

Flush the spine by sanding or planing the surface. If sanding, be careful not to over-sand the area around the spline, especially if the spline is harder wood than the board.

If planing, be sure to skew (hold plane diagonal to direction of cut) as you pass over the spline to help avoid tear-out.

And that’s it. A simple but cool little joint. This technique can also be used for joining boards together for tabletops etc. If a gap is desired, keep a thin piece of wood clamped between the boards while cutting the joint and then remove it before assembly.