Additional Materials Required:
- 3/4″ Galvanized Nuts (4)
- 3/4″ Steel Nuts (10)
Prep the U-channel for the Compressed Earth Brick Press main frame.
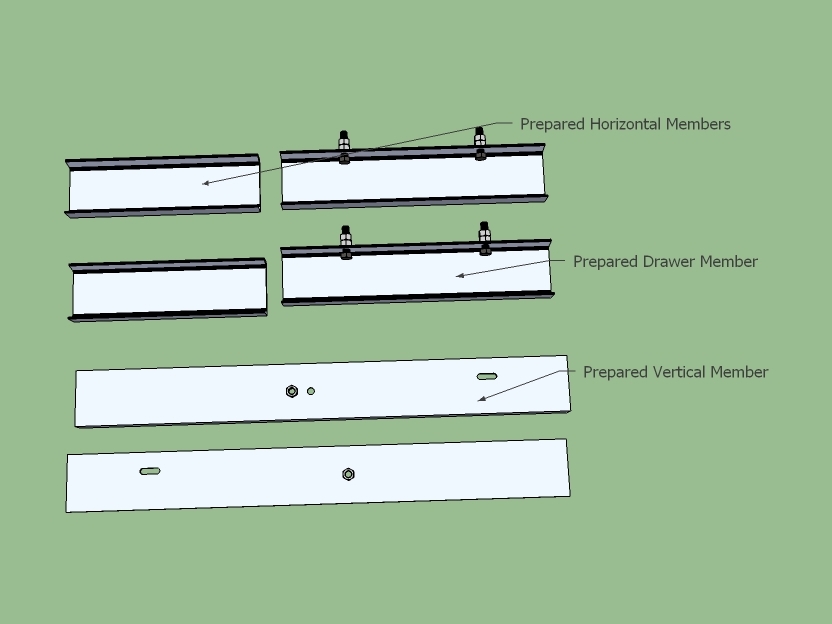
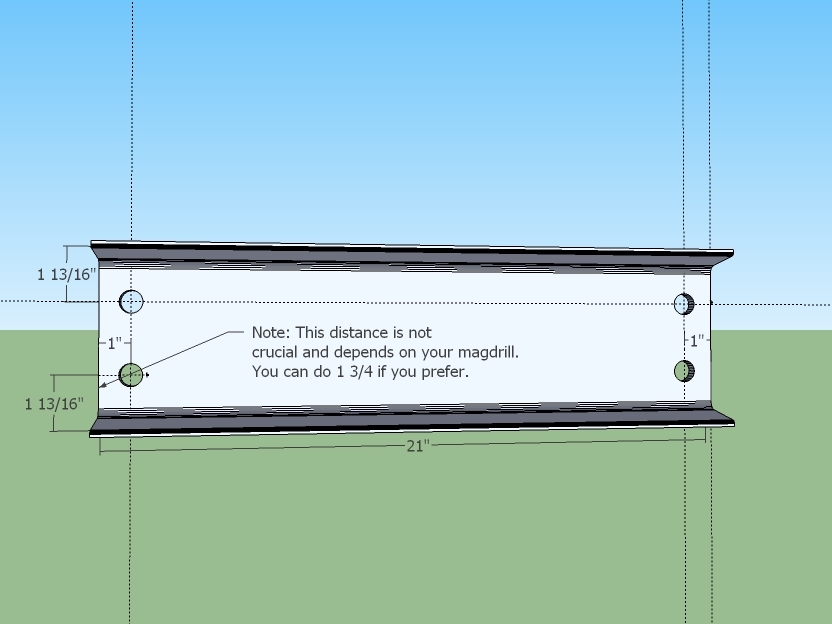
Mark the holes in the horizontal members as shown in the diagram. Center punch them.
DON’T PUNCH THEM! They will be mag-drilled in a later guide.
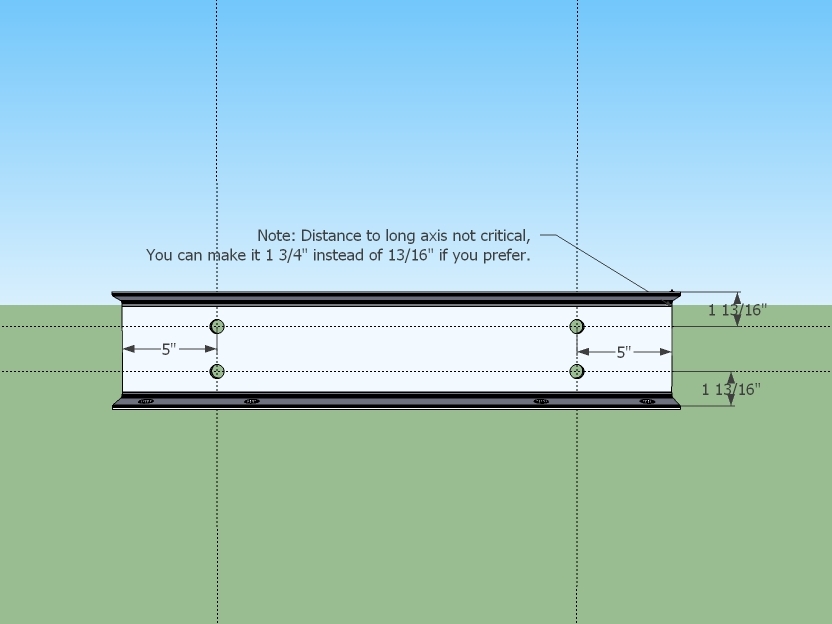
Mark and center punch the 4 holes on the face of the U-channel.
DON’T PUNCH THEM! They will be mag-drilled later
Torch holes for 3/4″ drawer adjustment bolts as shown in the diagram.
Grind away the slag.
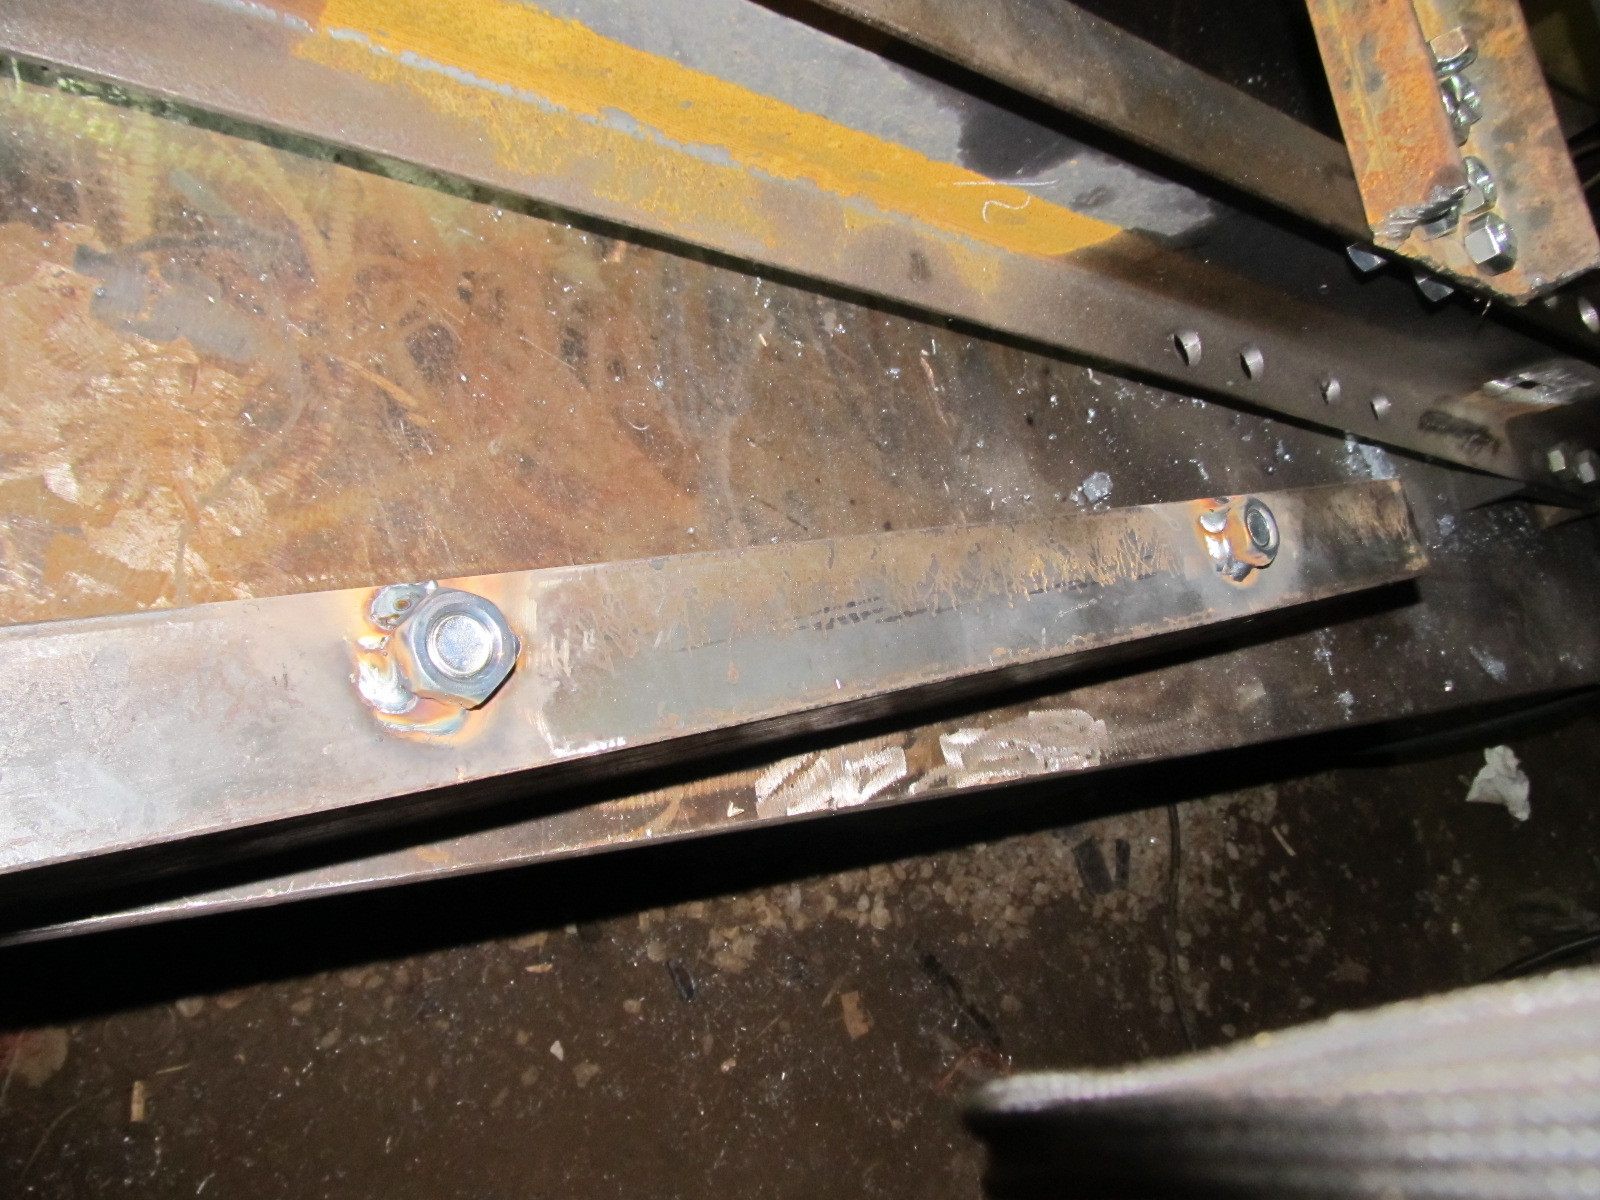
Weld 3/4″ nuts to the outside of the U channel where the holes are torched.
Weld it with a bolt coming thru the other side so it protects the threads and so you know the nut won’t get off center.
Grind away any spatter between the bolts.
Make (4) 3/4″ x 3.5″ bolts using 3.75″ threaded rod and steel nuts. See Making Bolts.
Thread the bolts through the nuts and thread another nut on top as shown.
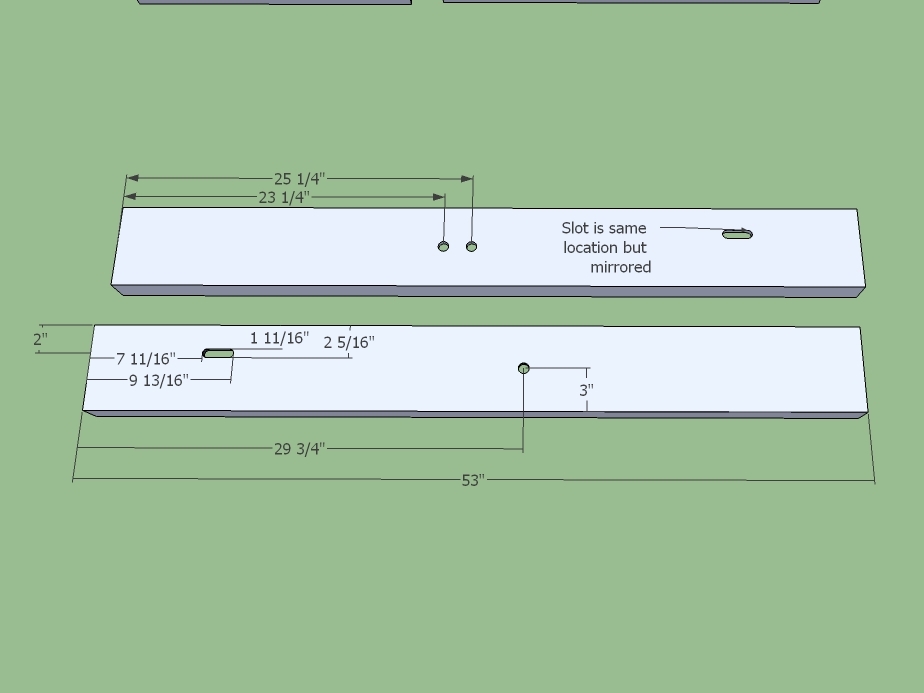
Punch the holes as shown. The diameters are 3/4″.
Torch the roller slots as shown.
Insure a 1/2″ bolt goes thru it.
Grind away the slag.
Weld the the thin cylinder support nuts, taking care to protect the threads.