Materials Needed:

Steel:

  • .25×2 Flat: 12” (1) – Controller Mount
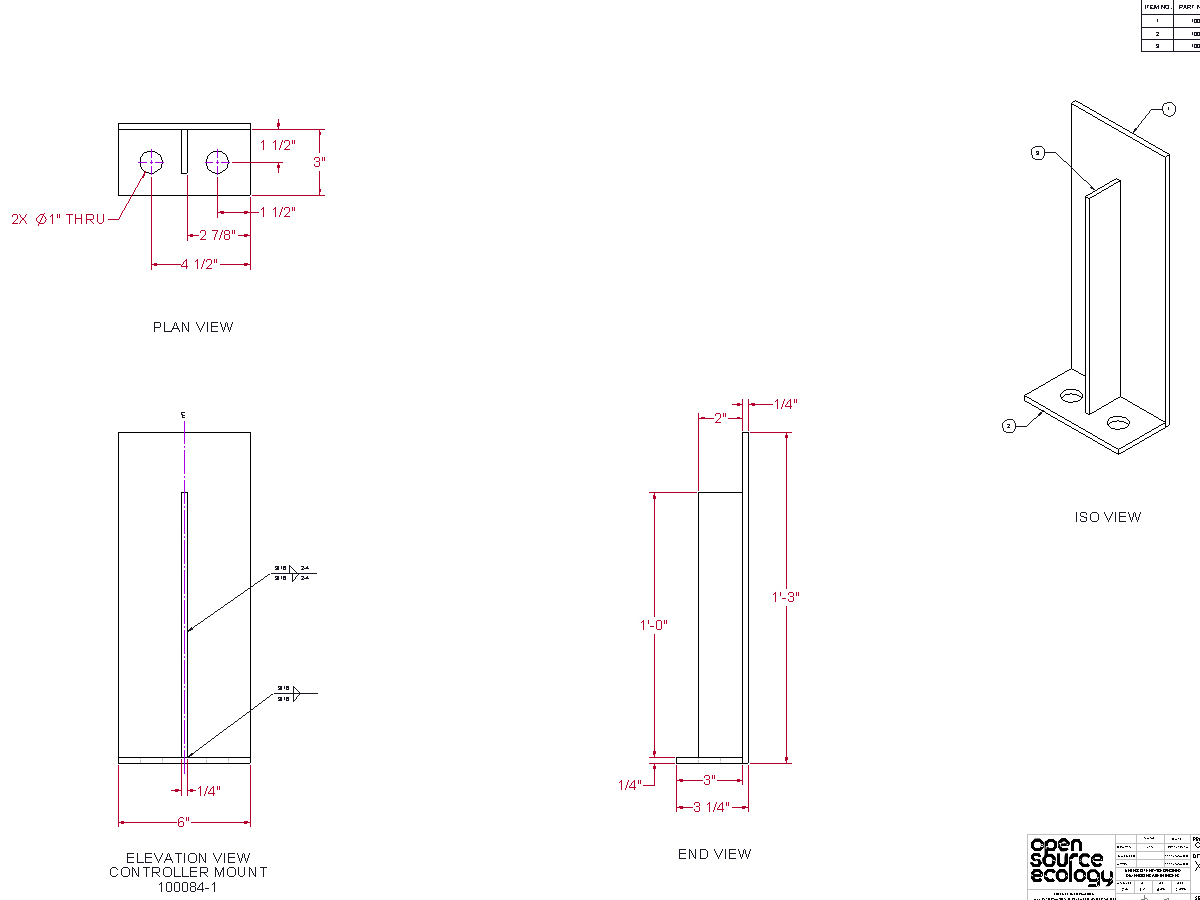
  • .25×3 Flat: 6”(1) Controller Mount Bottom Piece
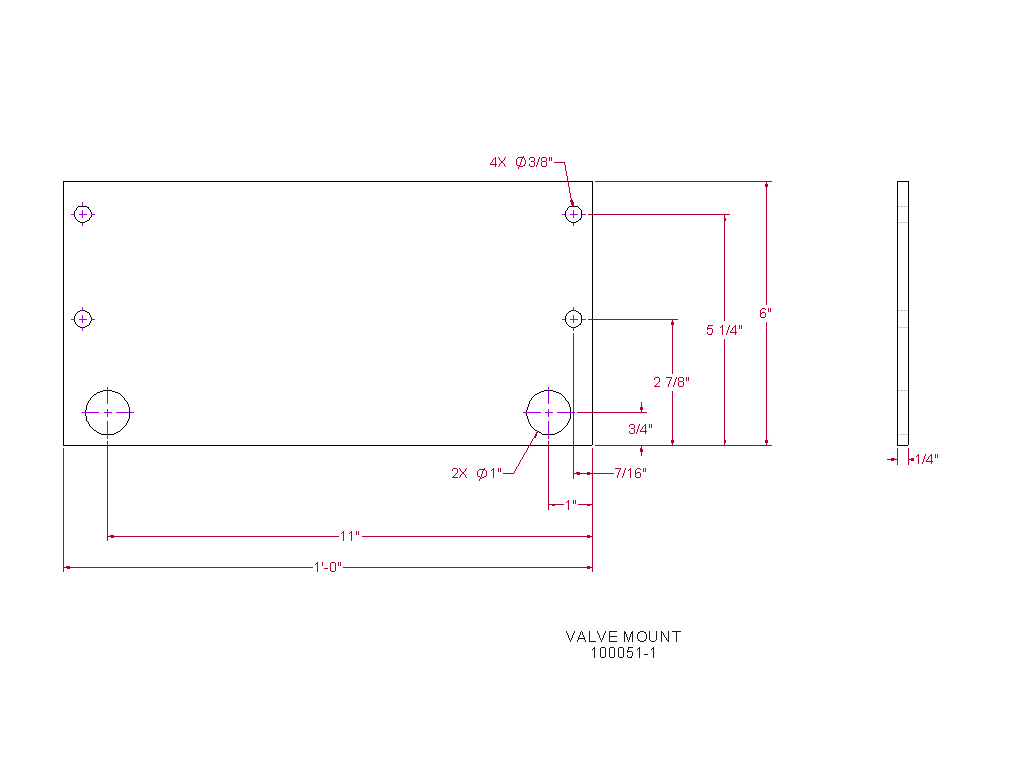
  • .25×6 Flat: 12” (1) Valve Mount
  • .25×6 Flat: 15” (1) Controller Mount
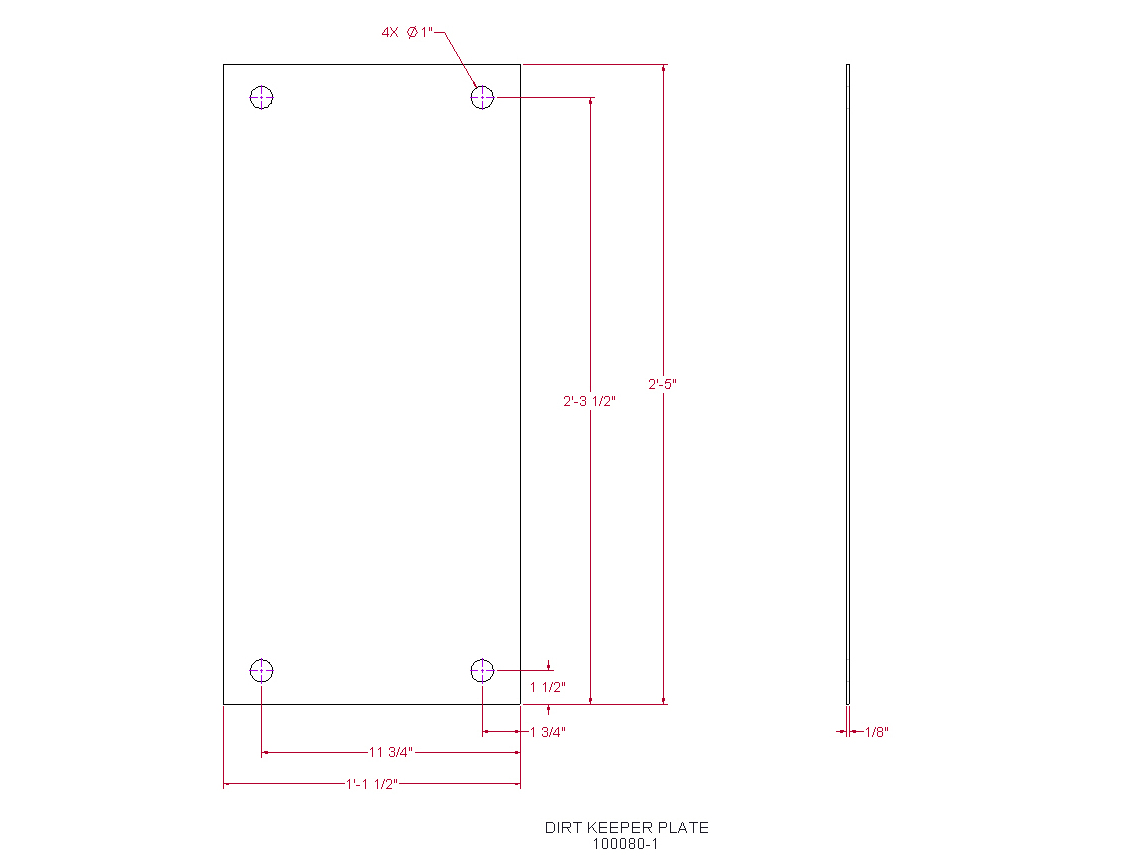
  • .125x29x13.5 Sheet (1) Dirt Keeper Plate
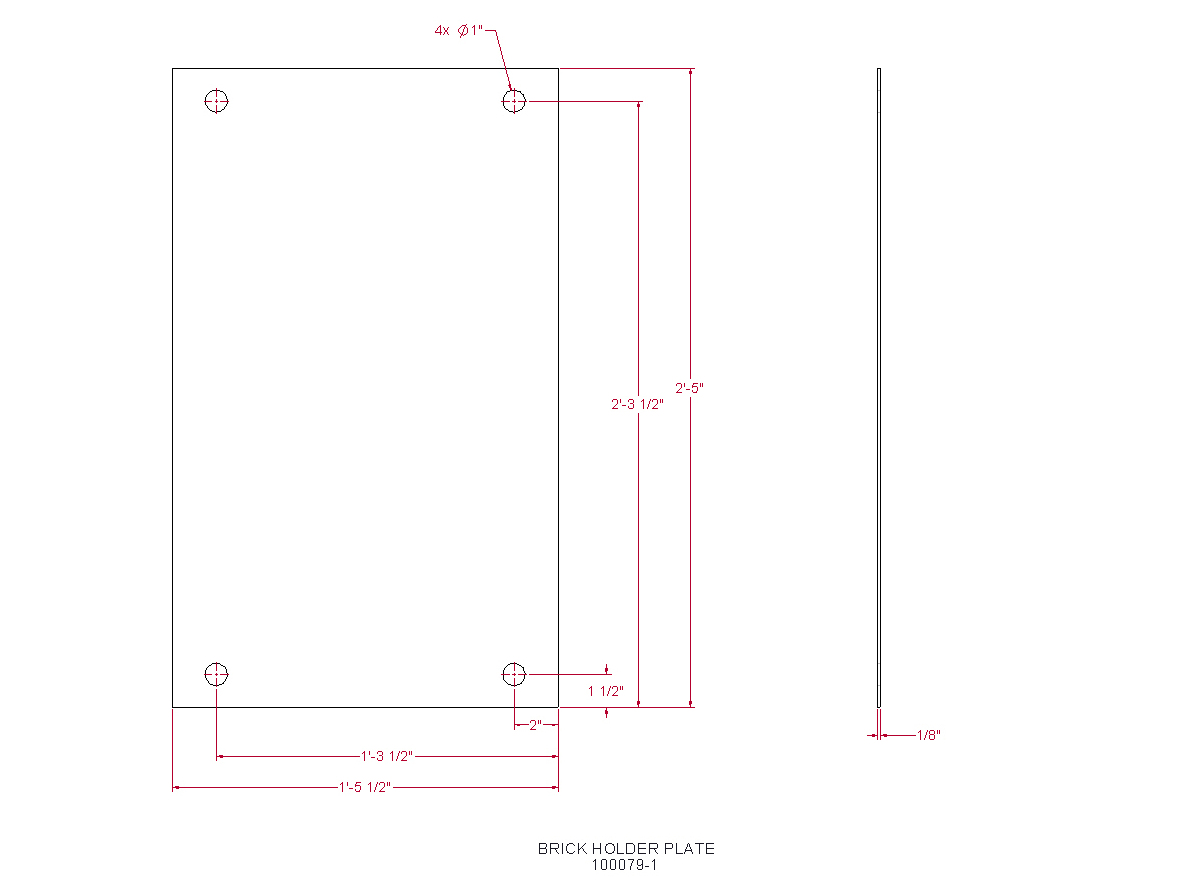
  • .125x29x17.5 Sheet (1) Brick Holder Plate

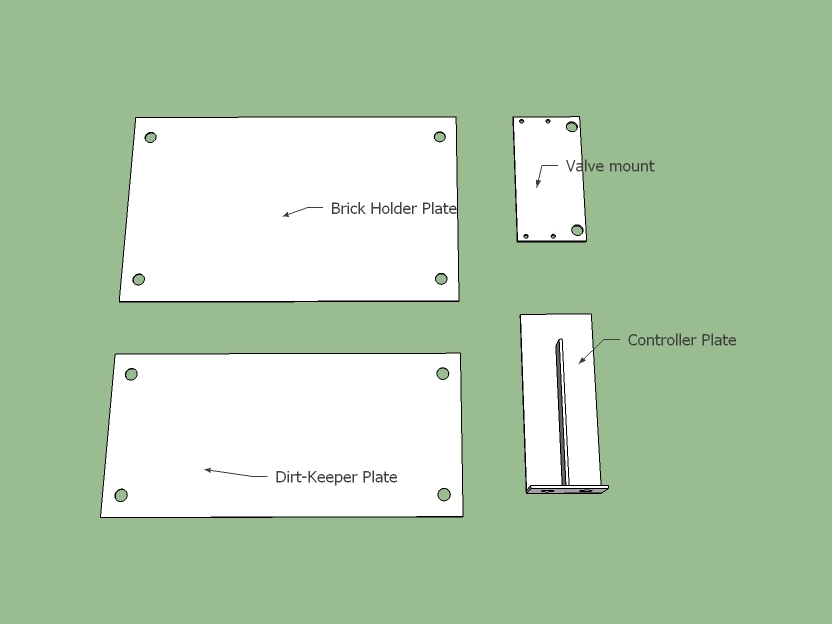
Sketchup Model

What will the next generation of Make: look like? We’re inviting you to shape the future by investing in Make:. By becoming an investor, you help decide what’s next. The future of Make: is in your hands. Learn More.

Project Steps

Make Brickholder Plate

Punch all holes.

Make Dirt-Keeper Plate

Punch all holes

Make Valve Mount

Punch all holes, or drill if necessary.

Make Controller Plate

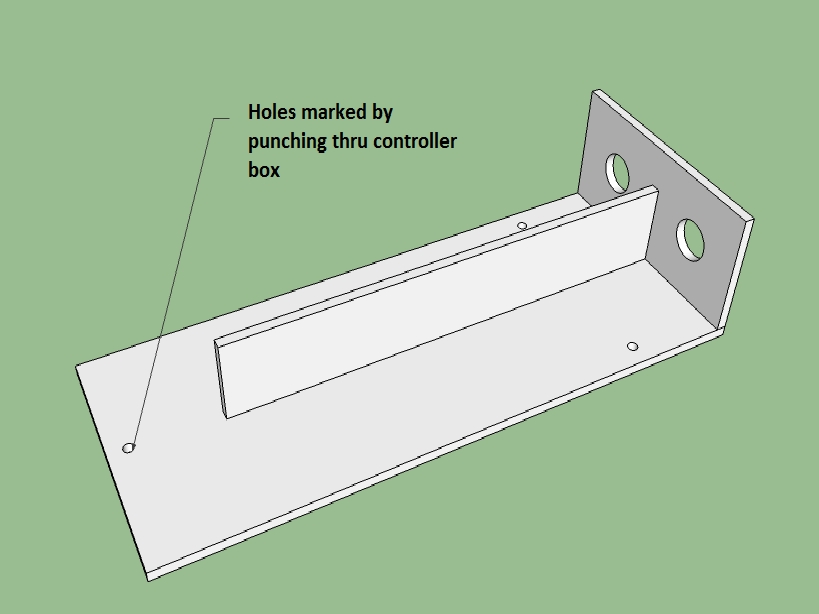
Find your controller box and locate its mounting holes on the back.

Place it on top of the 6×15 plate so it is square and the top hole is about ½” away from the top. Transfer punch the holes on the controller box to the plate.

Drill those 1/4″ holes.

You can drill them a little bigger (up to 5/16″) if you’d like, as it’s difficult to get the holes perfectly aligned.

Punch the holes in the bottom piece.

Weld the bottom piece to the large plate.

Make sure it’s square

Weld the flatbar on the back.

Make sure it’s square.