


Starting on December 21, 2015, the Federal Aviation Administration (FAA) began requiring hobbyists to register their Unmanned Aerial Systems – often referred to as drones. After two days of registration, the database contained 45,000 aircraft dedicated and designed for personal use. This mandate was set forth by the Federal Aviation Administration (FAA) to increase accountability for drone operations and reduce accidents involving small drones. Failure to register a personal drone weighing between 0.55 lbs. and 55 lbs. could land you with a fine of up to $27,000. A federal judge ruled in May, 2017 against the requirement for registration, but the matter may be appealed (“Federal Appeals Court Voids FAA Registration Rule For Model Aircraft,” John Goglia, Forbes, May 19, 2017).
Drones are everywhere; in fact, the FAA estimates that by the year 2020 there will be approximately 7 million drones in the sky. As more and more people use drones, it has become the mission of the FAA to ensure that drone enthusiasts are operating in a peaceful and safe manner. You can visit their website to see the restrictions with which you must comply as a drone owner, including weight restrictions, visual line-of-sight (LoS) restrictions, and airport restrictions, among others. All of these are put into place to ensure a safe environment for those who are, and those who aren’t, involved in flight.
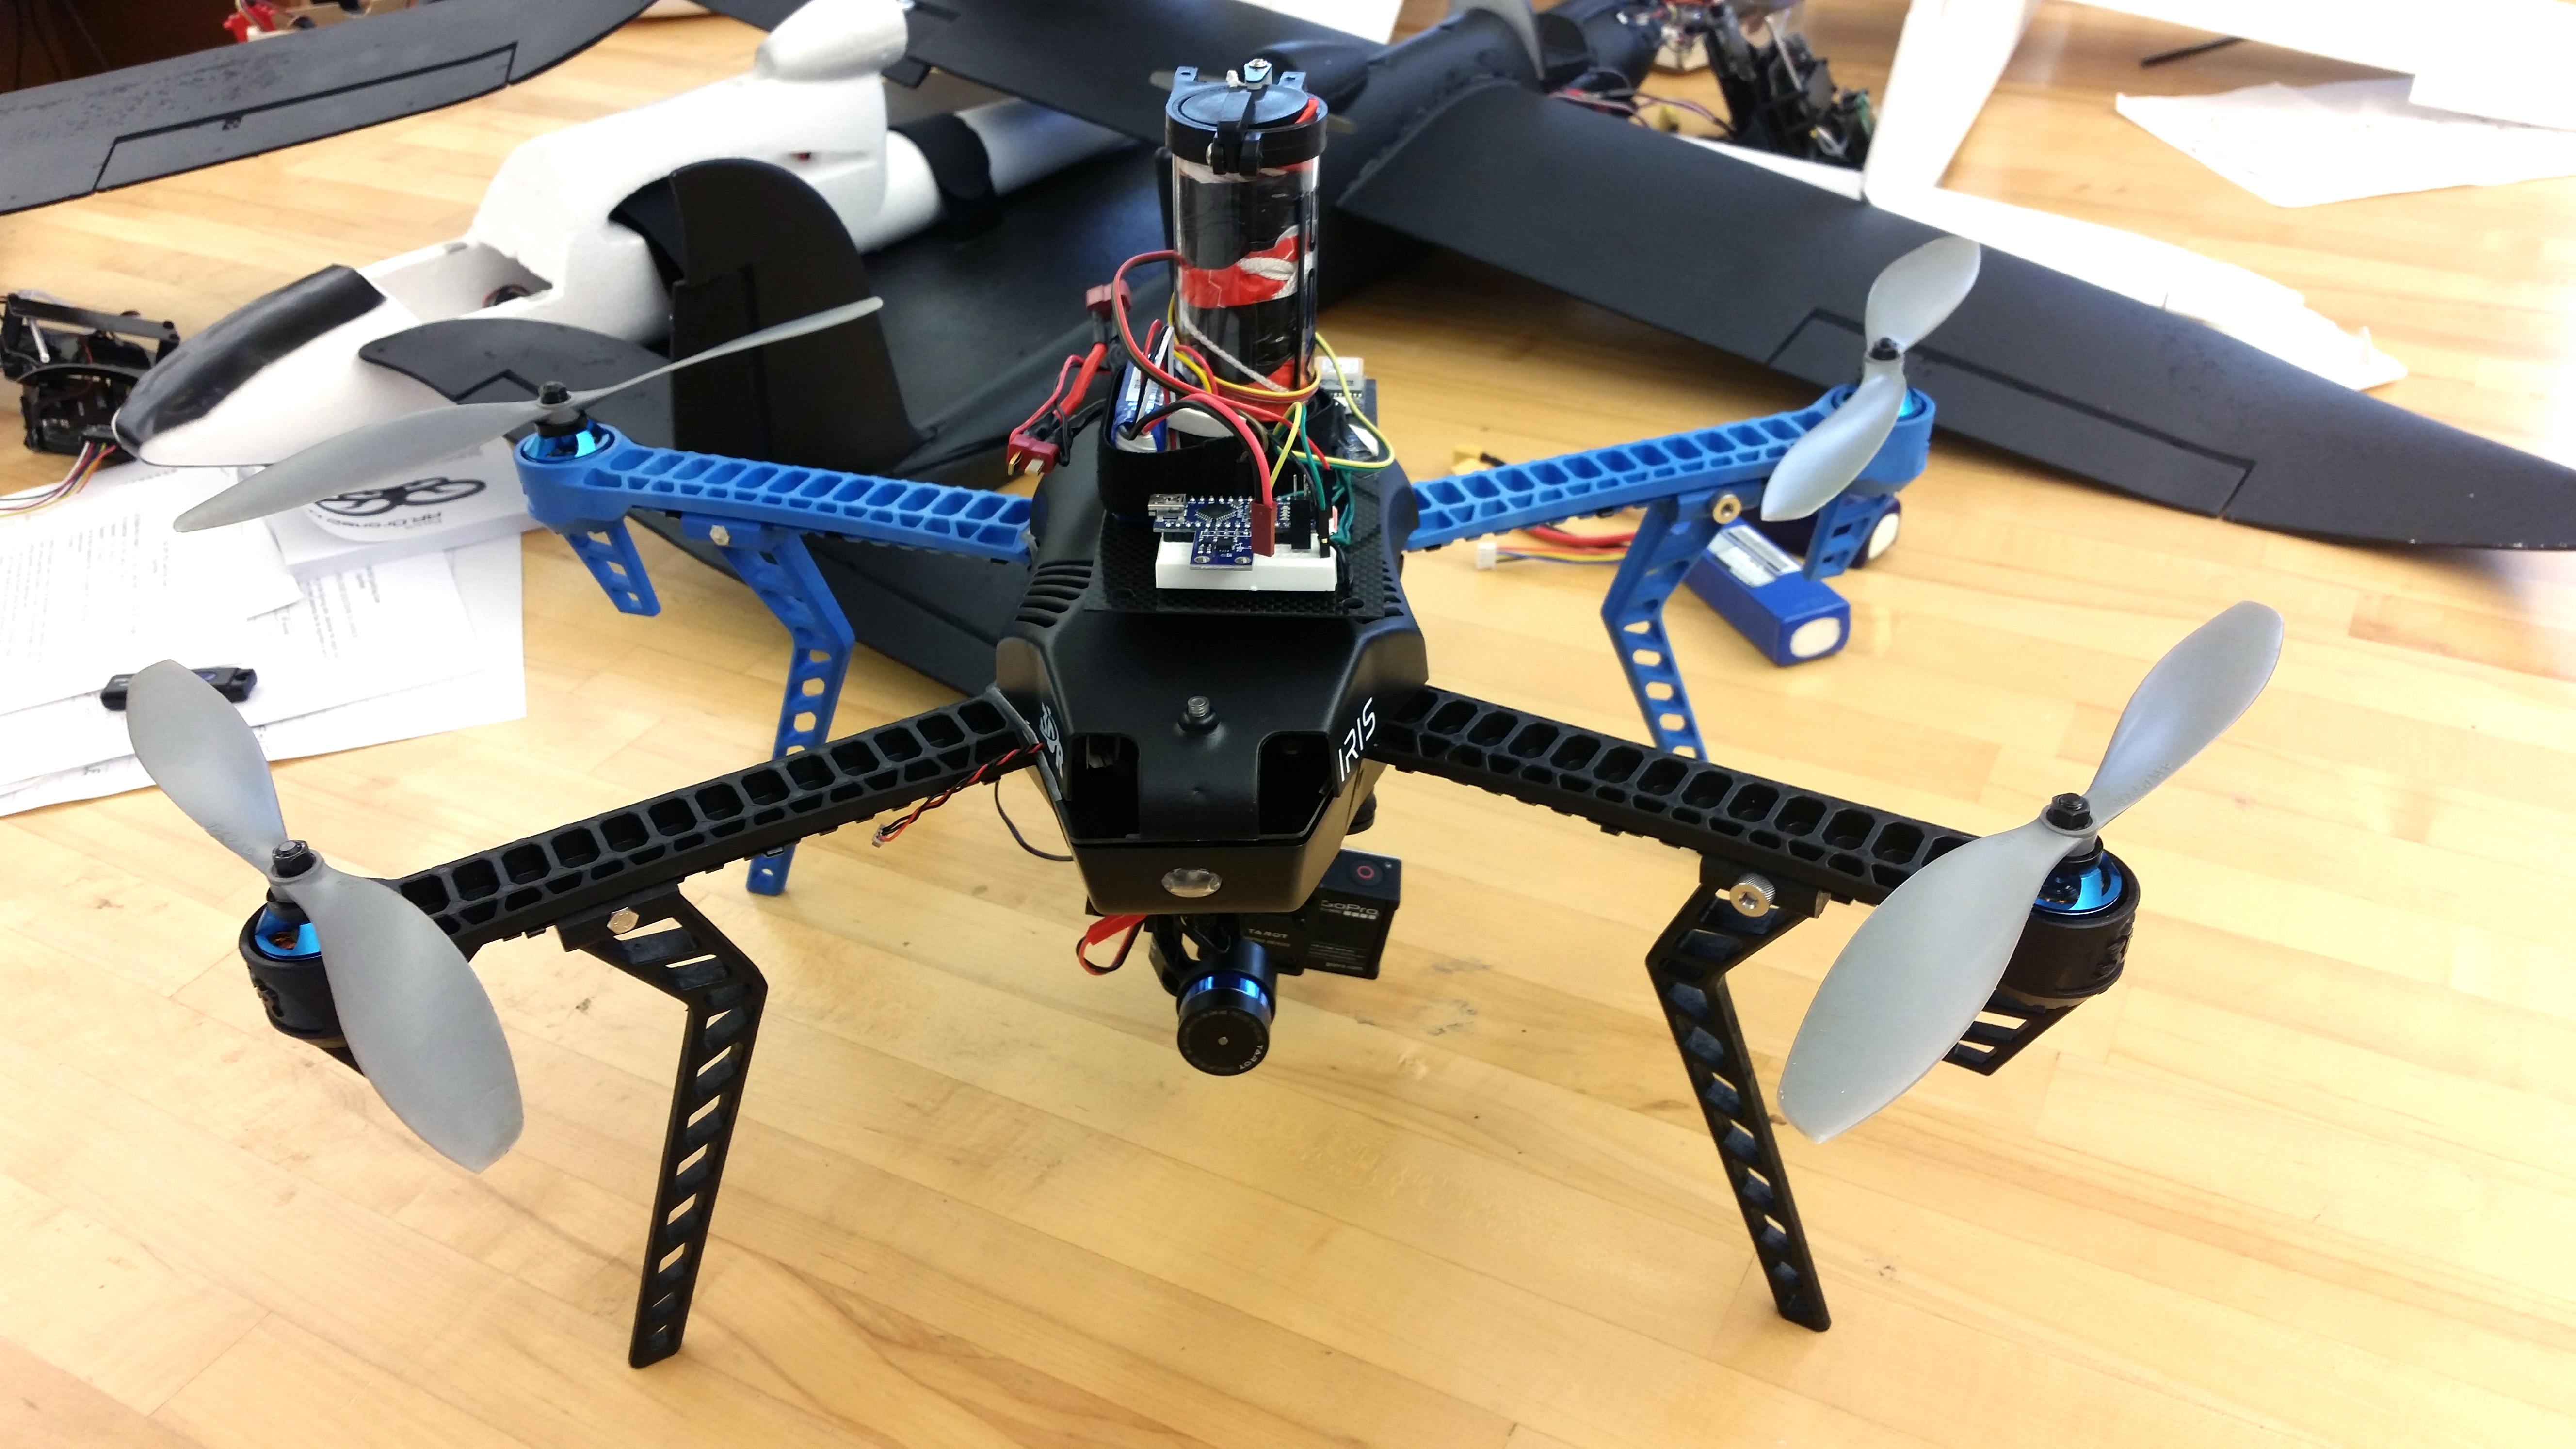
We have all seen a quadcopter in the sky – flying so majestically in one location – until it drops like a rock. Unlike fixed wing aircraft, quadcopters lose lift when the battery is depleted, or even when the craft is upset beyond its ability to recover. As there continue to be more and more drones in the sky, everyone must take the safety of their aircraft into their hands. This project will explore the design and construction of a ballistic parachute recovery system for small unmanned aircraft. The recovery system, based on an Arduino microcontroller, uses sensors to determine GPS coordinates, remaining battery voltage, and acceleration. If the system determines that the drone’s battery is depleted, or that it is operating outside of prescribed GPS boundaries, or that the unit is in free-fall, the recovery system cuts power to the motors and deploys the parachute, lowering the aircraft to the ground at a safe velocity.
Let’s build a recovery system for our drone!
Note: There will be several places you can find most of these materials. Please take into consideration cost and simplicity when ordering your parts. A simple overview of the electric circuits will be covered in this tutorial. Please make safety your top priority.
Design
The recovery system is controlled independently of the drone’s flight computer through the use of an Arduino Nano microcontroller powered by a separate 7.4V LiPo battery, to ensure proper operation of the recovery system in the event of a depleted main battery. This microcontroller provides 14 Digital Input/Output Pins, 8 Analog Pins, a regulated 5V power source with a 16MHZ Clock and 2Kb of SRAM. Through this unit, all monitoring and decision-making processes are completed. Each hardware component is connected to the microcontroller via the digital or analog I/O pins.
Accelerometer – The accelerometer is connected via analog input pins on the microcontroller. Acceleration components in x, y, and z directions are read according to voltage values generated by the accelerometer. Since the accelerometer module does not require much current, analog output pins were a sufficient source of power for the accelerometer.
GPS – The GPS module is powered through the dedicated recovery system battery and communicates over a serial (“Software Serial”) connection on the microcontroller’s Digital I/O pins. The GPS unit transmits NMEA data via a RS232 serial connection to the Arduino.
Voltage Sensor – The voltage sensor connects to an analog pin on the microcontroller. The voltage sensor unit acts as a 4:1 voltage divider, providing a voltage range within the limits of the analog-to-digital conversion circuitry on the Arduino’s analog input pins.
5V Relay Module – The relay module is activated by a 5V digital signal from the microcontroller and cuts the power to the drone’s motors when activated. This particular relay was “Active HIGH”, providing a 5V signal to the module which activates the internal switch.
Servo Motor – The servo motor that deploys the parachute is controlled via a Pulse Width Modulation (PWM) signal from the microcontroller’s digital pins. To save energy for the recovery system, the servo motor is set to close initially and then virtually detached from the system. This saves battery and Arduino processing power since the pressure of the parachute release door keeps the door closed.
Parachute – The parachute utilized for recovery is a MARS Mini, which could also be constructed and designed as its own component. This MARS Mini parachute is deployed by a servo motor controlled door that holds back pressure. The parachute fabric is launched outward by an internal spring and plunger mechanism. Resetting the unit is possible for quick testing and implementation. This parachute can be constructed of a PVC tube, large spring, baseplate, 3D printed door and servo motor holder, and a servo motor. Please see pictures for additional details. The figure below presents the overall design schematic of the recovery system:

Software
The software constantly monitors three conditions to determine if aircraft failure has occurred: depletion of main battery voltage, free fall of aircraft, and beyond Line-of-Sight (LOS) distance from pilot according to GPS. Through the hardware components previously described, it is possible to obtain real-time values from these components to be monitored.
When monitoring values, specific calibration is needed for proper use as a recovery system. The accelerometer values need to be set to detect free fall. The voltage sensor must be calibrated to proper cutoff voltage of motors. The GPS must obtain current position from satellites and compare to expected values stored in the microcontroller. Once these components are set, the UAV will be available for flight. The software design flow is outlined in the figure below.

GPS
The GPS unit constantly streams position information (latitude, longitude, altitude, and time) in National Marine Electronics Association (NMEA) 183.5 text (ASCII) format The unit communicates via RS232 serial connection to the Arduino Nano at a baud rate of 38400 baud.
To comply with current FAA regulations, the operator, and/or a flight assistant, must have a complete LOS view of the aircraft while in flight. If the aircraft exceeds the predetermined range from its takeoff point, the recovery system will take over and cut power to the main system. Once it cuts power, the recovery system will deploy the parachute and land safely.
Voltage Sensor
The voltage sensor software polls a value continuously from the main battery source. Brushless DC Motors often used on UAVs are voltage dependent: that is, the voltage of the power source primarily determines if the motors are able to keep running. Lithium Polymer (LiPo) battery technology is typically used in hobby based UAV aircraft. These batteries have steady voltage until the battery reaches the end of charge. At that point, the battery voltage falls rapidly. After polling the motor battery voltage, the recovery system determines if the state of the aircraft is adequate for safe flight. If it is, the system continues to monitor. If the voltage of the main battery is inadequate, the recovery system cuts off power to the aircraft via the relay, and deploys the parachute for a safe landing. Addressing real-time battery voltage is most applicable to multi-rotor systems. Fixed-wing units have the capability to glide when powered down midflight. Unlike the fixed-wing system, multi-rotors need to power all motors for stable flight. By monitoring battery voltage, it is possible to determine a potentially unsafe flying condition.
Accelerometer
A 3-axis accelerometer attached to the recovery system constantly monitors forces exerted on the aircraft. The goal of the accelerometer is to monitor the UAV for detecting free fall. While other forces acting upon the UAV may be useful for determining orientation and movement, the accelerometer needs to monitor the instance in which a UAV may be in an unsafe state. In the case that the operator loses control of the aircraft, where many UAVs cannot recover from free fall accelerations, the recovery system deploys a parachute and cuts power to the main controls via the relay. The accelerometer detects free fall when the aircraft is experiencing 0 acceleration in x, y, and z directions (due to the way an accelerometer works).
Calibration and Testing:
In the Arduino code, find equilibrium on your accelerometer (all forces in x, y, and z are the same), test your GPS signal and location data, and find the battery voltage in which your LiPo begins to drop off. This calibration may take some time, but in the end, it will make your flight safer for all who are, and who are not, directly involved.
Happy making!
Acknowledgements
This project was completed during the Summer of 2016 at Auburn University under a Research Experience for Undergraduates program funded by the National Science Foundation, Dr. Saad Biaz, Principal Investigator, Dr. Richard Chapman co-Principal Investigator. Dr. Chapman initially posed the problem. I am thankful for their support.