As you fall asleep, halfway between consciousness and unconsciousness, a window of opportunity opens for hacking your own dreams.

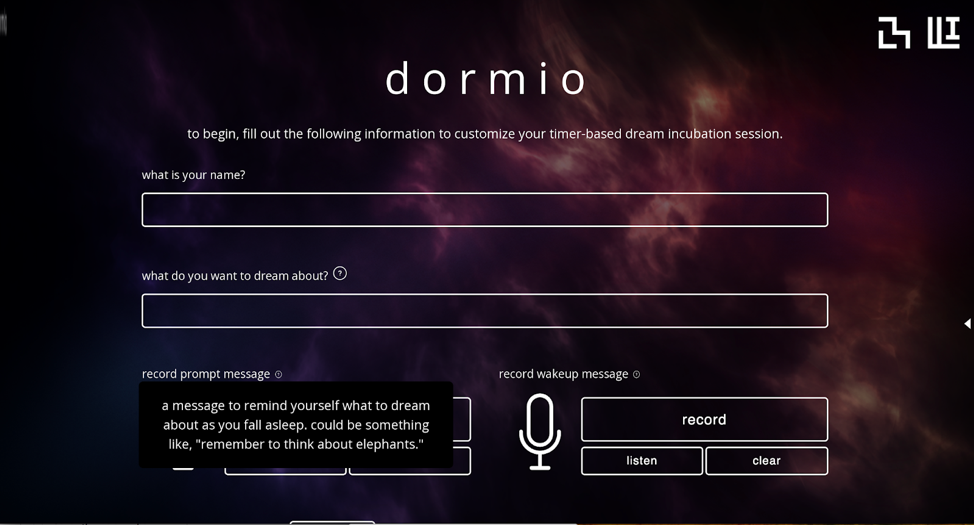
In this special period during the onset of sleep, called hypnagogia, simple stimuli like the movement of a car or the crackling of a campfire can change what you dream about. Our tool, the Dormio, helps you track this halfway period of semi-consciousness and then plays sounds to you at the specific moment when auditory stimuli are likely to redirect your dreams as you slip into sleep.

This article appeared in Make: Vol 81. Subscribe today for more robot projects and tips.

Historically, luminaries like Thomas Edison, Tesla, Poe, and Dalí each accessed this state of mind to capture creative ideas generated in their sleep onset dreams. Our own research suggests dreaming about a creative problem can improve your waking performance on it. And a recent neuroscience paper showed that people who access this hypnagogic sleep are able to triple their number of creative sparks when solving math puzzles.

It’s exciting to think there are parts of our minds that we typically can’t see, as they’re hidden by sleep, and that we can use sleep tracking tools to uncover our own hidden creativity. If you decide to do this project it will have some tough spots, debugging, and improvising, but you will learn lots about sensors, sleep, and hopefully yourself.

WHAT: The Dormio V3 is the newest in a series of wearable devices we’re making which help you track certain stages of your sleep and stimulate yourself with sound or smell to change your dreams in real time. We will make it together in this tutorial!

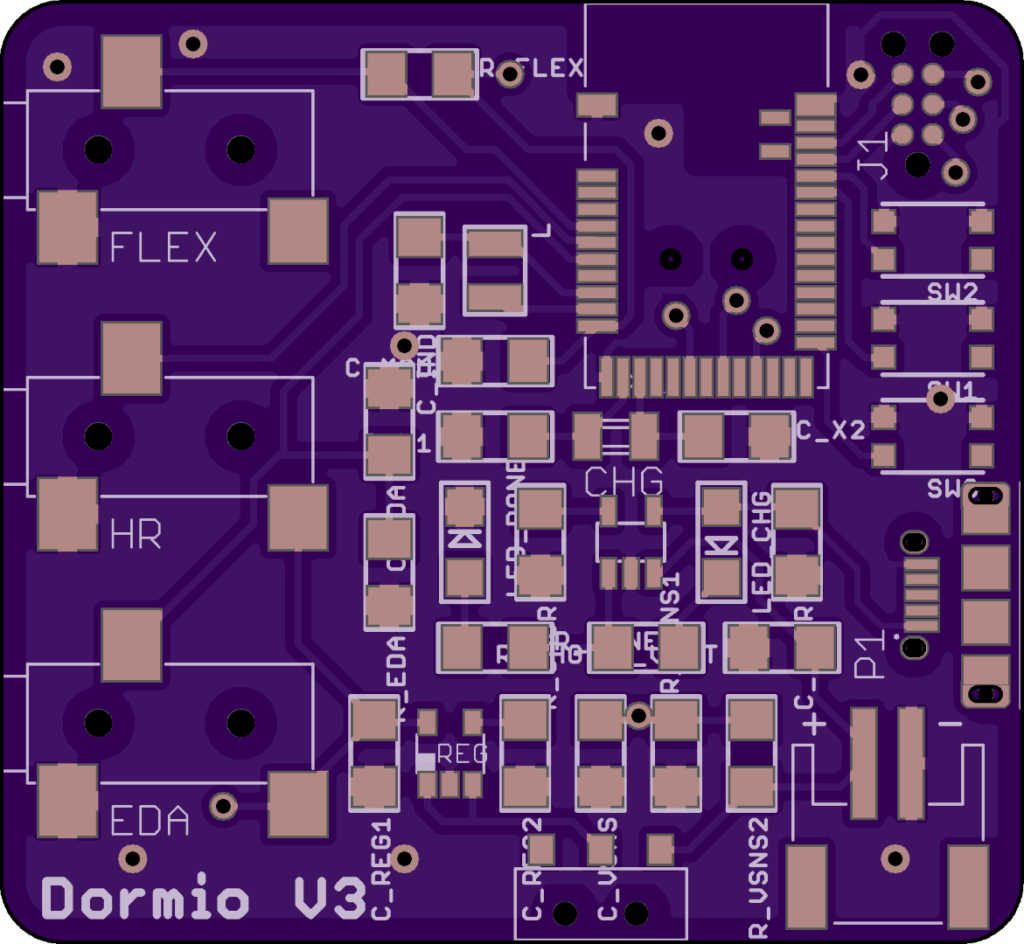
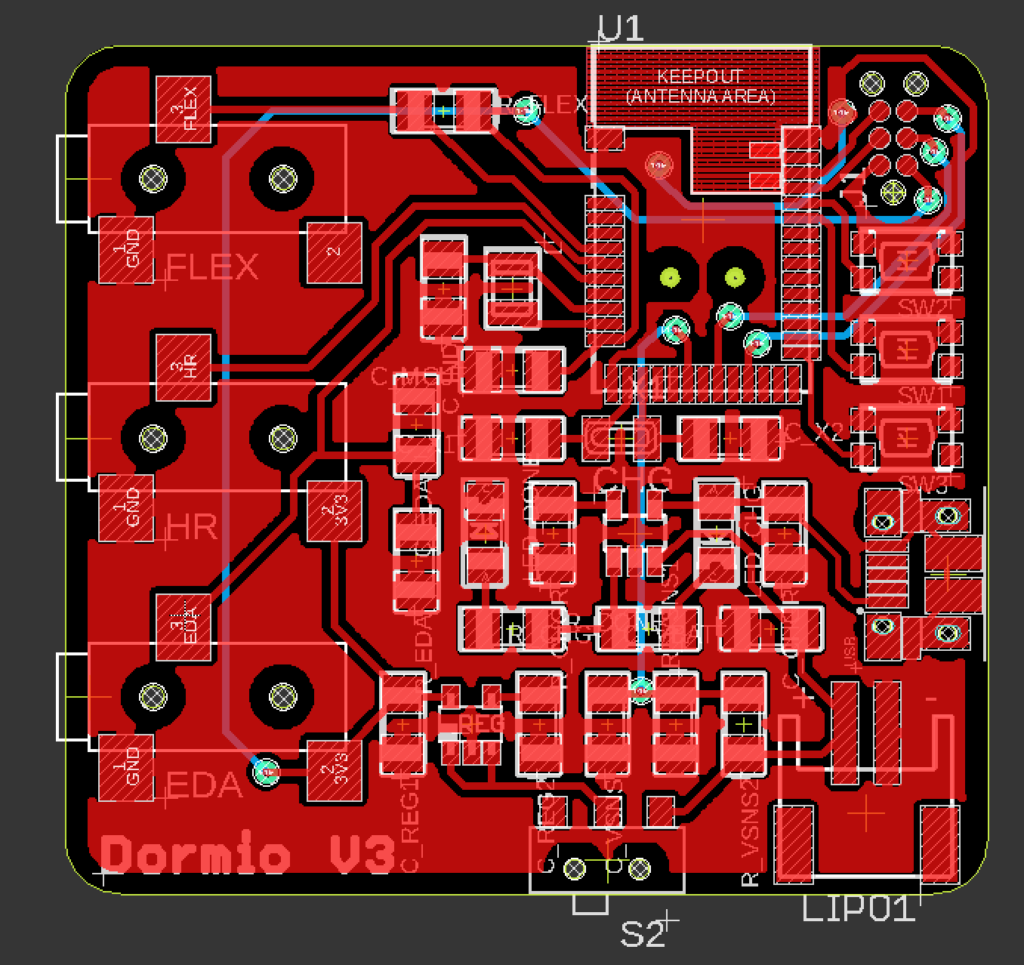
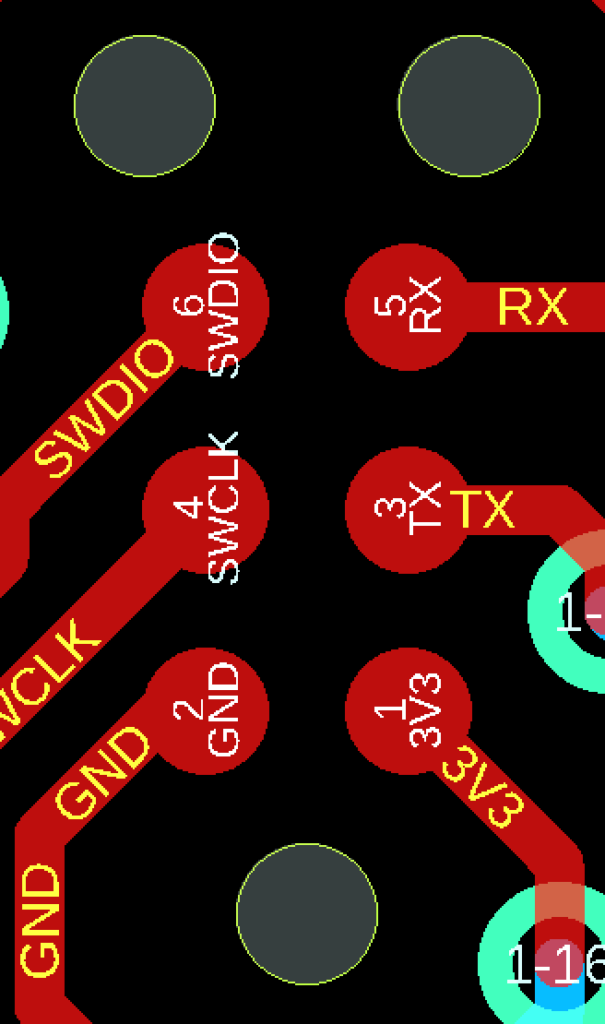
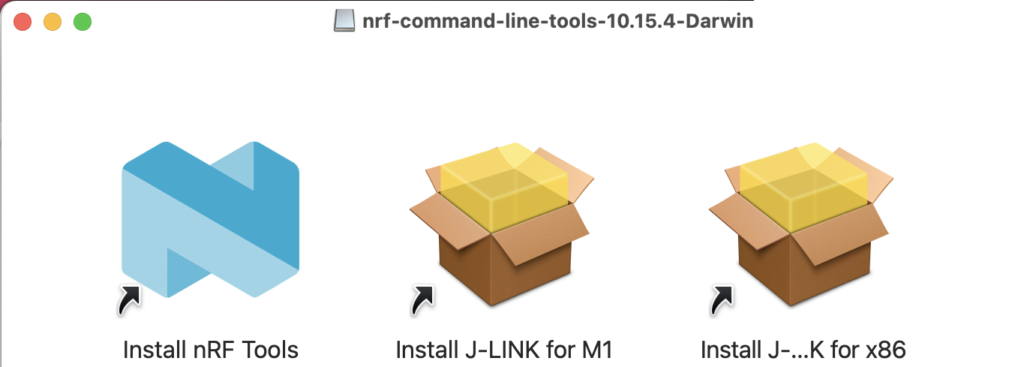
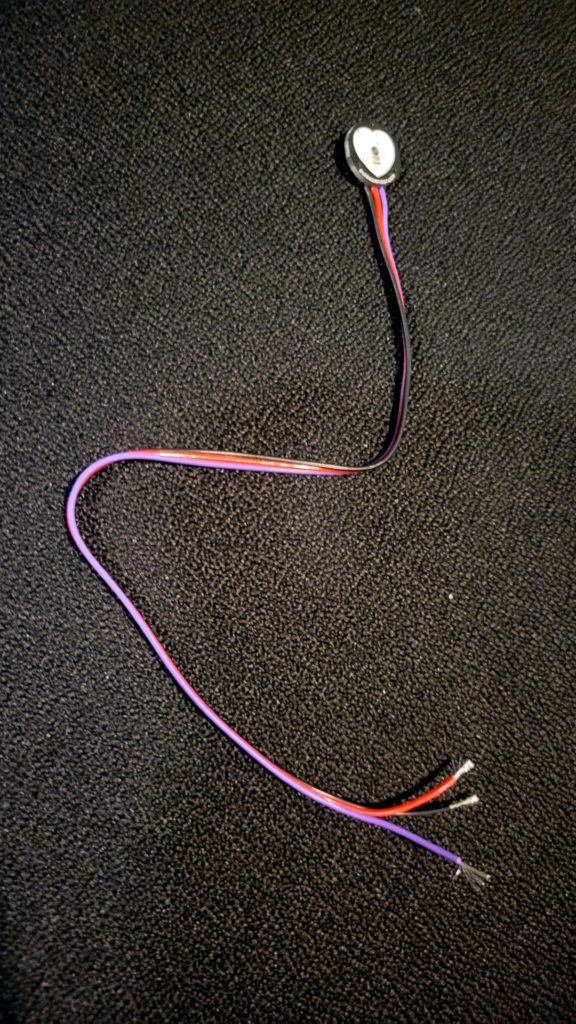
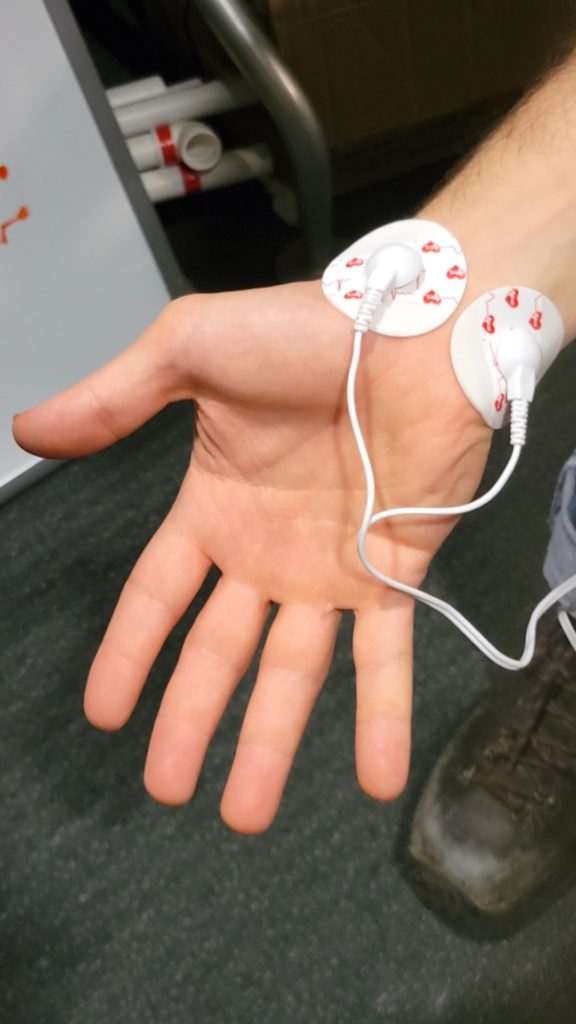
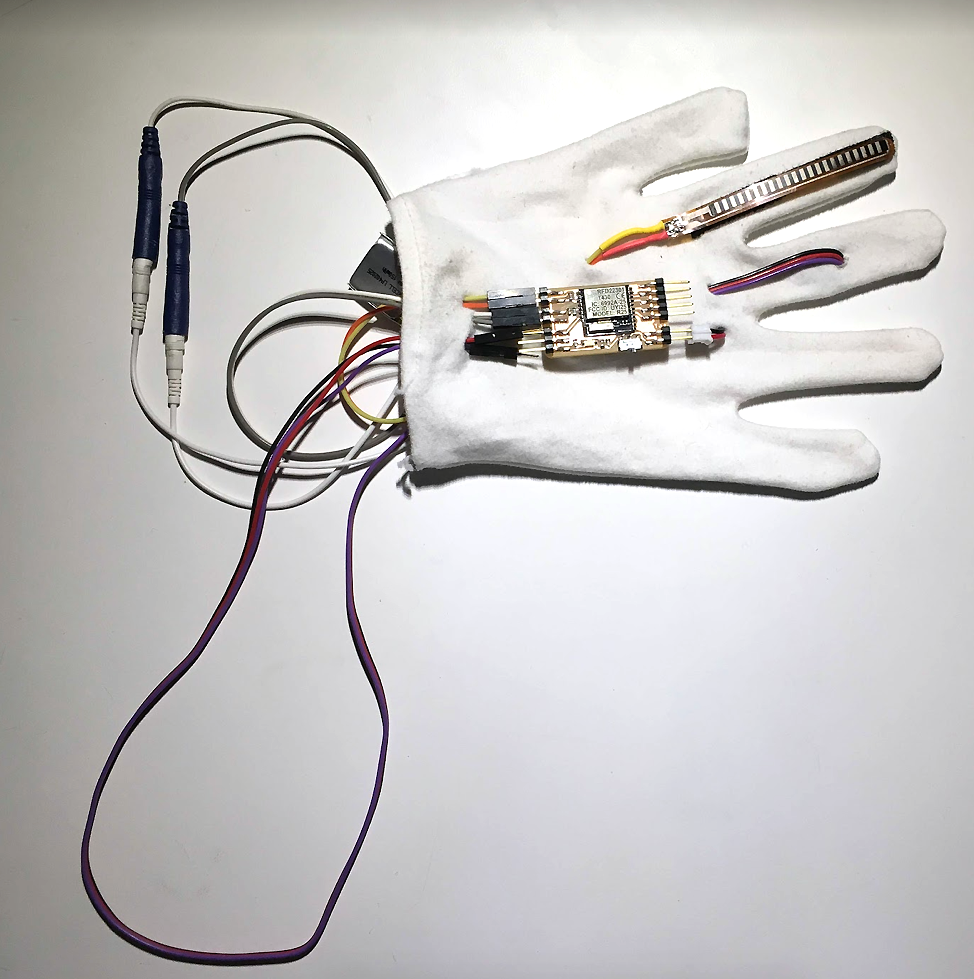
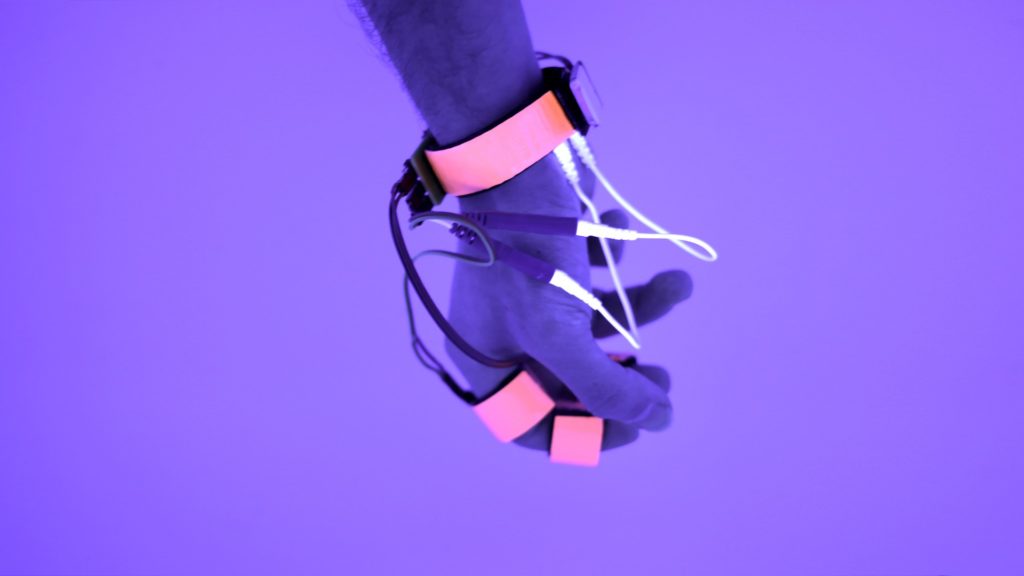
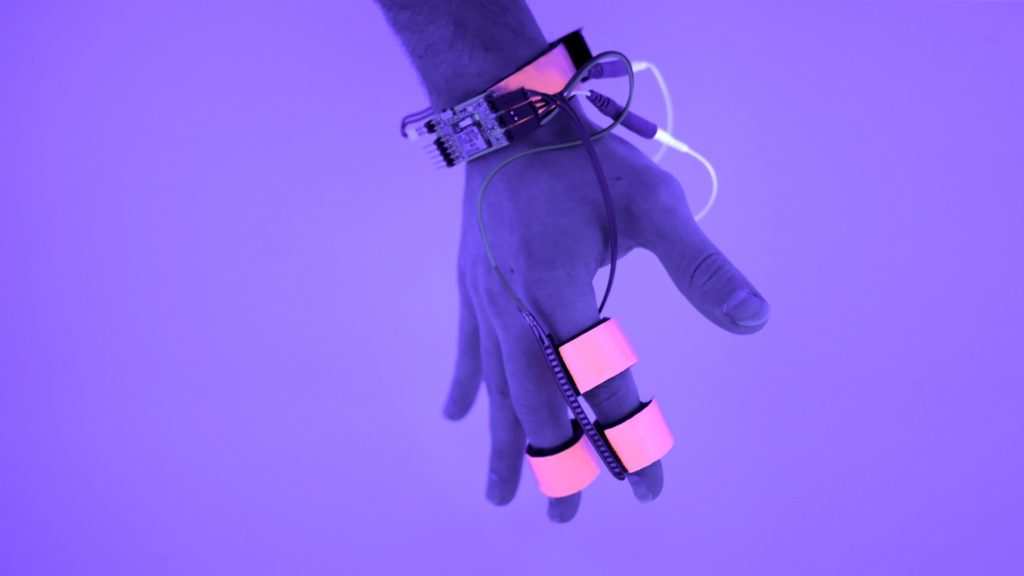
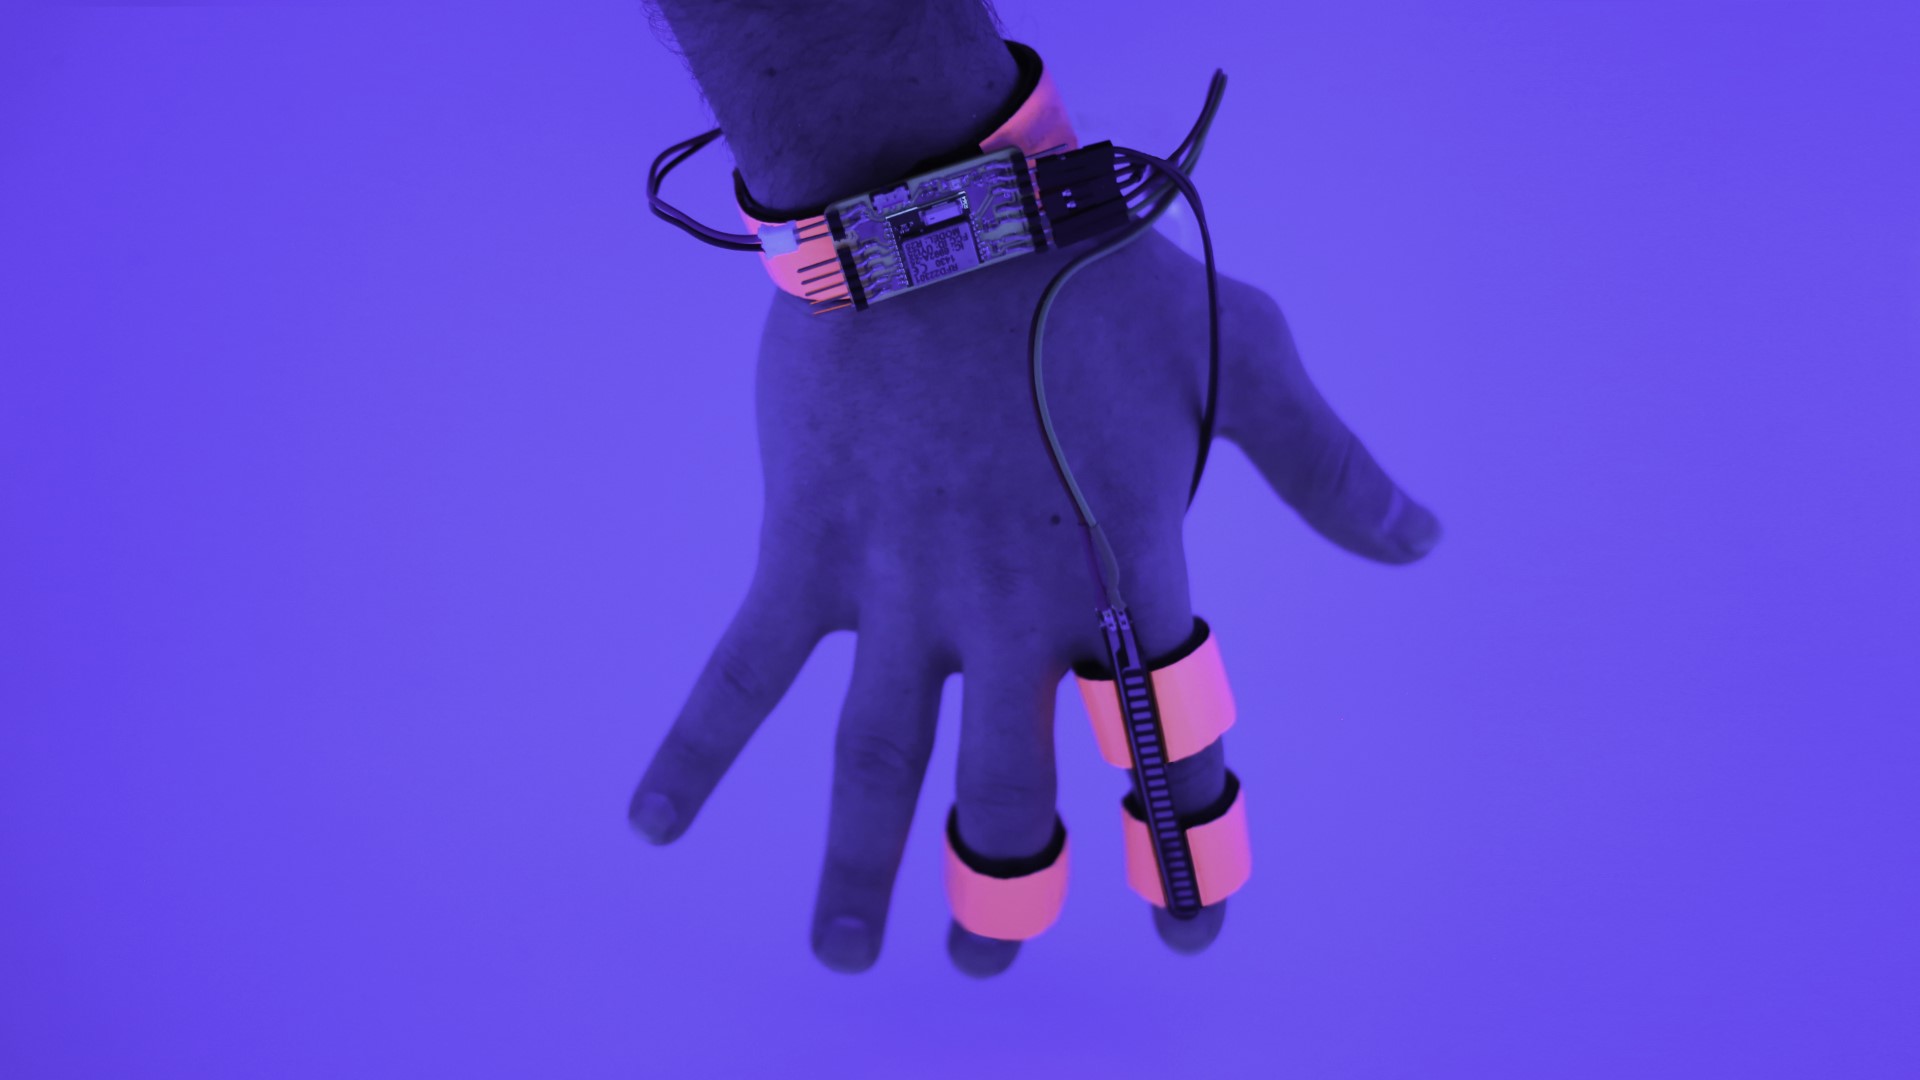
The Dormio V3 is a hand-worn device that tracks changes in three biosignals: heart rate, skin conductance (electrodermal activity or EDA), and finger muscle flexion. Changes in these signals indicate the onset of sleep, when there is a window of opportunity to play audio that will influence your dreams. Dormio broadcasts these three changing signals via Bluetooth to a web interface which detects sleep onset and plays audio during this special window of opportunity. It uses an nRF52832 Bluetooth microcontroller, so we can use Adafruit’s Bluefruit Feather BLE ecosystem to program it.

WHY: For decades it was accepted scientific fact that while we sleep our brains are turned off and we’re not processing sight, sound, or smell. Instead, new evidence suggests our brain is not turned off in sleep at all — in fact many parts are more active than when we’re awake, as they work to process memories from the day, restore cognitive function by clearing the brain’s cellular waste products, and prepare for the next day by simulating possible future scenarios. We are conscious, dreaming, for most of the night, and our brain is still processing sound, sight, and smell enough that each of these sensory inputs can reliably alter people’s dreams.

Even cooler, what we dream about changes how we think in the day. Our dream emotions carry over into our daytime emotions. Dreaming about something specific is tied to improved memory of that thing in the morning. Dreams can even augment creativity! That means dreams, with the right interface to influence them in targeted ways, can be a route to alter and improve your thinking.

WHO: You! Anyone and everyone can be a dream hacker. Even if you think you don’t remember your dreams, this Dormio device will likely be a blast. People who typically forget their dreams can often remember them in hypnagogia. Targeted dream incubation using Dormio is aimed at this early sleep stage, at night or in daytime naps, and wakes people directly during their dreams, so we especially encourage you to try this if you typically can’t remember dreams or you think your dreams are boring. We bet you’ll find some weird stuff in your head if you give it a go!

GOING FURTHER

Dormio V3 is only built for tracking and changing sleep onset, a tiny slice of the overall experience of sleep and dreams. Want to go further?

Try and build something that tracks a different sleep stage (maybe an eye tracker that can capture REM sleep) and see if you can change your dreams in a later stage. We built a different device aimed at REM that looks like a sleep mask, if you want inspiration, and wrote a paper about it for a class project.
Think more about the comfort and attachment of the Dormio device on the hand. Build a better housing or a better PCB fixture than velcro. We’d love to see your ideas and inspirations, let us know at dormio@media.mit.edu!

MORE ON DORMIO AND LUCID DREAMING

Project Steps

ORGANIZE YOUR PARTS

First things first. Make sure you have your PCB, solder, soldering iron, flux pen, and electronic components ready to go. Your Dormio V3 board should look like the picture above.

I like to put a piece of double-sided tape on the back of the PCB, just so it doesn’t shift while being soldered. If you do, be sure to limit the time the soldering tip touches the board or the tape will melt. Solder on a silicone heat-proof mat if you have one.

SOLDER COMPONENTS ONTO PCB

You’ll need a PCB design software to click around and see which part goes where. First, , download the board and schematic files from Github.

Then you can upload them to the free Altium Online Viewer to see how the components should be arranged. Or download Eagle, which offers a free version for hobbyists. This is the software we used to designed the board and can also be used to visualize all the components and traces (Below). This way you can looking at the .brd and .sch files while you solder all the components in place.

Now you can start soldering the components! Use generous amount of flux when soldering the MCU and check closely to avoid bridging.

In the timelapse video of Tomás working he’s using a stencil (and taking a long time to align it!) and solder paste, but this is not necessary. The board was redesigned so that you can assemble it using only a soldering iron, with no need for a reflow oven.

Once the board is all soldered up it should look like the picture above

CONNECT THE PROGRAMMING GEAR

Check that you have the J-Link, FTDI, and SWD breakout boards.

Solder the included jumper pins onto the SWD breakout board.

Plug the J-Link into the SWD breakout board, then connect the J-Link to your computer by USB. Also connect the FTDI connector to your computer by USB

Connect the SWD and FTDI breakout boards to the Tag-Connect cable as shown in the diagram (Above). When powering the Dormio board using a battery, connecting the VCC of the FTDI breakout board isn’t necessary.

CONNECT THE PROGRAMMING GEAR (continued)

Use the pinout diagram as reference to match the pins of the Tag-Connect cable. Note that the connections you attach should be mirrored from their layout on the PCB viewer.

You can now connect the Tag-Connect to the Dormio V3 PCB

PROGRAM YOUR DORMIO

Now on your laptop, download and install the nRF command line tools from the Nordic website. From this nRF package, also install the J-Link drivers for your machine (below ). Open a terminal window and type nrfjprog -v to verify that the nRF tools and J-Link driver are installed.

Download the Adafruit board files to Arduino IDE. Also grab the Adafruit bootloader. Then run these commands in terminal to program the bootloader:

nrfjprog -f nrf52 –eraseall

nrfjprog -f nrf52 –program feather_nrf52832_bootloader-0.6.2_s132_6.1.1.hex

nrfjprog -f nrf52 –run

Alternatively you can flash the bootloader by forcing the device in bootloader mode, by following this tutorial.

Finally, grab the Dormio firmware file sleepduino_nrf52.ino from Tomás’ GitHub. In the Arduino IDE, select FTDI on the Serial Port, then hit Upload to flash the firmware to the board. Now your Dormio is programmed!

MAKE THE SENSOR AUX CONNECTORS

The Dormio V3 has three 2.5mm stereo aux connector jacks, just like you use with headphones. We use a 2.5mm male plug for sensor connection, so you can take the sensors in and out with ease.

You just need to connect each sensor to a male aux cable and you’re good to go! The aux cables have a signal (white), ground (black) and power (red) wire each exposed.

The heart rate sensor will use all three wires. Solder each wire of your Pulse Sensor (above) to the respective wire of an aux cable: red to red (power), black to black (ground), and purple to white (signal).

For EDA sensing, the electrode cables already have their own 2.5mm plugs (one wire connects to power and one to signal). To connect the electrodes, you only need to snap them onto the snap cable heads, and then you can stick the electrodes on your wrist when it’s time to sleep (above).

For the flex sensor, solder one lead to an aux plug signal wire (white) and the other to ground (black). Once you have the wires soldered to the flex sensor, we recommend you wrap some electrical tape around the base of the sensor to give it some rigidity at the base (above). Another alternative is to use heat-shrink tubing.

MAKE IT WEARABLE

You can really attach this device to your hand however you want to. The only necessities are that the heart sensor stays on your fingertip, the electrodes stay on the inside of your wrist, and the flex sensor stays attached to your finger.

An earlier version of the Dormio used a glove, but then people complained their hand was too hot while they slept.

A newer version uses simple velcro straps for a more breathable attachment setup (above).

he easiest solution is just to attach a bit of velcro to the back of the PCB you’ve assembled (hot glue works well), wrap another piece of velcro around your wrist, and attach the PCB to that. You can use velcro or adhesive to attach the battery under the board. Now you just secure the sensors to your fingers (velcro again works well) and you’re good to go!

CONNECT TO THE SITE

Now all you have to do is connect using Chrome web browser (Chrome >v56 for Mac, Chrome >v70 for Windows), by locally opening the file serverless/wearable.html from the GitHub repo.

Power up your Dormio by plugging in the battery. Since the board is programmed, you’ll start seeing signals on the web page right when you plug in the sensors. Check out Tomás testing his board and sensors.

The web interface is designed to:

Connect to your Dormio sensor device

Record your dream incubation audio stimulus, and also an audio message to wake you up and ask for a dream report

Sense real-time changes in your biosignals

Play the dream incubation audio when you slip into the beginning of hypnagogia

Play the dream report audio when you near the end of hypnagogia

Repeat this cycle as many times as you want, for multiple rounds of hypnagogic dreams!

Here’s a clickthrough demo of how to use it.

Record your dream incubation stimulus, and lie down for a nap while wearing your DIY dream incubation device!

You’ll notice that at the end of your session, your data and audio are downloaded to a local .zip file, not uploaded to any server where anyone else can see it. Your dream, your incubation, your audio — private.

If you want to, you can plot your biosignals to see changes as you slip into sleep. Figure shows what a typical descent into hypnagogia with wakeups and dream reports looks like.

DREAM ON!

You now have a basic interface that will let you change your dream content! We suggest you use this device during a nap, and that you make sure to set a clear intention to dream about your chosen dream theme before you lie down, even saying out loud why you want to dream of that theme.

You may have to tweak things to get this whole hypnagogic incubation practice right — from your bedtime to the volume of your audio — because this is not an exact science. But though it is inexact, it is an ancient, important, human practice; dream incubation has been used for at least 4,000 years to seek answers to life’s questions, to find creative inspiration, and to heal.

These are your dreams, and this is your dreamscape, so explore what you will! Maybe you want to have dreams of Batman, and Beyoncé, and more power to you. Maybe you want to travel inside your favorite video game, or to your favorite planet, all in your own imagination. Please, do tell us how it goes.