YouTube player

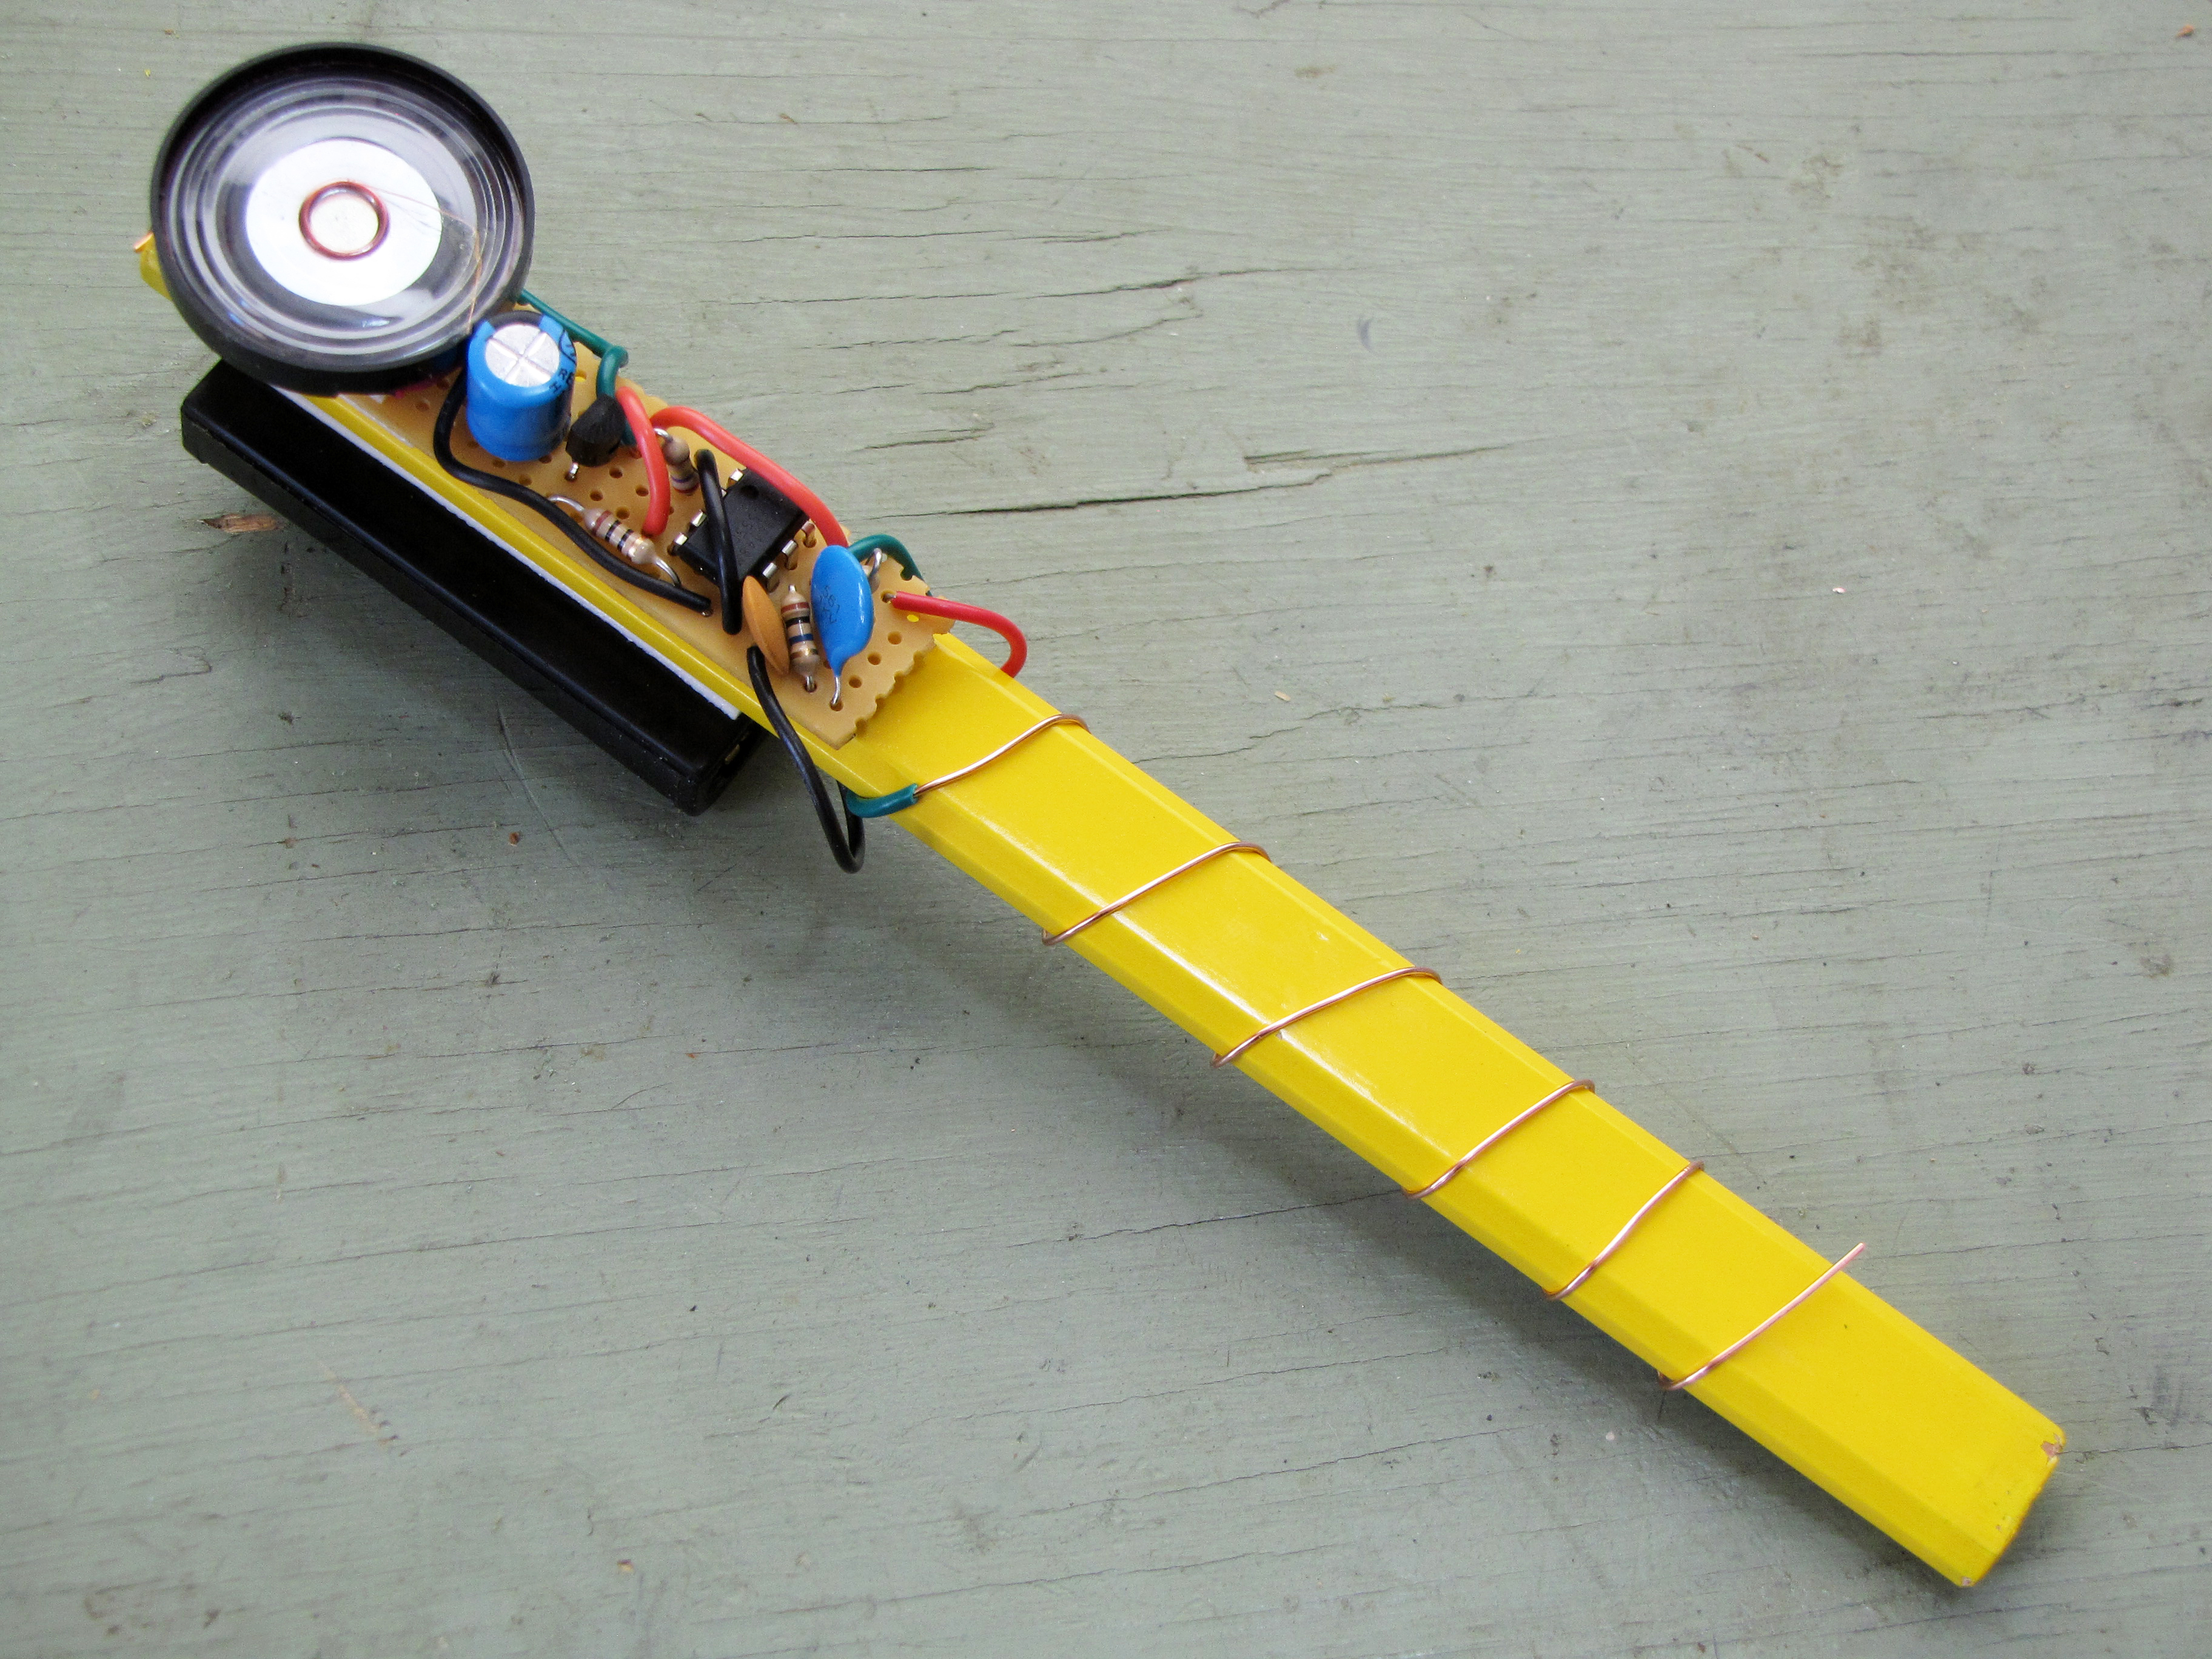
Drawdio is a simple electronic sound synthesizer built onto a pencil! Designed by Jay Silver, then a student in the Lifelong Kindergarten group at the MIT Media Lab, the Drawdio circuit plays a musical tone with a frequency that varies based on the resistance between two points. The wire wrapped around the pencil handle is one point, and the pencil lead itself is another. When you hold Drawdio in your hand, your body becomes part of the resistive loop, and you can do all kinds of fun tricks, like draw yourself a piano and play a little tune!

drawdio_schem_pinout_battery_symbol_corrected


The Drawdio circuit is based on the classic 555 timer chip. To save space on batteries, we’re using a more modern low-power version of the 555 that will run on 3 volts, but otherwise it behaves just like a standard 555. Wired like this, the 555 operates in so-called astable mode, outputting a continuous stream of pulses from pin 3. The frequency of those pulses can be controlled by changing the values of the resistors and capacitors connected to pins 2 and 7. Since the contacts are arranged to put the user’s body into the resistive loop, the frequency output by the 555 naturally varies depending on what she or he is touching. The transistor amplifies those pulses, which emerge from the speaker as audible sound.

000_opener

What will the next generation of Make: look like? We’re inviting you to shape the future by investing in Make:. By becoming an investor, you help decide what’s next. The future of Make: is in your hands. Learn More.

Project Steps

Mock up the perfboard.

You’ll need a long skinny rectangle of perfboard with 5 rows of 23 holes each. Score the perfboard, where you want to cut it, with a utility knife and a straightedge. Snap it along the scored lines, over the edge of a table, to make the cuts.

Position the chip as shown, and splay the legs out slightly to hold it on the perfboard. Number the pins on the bottom with a pencil or fine-tip marker.

Mock up the perfboard layout, as shown, on a piece of deep carpet or green phenolic florist’s foam. Be sure the timer IC and the electrolytic capacitor are inserted in the correct orientations.

NOTE: If you’re concerned about damaging your components through electrostatic discharge (ESD), you may want to avoid using foam for perfboard mock-up purposes. I have been using florist’s foam this way for years, however, and have not had any problems.

Fit the speaker and battery holder.

Test fit the speaker in the empty space at the end of the perfboard.

Cut, strip, and tin the leads to fit neatly into the two indicated holes in the perfboard layout.

Do the same thing with the battery clip. With the stripped ends in place in the perfboard, you want about an inch-and-half of distance between the battery clip and the perfboard, as shown.

Make 3 jumpers.

The short red jumper goes between pin 4 and Vcc, as shown. It should be about 1-3/4″, overall, with 1/2″ stripped at each end.

The mid-length black jumper goes between pin 1 and ground, as shown. It should be about 2″, overall, with 1/2″ stripped at each end.

The long red jumper goes between pin 8 and Vcc, as shown. It should be about 2″, overall, with 1/2″ stripped at each end.

Test-fit the 3 jumpers into the perfboard mock-up.

Make the grip and graphite leads.

Cut two lengths of green wire—one 5″ long and one 12″ long. Strip 3/4″ of the insulation from one end of each lead. Then, starting at the other end and working in 1″ increments, strip all but about 2″ of the insulation from the long lead.

Test-fit the leads into your perfboard mockup, where indicated. One of these leads (the “graphite lead”) will be connected to the pencil’s lead, and the other (the “grip lead”) will be wrapped around the pencil body to make contact with your hand.

Populate the perfboard.

Remove all the components from the mock-up except for the chip. Turn the perfboard over and solder a jumper, cut from a leftover component lead, between pins 2 and 6, as shown.

Insert the components through the perfboard holes and bend and solder their leads together on the underside to assemble the circuit. It does not really matter what order you go in, but I recommend saving the battery pack and, especially, the speaker for last.

Refer to the schematic and detail photo to understand how the circuit is connected on the underside. Be patient, take your time, and work neatly.

TIP: It’s good practice to test each component with a multimeter right before you add it to the perfboard. Most multimeters include an ohmmeter for verifying resistances, and quite a few, these days, include a capacitance meter as well.

Attach the speaker.

Cut a piece of Supermount double-stick foam tape to fit the empty space at the end of the perfboard. Peel off the backing and apply it as shown.

Peel off the top protective film and attach the speaker to the perfboard, as shown. Note that VHB tape is very strong and bonds almost instantly, so line it up just right before making contact.

Route the speaker leads through the perfboard holes and solder them into the circuit on the backside. Your perfboard is now complete!

NOTE: You can test the circuit now, before going any further. Just pop in two AAA batteries and grab the exposed green leads with each hand. You should hear a musical tone that varies with the resistance between the two leads.

Attach the perfboard to the pencil.

Cut another piece of Supermount tape to fit the empty space on the underside of the perfboard, right below the speaker, as shown. Remove the backing and press it down.

Fold the battery clip back under the perfboard, and then “thread” the carpenter’s pencil in between the perfboard and the battery clip, as shown.

Position the perfboard near the end of the pencil, but far enough back that the speaker does not extend past the edge. Remove the top protective film from the the tape and fix the perfboard in place.

Attach the battery clip to the pencil.

Cut a 1-1/2″ long piece of Supermount tape to fit the width of the pencil. Peel off the backing and apply it to the other side of the pencil, directly opposite the perfboard.

Peel off the top protective film and fix the battery clip to the pencil opposite the perfboard, as shown.

Secure the graphite lead.

Route the graphite lead up to the top of the pencil, as shown, and strip off the insulation.

Press the thumbtack part-way into the center of the exposed graphite at the top of the pencil. Wrap the stripped graphite lead once around the tack as shown.

Stand the pencil on end and lightly tap the thumbtack down into the graphite with a small hammer. Trim any excess lead with wire cutters.

Secure the grip lead.

Wind the exposed copper of the grip lead down and around the body of the pencil. Stop about 1-1/2″ short of the tip to leave room for sharpening.

Secure the free end of the grip lead with 1 or 2 turns of electrical tape.

Finish up.

Sharpen the pencil with a utility knife. If you need to resharpen after extended use, just peel off the tape, move the grip lead up a bit, and reattach.

Insert 2 AAA batteries into the battery clip.

Hold the pencil normally, making sure your hand is in contact with the grip lead. Now touch your finger to the pencil tip. What happens? Experiment with different substances, objects, and distances between the pencil tip and your finger. What happens? Why?

Conclusion

There are lots of fun ways to use Drawdio, and the best way to get started is just experiment!

Here's a favorite trick to get you started: First, draw a big dot on a piece of paper. Then moisten the tip of your finger, on the other hand, and touch the dot while drawing a line away from it on the page. The carbon laid down on the paper forms a conductive trail that runs from the graphite in the pencil, through the line you're drawing, through the starting dot, through your finger, around through your body, and back to your other hand where it contacts the grip wire. Drawdio detects this current and plays a tone; as your line gets longer, the resistance along the conductive path increases, and the frequency drops. Jump back and forth along the line, and you can play different notes and even, with a bit of practice, entire melodies.