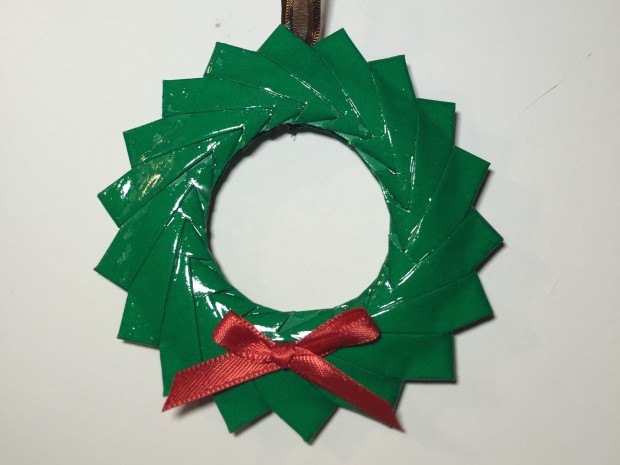
I love Christmas decorations, especially the hand made ones! They are also fantastic gifts for friends. I have made the following wreath before, so I wanted to make some changes to it. I’ve gotta say… it turned out fantastic.

Have a fork? You will need one to make the perfect bow for this wreath.

Happy crafting!

What will the next generation of Make: look like? We’re inviting you to shape the future by investing in Make:. By becoming an investor, you help decide what’s next. The future of Make: is in your hands. Learn More.

Project Steps

Start folding

Lay your paper flat on the table.

Fold your paper both horizontally and vertically. Crease well

Fold the top two corners to the center

Continue

Fold AB line up to CD line. Crease and unfold

Fold line AB to CD (as shown in the second photo) and crease.

Turn the model over.

Continue

Fold the left and right corners (as shown) and crease.

Fold the bottom up, using the existing crease line.

Almost finished...

Turn the model over.

Fold in half. Your model piece is complete.

Repeat steps 1-4 Until you have 18 triangular pieces total.

Put the wreath together

You will be using the pocket indicated in the first picture to assemble your wreath.

The pieces indicated in the second picture are… lets say legs.

Slide the legs into the pockets. Remember, there’s a pocket on both sides of the triangle, so slide one leg into each one. Continue until you’ve completed a circle.

Finishing the wreath

Once you have all 18 pieces attached together, your finished wreath should look something like this.

Add a finishing coat

Triple Thick is a protective clear coating that leaves a glossy finish. It’s also holding a looped ribbon in place.

Take a brush and paint on the Triple Thick. A little goes a long way. Let it sit overnight.

Tie the ribbon

I always struggle with tying a perfect bow. This is the best method I’ve found. It’s a really fast and easy way to make the perfect bow every time!

Place the ribbon on your fork as shown.

Tie the ribbon (cont'd)

When you flip your fork over, both ends of the ribbon should be coming through the same section of the fork. Then just tie a knot.

Glue on the bow

Slide the ribbon off the fork and you’ve got yourself a wonderfully perfect bow! Cut the lengths to your preference.

Glue the bow onto the front of your wreath.

I’ve shown two options here: the first does not have a ribbon or a Triple Thick finish. You could put a pin on the back and wear this as a brooch. The second option has the glossy finish and a ribbon to hang it as an ornament.