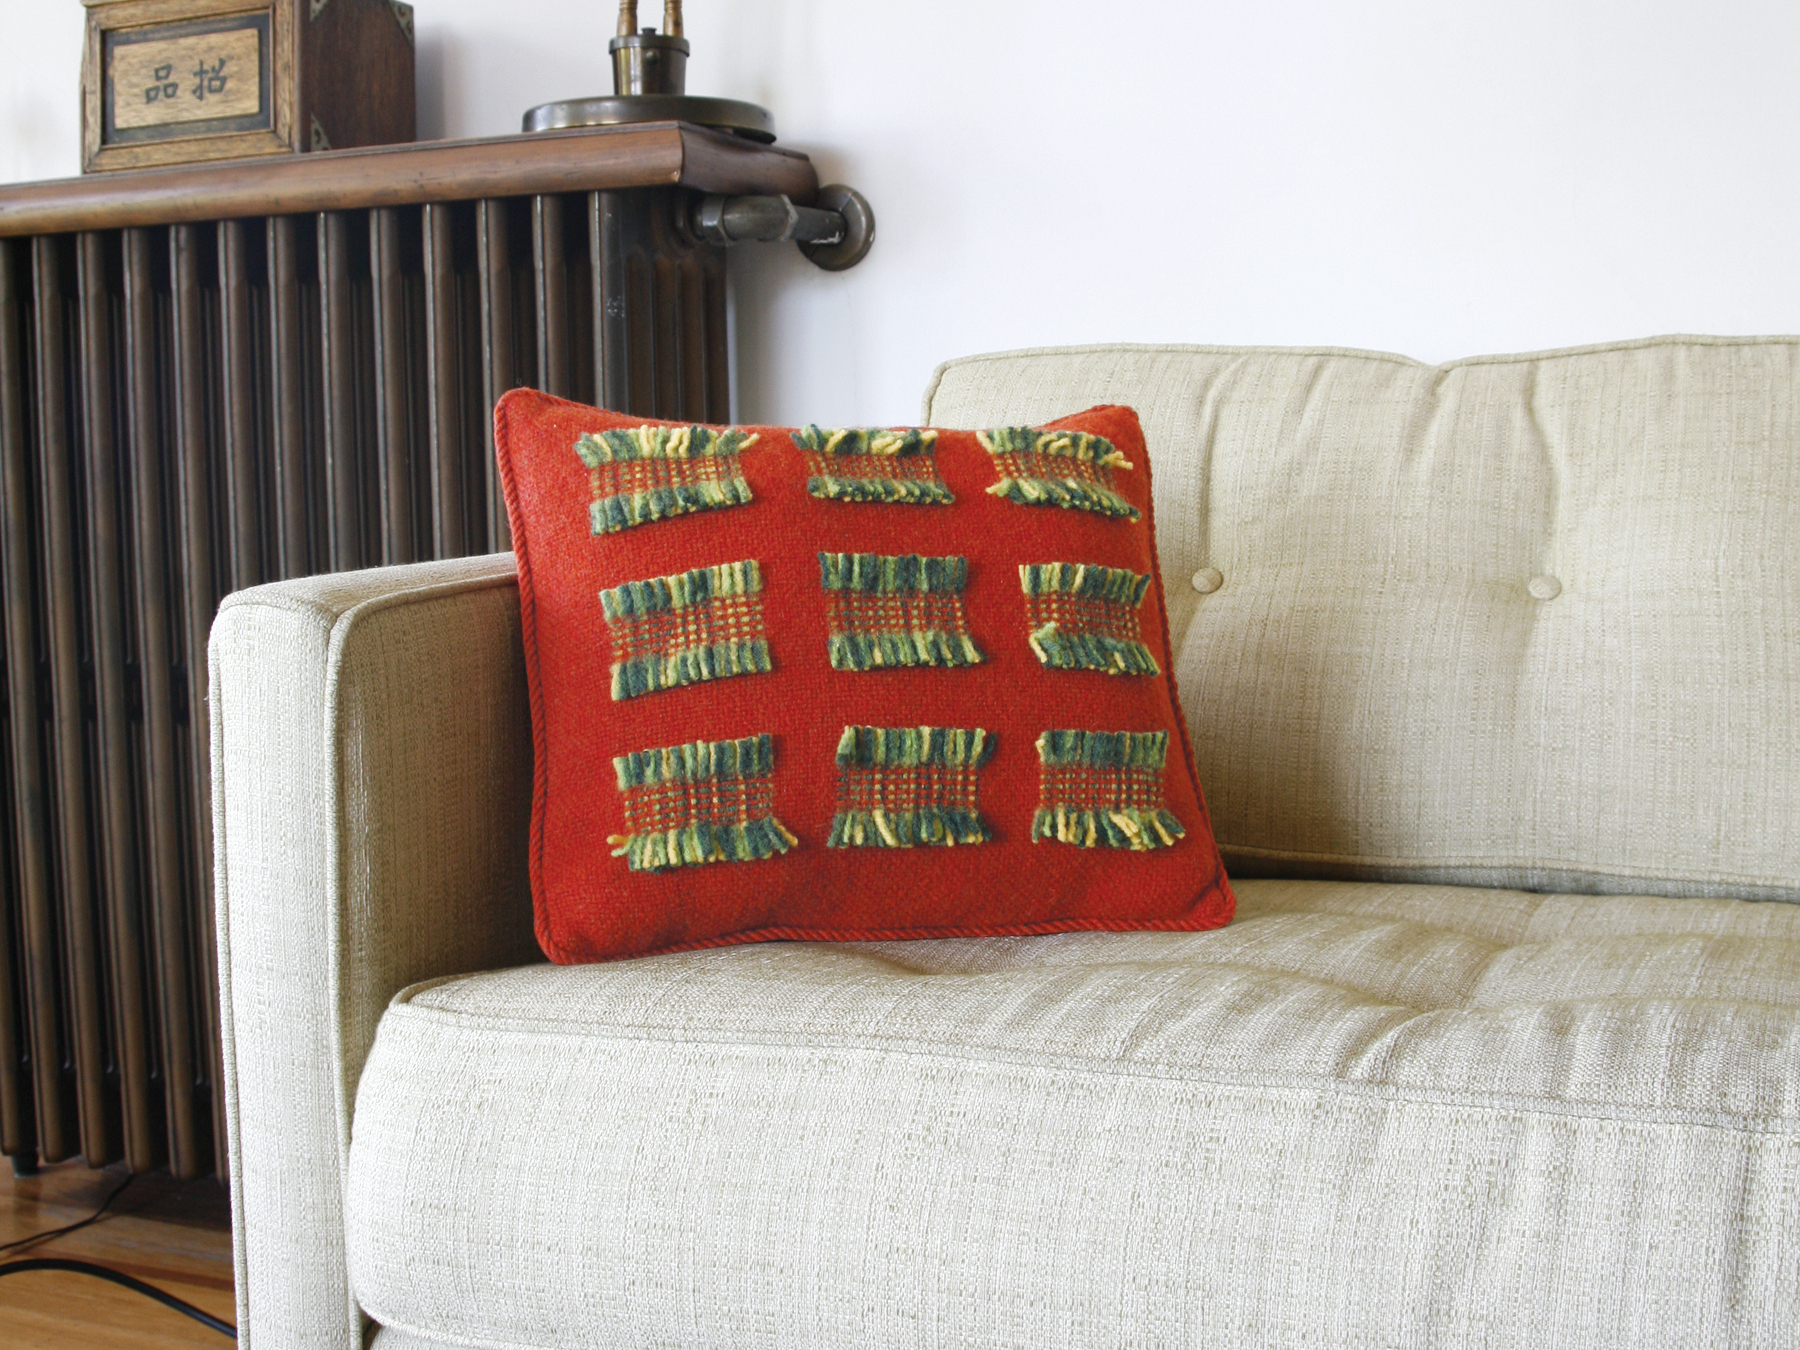
For the budding weaver, a rigid heddle loom is affordable and easy to use. To make this woven pillow, you’ll use one color of yarn for the threads on the loom (the warp), and another color to weave with (the weft).

To accent your pillow you’ll use a bundle of 4 colors and a pick-up stick. If you’ve never woven before, weave the back of the pillow first. By the time you finish the back, you’ll be ready to tackle the front using 2 shuttles and a pick-up stick. This is a perfect first project. The thick wool yarns weave up quickly, and the colorful fringe accent adds a bit of zest and is easy to accomplish.

What will the next generation of Make: look like? We’re inviting you to shape the future by investing in Make:. By becoming an investor, you help decide what’s next. The future of Make: is in your hands. Learn More.

Project Steps

Thread (warp) the loom.

Your warp (the threads that run vertically on the loom) will be 2 1⁄2yds long.

Place the warping peg in front of the loom, 2 1⁄2yds away from the back apron rod.

Clamp the loom to the table, with the back of the loom hanging over the edge of the table, and place the burnt orange yarn on the floor underneath the apron rod. Facing the back of the loom, tie the yarn onto the rod close to one end (it doesn’t matter which side; whichever is most comfortable for you).

Using the threading hook, take a loop of the warp yarn through the slot in the heddle (1⁄2″ from the edge of the heddle) and carry it over to the warping peg. There will now be 2 warp ends through the slot.

Bring the yarn around the apron rod and through the next slot, and then around the warping peg.

Continue in this manner all the way across your loom for a total of 19″ (152 ends).

Tie off the end on the apron rod.

Cut the loop of warp yarn around the warping peg and tie it in 1 big, loose overhand knot.

Wind the warp onto the back beam, separating the layers with heavy paper. Check to make sure that the paper is winding on straight. Every so often, pull on the warp at the front to tighten it around the beam.

Turn the loom around and work from the front. Beginning at either edge of the warp, take 1 of the 2 warp ends out of each slot and thread it through the adjacent hole. Repeat all the way across until all the holes have been threaded.

Tie the ends in 1″ sections (bunches of 8) onto the front apron rod, using the first part of a surgeon’s knot (i.e., a double overhand knot, like when you start to tie your shoes but with an extra pass through). Check the tension all the way across the width of the warp to make sure it’s even, then secure the knots with a bow knot.

Begin weaving.

Wind a stick shuttle with dark red-orange in a figure-8 pattern; wind only as much as is comfortable in your hand and will fit through the shed. Place the heddle in the up position and look through from the side; you’ll see an opening, the shed, through which you’ll pass the shuttle. To weave, you’ll simply place the heddle alternately in the up position (“up shed”) and the down position (“down shed”), passing the shuttle through the shed each time, back and forth.

To spread the warp to prepare for weaving, just pass the shuttle back and forth between the upper and lower sheds 3 or 4 times before pressing the yarn into place using the heddle. Repeat if necessary.

Begin weaving your pillow. Place the heddle in the up shed, insert the shuttle into the shed on one side, and take it out on the other. Press the weft into place with the heddle (this is called beating) and then place the heddle in the down shed and pass the shuttle through the shed to the other side. Beat.

You’ll notice that alternate warp threads are lifted each time. This forms the most basic of weave structures, called plain weave. To prevent your weaving from drawing in, run the weft yarn through the shed at a 45° angle before beating. Weave so that there are about 8 rows (or picks) of weft per inch. Weave the back of the pillow for 33″ and then begin the front.

Prepare for the pick-up pattern.

Place the heddle in the down shed. Working behind the heddle and using the pick-up stick, count and pick up only the raised warps. Placing a piece of paper between the layers makes it easier to see what you’re doing. Pick up in this way: skip 17 warps, pick up 6, skip 12, pick up 6, skip 12, pick up 6, skip 17. Slide the pick-up stick to the back of the loom until you’re ready for it.

Weave the front.

To weave the front, use 2 shuttles, one with the same dark red-orange weft you used for the back, and a second shuttle wound with 4 colors for your pattern: dark green, medium green, light green, and yellow (the pattern weft). You’ll use the pick-up stick to create the pattern.

Weave 2 1⁄2″ in plain weave.

Weave pick-up for 12 rows in the following sequence:

Heddle in down shed. Weave with burnt orange.

Heddle in up shed. Weave with burnt orange.

Place the heddle in neutral, bring the pick-up stick forward to the back of the heddle, and turn the stick on edge, creating a temporary shed. Now weave with your pattern weft, just in the picked-up warps, leaving a 2″ tail at either edge. Return the pick-up stick to the back of the loom.

Repeat this sequence until you’ve woven 12 rows of pick-up pattern.

Weave 2″ plain weave.

Wash the fabric, finish and sew the pillow.

Machine-wash your newly woven fabric in cold water and detergent, on the gentle cycle. Check the fabric often to make sure it isn’t felting too much.

Remove it when it measures about 14 1⁄2″ wide, rinse it in the sink with cool water, and then squeeze out as much water as possible and lay it flat to dry. Your fabric will measure about 40″×14 1⁄2″.

Cut the pattern loops and floats (the free ends) to 3⁄4″ length.

Cut the pillow front, centering the pattern. I measured 2 1⁄4″ from the edge of the pattern on all 4 sides and trimmed the fabric to this size, creating a rectangle approximately 14″ wide by 16″ long.

Your fabric size will vary according to how much it shrinks during washing.

Cut the 2 back pieces: a back flap that measures 8″ by 16″ long (or the length of your fabric) and a back piece 12″ by 16″ (or the length of your fabric).

On the flap, fold over 1″ along a long edge and stitch it down. Cut 3 velcro strips 3⁄4″ wide by 1 1⁄2″ long, then center them 1 1⁄2″ apart along the fold and stitch them by hand. Use only the hook side of the velcro; it will adhere to the fabric to keep the pillow closed.

To assemble the pillow, place the front piece right side up and lay the back flap along 1 short edge, right sides together and raw edges aligned, with the folded edge toward the center and the velcro facing up.

Lay the back piece along the opposite short edge, right sides together and raw edges aligned. The back piece should overlap the flap by about 2″.

Sew a 1⁄4″ seam around all the outside edges. Turn the pillow right side out.

Make the inner pillow using muslin or scrap fabric. Cut two 15″×17″ pieces and stitch them around the edge, leaving about a 5″ gap in the center of 1 side. Stuff with polyester fiberfill, distributing the stuffing evenly, and hand-stitch the side closed. Now stuff this inner pillow into your woven creation and close the edge with velcro.

For a professional edge finish, make a 6-strand twisted cord with dark red-orange and burnt orange. To make this cord, I used the Incredible Rope Machine but you could hand-twist or braid a trim. Hand-sew the cord around the edge of the pillow, tucking in the ends.

Conclusion

This project first appeared in CRAFT Volume 08, pages 64-69.