

In 2016 Blue Hills Press published my book Making Classic Toys That Teach, about the wonderful teaching tools developed by Friedrich Froebel (Fröbel), the inventor of kindergarten in the mid-1800s. The geometric toys that Froebel called gifts — including cubes, spheres, planks, cylinders, and prisms — were of enormous influence on the world’s culture, having directly shaped such notables as architects Frank Lloyd Wright and Buckminster Fuller, toymaker Milton Bradley, and artists Paul Klee, Wassily Kandinsky, and Josef Albers. Froebel’s gifts also influenced and predated the development of the Montessori educational method.


As the son of a kindergarten teacher, I realized the importance of play as an instrument in education. My mother would explain to parents at school conferences that when they would ask their children what they’d done in school today and their answer was “Play,” that was the right answer.
At one time, under the inspiration of Froebel’s kindergarten, educators wondered how to extend instructive play into the upper grades, and manual arts education was introduced in Scandinavian schools as a result. Scandinavian manual arts training, also known as educational sloyd, became important throughout the world for an all too short period of time.
I think history is important for two reasons. One is to avoid the failures of the past. The other is to provide a path for renewal of those things we’ve forgotten. Kindergarten is one of those things that ought to be remembered and replicated. If we were to each look seriously at the times in which our own learning has been energized, we would design schools to engage the power of play in all subjects and at all levels.
My book, published after years of study, attempted to empower parents, grandparents, and fellow woodworkers to do what generations had done before: make the gifts of early childhood that once served as a pivot point for an international revolution in education, one that has been largely abandoned despite its obvious value. Frank Lloyd Wright, in his autobiography, recalled his years of playing with Froebel’s gifts: “These were smooth maple-wood blocks. All are in my fingers to this day.”
Super Size It


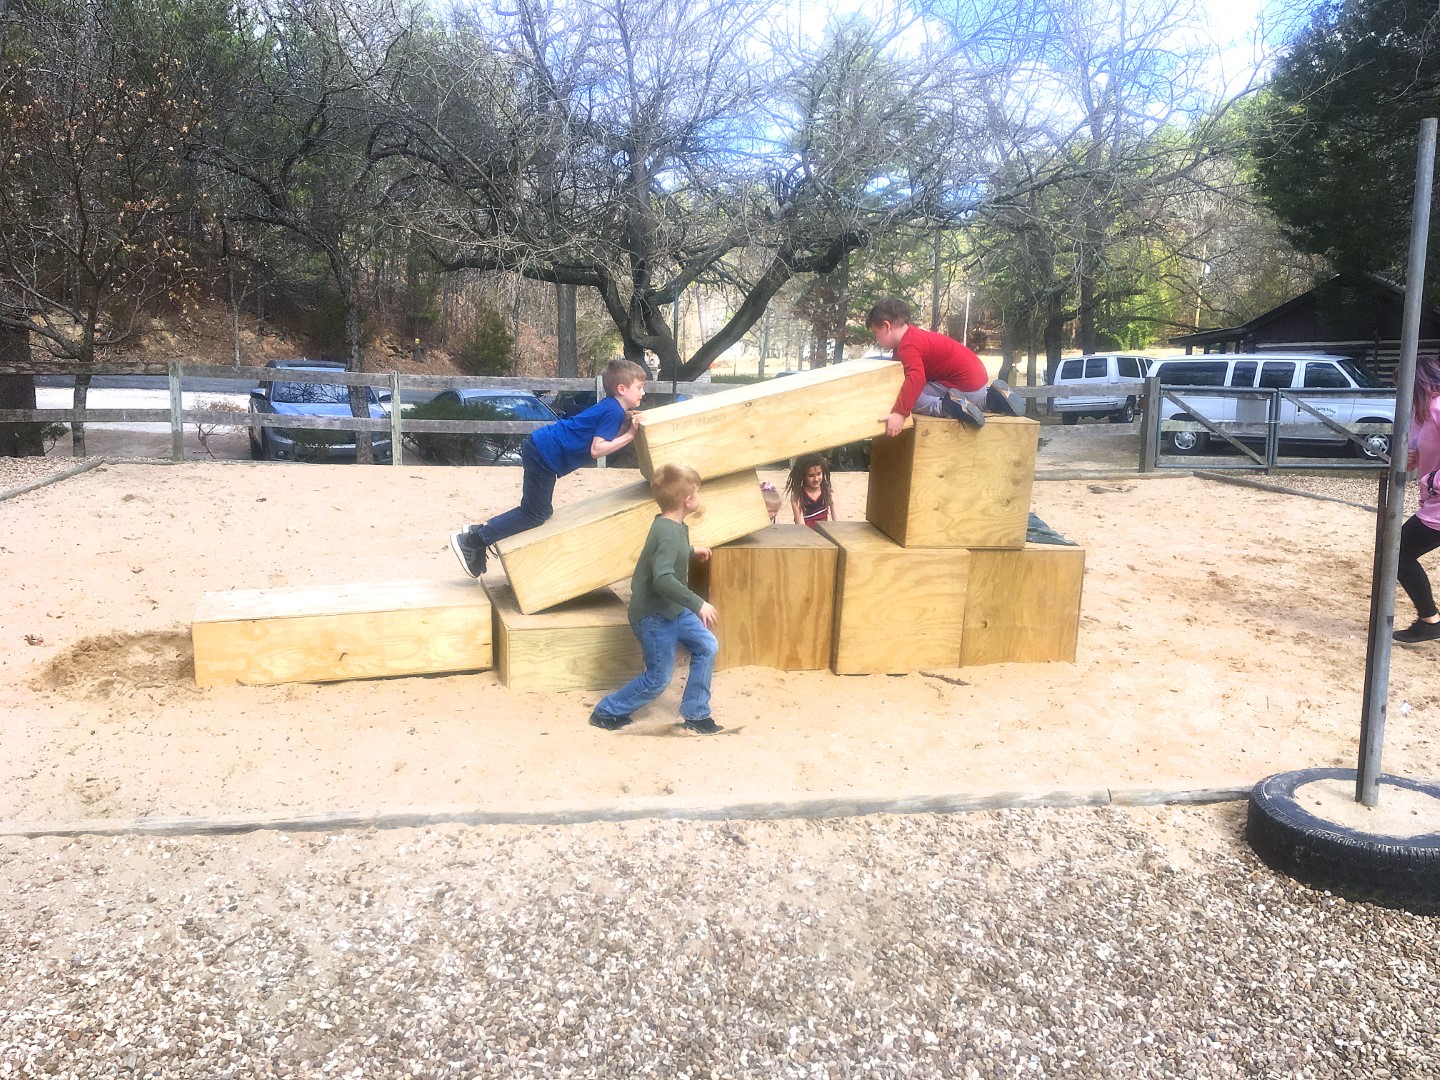
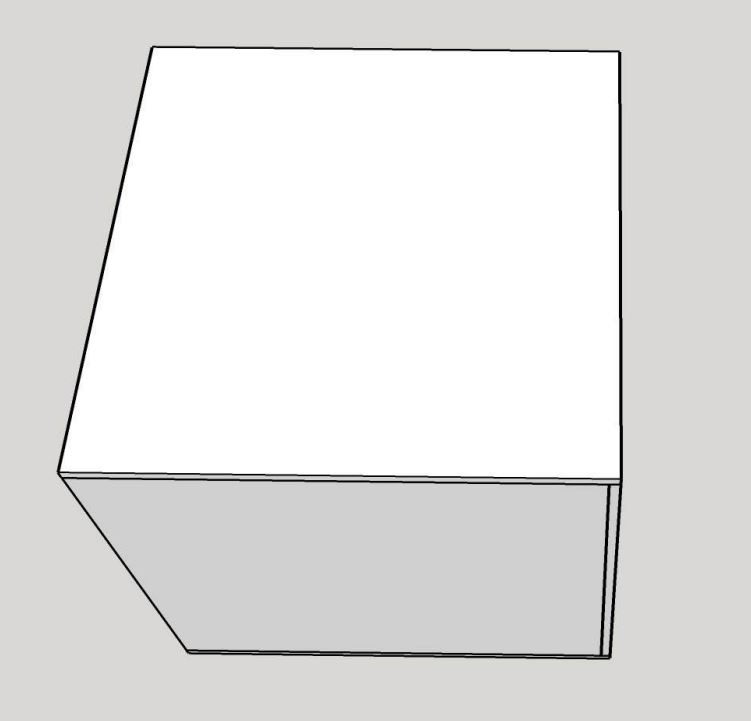
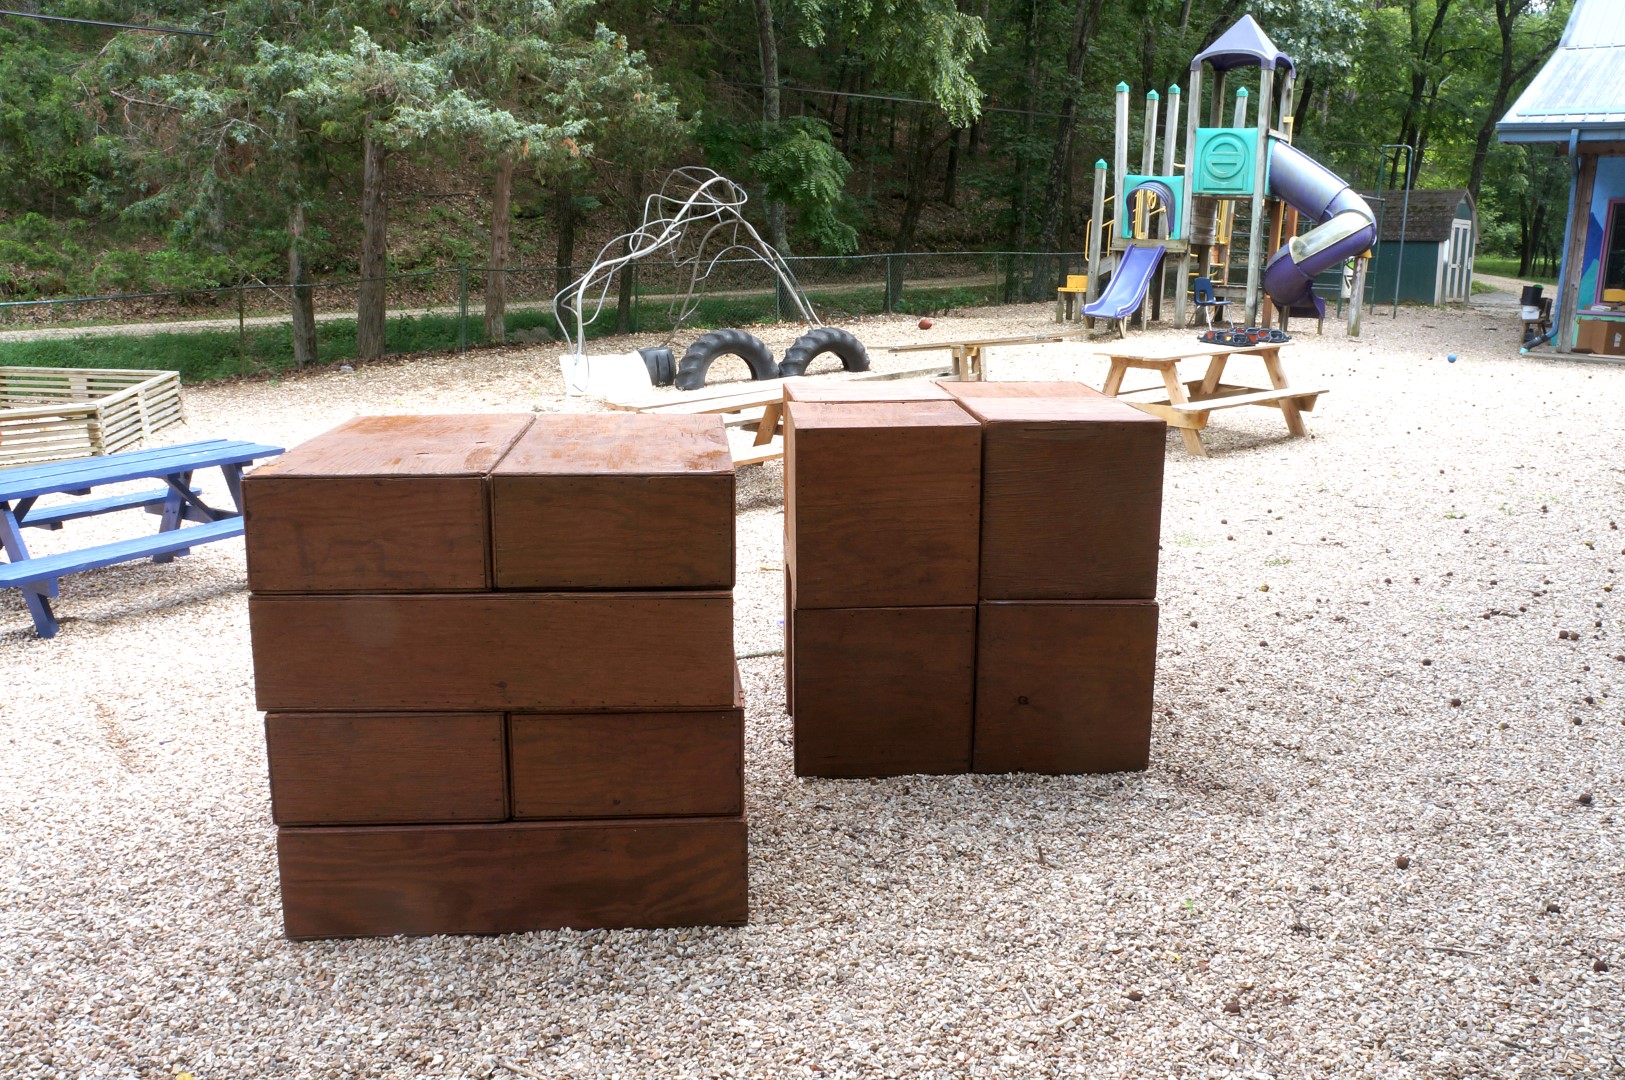
In 2018 I began making super-sized Froebel blocks and placing them unceremoniously on the Clear Spring School playground. I knew of no one else doing such things and was curious what the student response would be. Even with just two or three blocks, before a full set was in place, the students knew immediately what to do with them: stack and arrange, just as they would do with smaller blocks. The complete set that Froebel had called Gift 3 consisted of eight cube blocks (though of much smaller size) that could be used to construct a larger cube, or be arranged as
Froebel advised into “forms of beauty,” “forms of life” (building representative forms), or “forms of knowledge” (developing counting and stacking skills).
With the first eight giant blocks completed and seeing students’ enthusiastic response, I began making Gift 4 at the same scale. This set consists of eight flat “tile” blocks that also can also be arranged into a large cube.

The students at Clear Spring School keep the blocks in a state of continual rearrangement. One day they’ll be arranged as a fortress with space inside. The next they may be an obstacle course with kids taking turns to jump from one block to another.
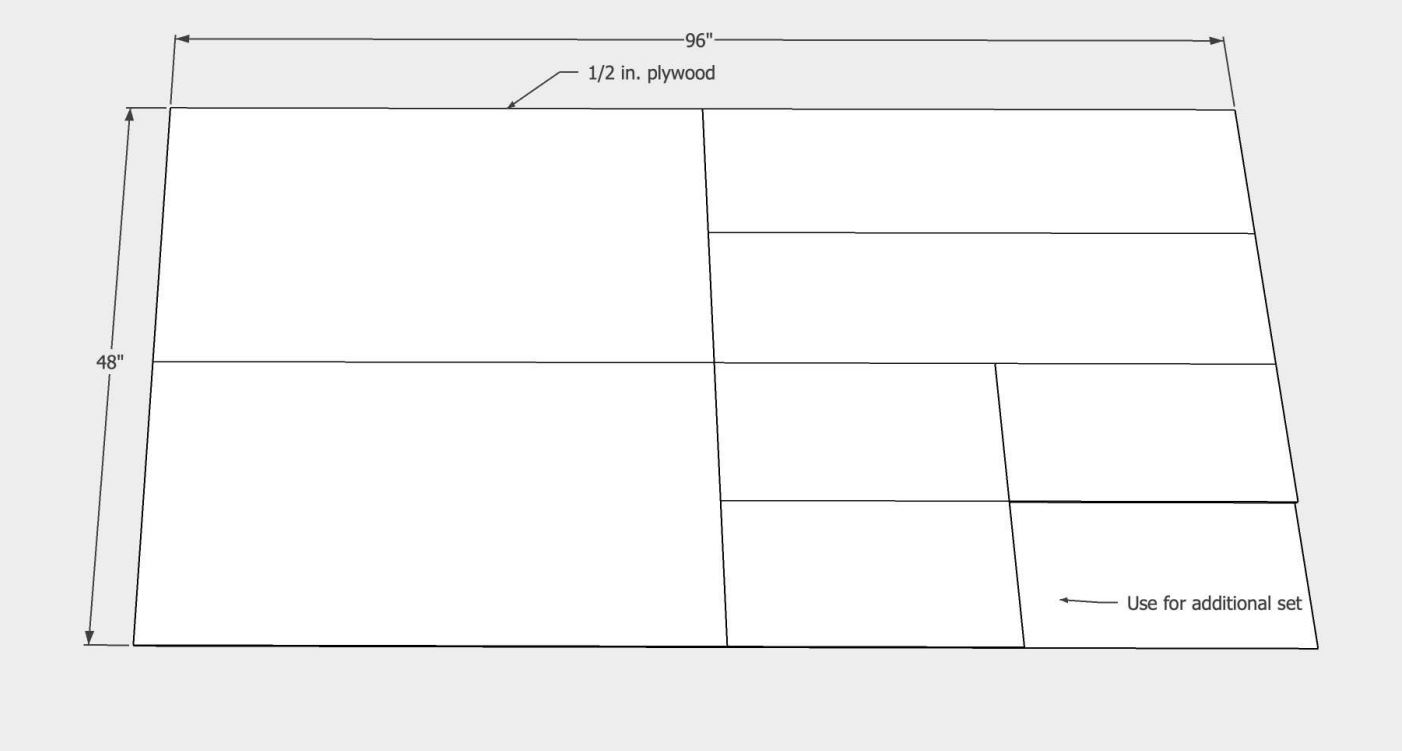
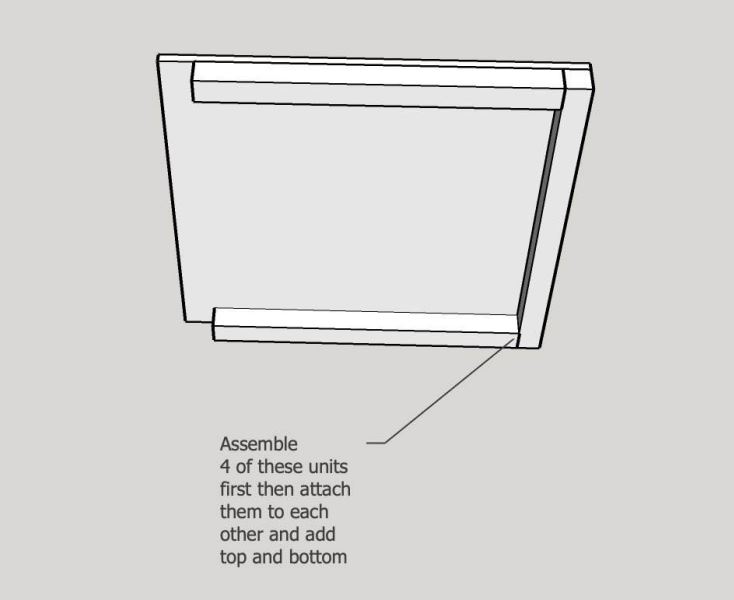
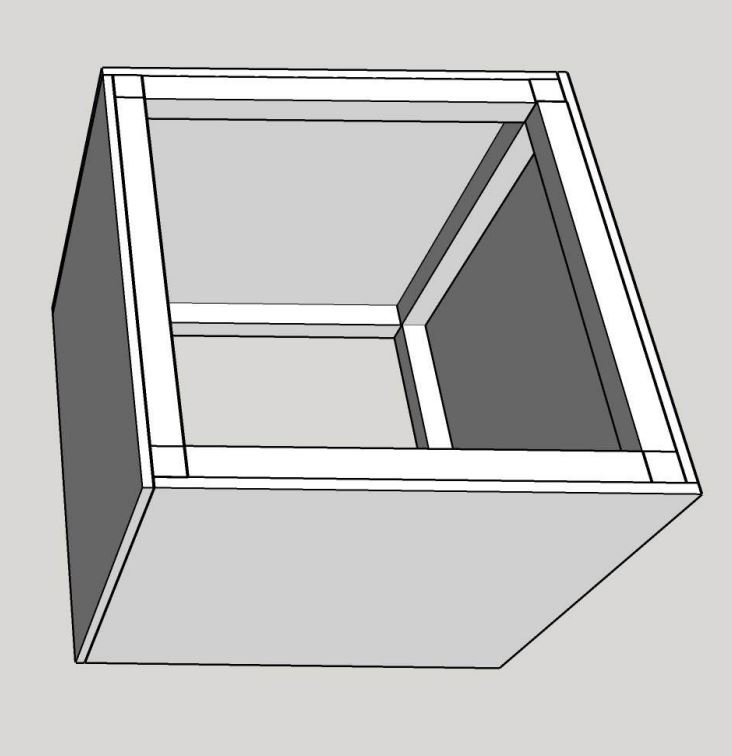
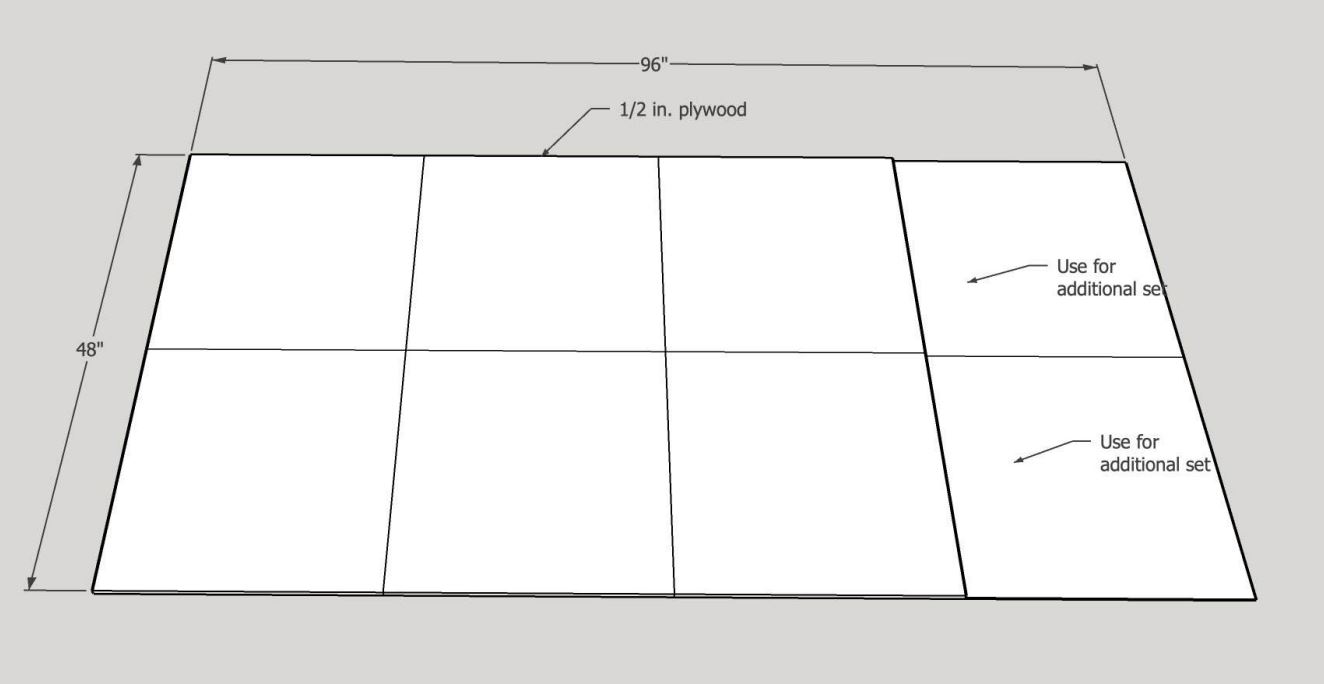
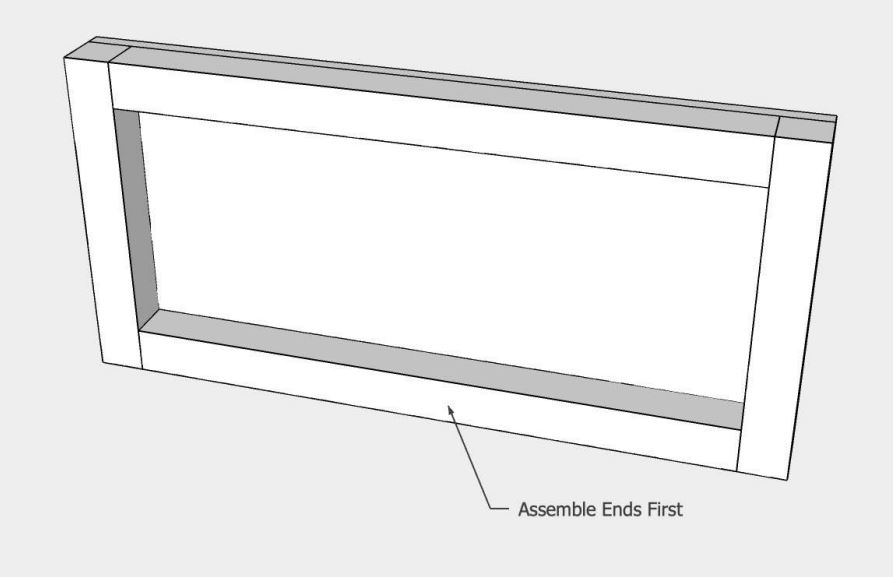
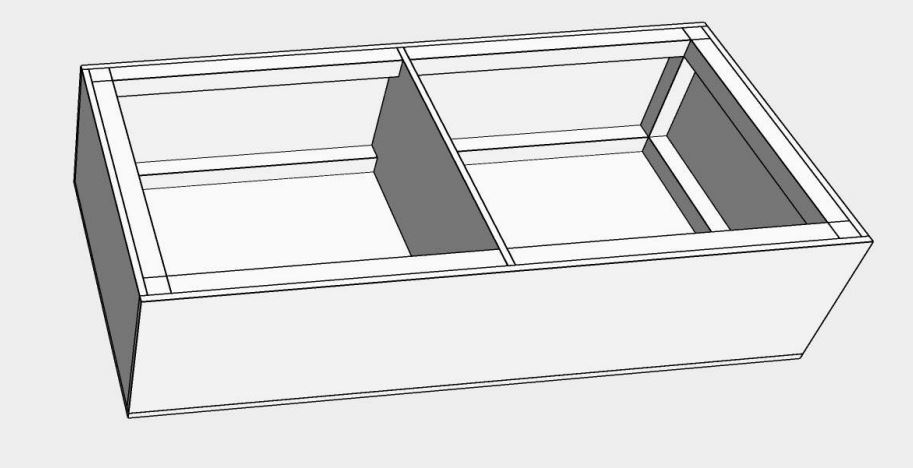
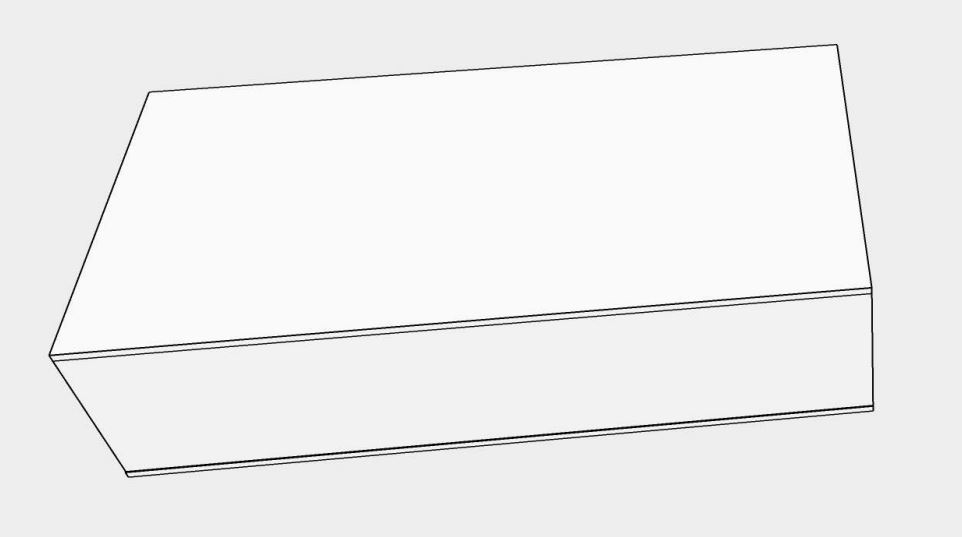
Here’s how to build super-sized Gifts 3 and 4 for your playground, using just a few tools and basic carpentry skills. They’re made from ½" exterior plywood with some interior bracing to withstand rugged play and being left outdoors throughout the four seasons (Figure A).


