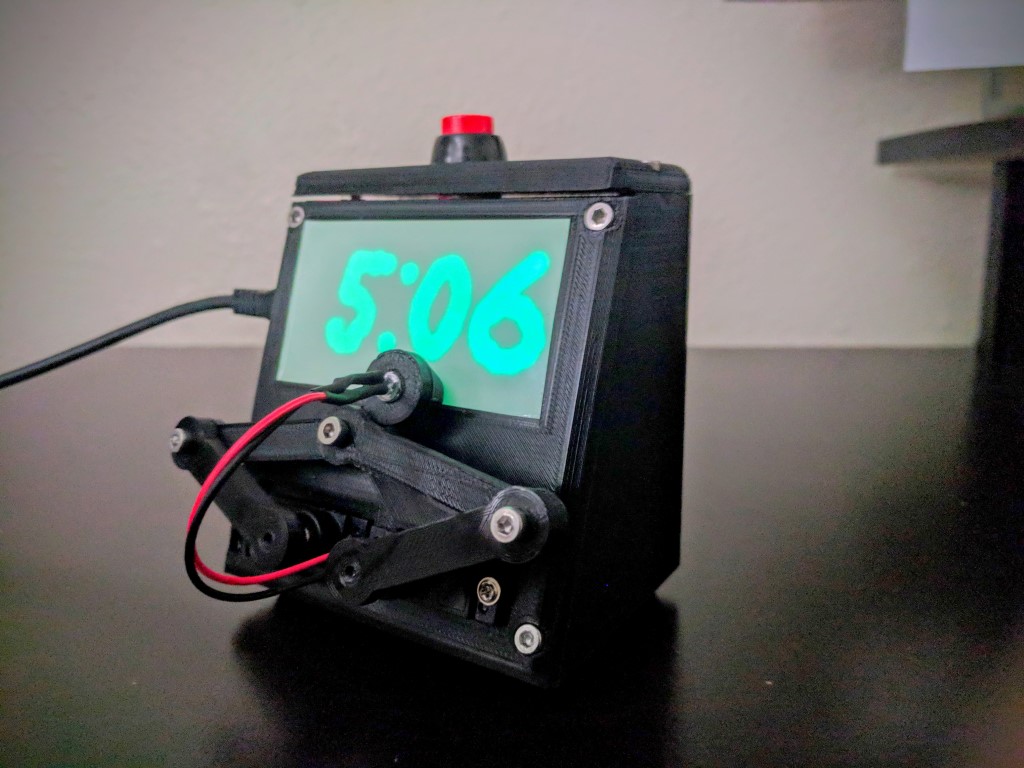
My Glow-in-the-Dark Plot Clock uses an Arduino Uno, two 9g servomotors, a UV LED, and a phosphorescent material to “draw” the time on demand. Whenever the button is pressed, a robot arm writes the time on the screen in glowing numerals that shine for several minutes before slowly fading away.

This project was inspired by the amazing whiteboard plot clock by Johannes Heberlein in Nuremberg, Germany , which writes the time with a dry-erase marker, and then erases it!

I really liked that clock, but I wanted a writing system that would last longer than the ink in a whiteboard marker. I decided to use a glow-in-the-dark material instead of the whiteboard, because it produces a visually appealing glow effect, “erases” itself, and can’t run out of ink. This glow effect, along with the 3D-printed enclosure, ensures that your plot clock will work reliably for years to come.

My previous iteration of this plot clock used a more expensive UV laser. Here I have replaced the UV laser with a UV LED that produces the same effect at a fraction of the cost. In fact, all the components required to build this project can be purchased for around $8 from AliExpress — that’s less than the laser cost alone. But shipping takes a long time. If you’re worried about quality and shipping time, Amazon and an official Arduino will work better.

You can download the 3D print files and Arduino code, and find all the AliExpress links there too. I also made a laser-cut version if you’ve got laser cutter access.

BUILD YOUR GLOWING PLOT CLOCK

YouTube player

Here’s a quick step-by-step:

What will the next generation of Make: look like? We’re inviting you to shape the future by investing in Make:. By becoming an investor, you help decide what’s next. The future of Make: is in your hands. Learn More.

Project Steps

1. Print (or cut) parts

Gather all the components listed, and 3D print (or laser cut) the enclosure and arm files found on Thingiverse. Print using PLA or ABS, without supports. I used PLA but most materials will work.

2. Wire the circuit

Solder 2 wires to the momentary pushbutton terminals, and 2 to the 5mm UV LED. Insert the servomotors into the front of the housing, and thread the LED wires through the front too.

Mount the Arduino Uno inside the housing using M3 screws. Solder wires onto the real-time clock (RTC) module as shown in the schematic diagram,


then mount the RTC in the housing using
M3 screws.

Now connect the wires from the RTC, servos, button, and LED to the Arduino, carefully following the schematic.

3. Assemble the enclosure and arm

Attach the front, top, and bottom of the enclosure using M3 screws.

Then connect the arms together using M3 screws. Insert the LED into the arm assembly, then attach the focusing cone over the LED.

Attach servo horns to the arm assembly and finally, attach the arm assembly to the enclosure.

Cut the glow sticker to size and apply to the front of the enclosure. Add rubber feet to the bottom.

4. Calibrate and upload code

Plug your Arduino into your computer. Open the Arduino IDE, then follow my code and calibration guide video.

YouTube player

You’ll install the Time and DS1307RTC libraries by Michael Margolis, set the time on the RTC, then calibrate the project code file Arduino_Code_Glow_Plot_Clock.ino so your servos are drawing a perfect rectangle around the glow sticker.

That way they’ll always draw the time in the right place.

My code is a modification of the code in the whiteboard plot clock. I changed a few things to better suit the new glow design:

» Use of 2 servos instead of 3

» Ability to toggle 12-hour or 24-hour times

» Pushbutton, instead of write every minute

» Different servo calibration methods

» Turns on an LED instead of lowering a marker to the surface

QUALITY TIME

Now whenever you push the button, your plot clock’s robot arm will write the hour and minute in glowing green. It looks awesome in the dark

and it’s easily seen during the day too.